

Tips for Selecting the Right White Paint Color and How to Use Them
With all the white paint colors out there, we do have some of our tried and true favorites that we start with as a baseline when meeting with our clients. Here are our top 5 favorite white paint colors.
In the world of interior design, few decisions are as seemingly simple yet surprisingly complex as choosing the right white paint color. While white may appear to be a straightforward choice, the reality is that there exists a vast array of whites, each with its own unique undertones, nuances, and effects on a space. As an interior design firm, we understand the importance of selecting the perfect white paint color to enhance the beauty and atmosphere of your living or working space. In this blog post, we delve into the intricacies of white paint selection, offering insights and tips to help you make an informed decision.
Understanding the Diversity of White
Contrary to popular belief, not all white paints are the same. In fact, the spectrum of white paint colors is incredibly diverse, ranging from warm, creamy tones to cool, crisp shades. Understanding the underlying undertones of white paint is essential for achieving the desired aesthetic in your space.
Warm Whites: Warm white paints often contain subtle hints of yellow, red, or brown undertones, creating a cozy and inviting atmosphere. These shades pair beautifully with traditional or rustic interior styles, adding a sense of warmth and character to any room.
Cool Whites: On the other end of the spectrum, cool white paints feature undertones of blue, green, or gray, imparting a clean and contemporary feel to a space. These shades are ideal for modern or minimalist interiors, offering a refreshing and serene backdrop for your décor.
Neutral Whites: Situated between warm and cool tones, neutral white paints strike a perfect balance, making them incredibly versatile and adaptable to various design styles. These shades are excellent for creating a timeless and harmonious ambiance, allowing your furnishings and accessories to take center stage.
Tips for Selecting the Right White Paint Color
Consider Natural Light: The amount of natural light in your space can significantly influence how white paint appears. Rooms with ample sunlight may benefit from cooler white tones to prevent the space from feeling too harsh, while rooms with limited natural light may benefit from warmer whites to add warmth and depth.
Test Paint Samples: Before committing to a white paint color, it's essential to test samples in your space under different lighting conditions. Paint swatches directly onto your walls and observe how the color changes throughout the day, from morning light to evening shadows.
Complement Your Décor: Take into account the existing furnishings, fabrics, and finishes in your space when selecting a white paint color. Choose a shade that harmonizes with your décor elements, whether it's enhancing the warmth of wooden furniture or accentuating the sleekness of metal accents.
Consult with Professionals: When in doubt, seek guidance from experienced interior designers or paint experts who can offer personalized recommendations based on your specific needs and preferences. They can help navigate the myriad options available and steer you towards the perfect white paint color for your project.
With all the white paint colors out there, we do have some of our tried and true favorites that we start with as a baseline when meeting with our clients. Here are our top 5 favorite white paint colors.
Our Top 5 Favorite White Paint Colors
Benjamin Moore: Super White
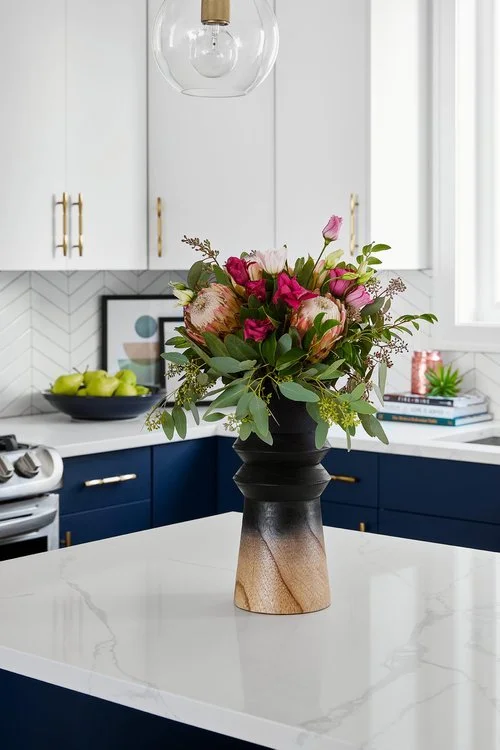
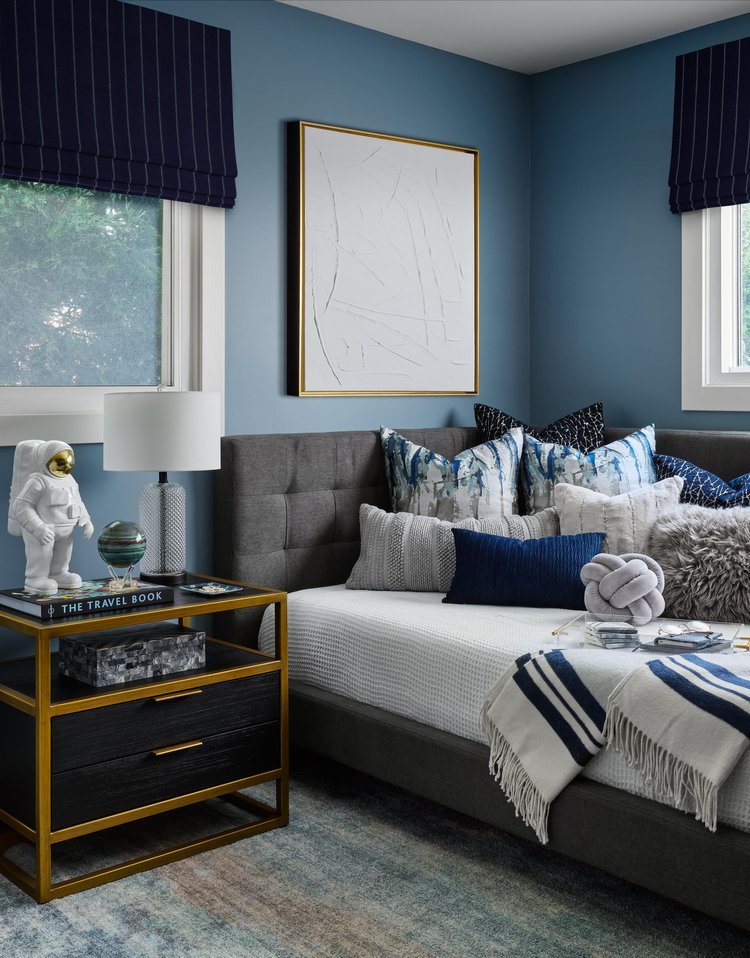
Why we love it: It’s a bright and crisp neutral white that doesn’t have undertones of any other hues. We love using this white on kitchen cabinets to create a light and airy effect.

Benjamin Moore: Super white

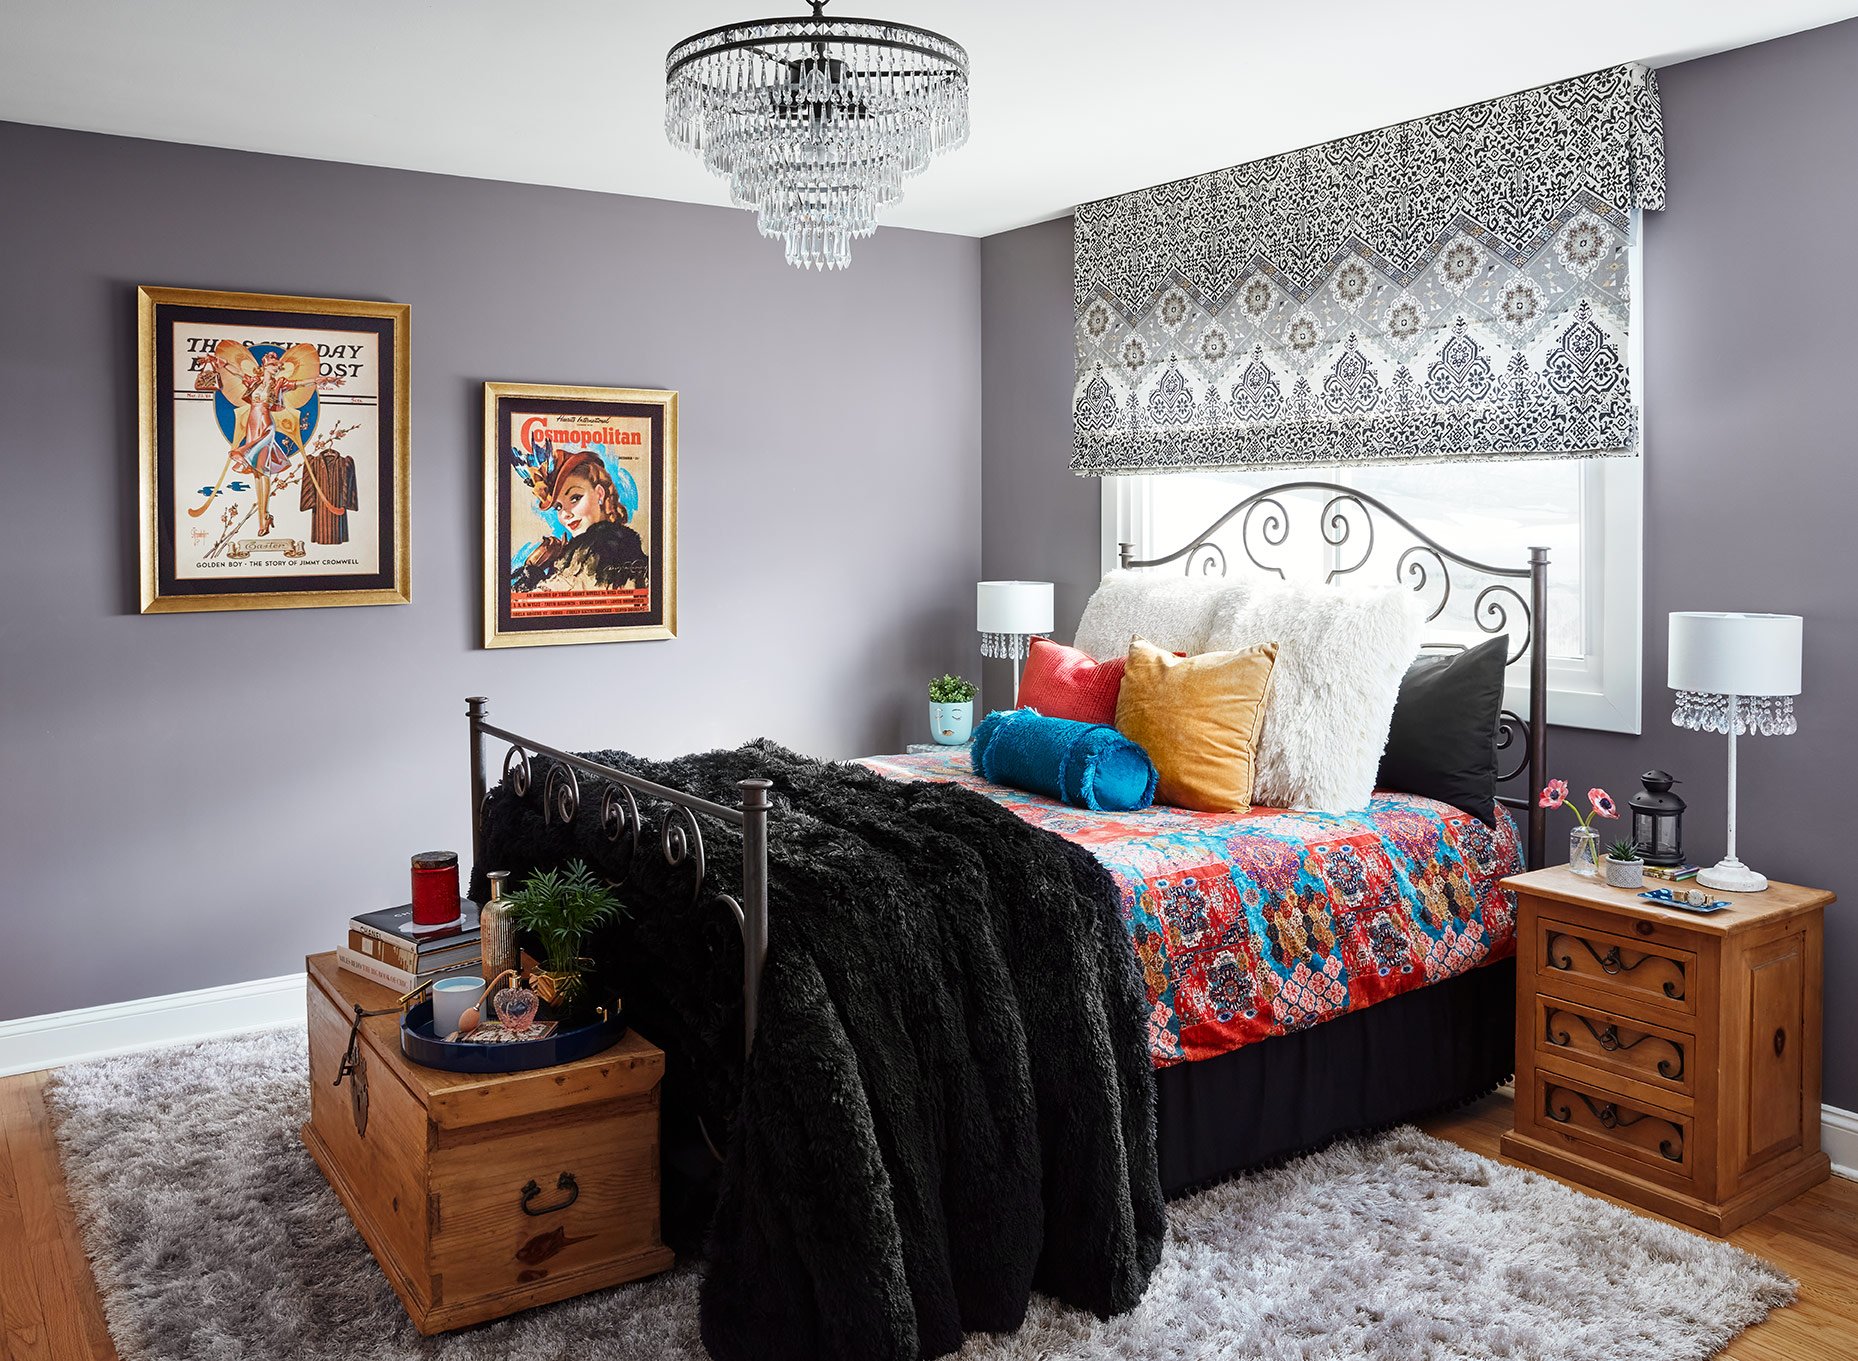
Benjamin Moore: NARRAGANSET GREEN

Designed by: Sarah Jacquelyn Interiors | Photography by: Dustin Halleck
Benjamin Moore: Dove Wing
Why we love it: A creamy, warm white with undertones of gray and yellow. This color pairs well with darker grays and nicely brings out the purple tones of Benjamin Moore Stone.

Designed by: Sarah Jacquelyn Interiors

Benjamin Moore: Dove Wing

Benjamin Moore: stone
Benjamin Moore: Chantilly Lace
Why we love it: Delicate like lace, this white is soft, clean, and works with almost any other color! We love using it on doors, decorative trims, and fireplace mantels.

Benjamin Moore: Chantilly lace

Photo Credit: Benjamin moore
Benjamin Moore: OC 151
Why we love it: A subtly warm white that added freshness to the room without being to harsh. We love using this on ceilings!

Photo credit: benjamin moore

Benjamin Moore: OC-151
Benjamin Moore: Decorators White
Why we love it: A timeless, classic white with cool undertones. This white is great for walls!

Benjamin Moore: Decorators White

photo credit: benjamin moore
Embracing the Power of White Paint
In conclusion, the selection of white paint color is a multifaceted decision that requires careful consideration of undertones, lighting, and design aesthetics. By understanding the diverse range of white shades and following these tips for selection, you can harness the transformative power of white paint to elevate your space with timeless elegance and sophistication. Whether you're aiming for a cozy retreat or a contemporary haven, the perfect white paint color awaits to bring your vision to life.

Need help selecting paint colors, finishes, or environmentally friendly products?

Elevate Your Thanksgiving Feast: A Guide to Styling Your Table
Expert tips to help you transform your Thanksgiving table into a visual masterpiece. From selecting the perfect color palette to crafting personalized place settings, discover how to create an inviting atmosphere that will leave your guests in awe. Join us as we delve into the art of Thanksgiving table styling, ensuring your feast is not only a culinary delight but a visual masterpiece as well.
Thanksgiving is a time for gathering with loved ones, expressing gratitude, and indulging in a sumptuous feast. As you prepare to host this cherished holiday, don't overlook the importance of a beautifully styled table. A well-designed table sets the tone for the entire event, creating a warm and inviting atmosphere that enhances the dining experience. In this guide, we'll walk you through some creative and practical tips to help you style your table for Thanksgiving.
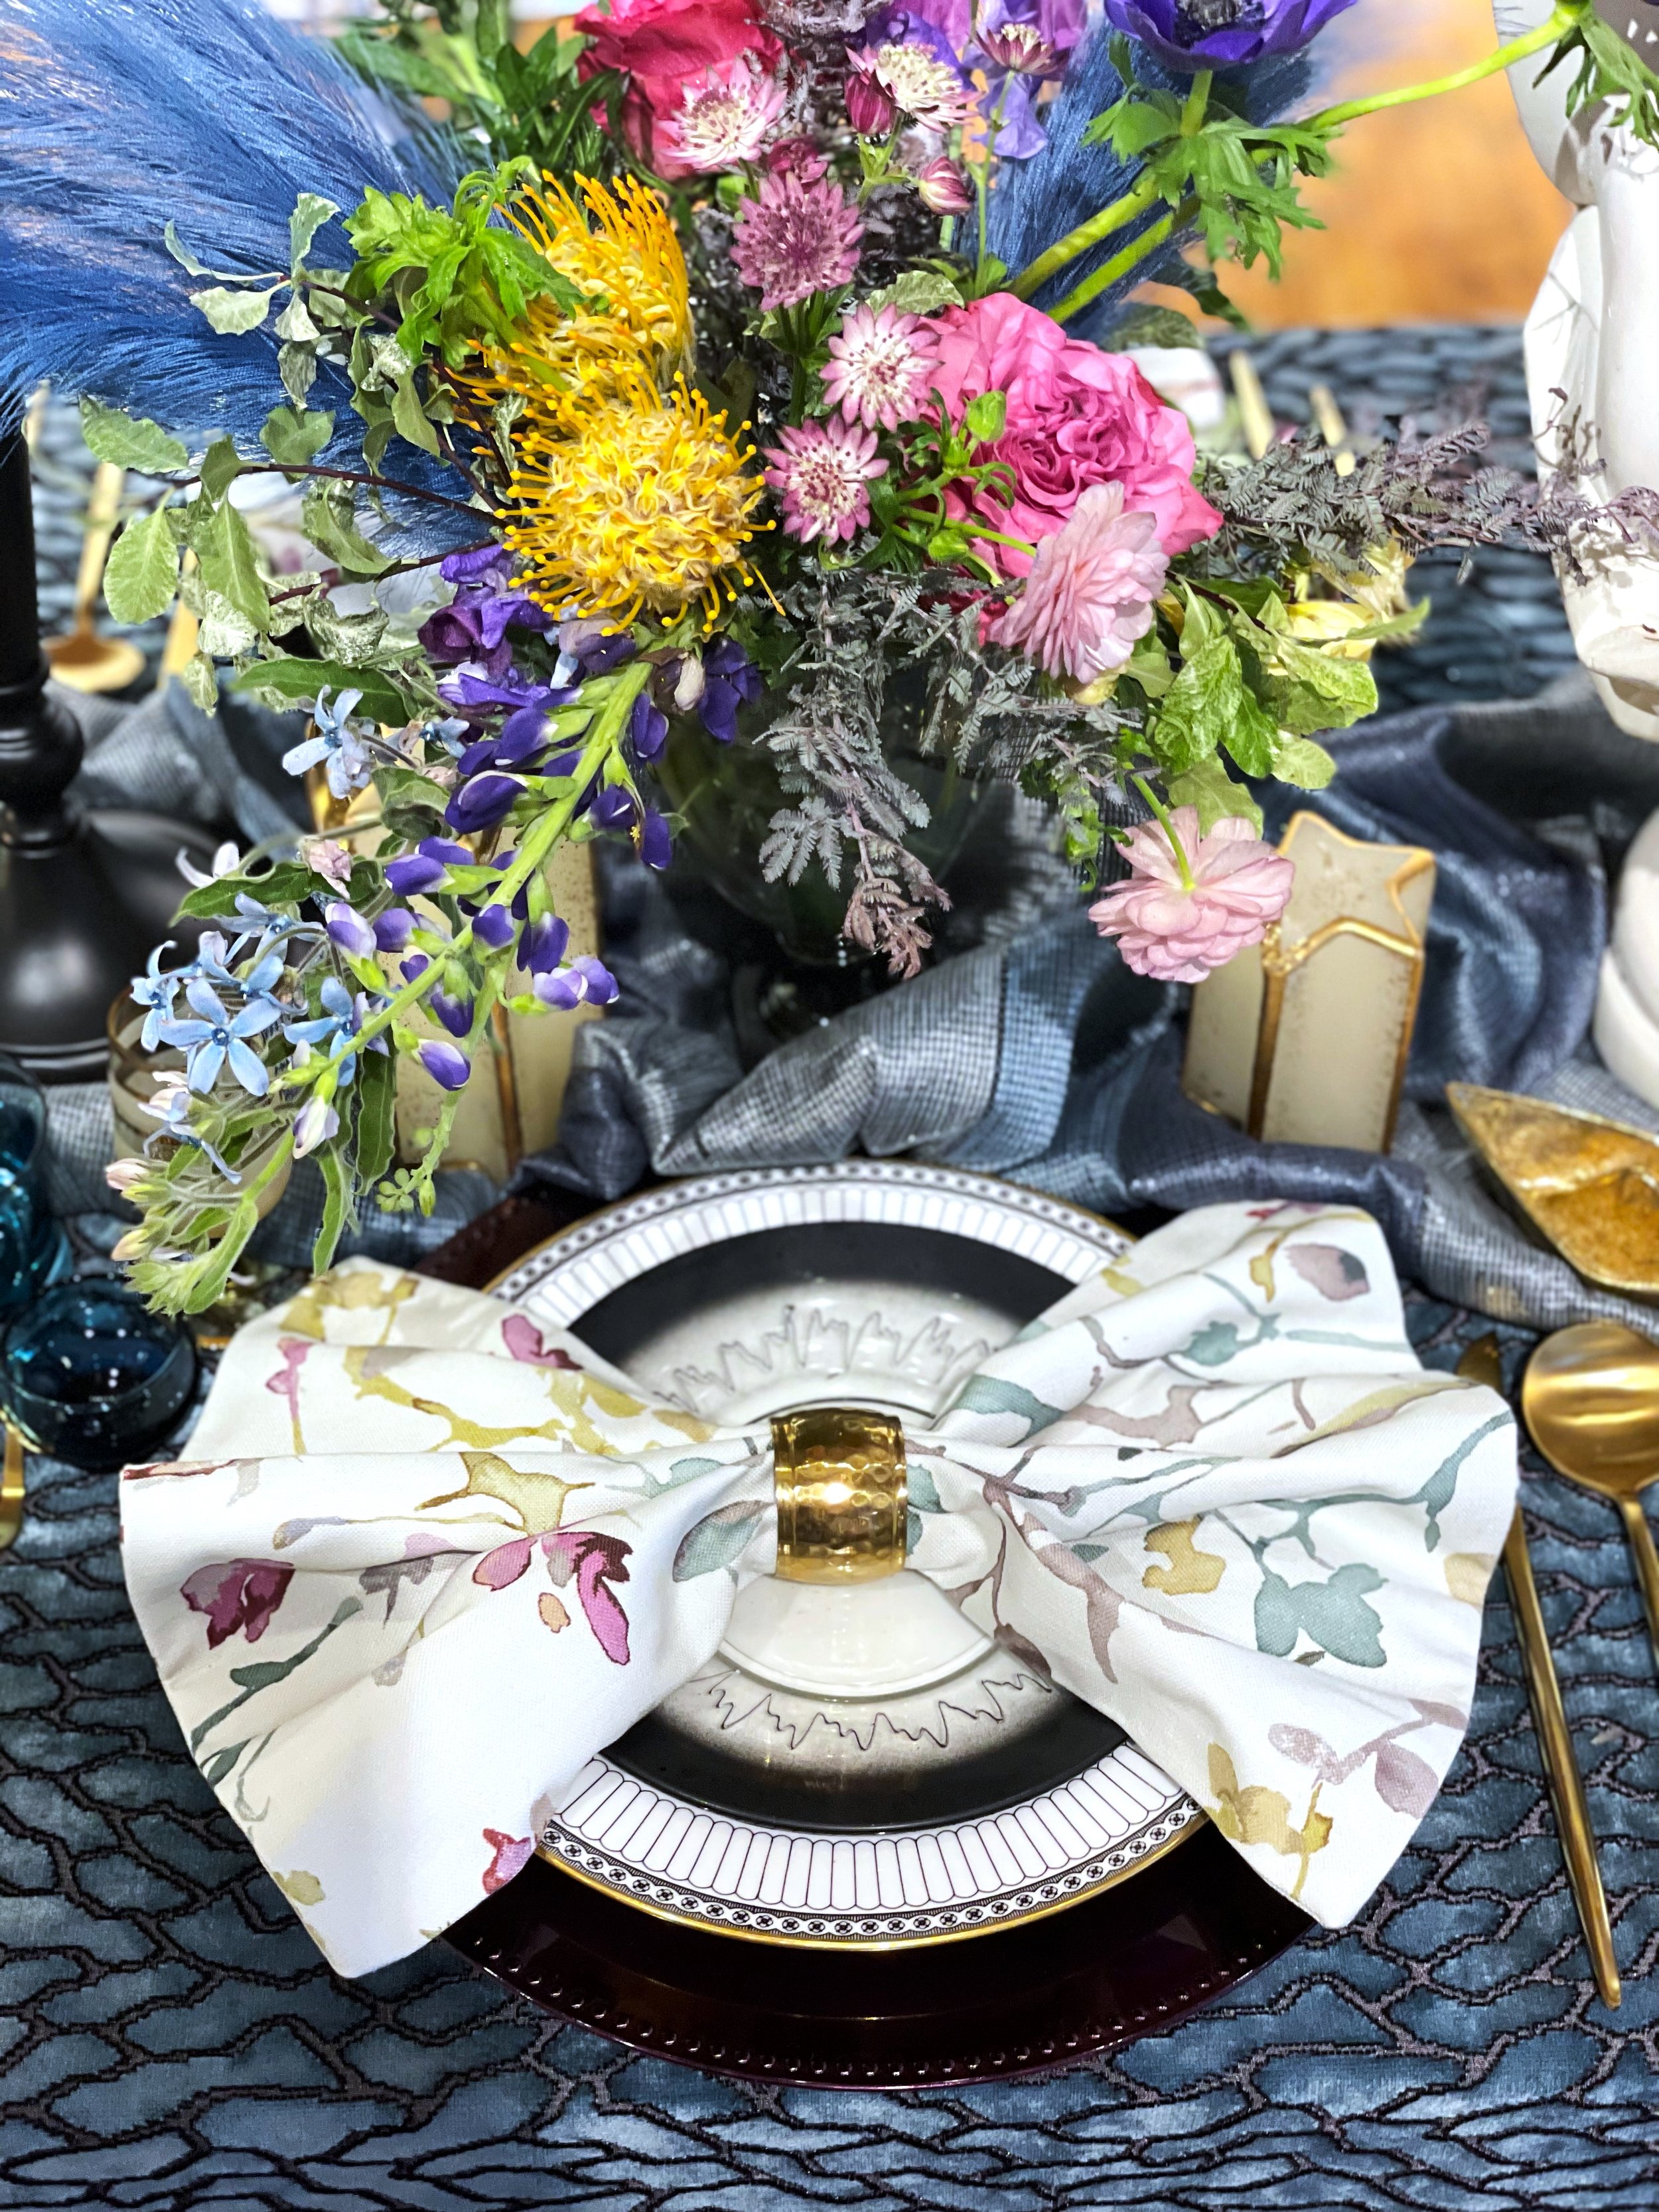
Art Of Dining Showcase by Sarah Jacquelyn Interiors (2022)
our top 6 Tips for elevating your thanksgiving table
1. Choose a Theme or Color Palette
Setting a cohesive theme or color palette can help create a visually appealing and harmonious table setting. Consider traditional autumnal hues like rich oranges, deep reds, and earthy browns, or opt for a more modern and minimalist approach with neutral tones and metallic accents. Incorporating natural elements like leaves, pumpkins, or acorns can also add a touch of seasonal charm.
2. Start with the Basics: Tablecloth or Runner
Begin by selecting a tablecloth or runner that complements your chosen theme or color scheme. A classic linen tablecloth can exude elegance, while a rustic burlap runner can add a cozy, farmhouse feel. If you prefer a more minimalist look, consider using a bare table with placemats or chargers to define each place setting.
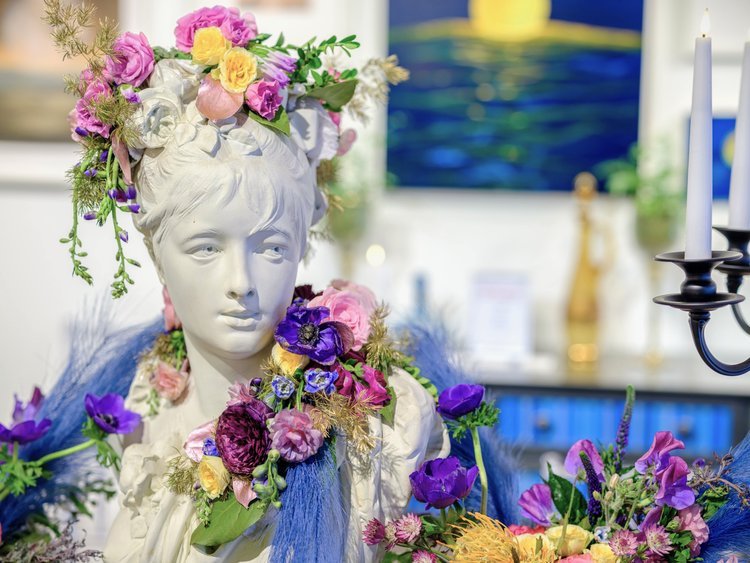
3. Create Eye-Catching Centerpieces
The centerpiece is the focal point of your table, so invest some time in creating something special. Consider options like:
Floral Arrangements: Incorporate seasonal blooms like mums, sunflowers, or eucalyptus in a rustic vase or a metallic container for an elegant touch.
Candle Displays: Arrange pillar candles, taper candles, or tea lights in various heights for a cozy and inviting ambiance. Consider candle holders that complement your chosen theme.
Natural Elements: Arrange pumpkins, gourds, pinecones, or a mix of fresh and dried leaves for a touch of rustic charm.
4. Personalize with Place Cards
Adding place cards not only helps with seating arrangements but also adds a personal touch to each guest's experience. Get creative with your place cards by using elements like mini pumpkins, seasonal fruit, or handwritten notes.
5. Incorporate Textiles and Napkin Rings
Consider using cloth napkins in coordinating colors or patterns to add texture and warmth to your table. Fold them neatly and secure them with decorative napkin rings for an extra touch of elegance. If you're feeling crafty, consider DIY napkin ring options using natural elements like twine, leaves, or cinnamon sticks.
6. Pay Attention to Lighting
The right lighting can set a warm and inviting atmosphere. Consider using string lights, lanterns, or candle sconces to create a cozy glow. If you're hosting an evening gathering, consider using unscented candles on the table to avoid overpowering the aroma of the meal.
With a little creativity and thoughtful planning, you can transform your Thanksgiving table into a stunning focal point that complements the delicious feast you've prepared. By incorporating these styling tips, you'll create a warm and inviting atmosphere that enhances the joy of sharing this special holiday with your loved ones. Happy Thanksgiving!
For more dining table style tips, click here to read our blog “HOST WITH THE MOST: STYLE YOUR DINING TABLE FOR THE PERFECT DINNER PARTY”
Thanksgiving is just around the corner, have you picked out your table décor yet? Principal Designer, Sarah Schwuchow, shares her top Amazon table décor picks!


Shop our Amazon lists!


Ready For Us To Transform Your Space?
Schedule a Design Discovery Call Today!

Revamp Your Home for the Fall Season and Create a Cozy Retreat
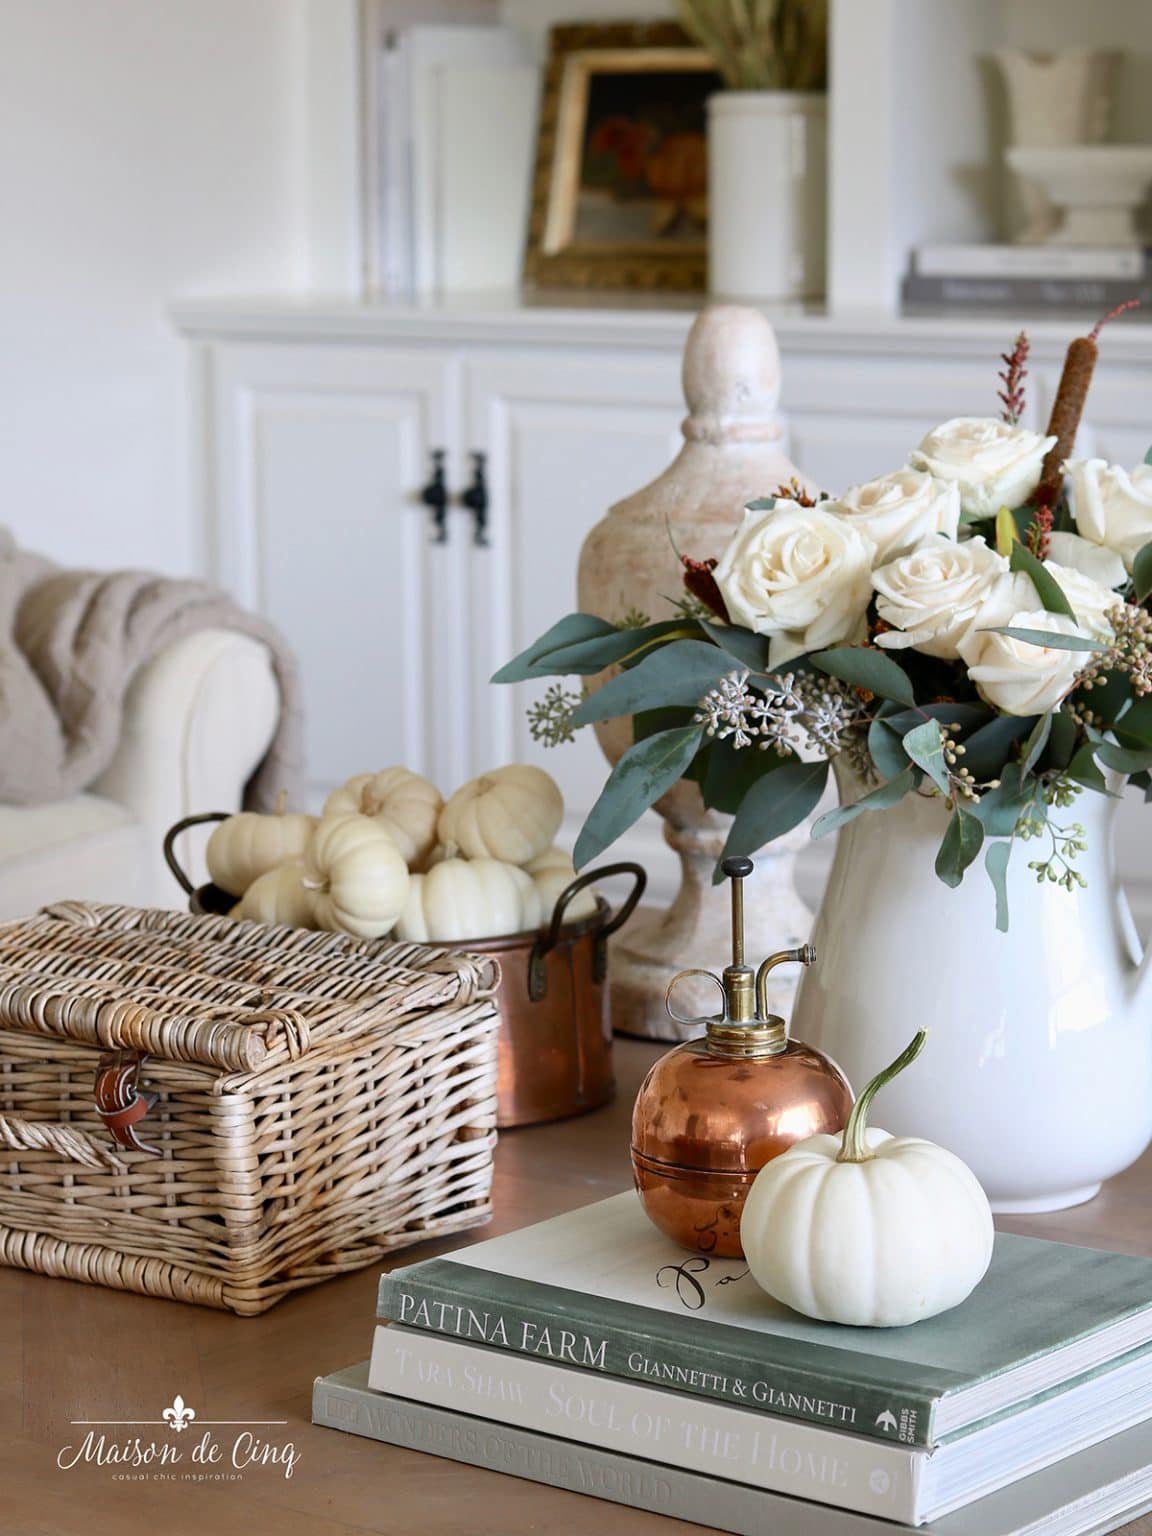
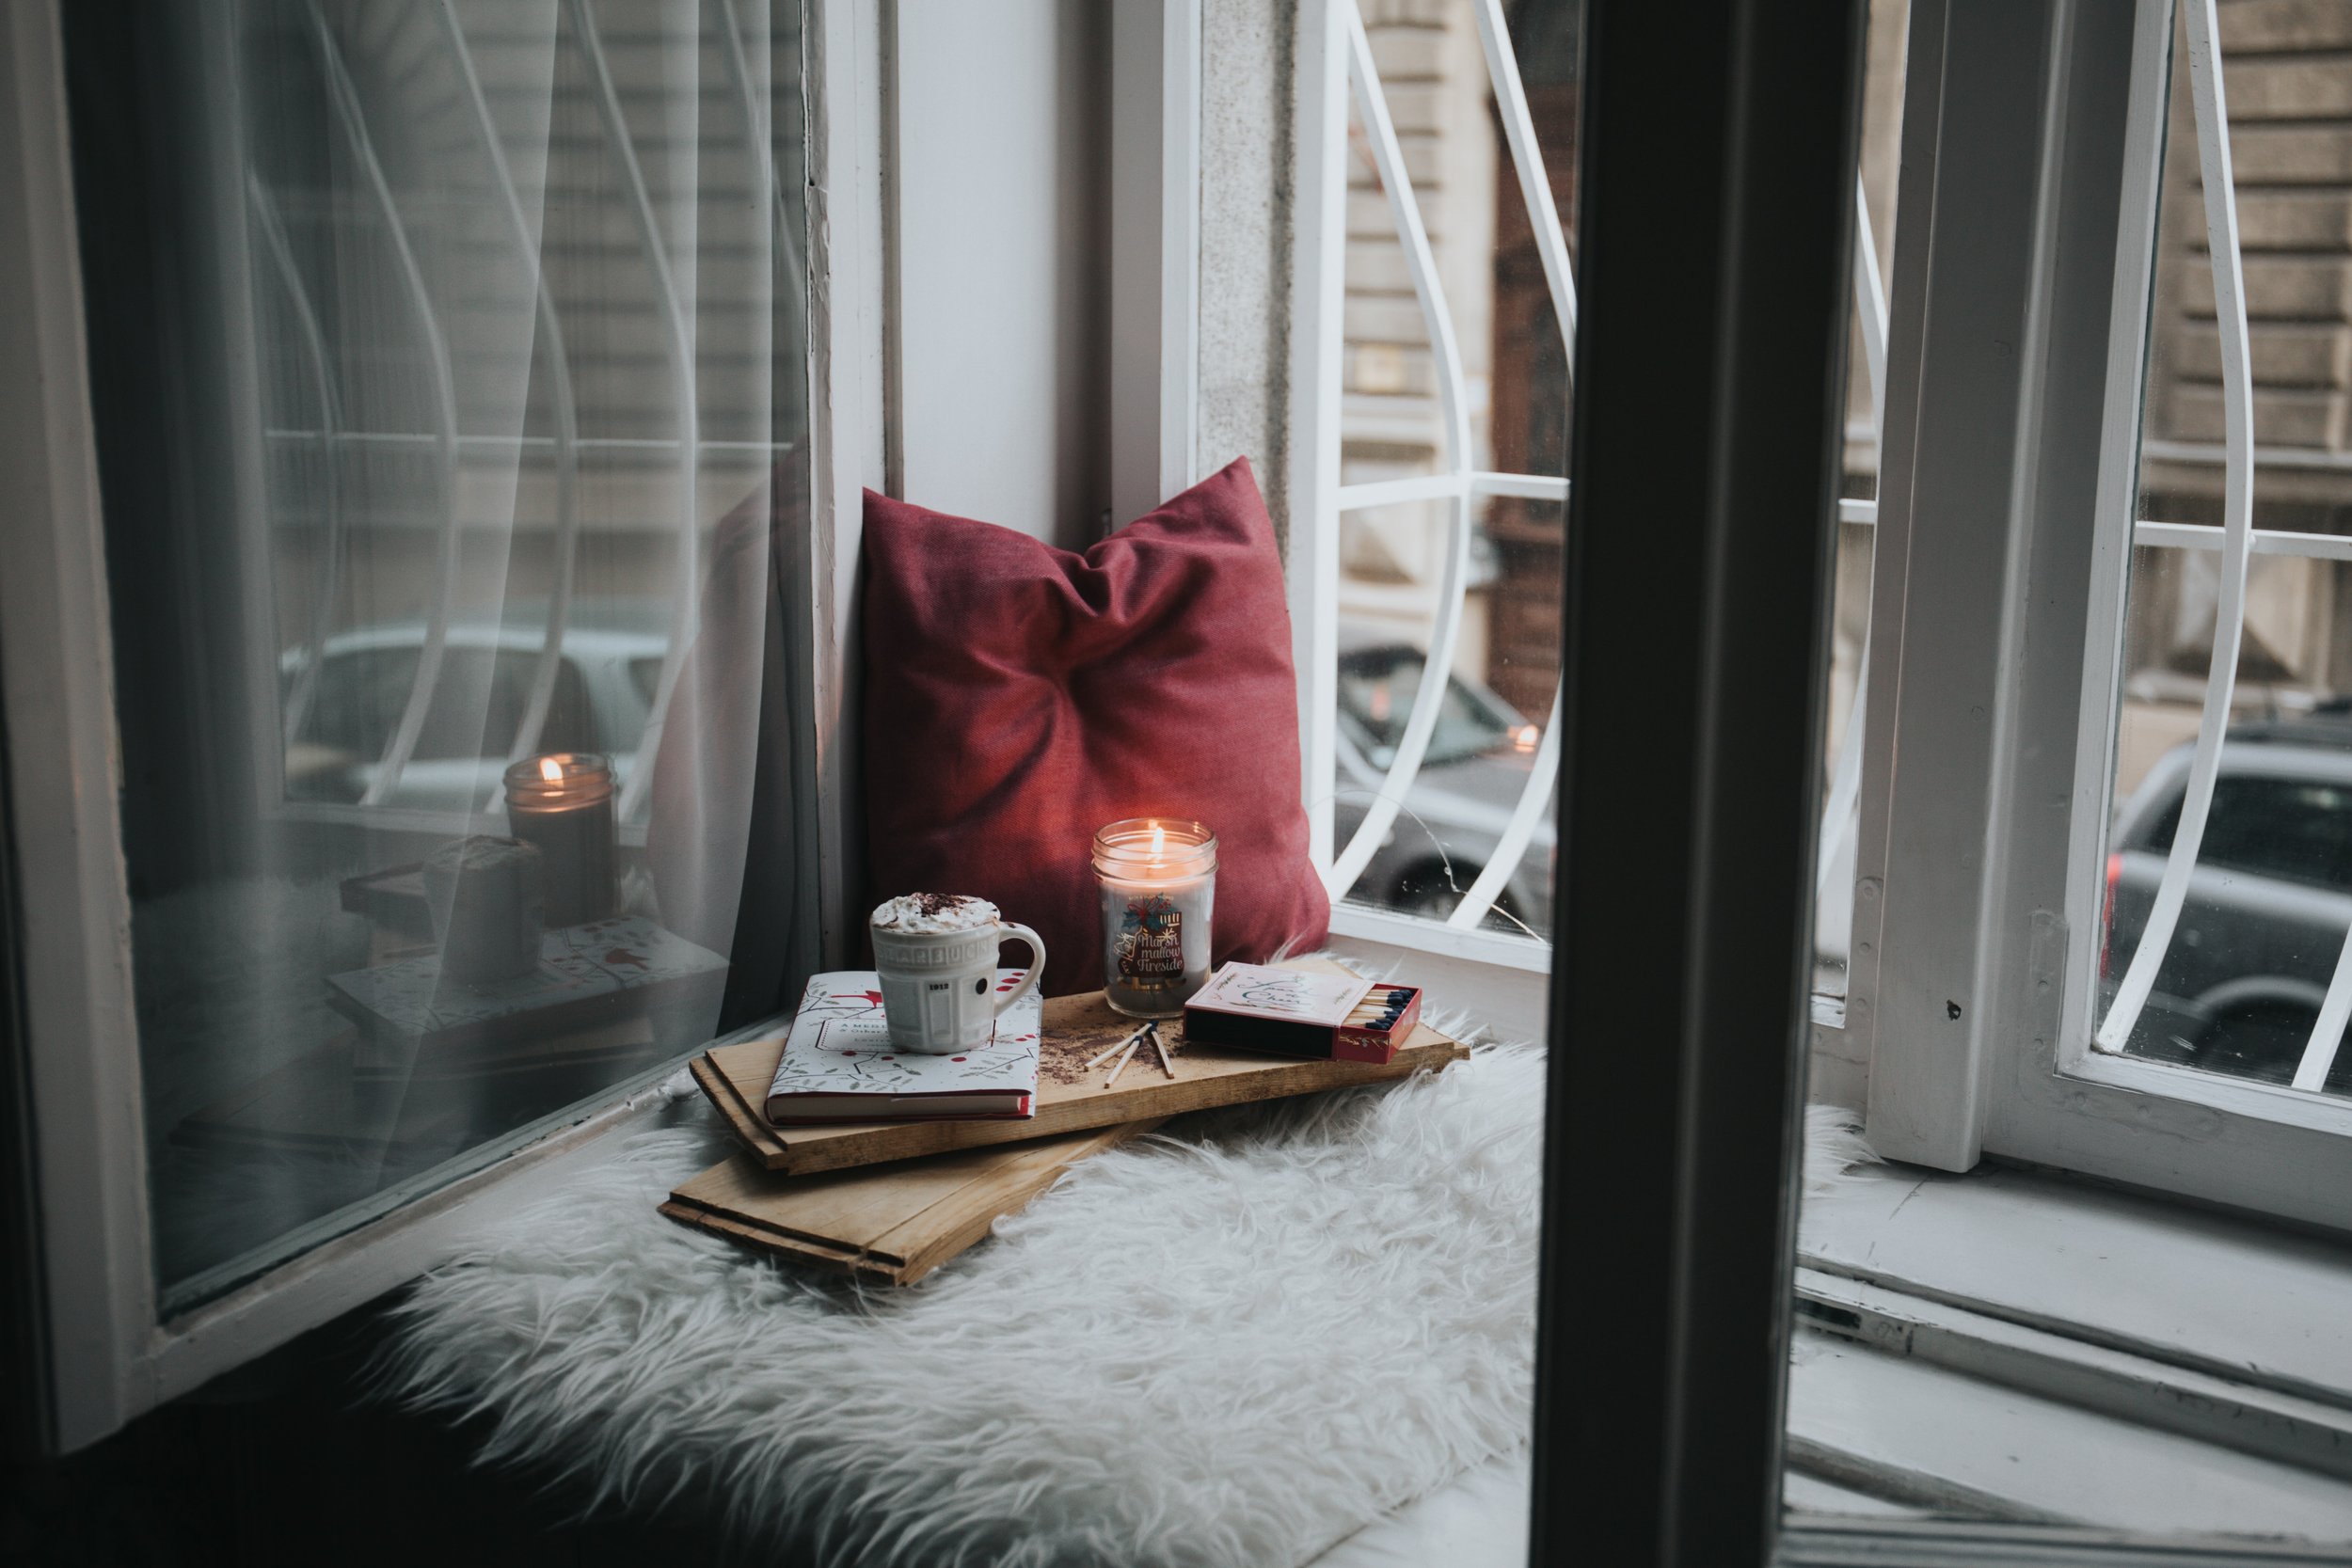
Get ready to embrace the fall vibes and transform your living space into a cozy autumn retreat! With a fall home refresh, you can create a warm and inviting atmosphere that perfectly captures the essence of this beautiful season. Autumn home decor is all about bringing in those rich, earthy tones and natural textures. Think warm hues like deep oranges, rustic browns, and golden yellows. Incorporate cozy blankets, plush pillows, and soft rugs to add comfort and warmth to your space
Get ready to give your home a cozy and stylish makeover this fall! With the changing season comes the perfect opportunity to refresh your living space and create a warm and inviting atmosphere.
A seasonal home makeover doesn't have to be complicated or expensive. Simple touches like swapping out summer accessories for fall-themed ones can instantly change the look and feel of a room.
So why not embrace the fall vibes and give your home a refreshing makeover? Transforming your living space into a cozy fall retreat will not only make it more inviting but also allow you to fully immerse yourself in the beauty of this magical season. Get creative, have fun, and enjoy creating your own little slice of autumn paradise!
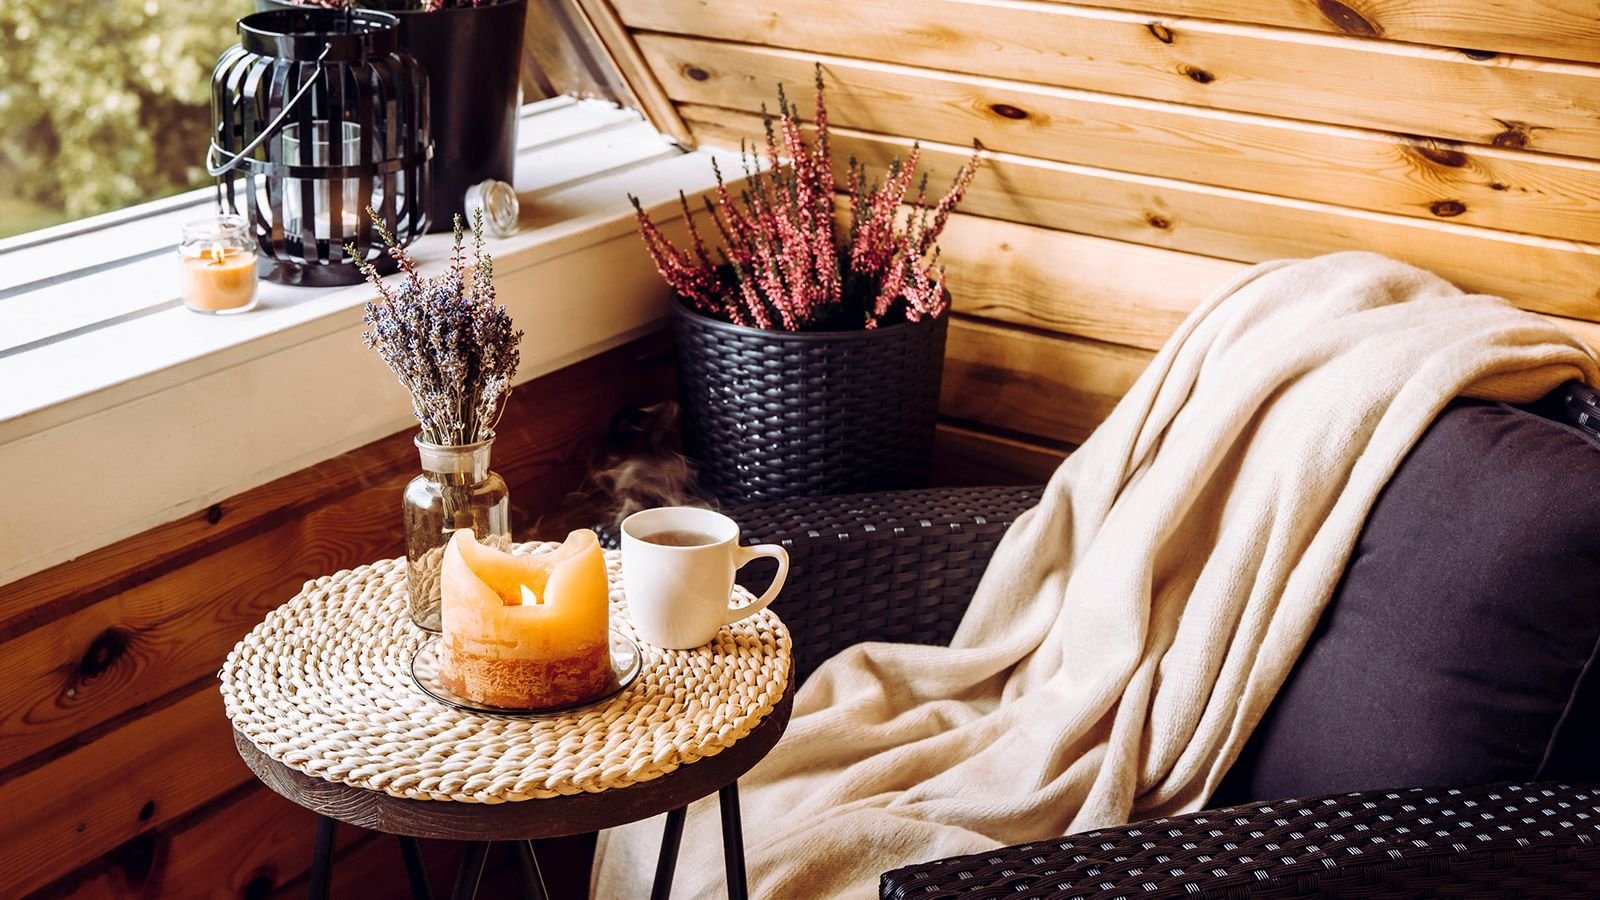
Photo Credit: CNN
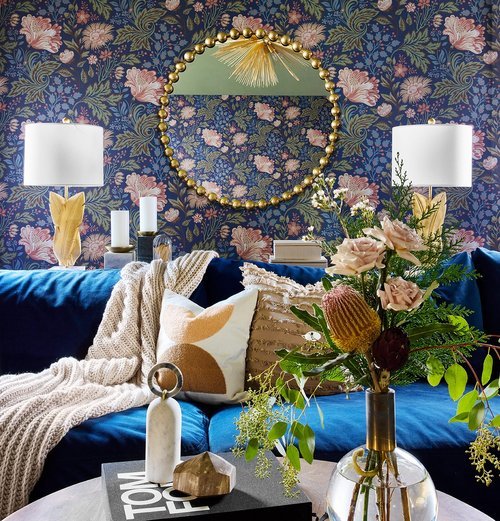
1. Bring in Warm Colors and Textures to Create a Cozy Ambiance
As the seasons change, it's time to bring in those rich and vibrant warm tones that instantly create a cozy ambiance.
Imagine walking into a room adorned with deep reds, burnt oranges, and golden yellows - colors that evoke feelings of warmth and comfort. These fall-inspired hues can be incorporated through accent walls, throw pillows, curtains, or even artwork.
But it's not just about the colors; textures play a crucial role too. Think plush velvet cushions, soft faux fur throws, or chunky knit blankets that beckon you to snuggle up on a chilly evening. These cozy textures add depth and dimension to your space while providing that extra touch of comfort.
Don’t forget to add scented candles with autumnal fragrances like cinnamon or pumpkin spice to fill the air with an irresistible aroma.
Photo Credit: Bridgeway Designs
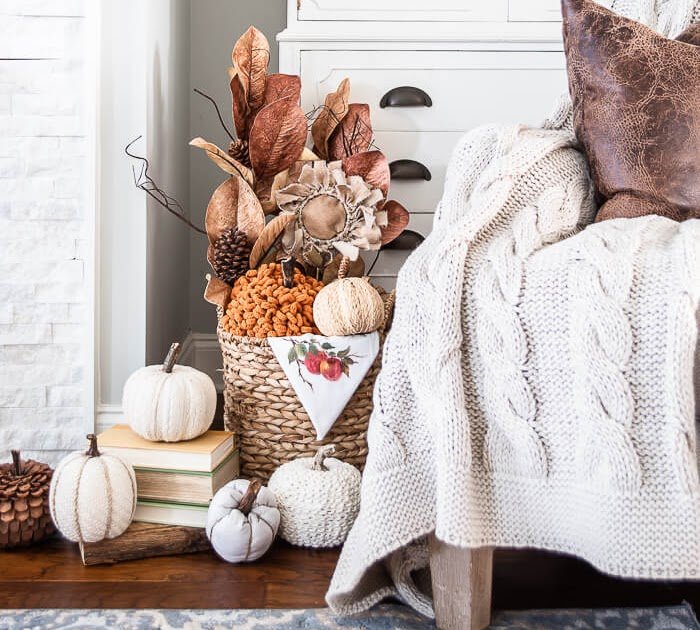
2. Add Fall-Inspired Accents to Reflect the Changing Seasons
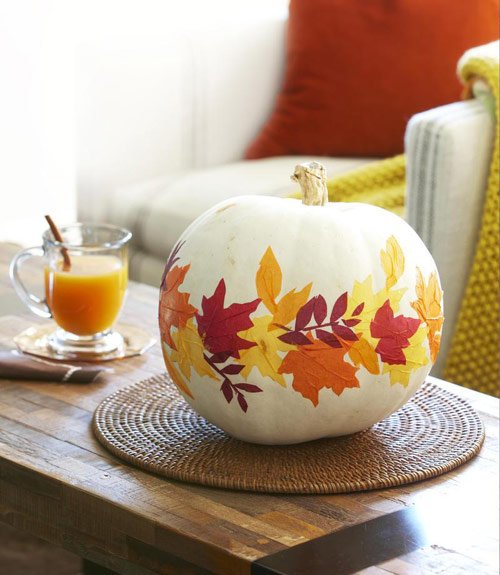
Fall decorations are all about creating a welcoming atmosphere that reflects the colors and textures of nature.
Think about incorporating autumn-inspired accessories such as rustic pumpkins, dried flowers, and leaf garlands. These simple yet impactful additions can instantly bring the cozy vibes of fall into any room.
To truly capture the essence of the season, consider incorporating nature-inspired elements like pinecones, acorns, and branches. These organic accents not only add visual interest but also bring a sense of tranquility and connection to the great outdoors.
3. Incorporate Soft Lighting for a Warm and Inviting Atmosphere
By incorporating elements like fairy lights, candles, and ambient lighting, you can transform any space into a cozy haven that will make everyone feel right at home.
Fairy lights are the perfect addition to any room. Whether you drape them along the walls, wrap them around furniture, or hang them from the ceiling, these twinkling beauties instantly add a touch of enchantment. Imagine relaxing in a space bathed in their gentle glow - it's like being transported to a fairytale!
Candles are another fantastic option for creating a cozy illumination. Their flickering flames not only provide warmth but also create a soothing ambiance. Place them strategically around the room - on shelves, tables, or even floating in water-filled jars - and let their soft light dance across your surroundings.
To take your lighting game to the next level, consider incorporating ambient lighting. This type of lighting is designed to create an overall mood or atmosphere in a room. It can be achieved through dimmer switches or by using lamps with warm-toned bulbs. The result? A space that feels inviting and relaxed.
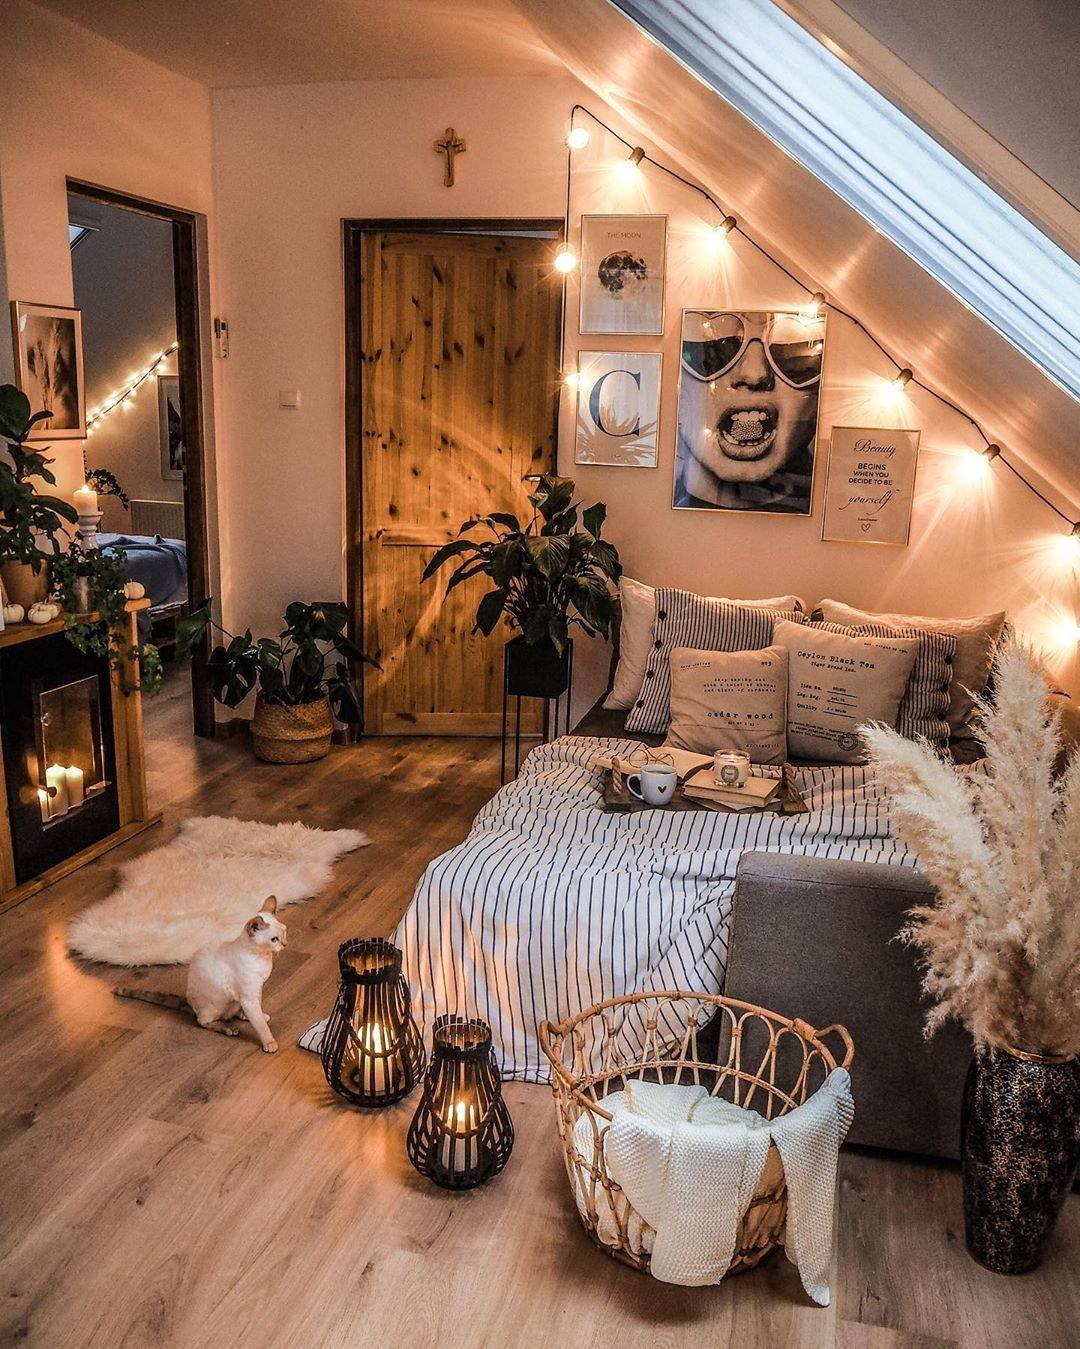
Photo Credit: @tatiana_home_decor
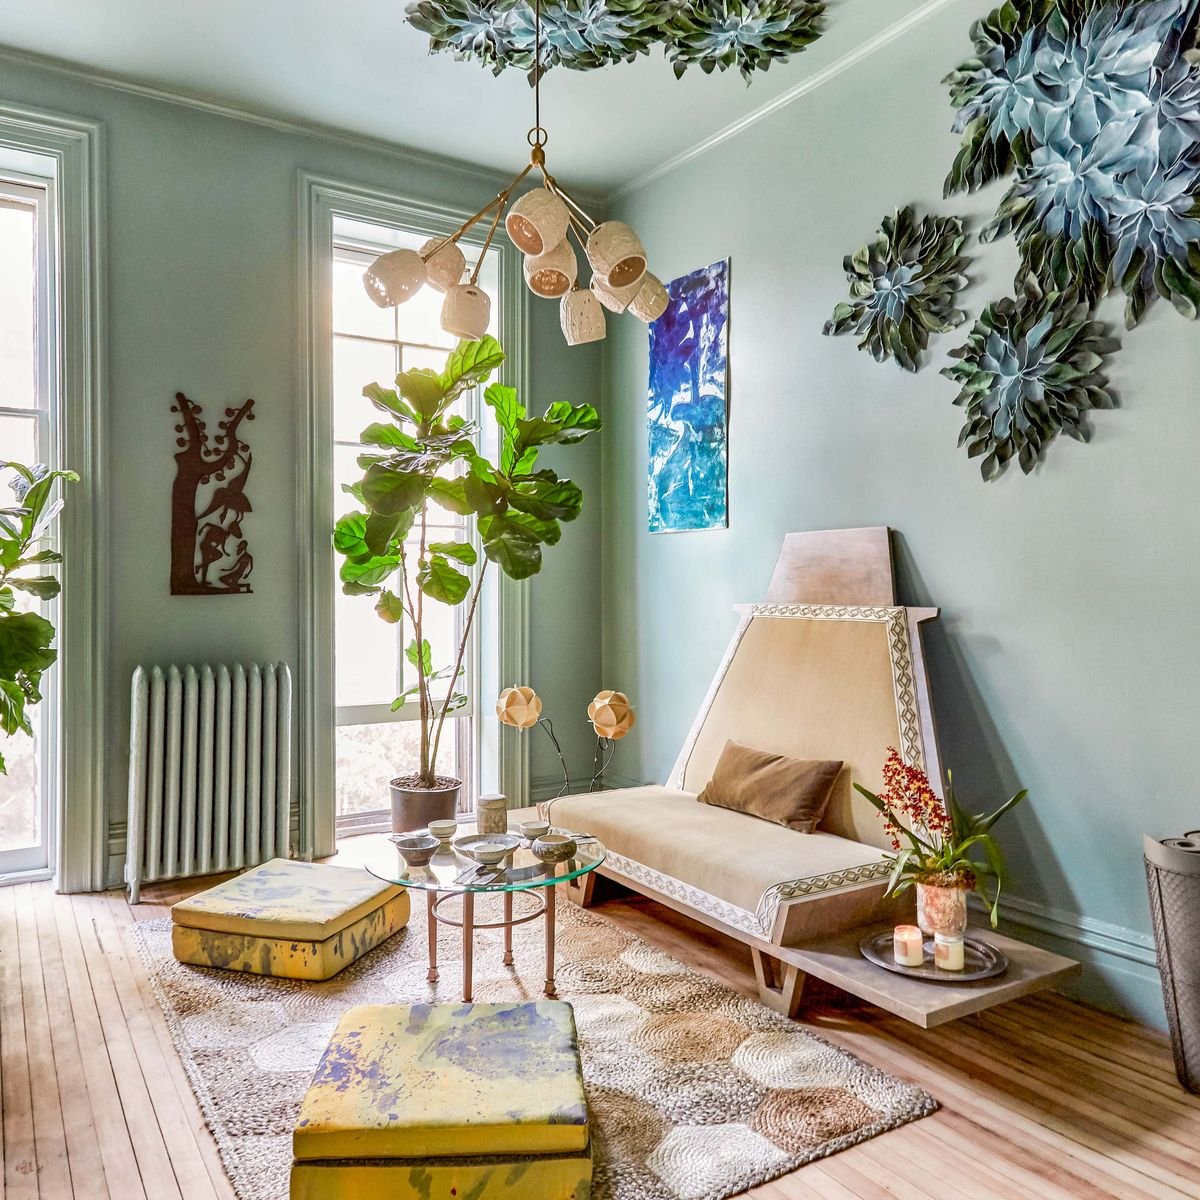
4. Embrace Nature with Indoor Plants and Seasonal Foliage
As we transition into autumn, why not incorporate leafy accents into your home décor? Autumn foliage arrangements add warmth and richness to any space.
Think about placing a stunning arrangement of colorful leaves on your dining table or adorning your mantel with an assortment of fall-inspired foliage.
Potted plants are not only aesthetically pleasing but also have numerous health benefits. They purify the air, increase humidity levels, and even reduce stress. Imagine walking into a room filled with vibrant green leaves, creating a serene atmosphere that instantly lifts your mood.

Photo Credit: Happy Sprout
Ready For Us To Transform Your Space?
Schedule a Design Discovery Call Today!

Interior Designers: Need Help Getting your New Stamp?
If you are NCIDQ Certified, but not registered with the State of Illinois yet. A quick explanation of how to apply with IDFPR.
Did you know that as of April 20th, 2023 Registered Interior Designers in Illinois can now obtain a stamp and use it to submit non-structural interior plans for permitting? Now you do!
Join ASID, IIDA, and CIDQ on Monday, July 24th at 5:30 pm CST for a live webinar to get you up to speed on the important details.


ASID, CIDQ, IIDA
This webinar will cover:
If you are NCIDQ Certified, but not registered with the State of Illinois yet
A quick explanation of how to apply with IDFPR
What your stamp should look like and where you can get one once you’re registered
Tips and tricks for getting your registration/stamp
Why it’s important to register even if you might not stamp drawings one day
Continuing education requirements
What to do if a jurisdiction rejects your stamp
Other great information and resources!
We’re excited to help you obtain your registration and are looking forward to answering all your questions. In the meantime, see below for the FAQ document to start learning more!
Don’t forget to Save the Date for an upcoming Registration Drive on August 10th!


Have more questions about becoming a Registered Interior Designer in Illinois?

Host with the Most: Style Your Dining Table for the Perfect Dinner Party
Picture this: you've spent hours perfecting your dinner party menu, sourcing the finest ingredients, and even practicing your culinary skills. But wait, there's one crucial element you might be overlooking - the styling of your dining table!
Picture this: you've spent hours perfecting your dinner party menu, sourcing the finest ingredients, and even practicing your culinary skills. But wait, there's one crucial element you might be overlooking - the styling of your dining table!
Believe it or not, how you decorate your table can make all the difference in creating a truly memorable dinner party experience.
When it comes to dining table styling, think of it as setting the stage for an unforgettable evening. The right combination of table décor can enhance the ambiance, spark conversation among guests, and even elevate the taste of your culinary creations (okay, maybe not literally). So grab those napkins and let's dive into the wonderful world of dining table aesthetics!
Art Of Dining Showcase by Sarah Jacquelyn Interiors (2022)
our top 6 Tips to Master the Art of Table Styling

1. Choose a Theme or Color Scheme
When it comes to decorating your dining table, choosing a theme or color scheme is an important first step.
This sets the tone for the overall look and feel of your dining space. Whether you're hosting a formal dinner party or simply want to add some style to your everyday meals, selecting the right theme or color scheme can make a big impact.
2. Start with a Clean and Clear Tabletop
When it comes to styling your dining table, starting with a clean and clear tabletop is essential.
This step sets the foundation for a visually appealing and organized space. By decluttering and prepping the tabletop, you create a blank canvas that allows you to showcase your personal style and creativity.

3. Select the Right Linens
When it comes to setting a beautiful table, the right choice of tablecloth and linens can make all the difference. Whether you're hosting a formal dinner party or simply want to add a touch of elegance to your everyday meals, selecting the perfect dining table linens is essential.
The Table Cloth
One of the key elements in choosing the right tablecloth is considering the size and shape of your dining table. A well-fitted tablecloth should hang evenly on all sides, with enough overhang to create an elegant drape. It's important to measure your table before purchasing a tablecloth to ensure a proper fit.
Napkins and Placemats
In addition to size, coordinating napkins and placemats can enhance the overall look and feel of your dining experience. Matching or complementary colors, patterns, or textures can create a cohesive and visually appealing tablescape. Consider selecting napkins and placemats that complement your chosen tablecloth for a polished and put-together look.
Fabric Type Matters
Another factor to consider when choosing dining table linens is the fabric. There are various options available, each with its own unique qualities. Cotton is popular for its durability and easy care, while linen offers a more luxurious feel and natural texture. Polyester blends are often chosen for their wrinkle-resistant properties, making them ideal for everyday use.
4. Arranging Place Settings like a Pro

When it comes to hosting a formal dinner or event, proper place-setting etiquette is essential. Arranging place settings like a pro not only adds elegance to the table but also ensures that guests feel comfortable and know where each item belongs.
From dinnerware placement to flatware arrangement and glassware selection, attention to detail is key.
Adding personalized touches can make a significant impact on the overall experience for guests. Two popular ways to achieve this are through the use of name cards and menu displays. Name cards provide a sense of familiarity and make guests feel welcomed, while menu displays allow for customization and easy navigation of food and beverage options.
5. Selecting the Perfect Centerpiece

The centerpiece plays a crucial role. It not only adds visual appeal but also sets the mood for the entire dining experience.
With a plethora of options available, selecting the perfect centerpiece can seem like a daunting task. However, by considering factors such as dining table size, overall theme or style, and personal preferences, you can find the ideal centerpiece that complements your space and enhances your dining ambiance. There are various dining table centerpiece ideas to choose from:
Floral Centerpieces: Explore different flower types, colors, and arrangements.
Candle Centerpieces: Consider various candle sizes and shapes as well as candle holders.
Mixing Elements: Combine flowers with candles or other decorative items for a unique look.
Seasonal Decorations: Incorporate elements that reflect the time of year or specific holidays.
6. Consider Additional Table Accessories

Attention to detail is key.
While the main focus may be on the tablecloth, dinnerware, and centerpiece, it's important not to overlook the impact that additional table accessories can have. Napkin rings, place card holders, coasters, and salt & pepper shakers are all small but significant elements that can elevate the overall look and functionality of a table setting.
Napkin Rings: Add a touch of elegance and sophistication to any dining experience. They not only keep napkins neatly folded but also serve as decorative accents that can complement the theme or color scheme of the event.
Place Card Holders: Essential for formal occasions or large gatherings where assigned seating is necessary. They help guests easily locate their designated seats while adding a personalized touch.
Coasters: Practical accessories that protect your table surface from water rings and heat damage caused by hot beverages or dishes. They come in various materials such as wood, cork, or metal, allowing you to choose options that match your decor style.
Salt & Pepper Shakers: Sstaple items found on every dining table. Beyond their functional purpose of seasoning food, they can also be decorative elements that add charm and personality to your tablescape.
Ready For Us To Transform Your Dining Decor?
Schedule a Design Discovery Call Today!

Day in the Life: Design Intern at Neocon
As an intern, I was thrilled to attend NeoCon for the first time. I heard so many great stories about the event from my peers, and I was eager to see the latest products, designs, and trends. Read on for a behind-the-scenes look at a day in my life!

HI, I’M VICTORIA- SJI’s Summer Intern!
As an intern, I was thrilled to attend NeoCon for the first time. I heard so many great stories about the event from my peers, and I was eager to see the latest products, designs, and trends. Read on for a behind-the-scenes look at a day in my life!

What is Neocon?
NeoCon is held annually at theMart in Chicago
Most important commercial design event since 1969
3 Day Long Event
Over 50,000 people from around the world attend
Companies showcase their latest products and innovations in furniture, lighting, flooring, wallcovering, and more
Learning opportunities, CEU’s, and networking events
Stay up to date with the ever evovling design industry!
ASID Illinois Ribbon Cutting & Luncheon
When I arrived at the event, I was amazed at the size of it. There were so many brands, designers, and vendors showcasing their products and designs. I felt like a kid in a candy store as I made my way through the different exhibits. To kick off NeoCon, I celebrated with the ASID Illinois team at the ribbon-cutting ceremony for the opening of their new office at The Mart! They provided lunch and drinks, and I got to see some familiar faces.


SJI Team at ASID ribbon cutting. Left to right: Bianka Daehler, Sarah Schwuchow, Victoria Ramos, Justine Trace

Left to right: Sarah Schwuchow, Victoria Ramos
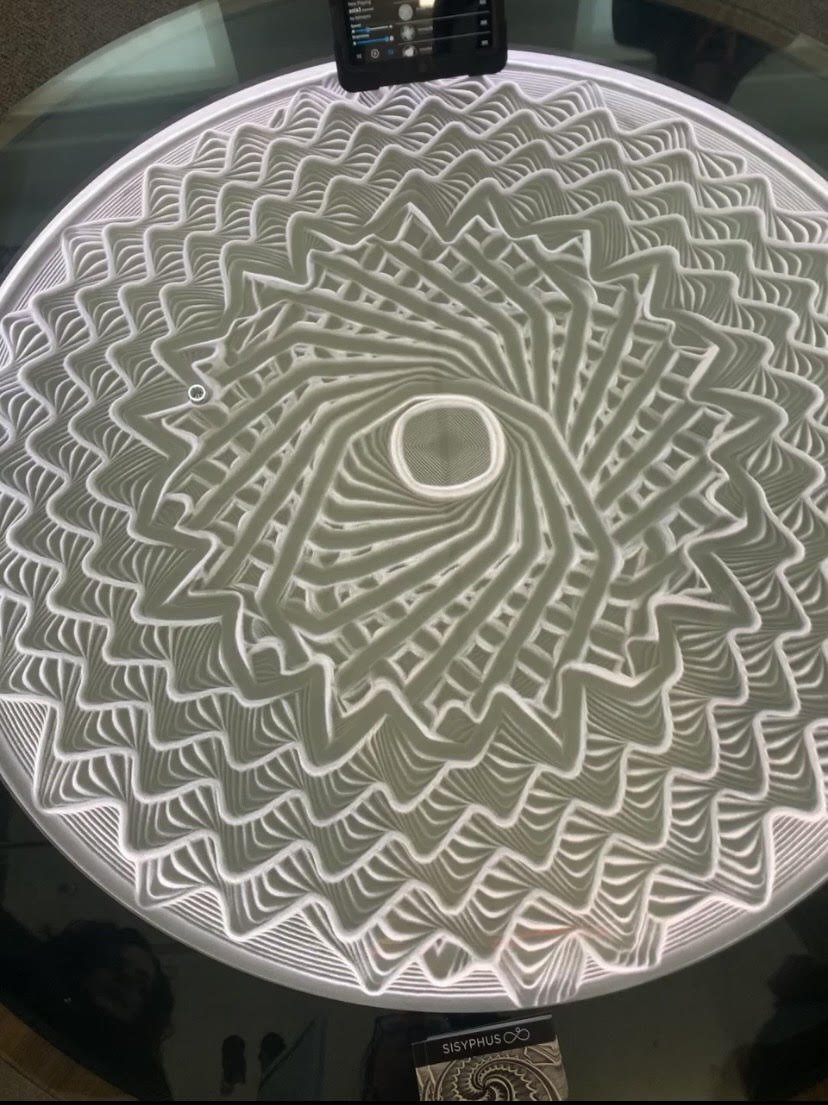
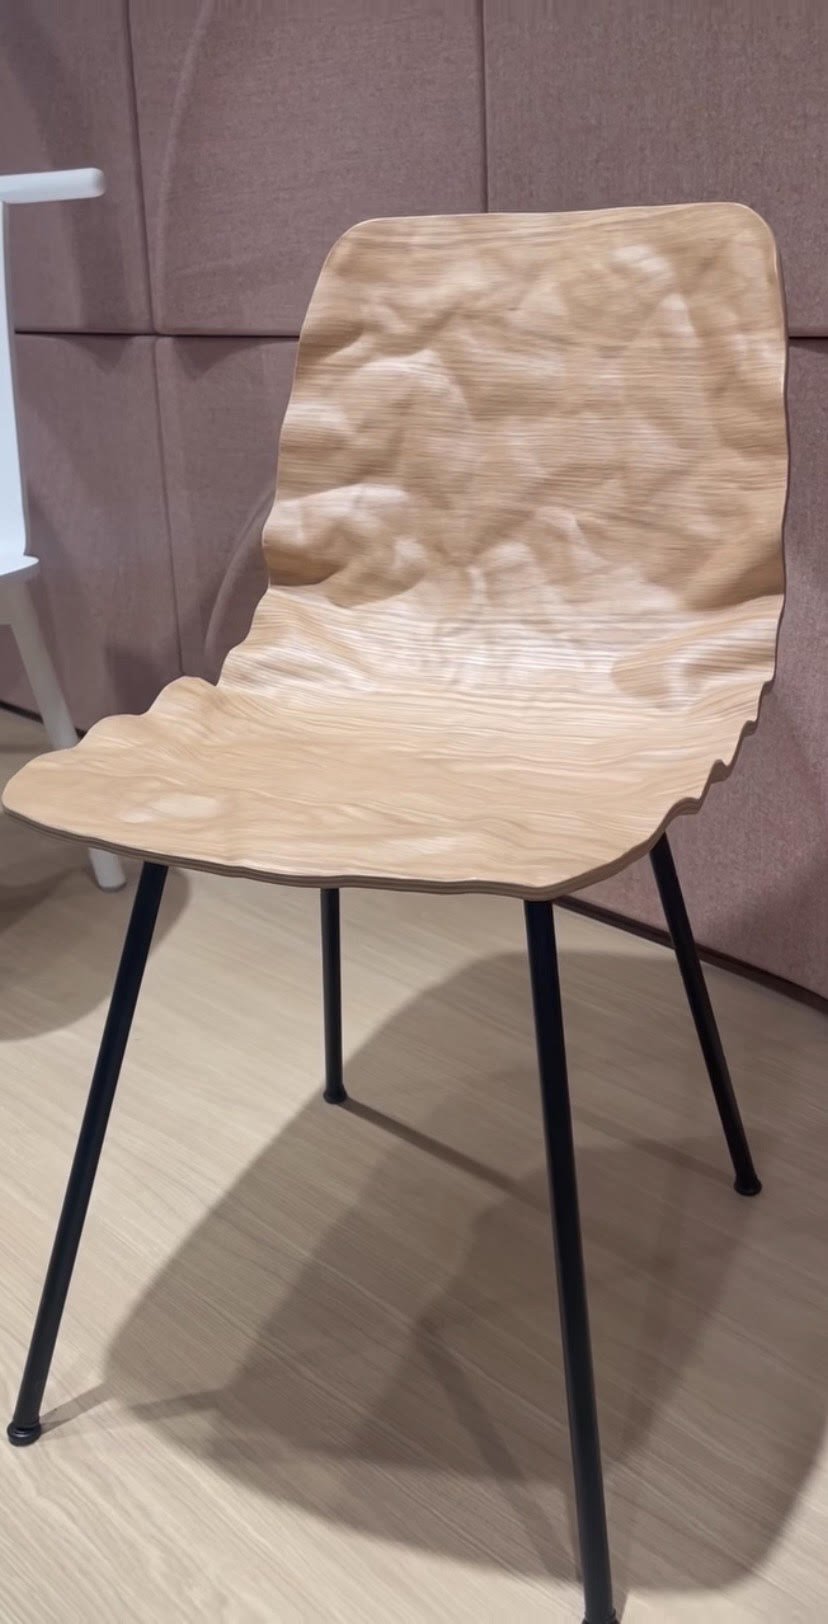
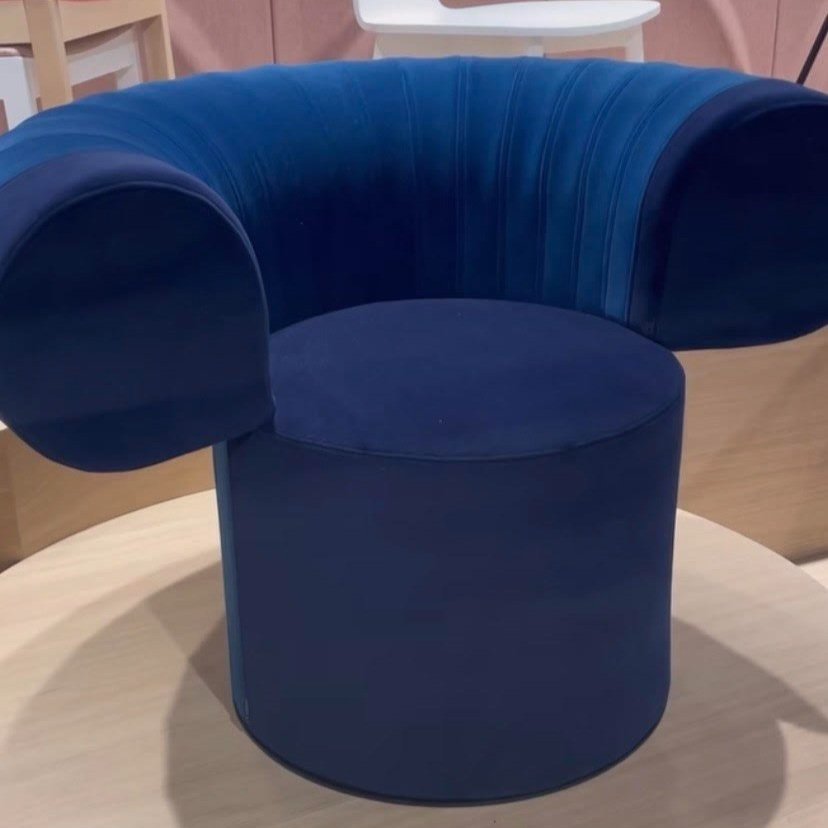
Walking the Neocon Showrooms
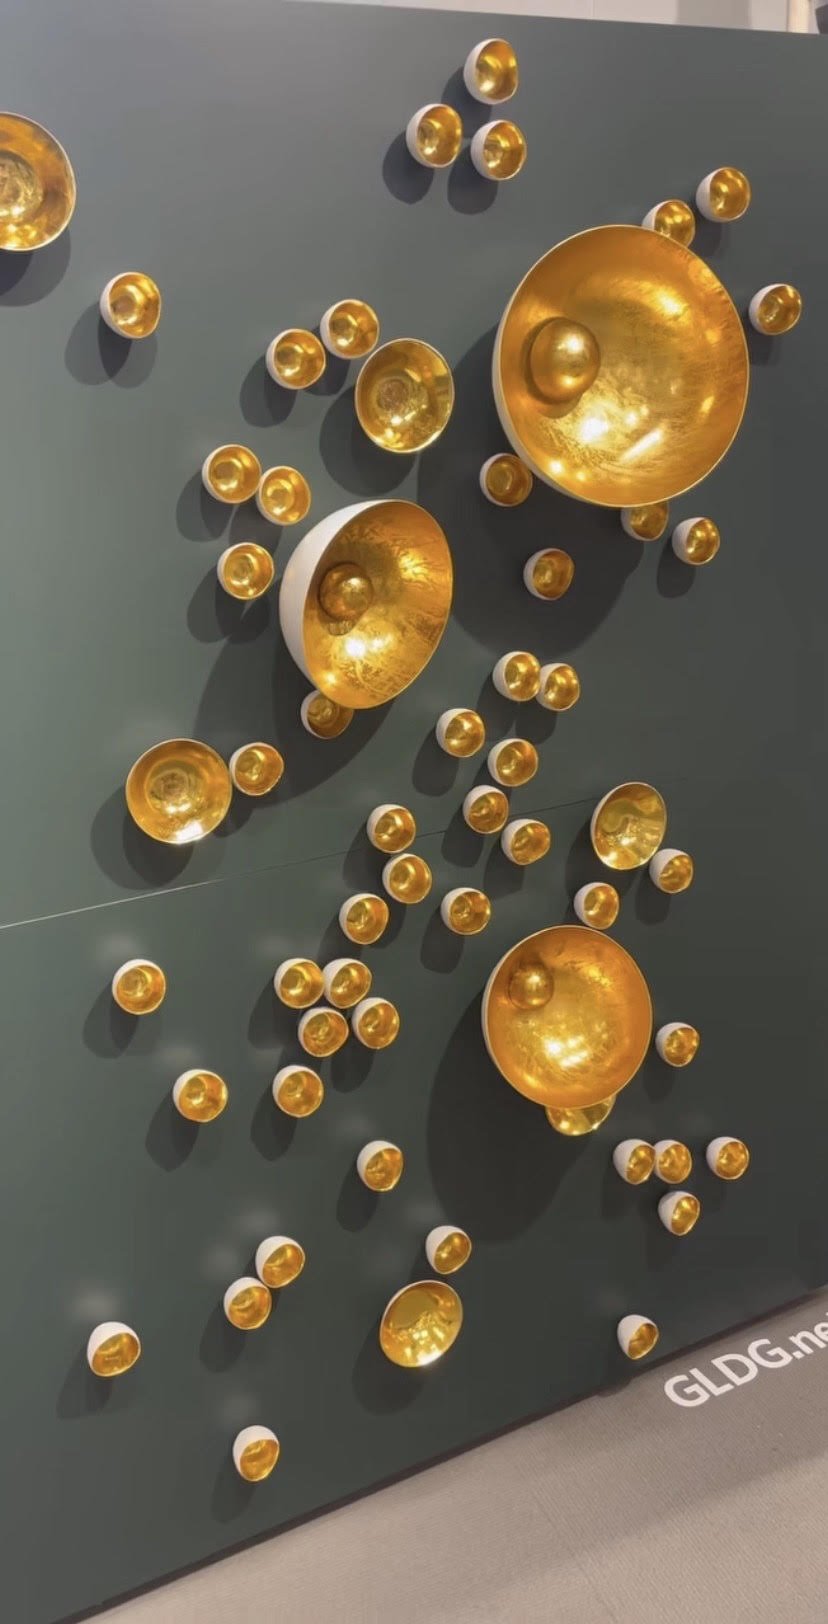
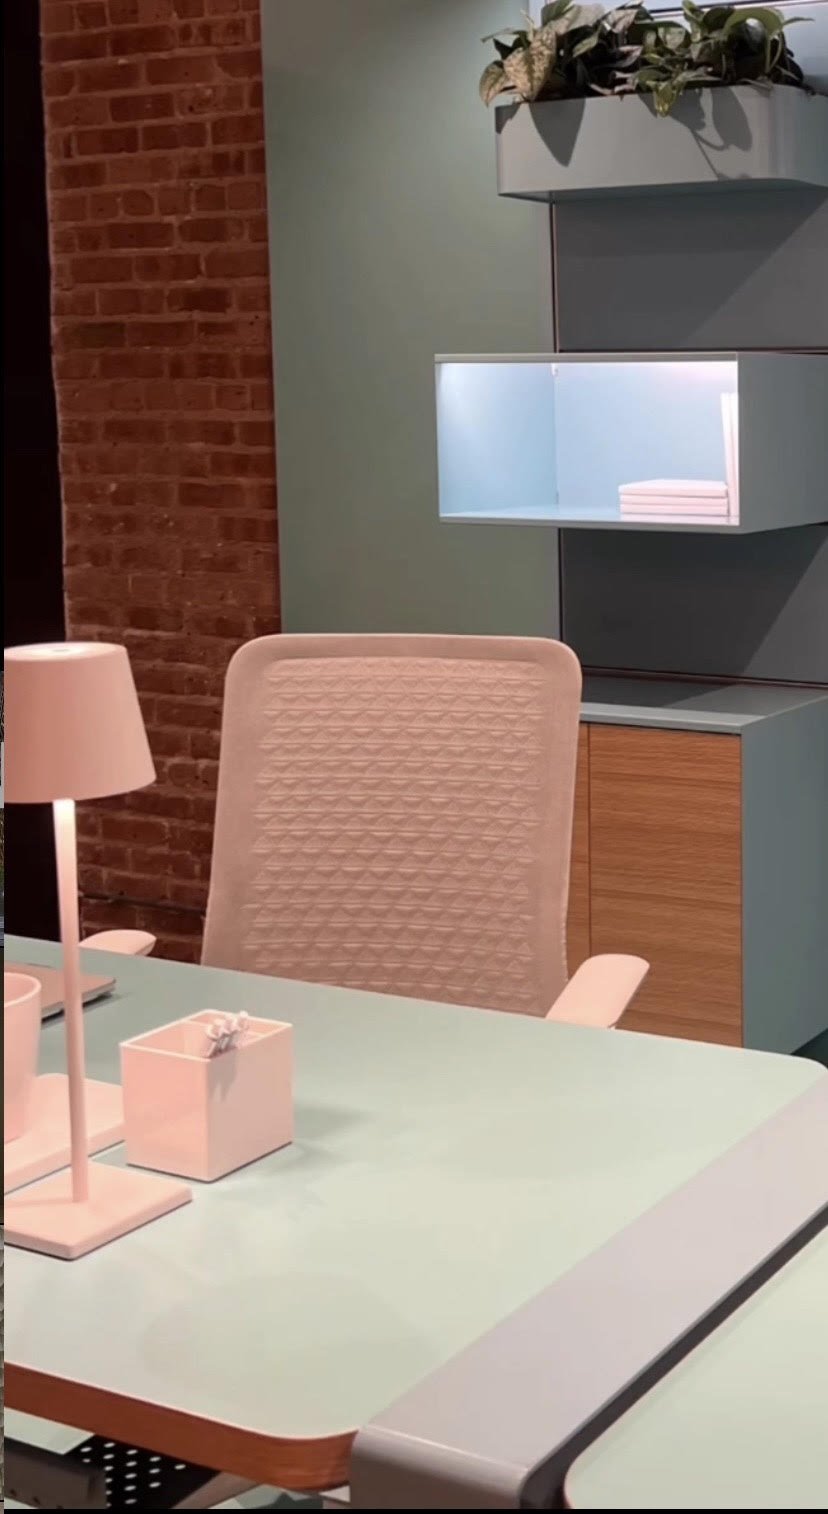
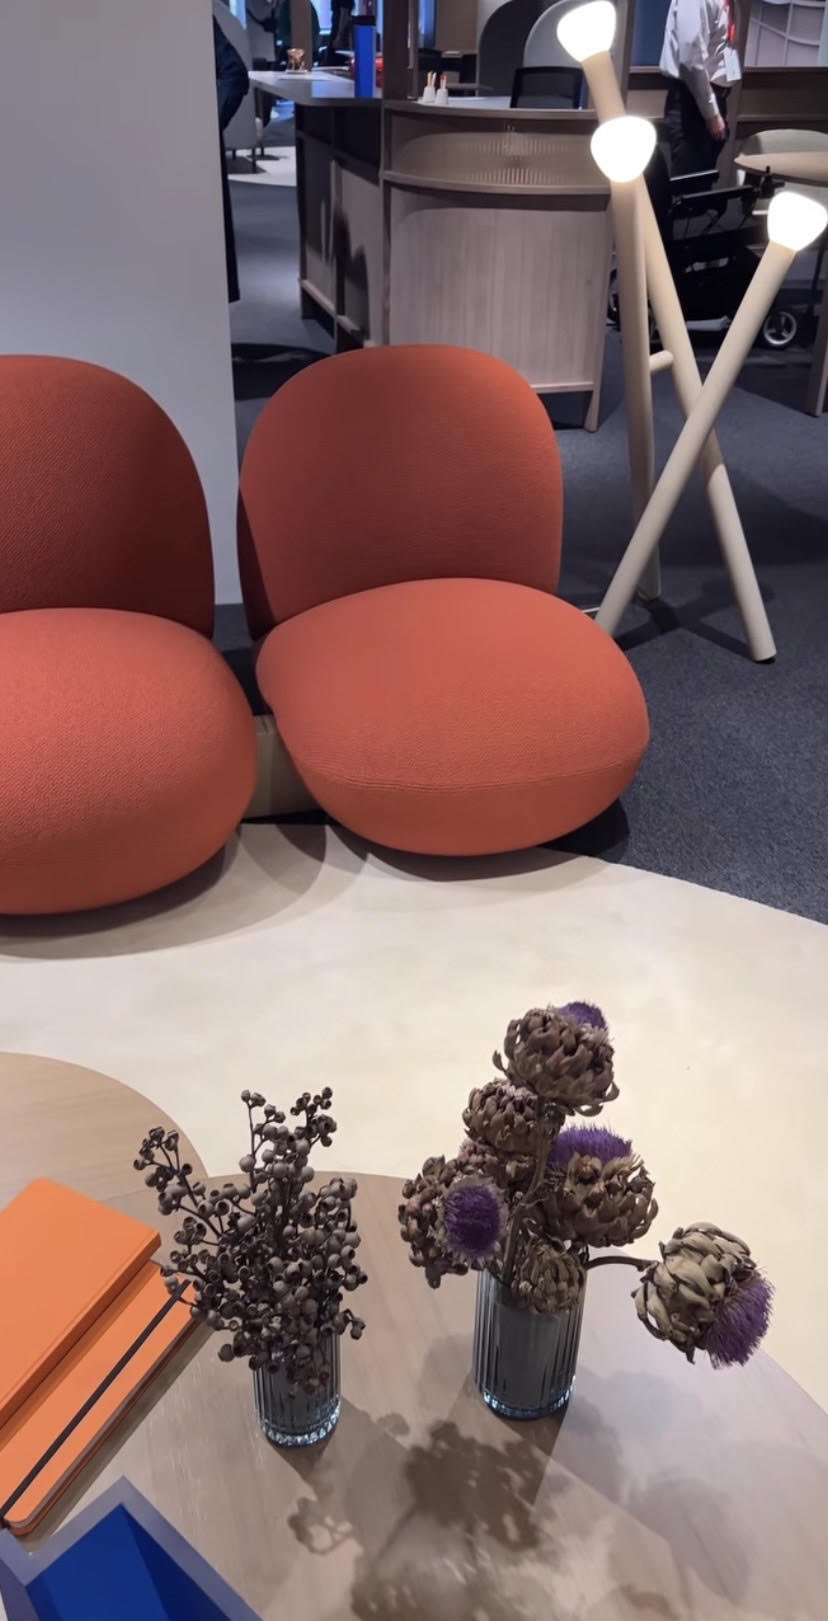
While making my way through the different floors with the SJI team, I was welcomed by friendly and knowledgeable exhibitors who were happy to take their time and explain the features of their latest products. From ergonomic chairs to eco-friendly materials, there was so much to see and learn. It was also fun seeing all the cool totes and giveaways the different showcases were offering.

SJI Team at Clarus Showroom. Left to right: Justine Trace, Victoria Ramos, Bianka Daehler, Sarah Schwuchow
Check Out Some of My Favorite Prodcuts

ASID National Portfolio & Resume Review
I also attended the ASID resume and portfolio review for students. Every 10 minutes we got to talk to different design professionals about what we could do differently to make our resume and portfolio better. I got a lot of great feedback and got to network and connect with some very talented individuals.

Dinner at Bavettes
After a long day of walking theMart, we relaxed with dinner and cocktails at one of SJI’s favorites right across the street - Bavette’s Bar & Boeuf!


Roof Top VIP After Party!
We ended the evening at the VIP Swatchbox + Behr Rooftop Soiree at London House!
Overall NeoCon Experience
What struck me the most was the sense of community and collaboration among the attendees. Everyone was passionate about the industry and eager to share their experiences and ideas. As an intern, I felt so welcomed and supported and left feeling inspired and excited to create new designs with the latest information and products I’ve discovered at NeoCon.
Overall, my first NeoCon experience was unforgettable. I learned so much and had a great time connecting with everyone I met along the way. I can’t wait to attend next year and see what innovative designs and ideas will be showcased.
Check out my Instagram Video recap!
Ready to refresh your home for summer?
Schedule a Design Discovery Call Today!

Art Lovers: Tips and Tricks
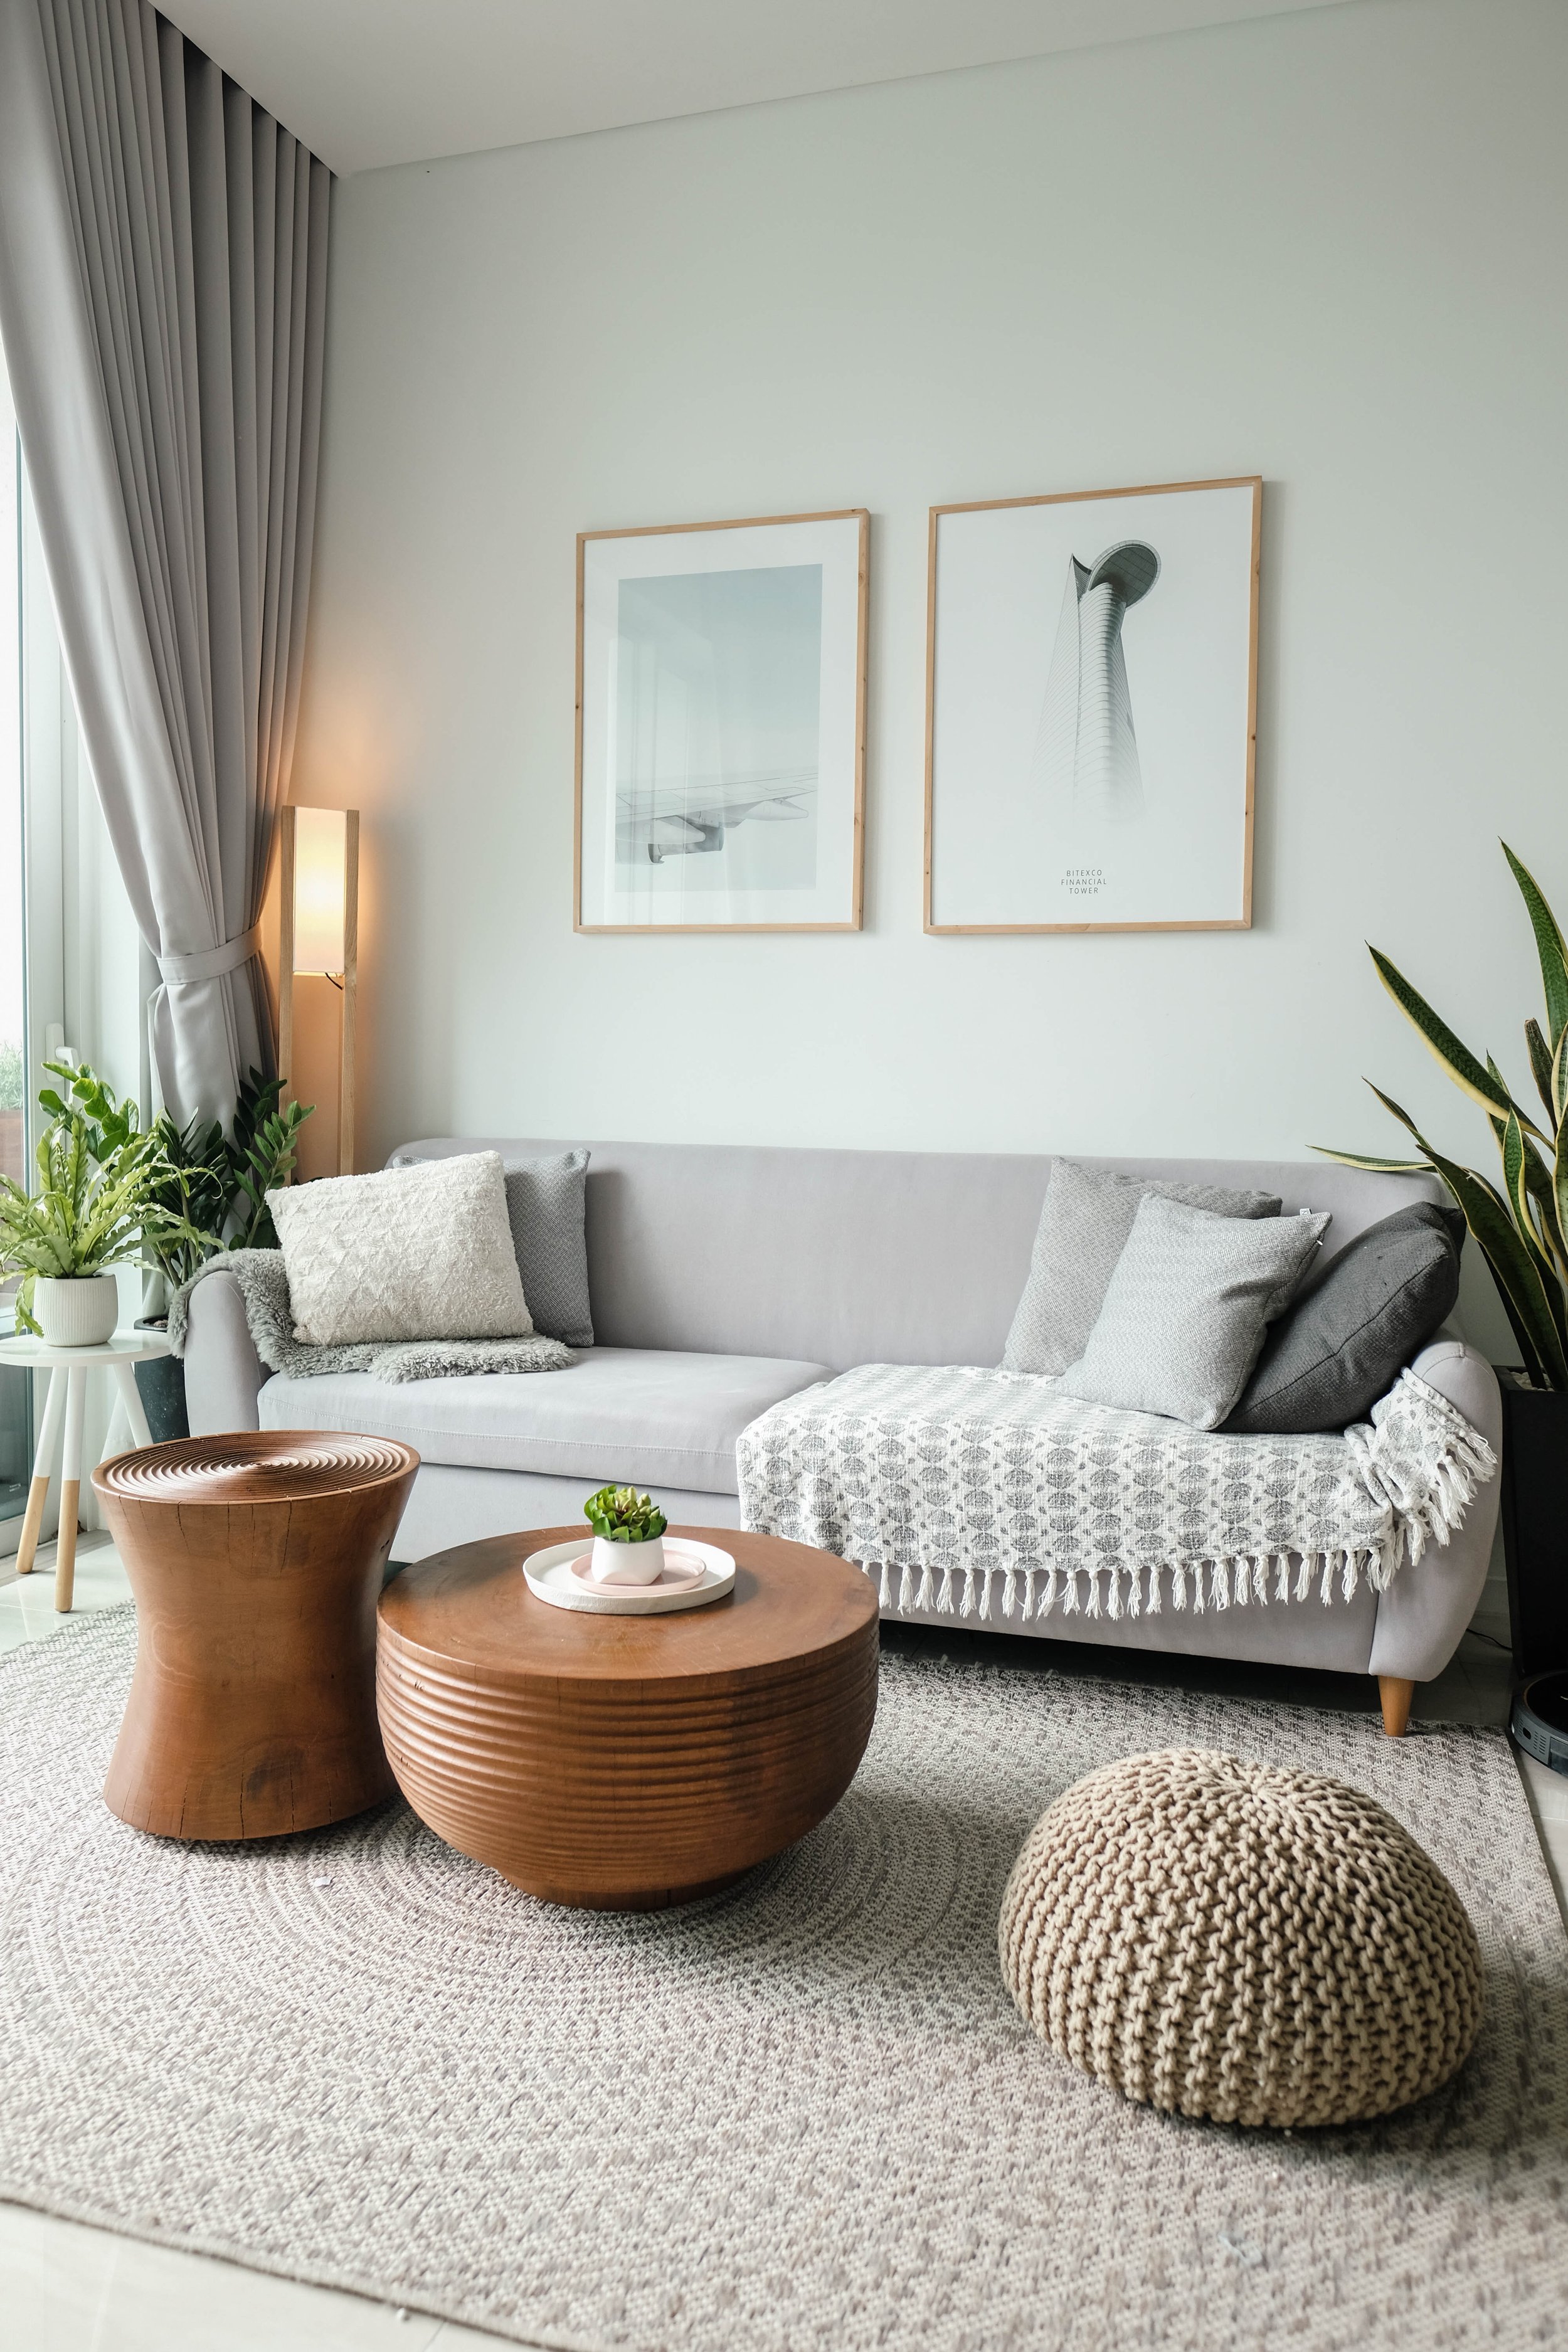
As interior designers, we believe artwork transforms a house into a home. Art breathes life and vision into the space where you spend quality time. The good news is that you have the opportunity to enjoy art anywhere and everywhere in your home. Artwork can make any room in your house polished, elegant and unique. The art on display in the foyer welcomes you and your guests with warmth and offers a glimpse into your unique style and personality. Placing artwork on the open walls of large rooms in your home can help create a sense of togetherness. Art has a place everywhere: peaking out behind objects on a styled shelf, in the tiniest nook, or even in the smallest frame.
As Interior Designers, we believe artwork transforms a house into a home. Art breathes life and vision into the space where you spend quality time. The good news is that you have the opportunity to enjoy art anywhere and everywhere in your home. Artwork can make any room in your house look polished, elegant and unique.
The art on display in the foyer welcomes you and your guests with warmth and offers a glimpse into your unique style and personality. Placing artwork on the open walls of large rooms in your home can help create a sense of togetherness. Art has a place everywhere: peaking out behind objects on a styled shelf, in the tiniest nook, or even in the smallest frame.
You bought it, you love it, and you had it framed— now you just need to decide how and where to hang your art. It may seem daunting at first to plan how to hang art throughout your house, but it doesn't have to be. Whether you're trying to decide where to put a large-scale framed art piece that you recently inherited or you're planning the layout of a gallery wall to display your family's special photos, we got just the tips and tricks to get the job done.
These suggestions will help you get past the challenging parts of selecting or hanging your art and jump right into embracing your creativity with interior design and decorating.

Art Framing and Gallery Wall by Sarah Jacquelyn Interiors
our top 5 Tips and tricks for art lovers
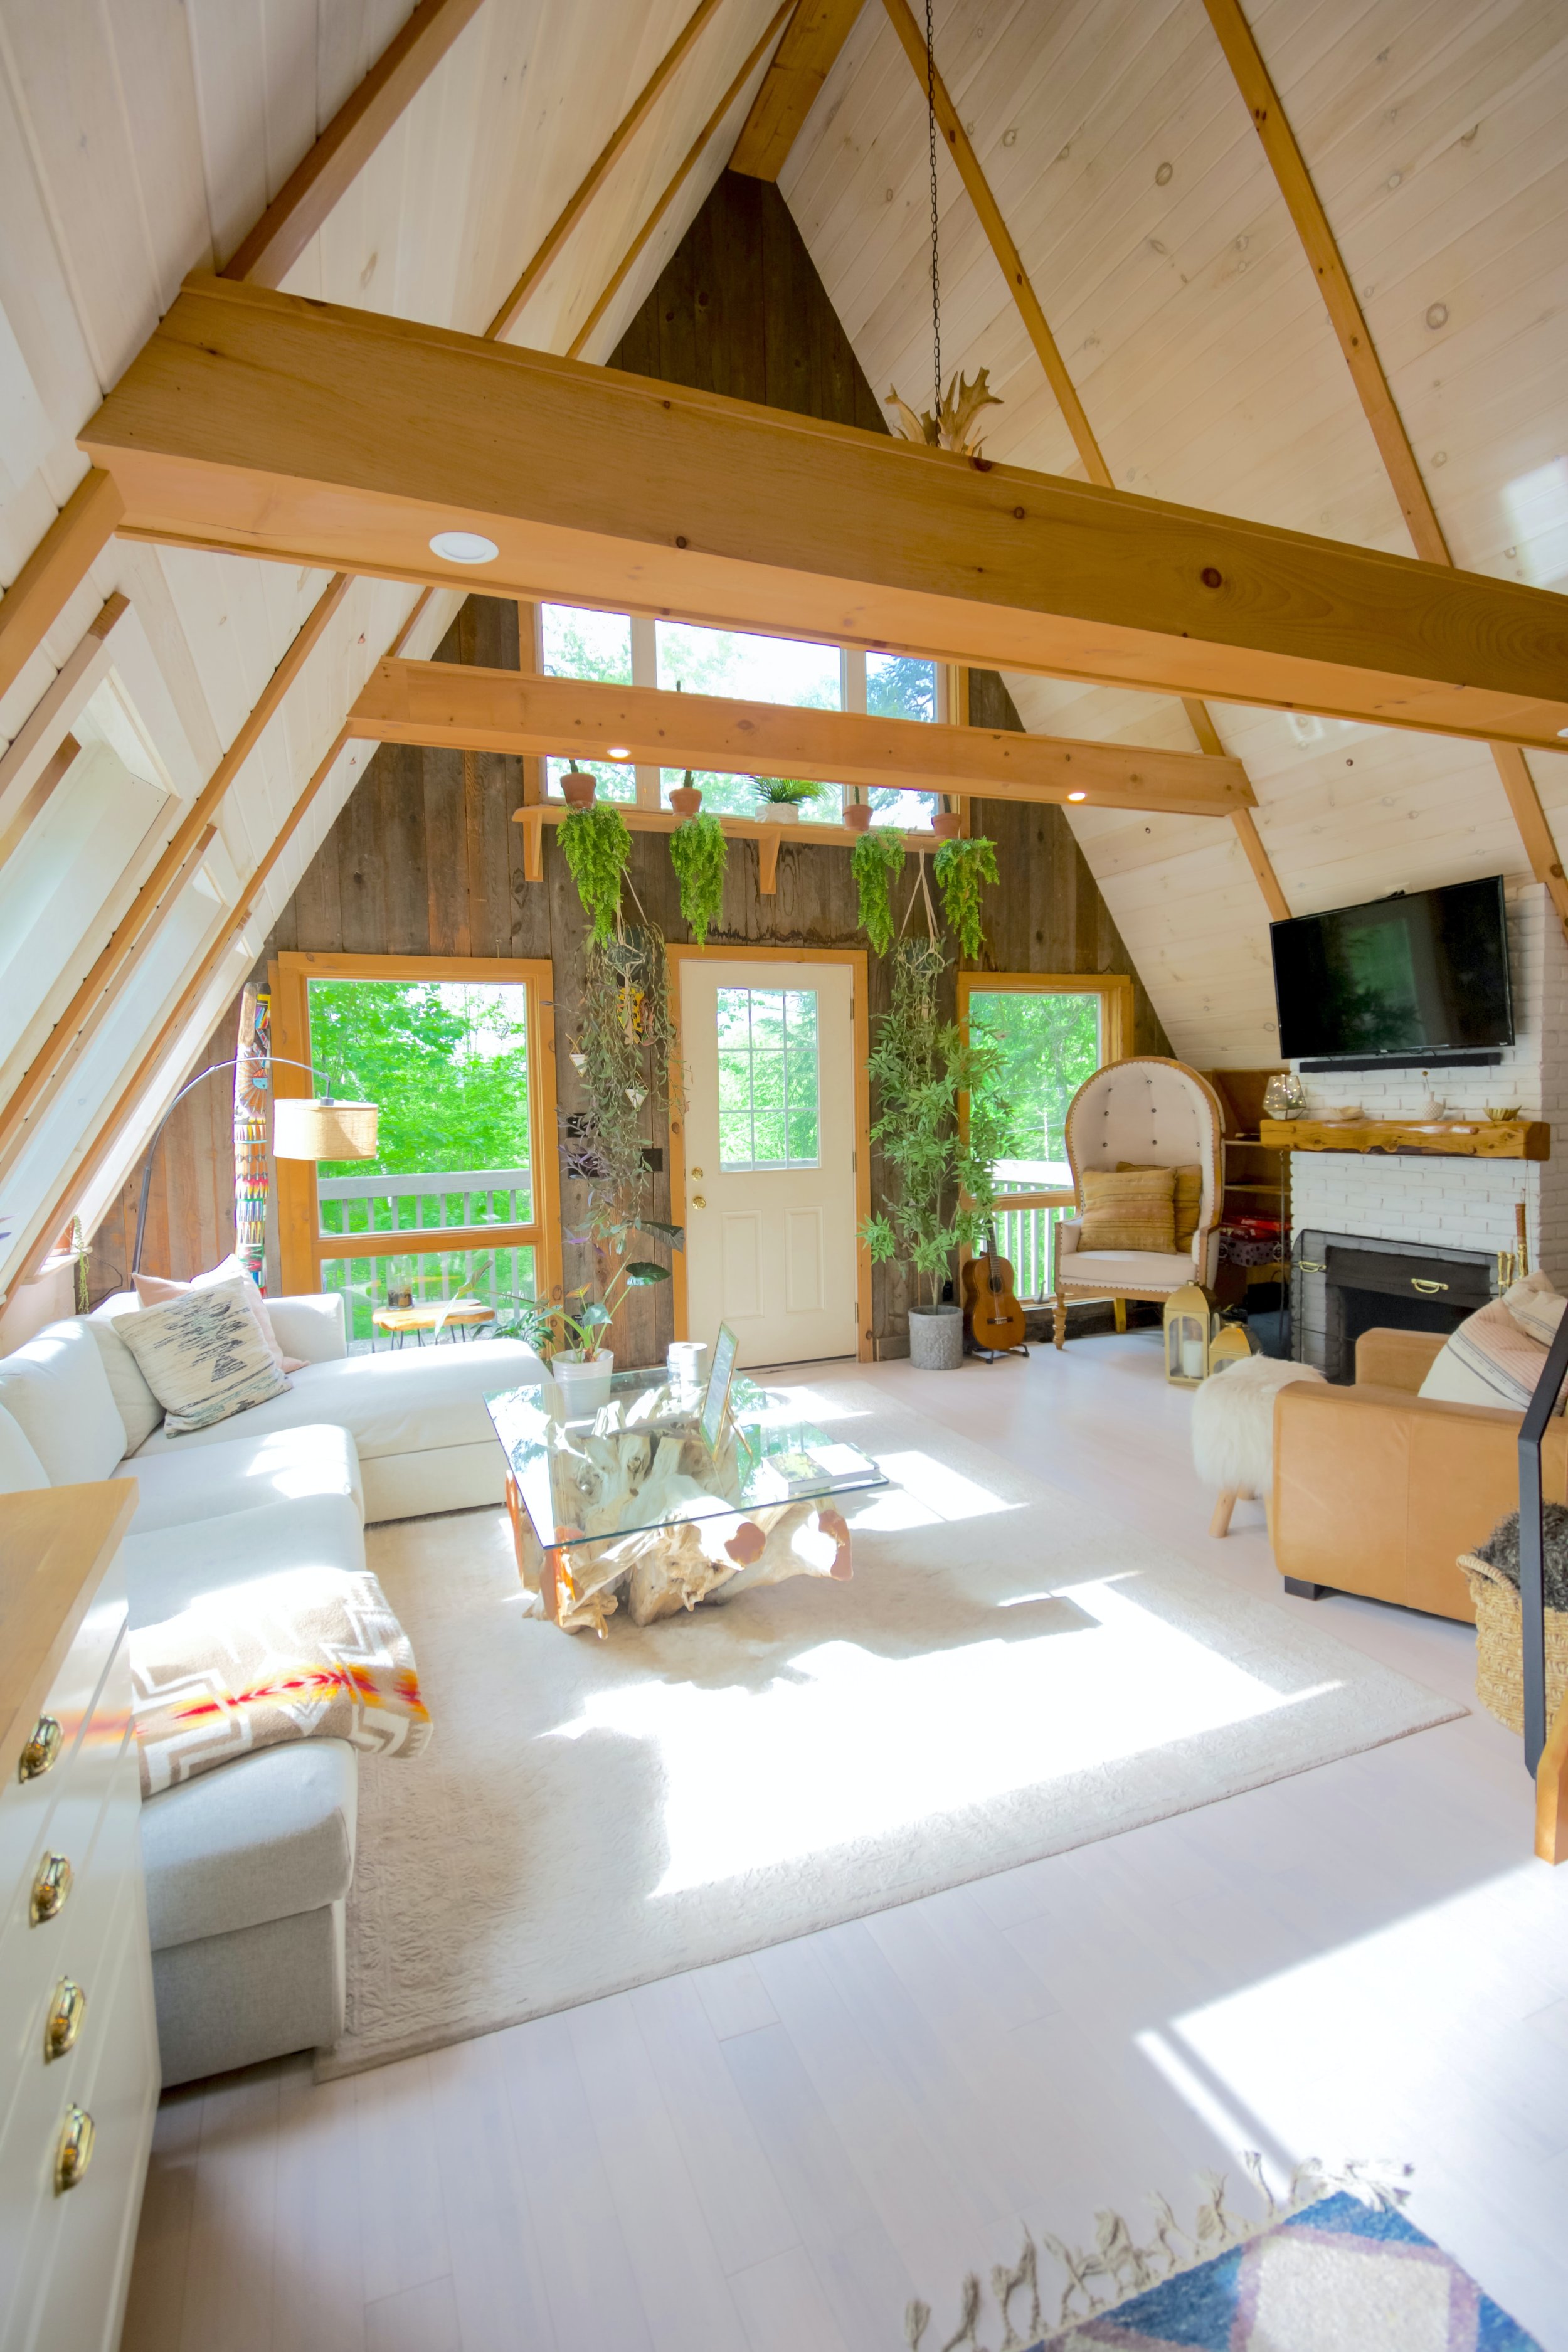
1. Create A Harmonious Space
Start with the art to find your color palette for the room! Pulling colors from the art allows you to find a harmonious thread to tie the room together. Layering like colors, varying forms, and mixed textures will create a dynamic space that feels effortless.

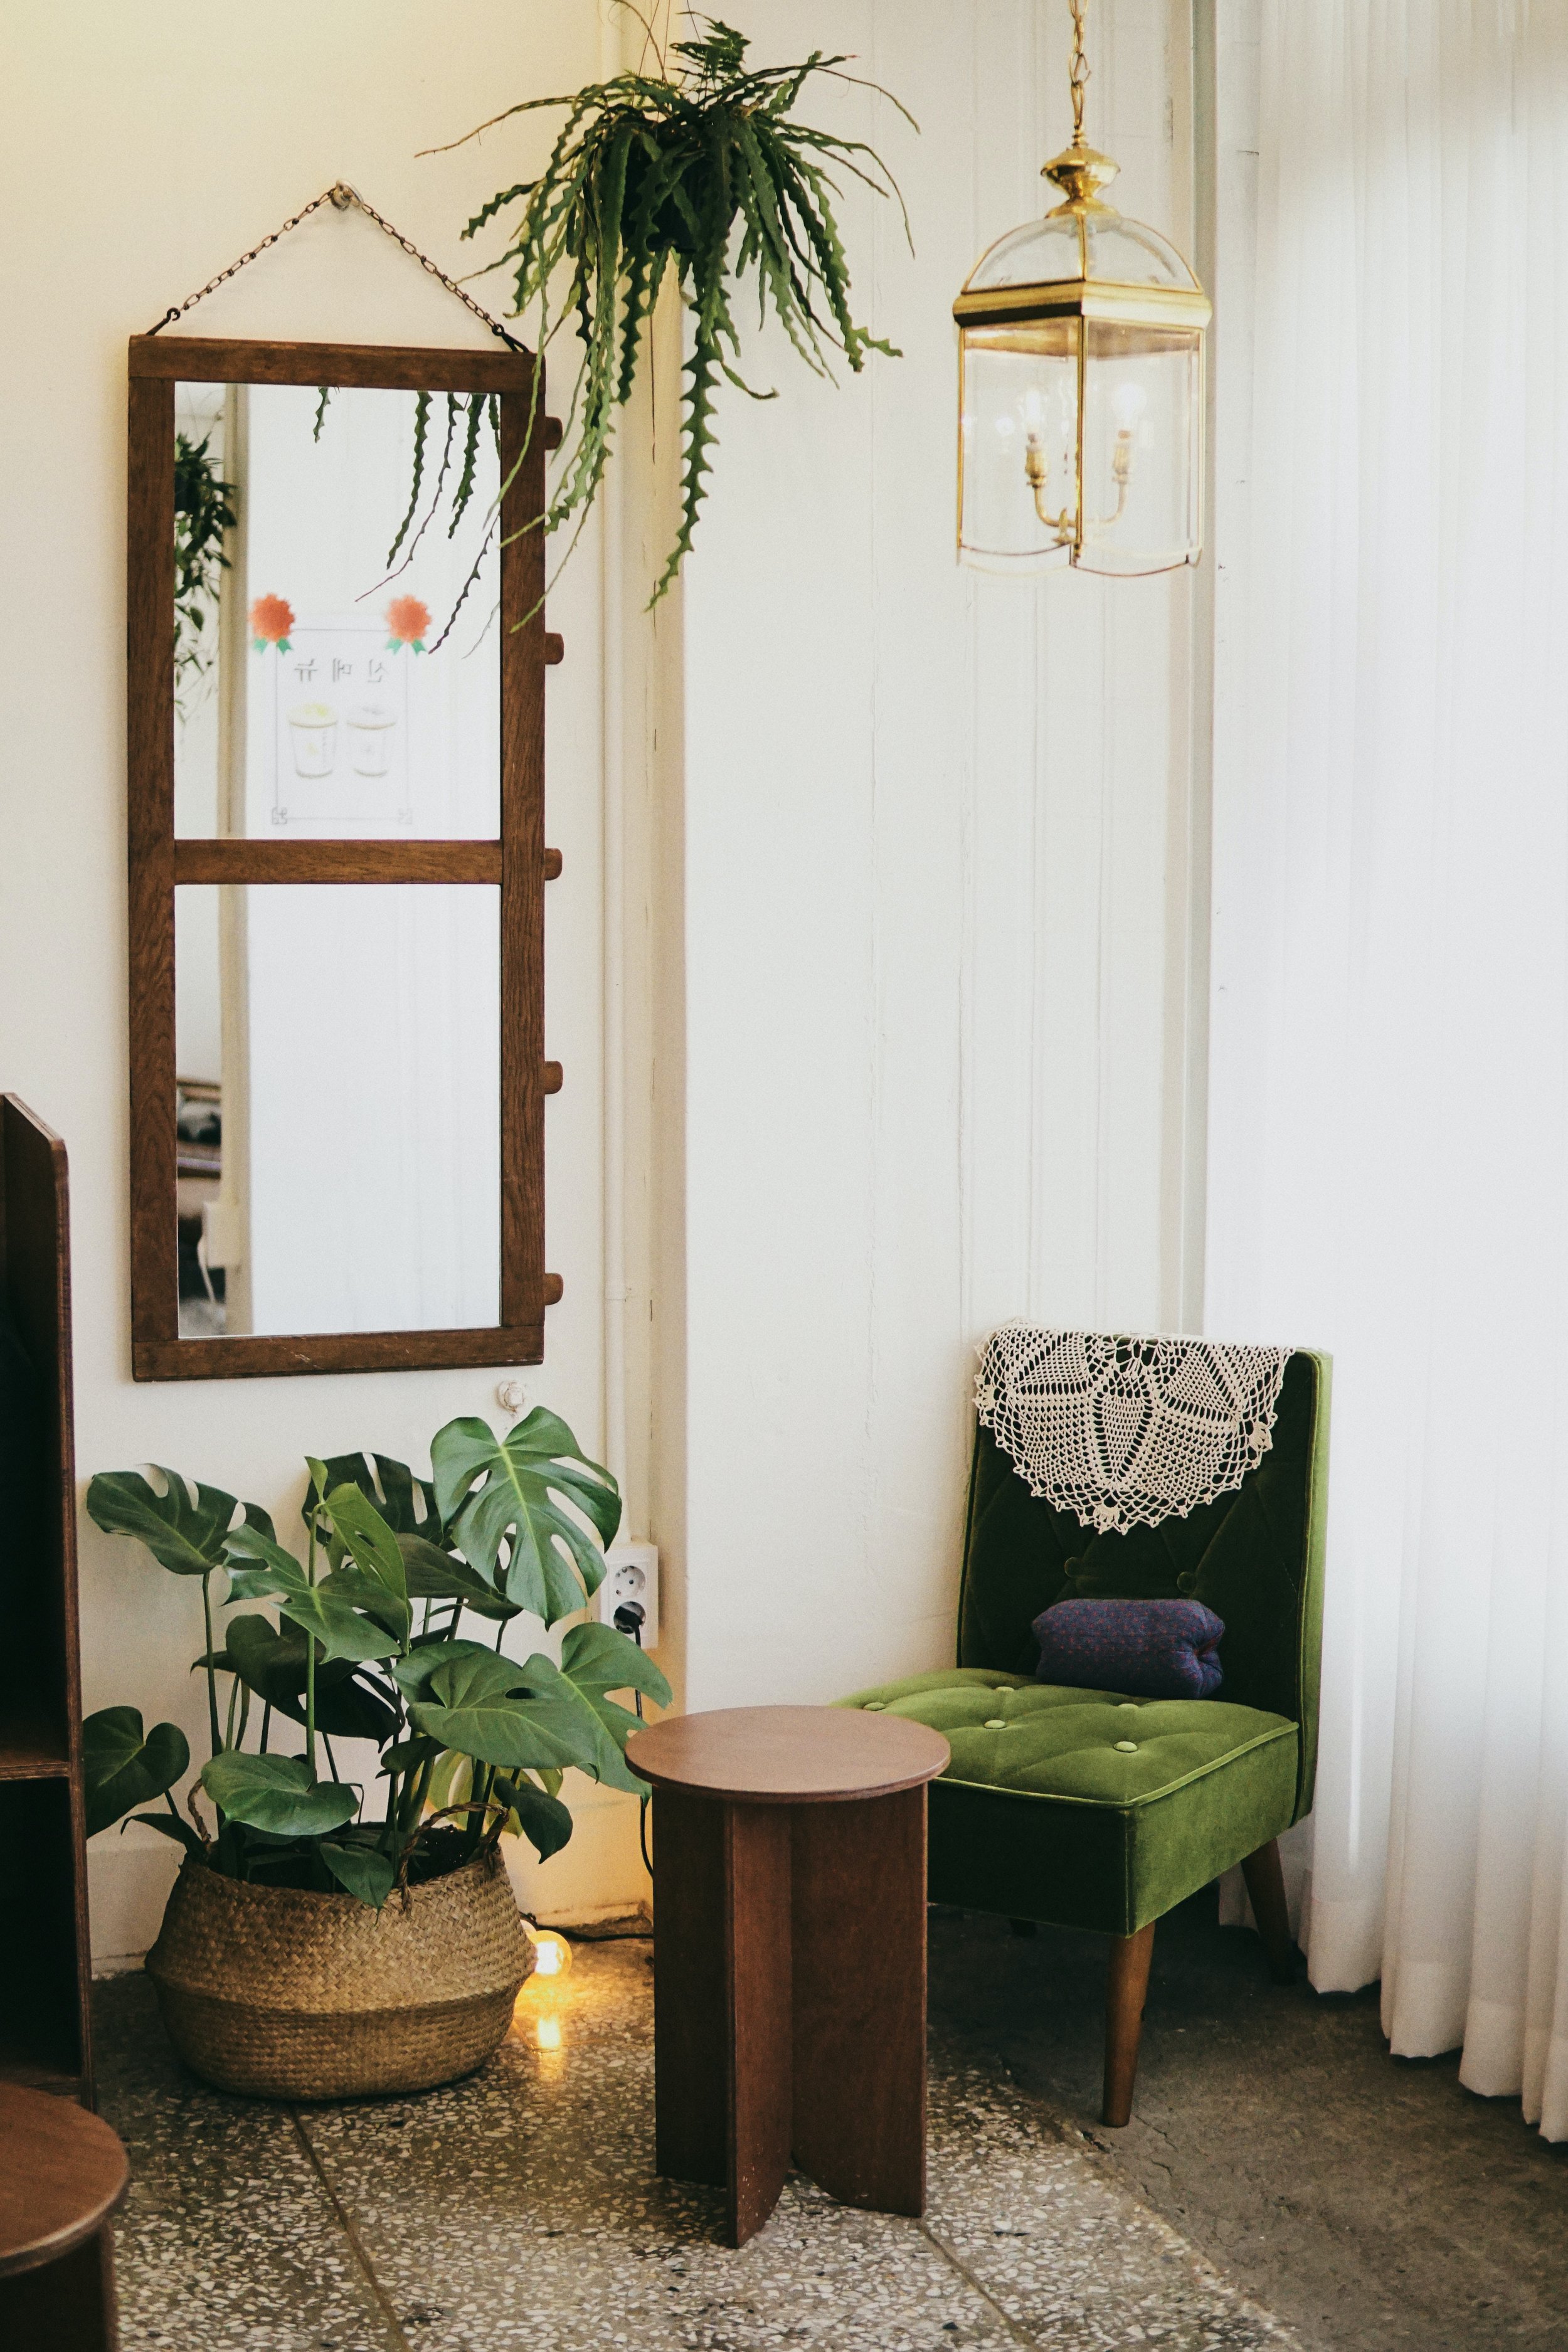
2. Hang Art Pieces at Your Eyeline
When you visit an art gallery, you will quickly notice that all the art is hung at your eyeline; this should apply to your home and spaces as well. As a general guideline, hang art so that center is 60 inches from the floor.

3. Framing Is Everything
Let me say that again: framing is everything. Getting the proportions of your art piece in the right frame, mating, color, texture, and form makes a world of difference on how your art feels in the room. The frame should enhance the art, not over power it. Getting the balance just right is an art.


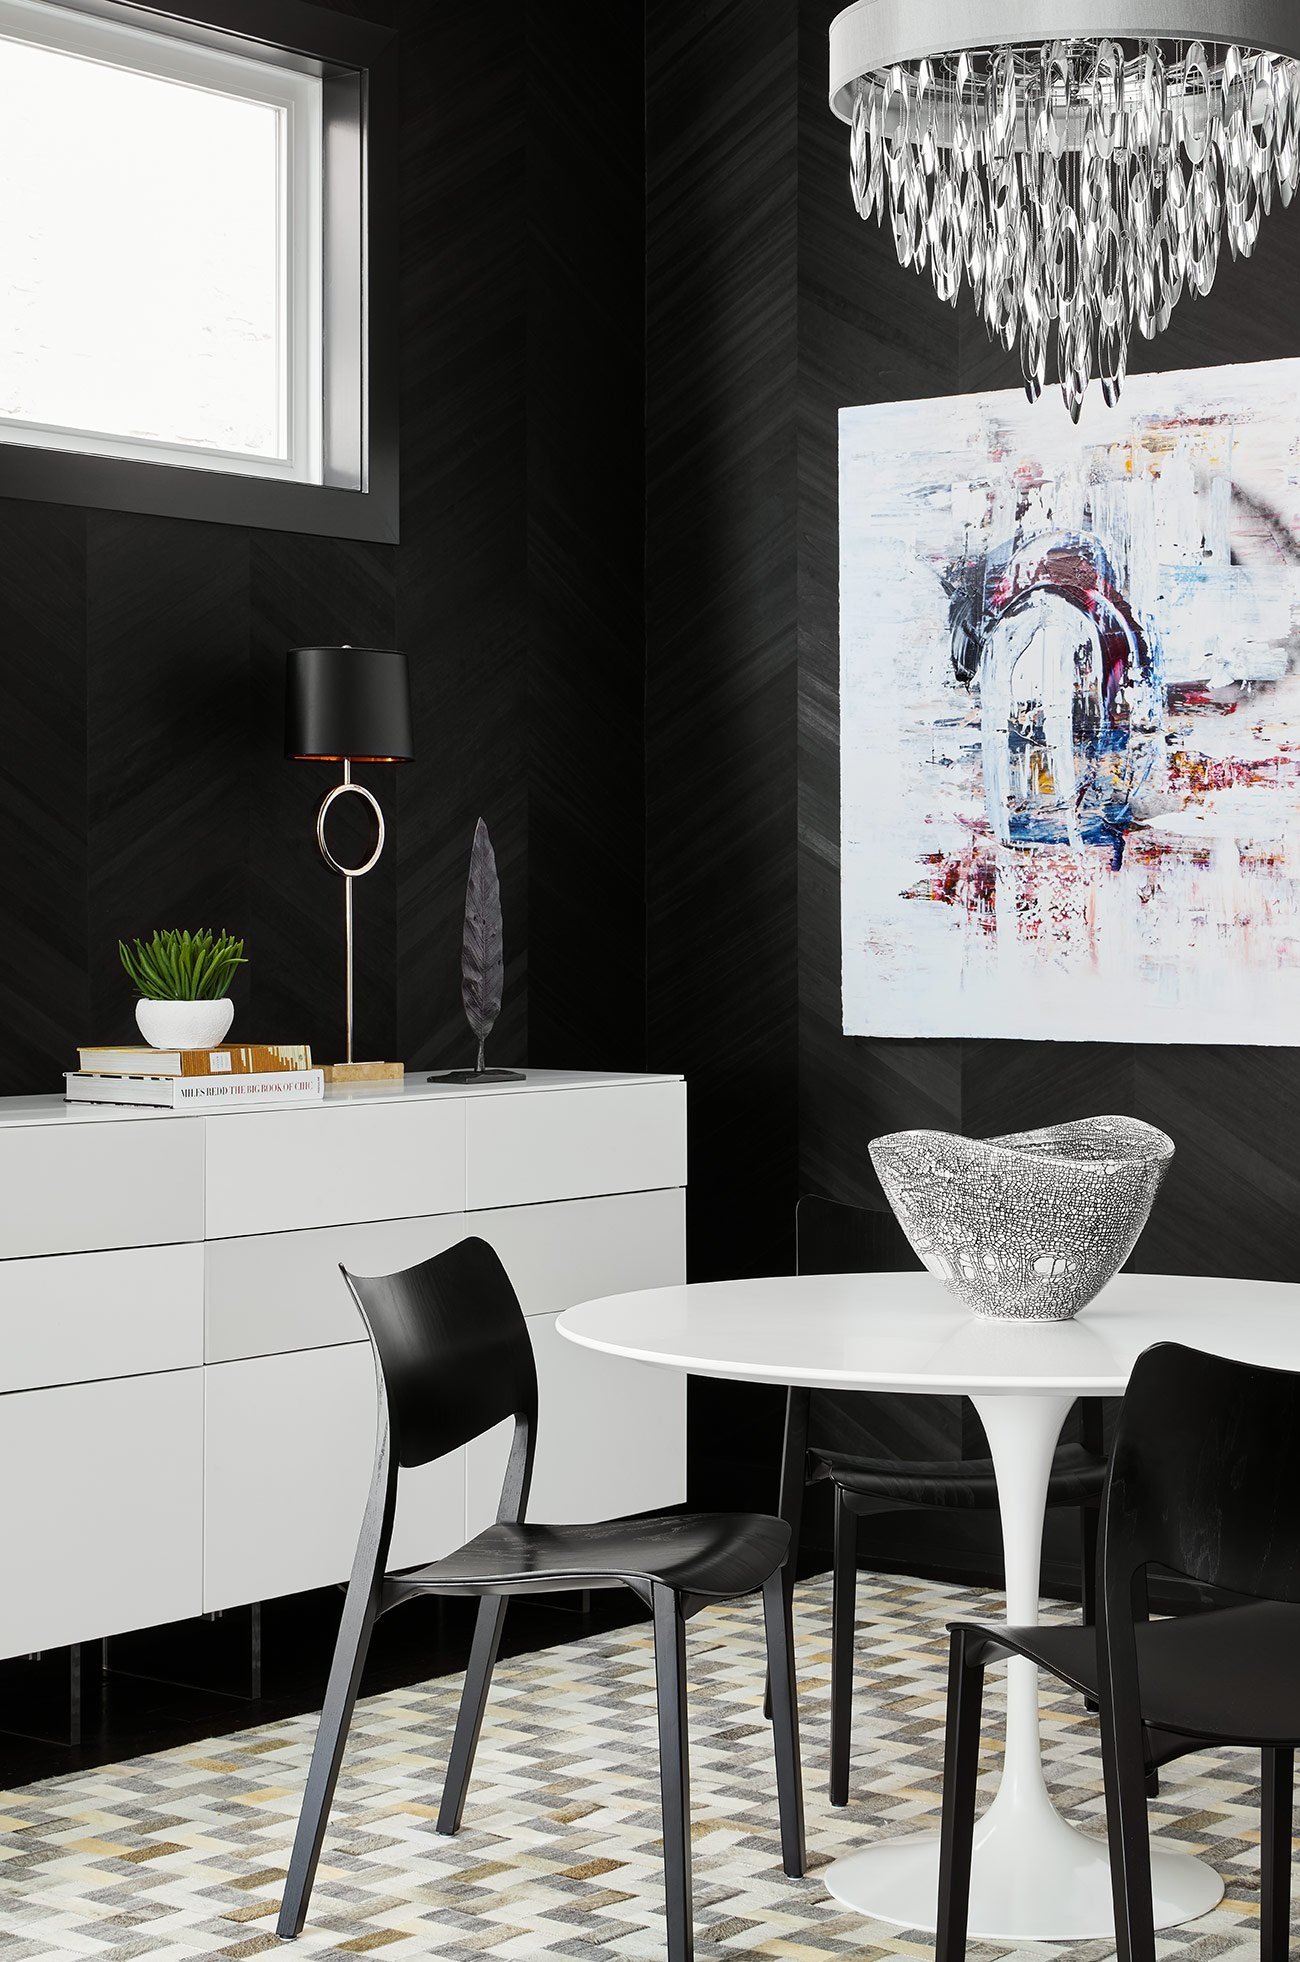
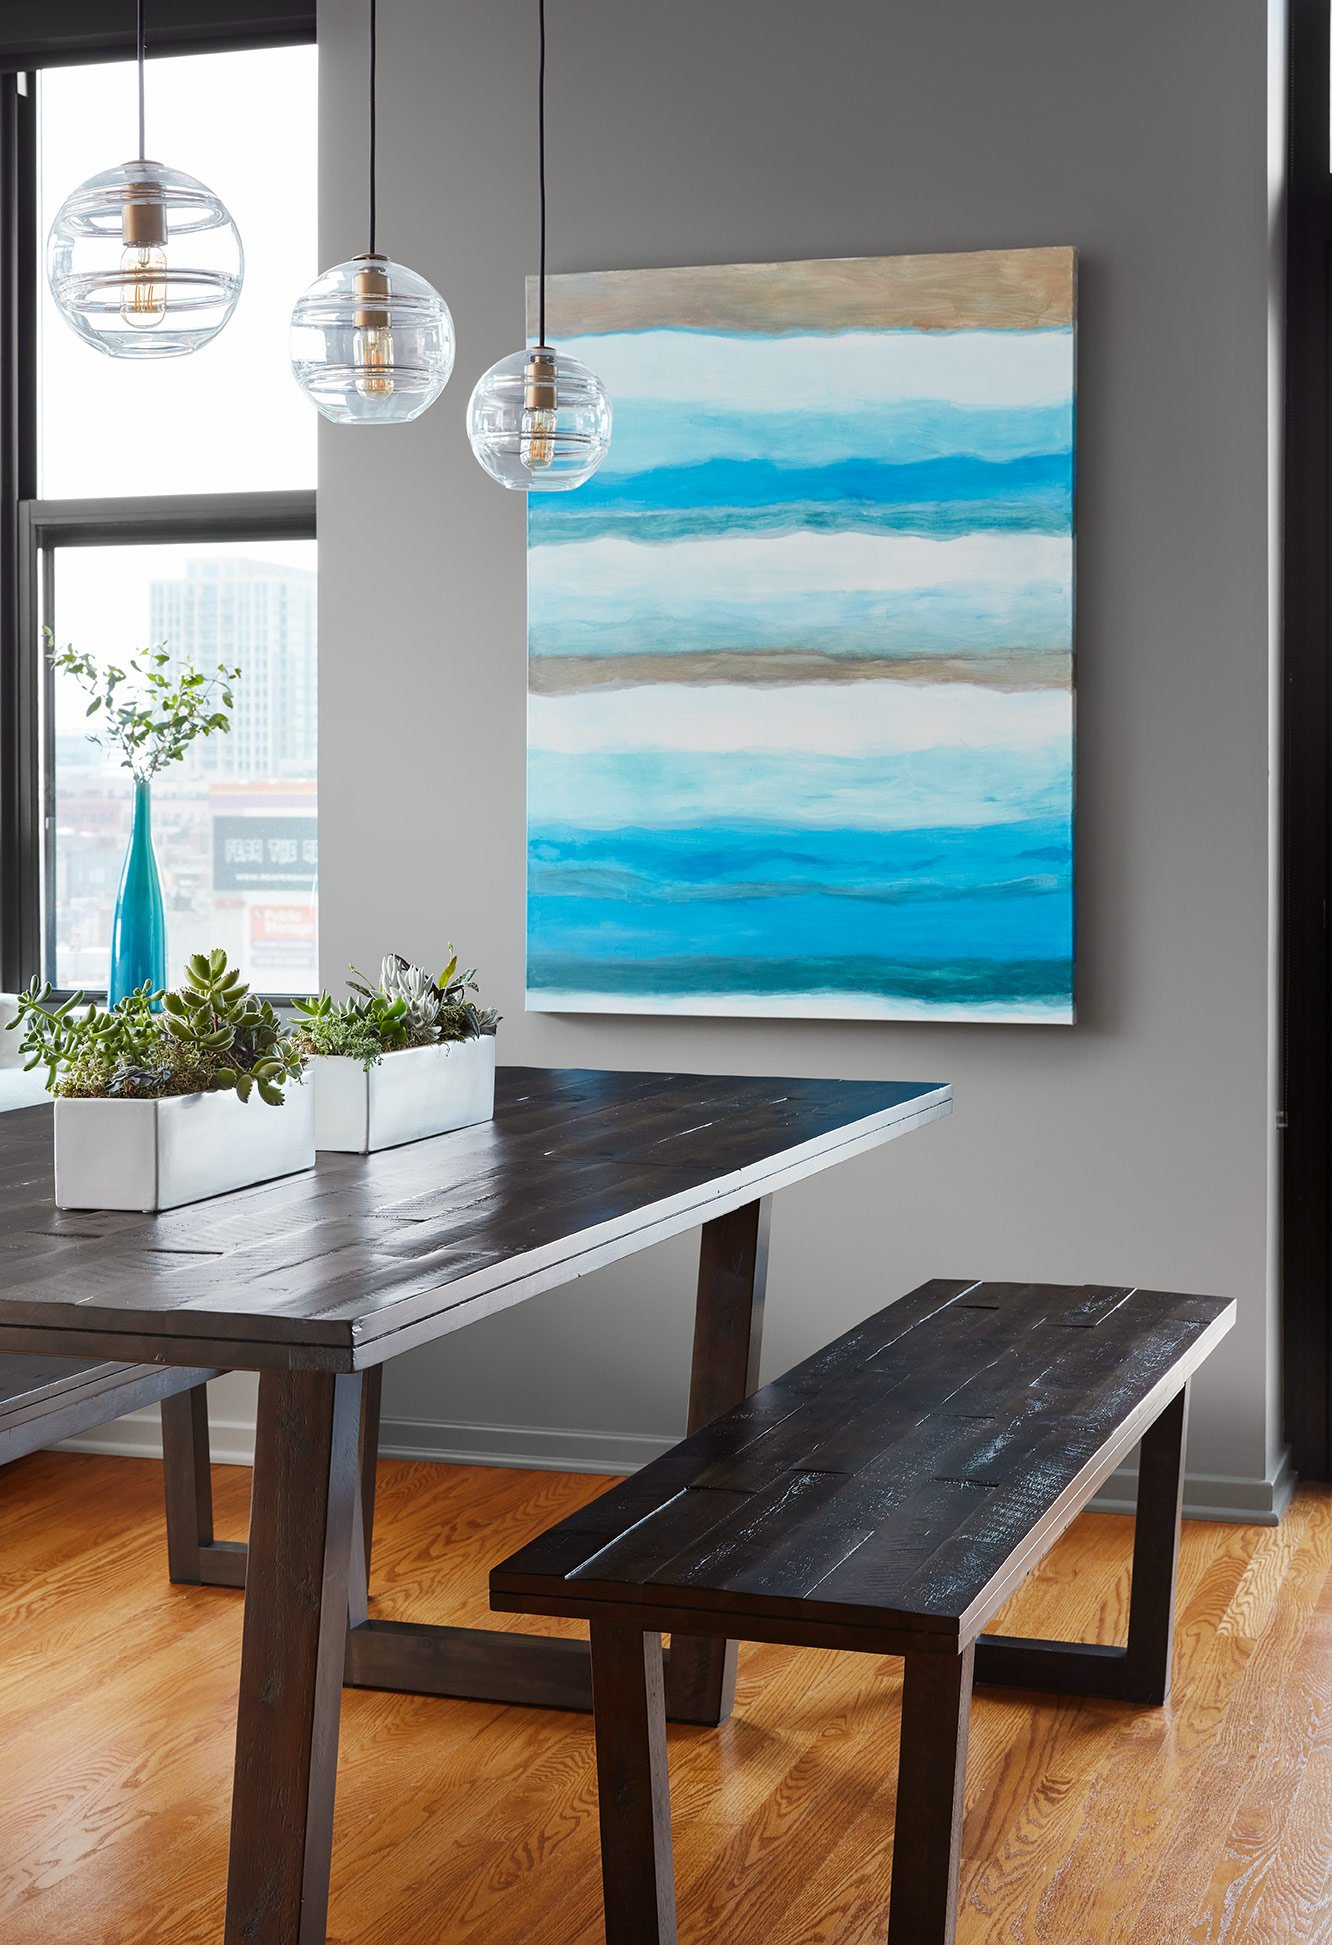
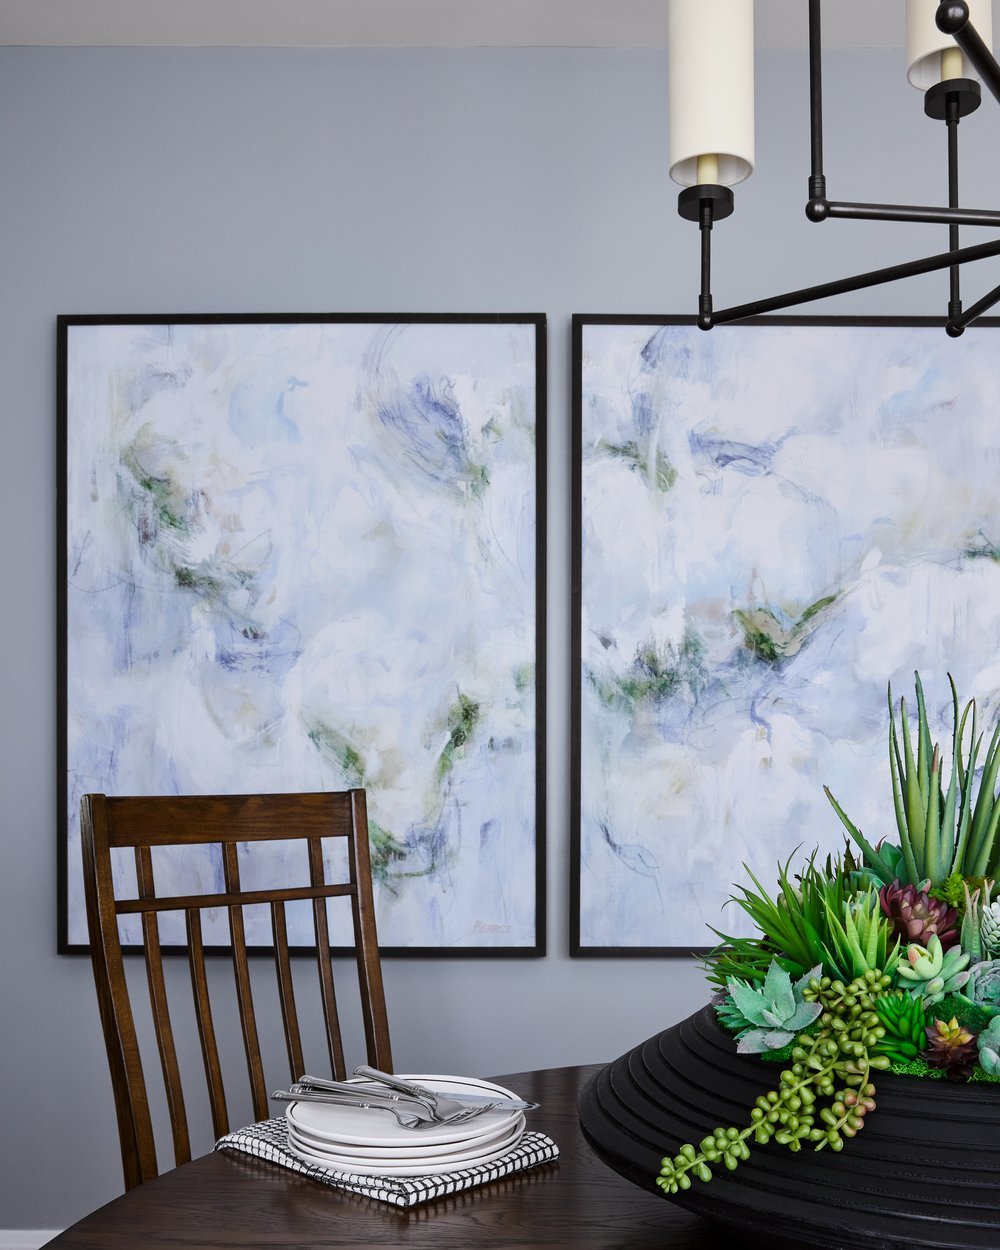
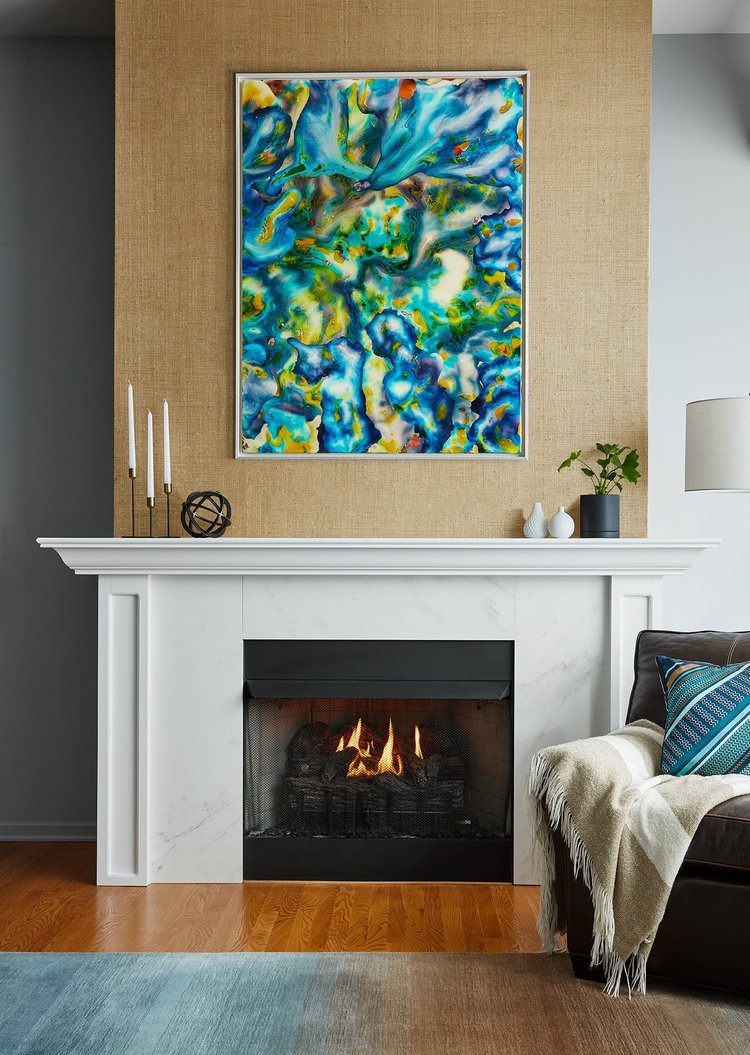
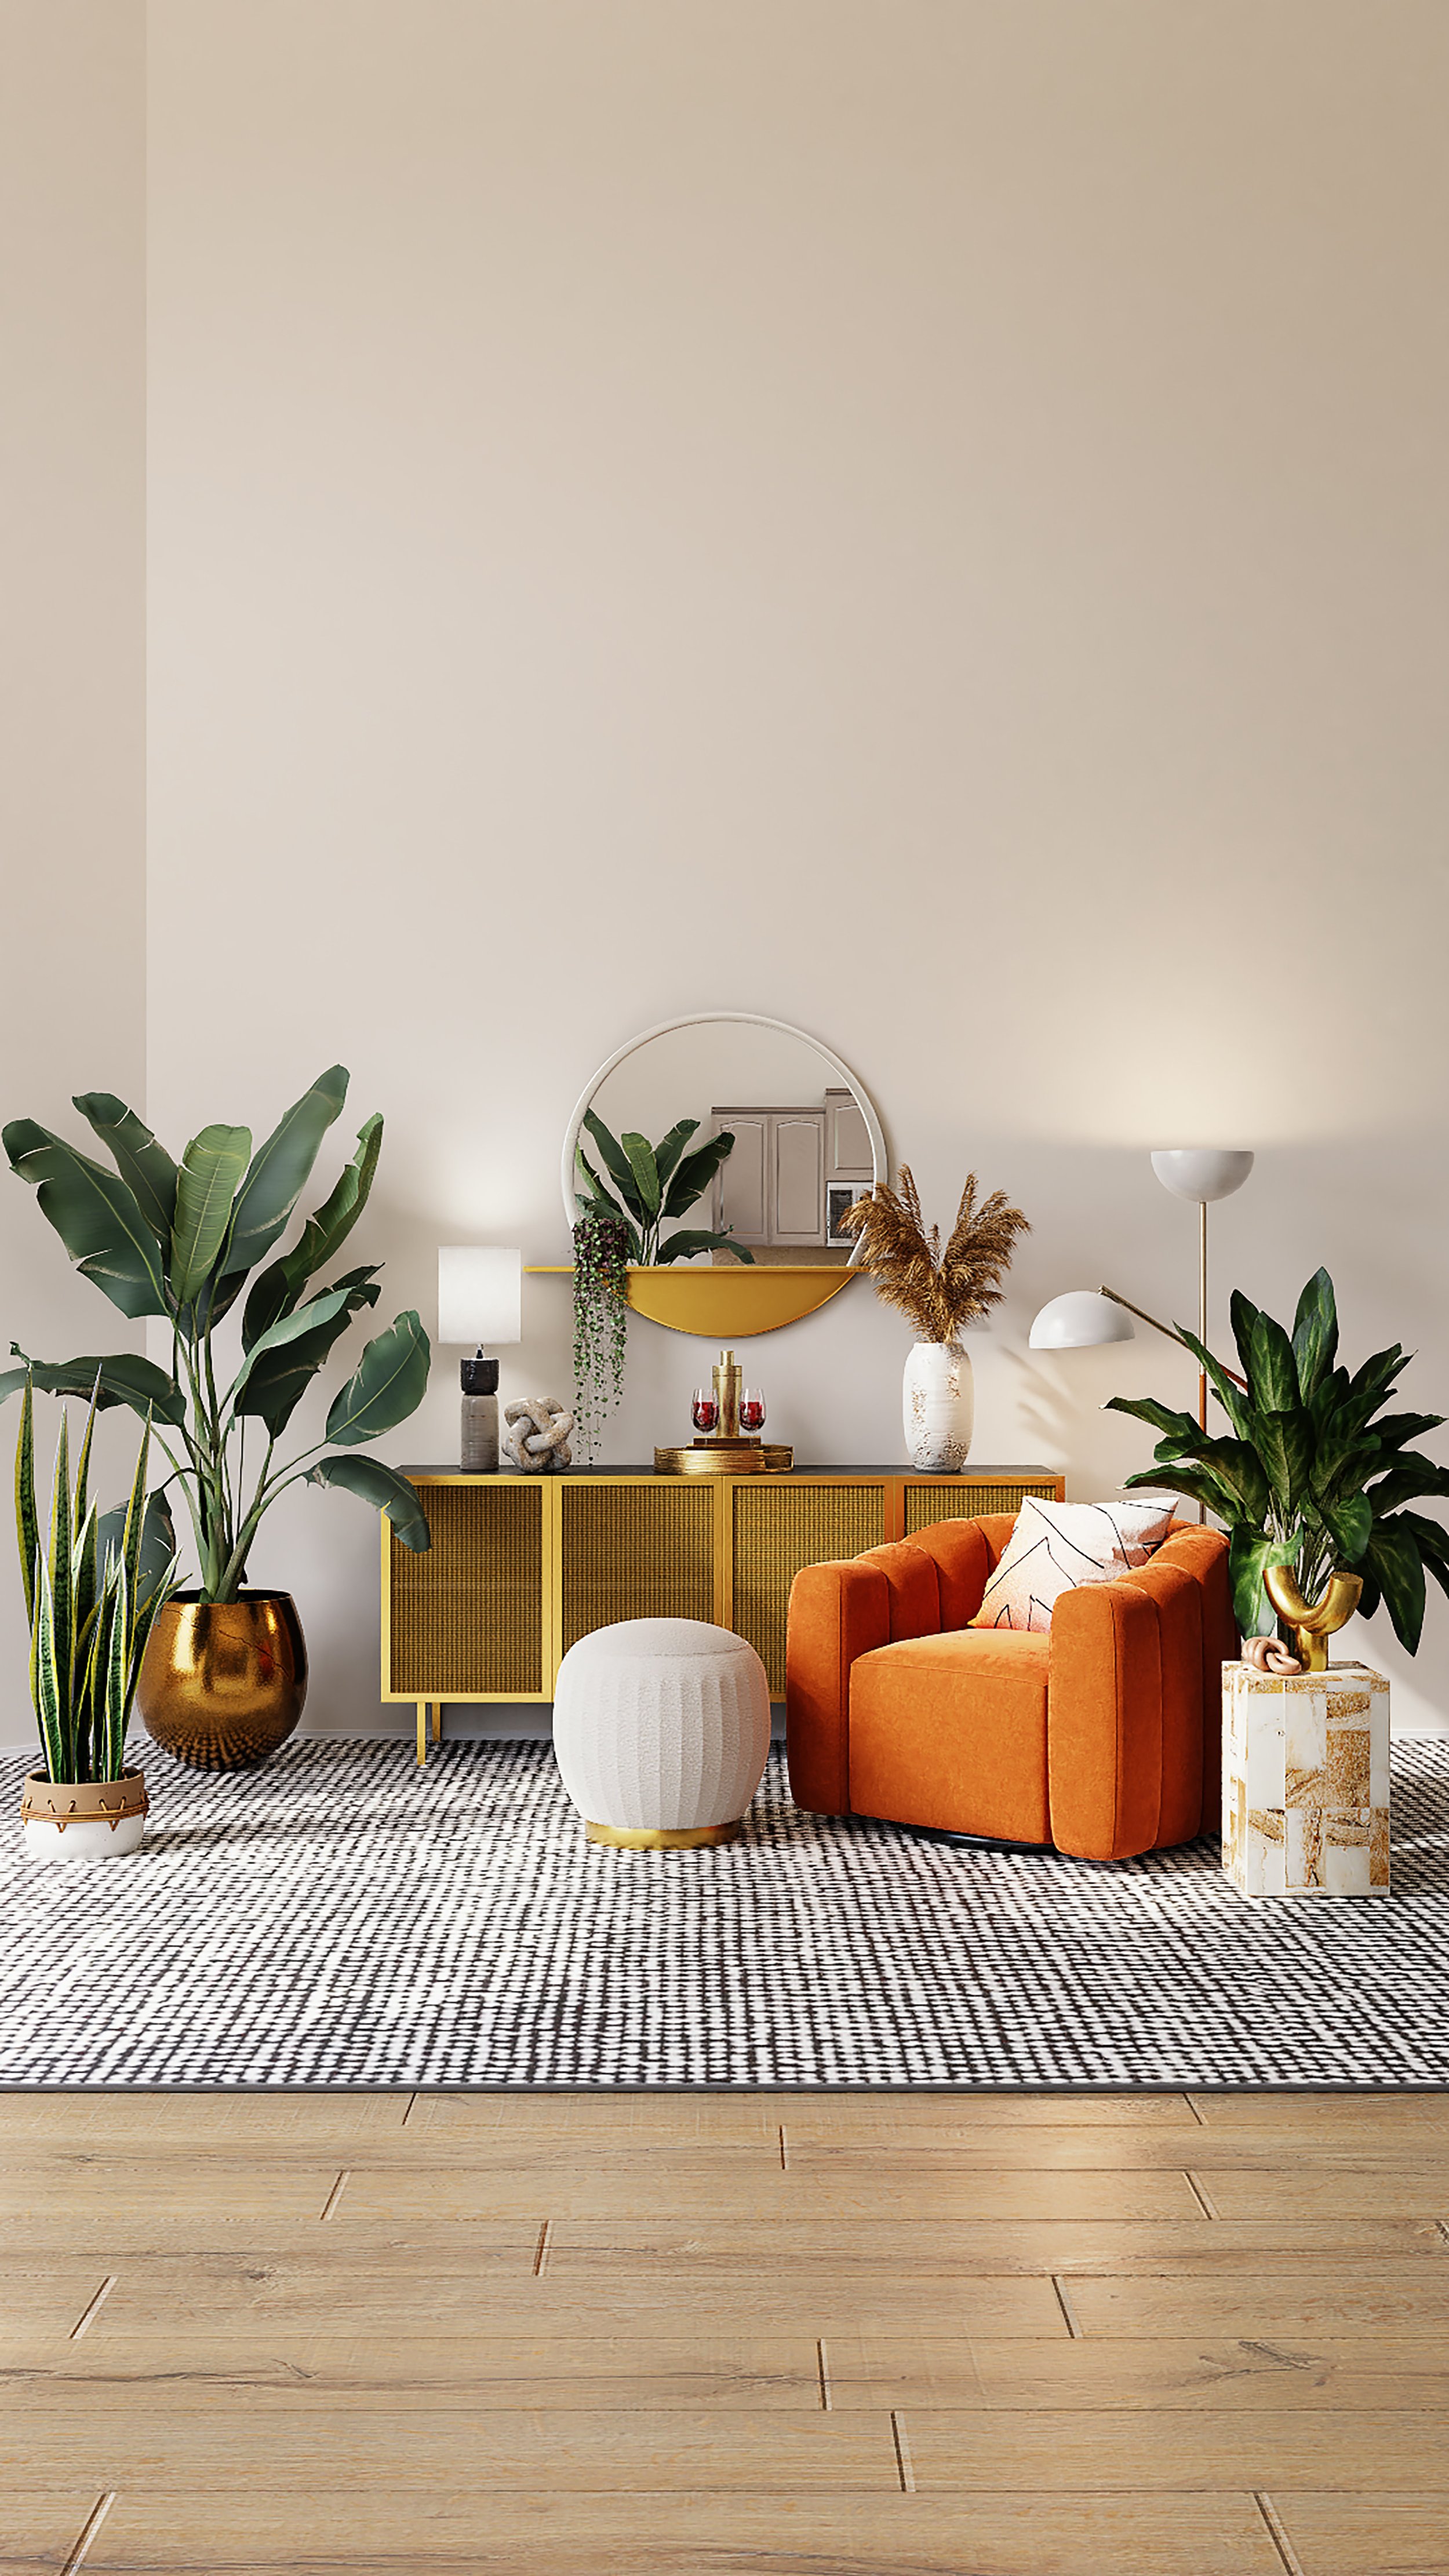
4. Add Drama and Scale
Art can make or break a room. A large diptych can fill an empty wall beautifully, adding color and texture to an otherwise blank wall. Think about the scale of all the elements in the room. When there are lots of small details in the chairs and rug, large scale art can be the perfect balance to create unity in space.

5. The Gallery Wall
Gallery walls can be put together a few different ways. If you want to go for an eclectic look, you can be more creative with your frame styles, shapes, sizes, and finishes. With this look, you can also bring in many different mediums: photos, paintings, textures, sketches, and more. If you want a more streamlined look, group pieces with similar frames, mediums, and/or a uniformed element; for example, use only black finish wooden frames or style black and white photos together. For spacing, we recommend two inches between each piece and you want to keep in mind the eyeline rule: placing the middle point of the gallery wall about 60 inches from the ground.

Ready to refresh your home for summer?
Schedule a Design Discovery Call Today!

Before and After: Behind The Scenes Of Our Award Winning Millwork Bar Design
Get a behind-the-scenes look at our award-winning Chicago new construction millwork bar design. See the interior design process from start to finish — and what we did to incorporate our client’s needs into a beautifully designed and functional space!
1st Place Winner: 2022 Celebration of Design - American Society of Interior Designers (ASID) Illinois


the challenge
Location: Chicago, IL - New Construction - Basement
Client: Young family who loves to entertain.
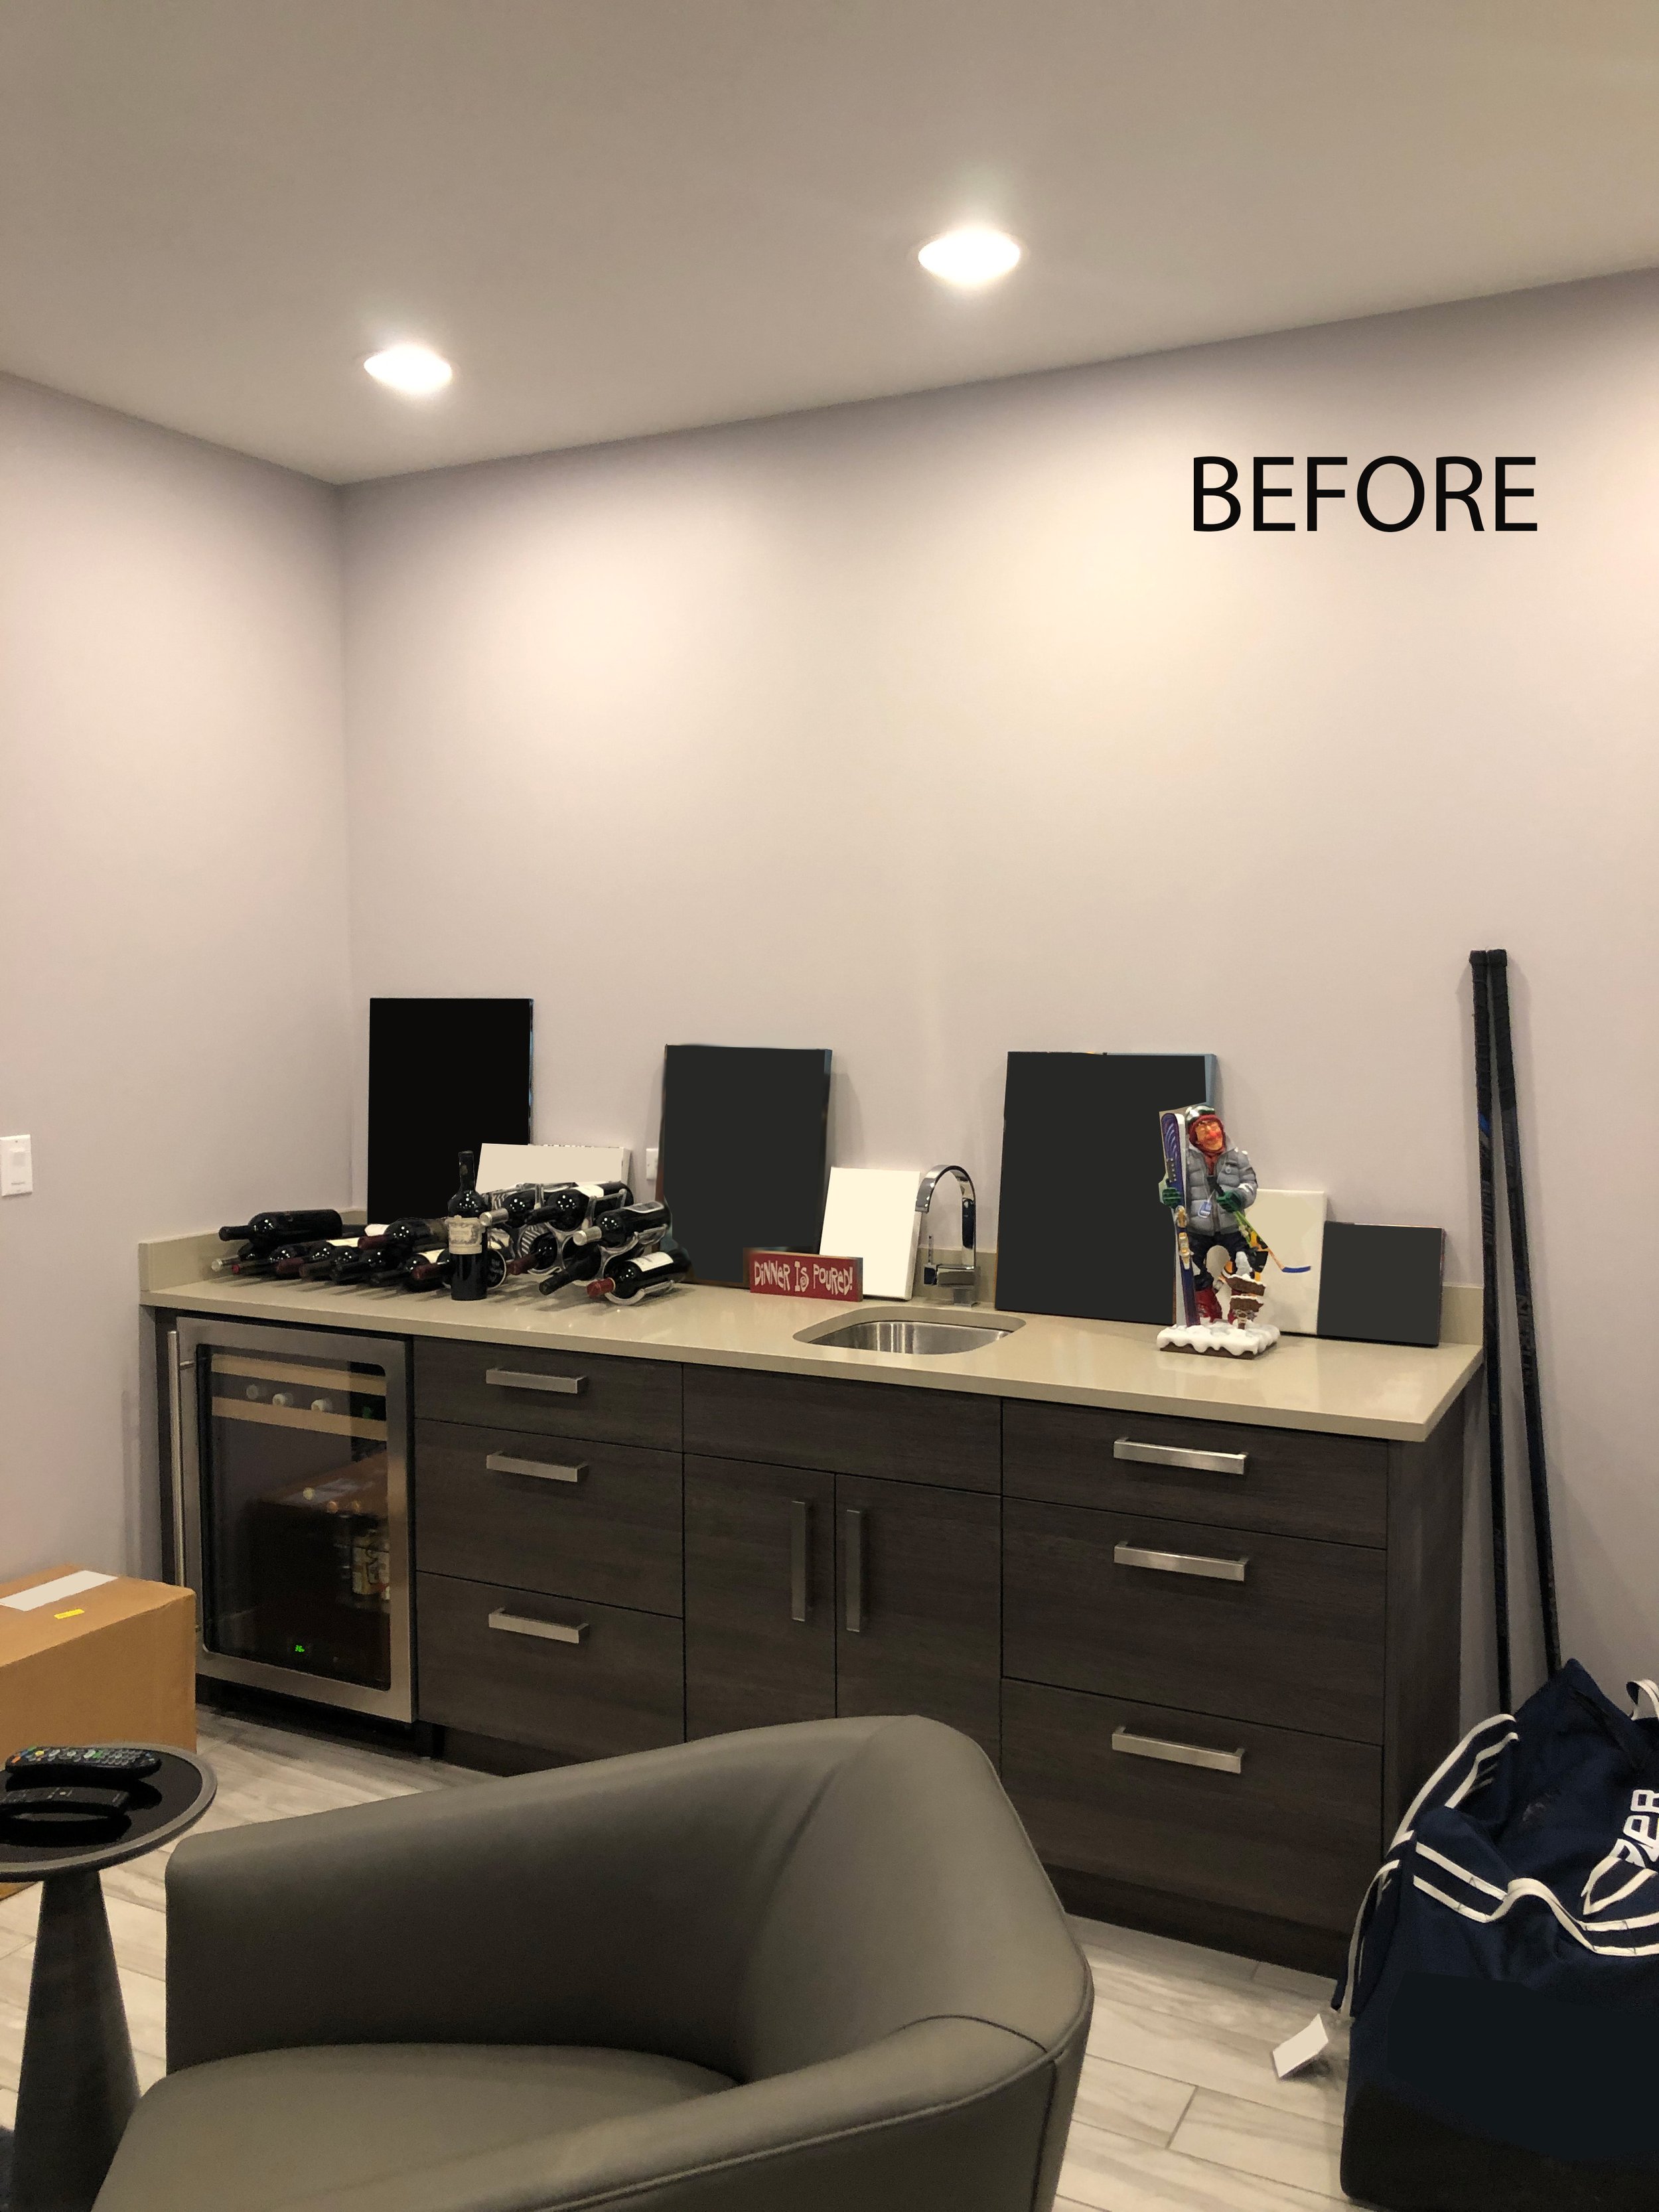
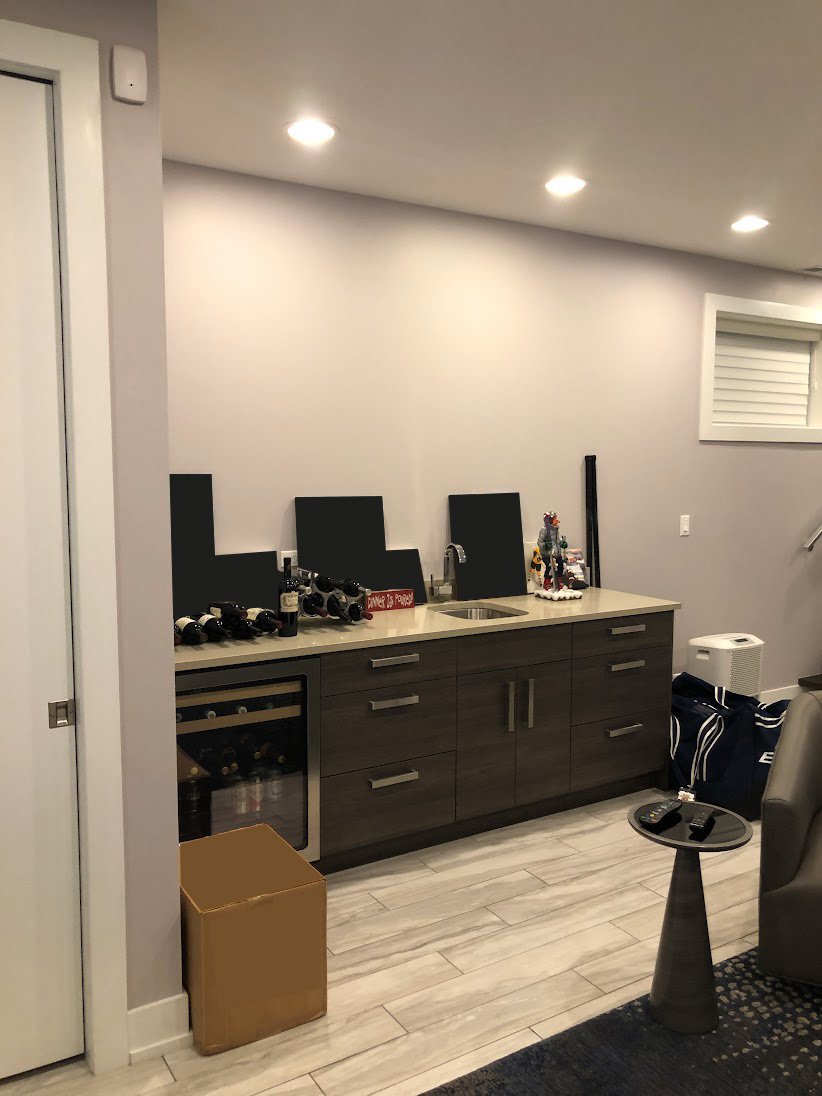
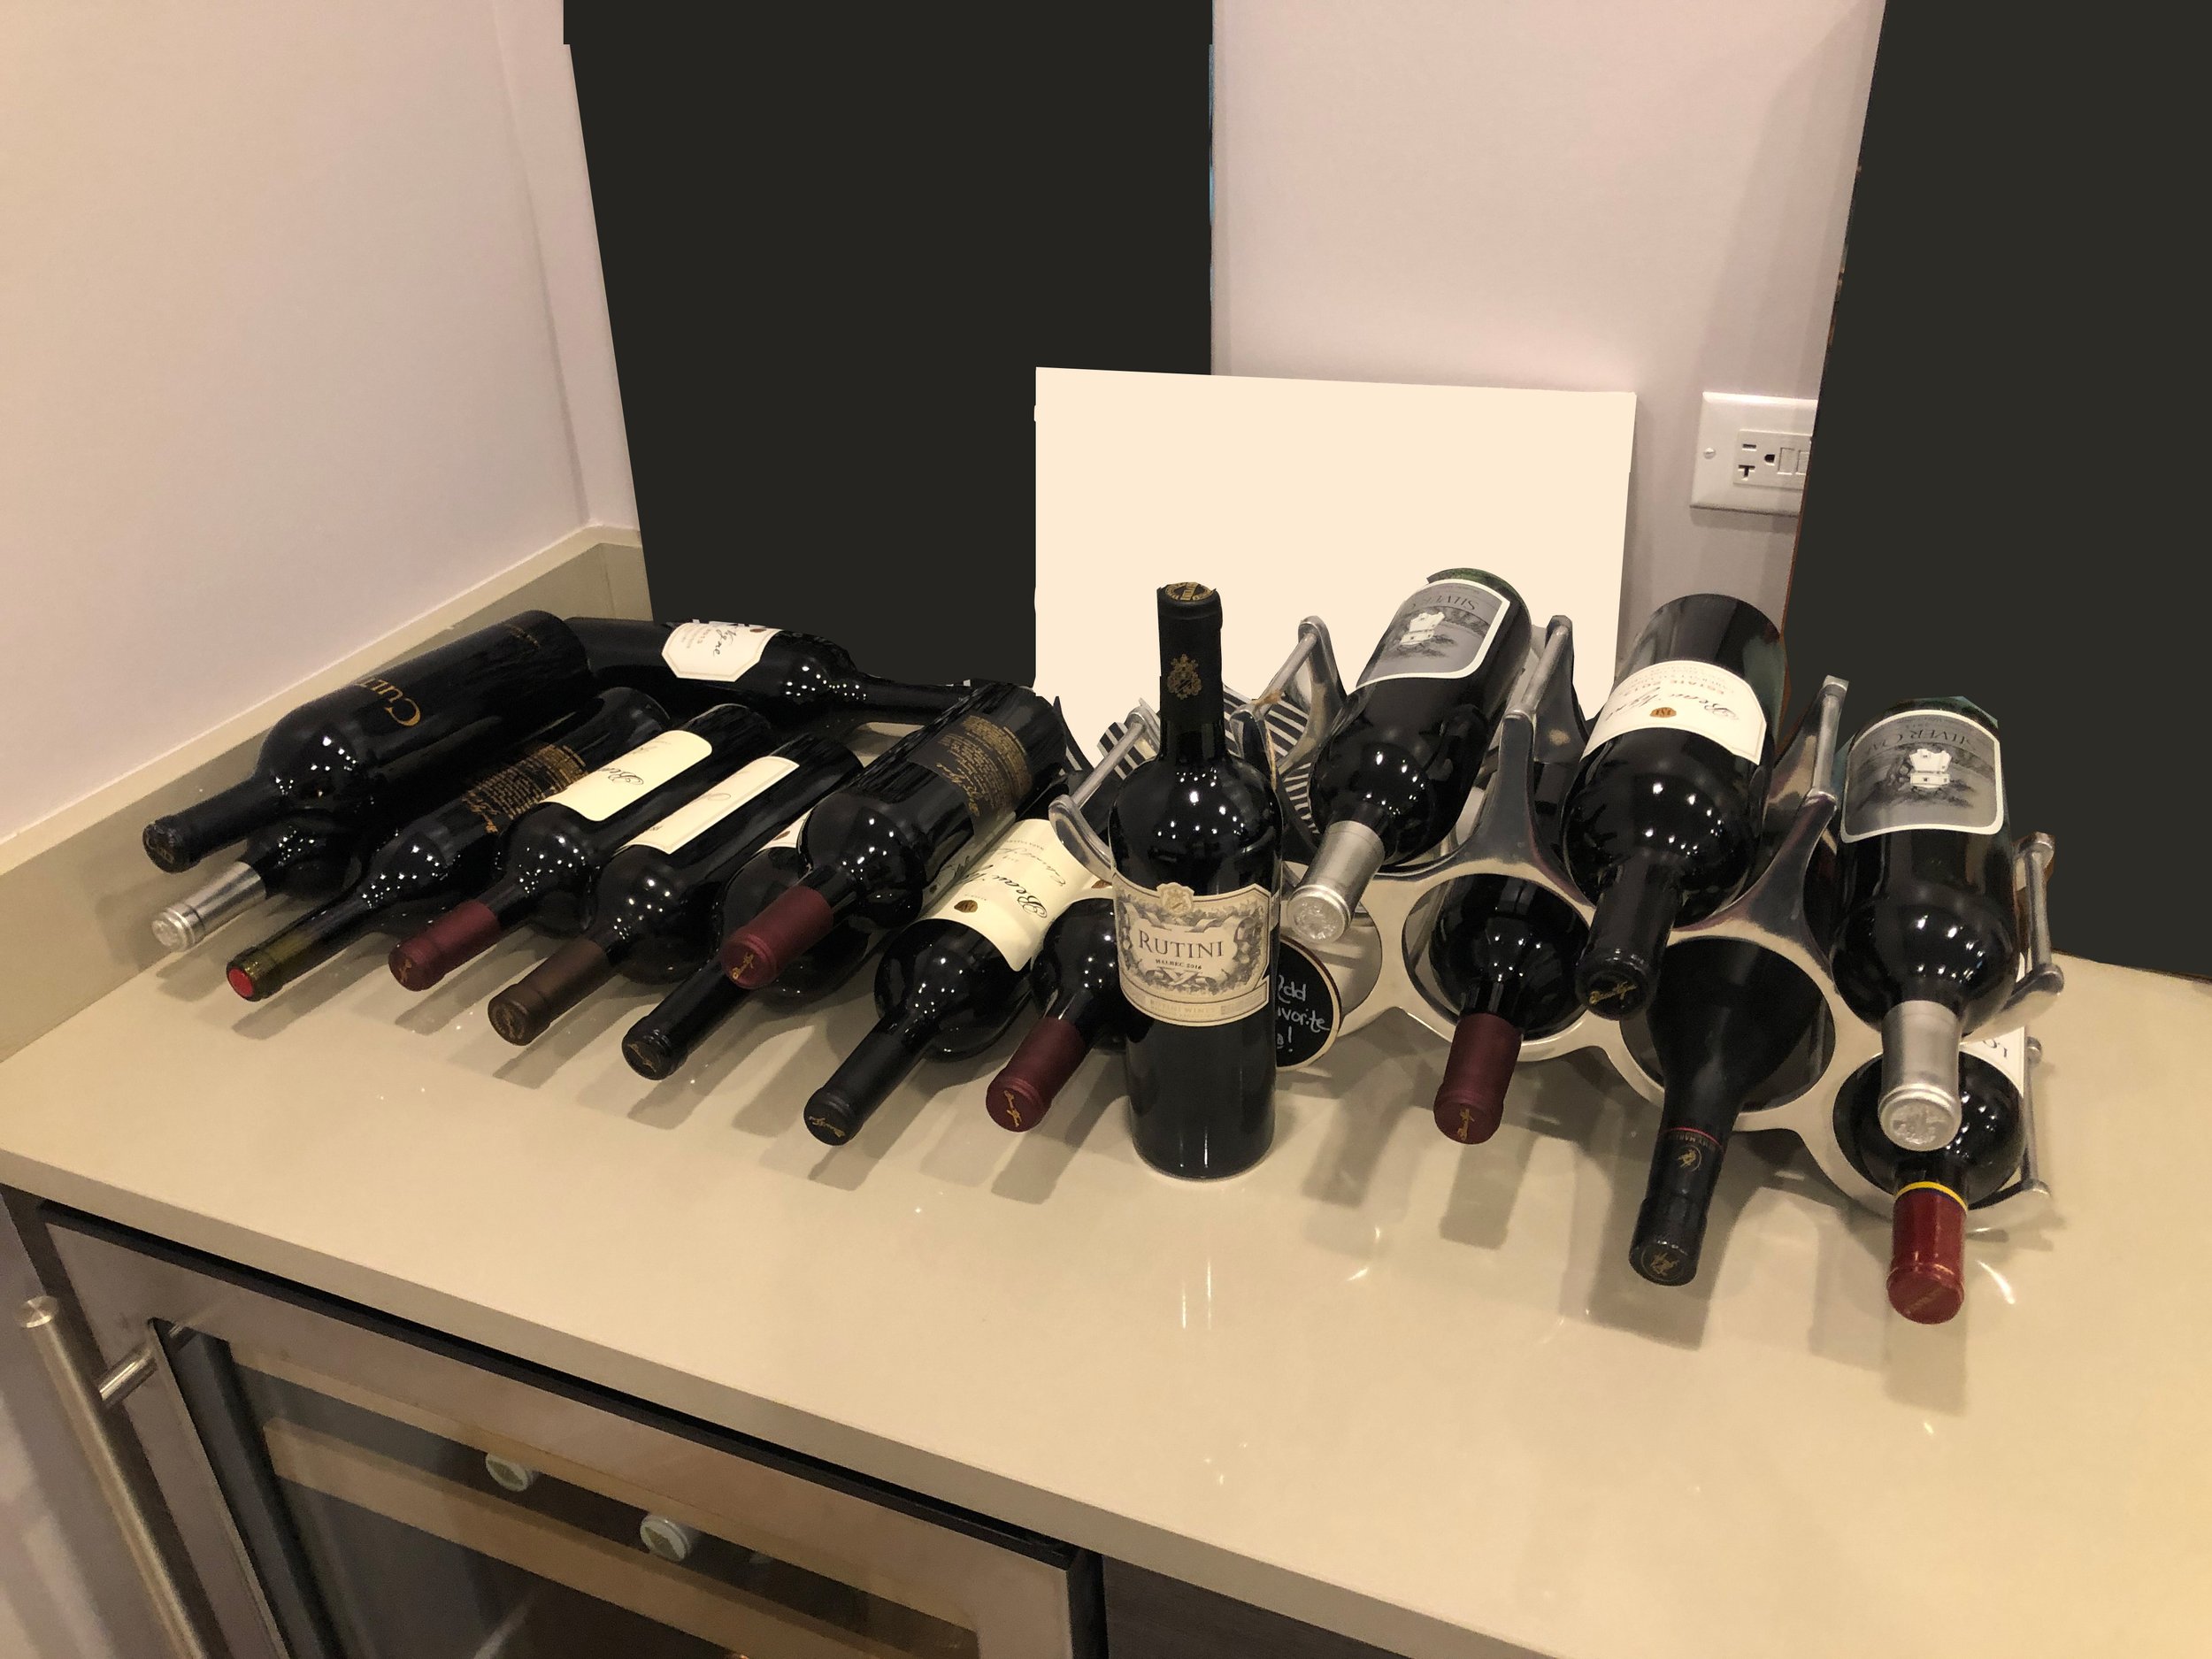
What doesn’t work now: The space lacked functionality and storage for their glassware and bottles. It was also missing a much needed wow factor and emphasis point in the room.
Style: Blend with the existing millwork, but add some flair.
Color Palette: Blue, gray, white, with pops of pink
How do you want it to feel: Inviting + One of a Kind
Functional Request: Storage for bottles
the design process
Schematic Design
This young family built a new construction home and was slowly adding personality to the space. Our client desired a better basement bar set up to entertain their guests. The challenge was to work with the existing base cabinets which were new, and our client wanted to keep them. We needed to create a design that would become a focal point in the room and blend seamlessly with what currently existed.
We needed to ensure we were designing a bar with the design elements that were important for our clients: uniqueness, storage, cleanliness, and functionality. Some of these elements we incorporated:
Storage: Our clients had a collection of alcohol with varying storage needs. We needed to ensure there were storage options incorporated for their beverage collection and glassware.
Cleanliness: It’s important to consider cleanliness when working on a food and drink preparation area. We needed to ensure that we designed a space that can be cleaned thoroughly and select materials with anti-bacterial properties.
Unique: Our clients wanted this area to be a show stopper; a spot where guests can relax, hang out, and grab a drink. We needed to design a bar that was eye-catching, functional, and made this smaller space have a big impact.
Shelving: Upper shelving shelves created much more functional and accessible storage for our client.
Task and Mood Lighting: LED Light strips under each shelf, wall wash lighting, and cabinet lighting.

2. Design Development
In the design concept for this new space, we took all of our client’s aforementioned needs and got to work. Here are some of the design elements we incorporate:
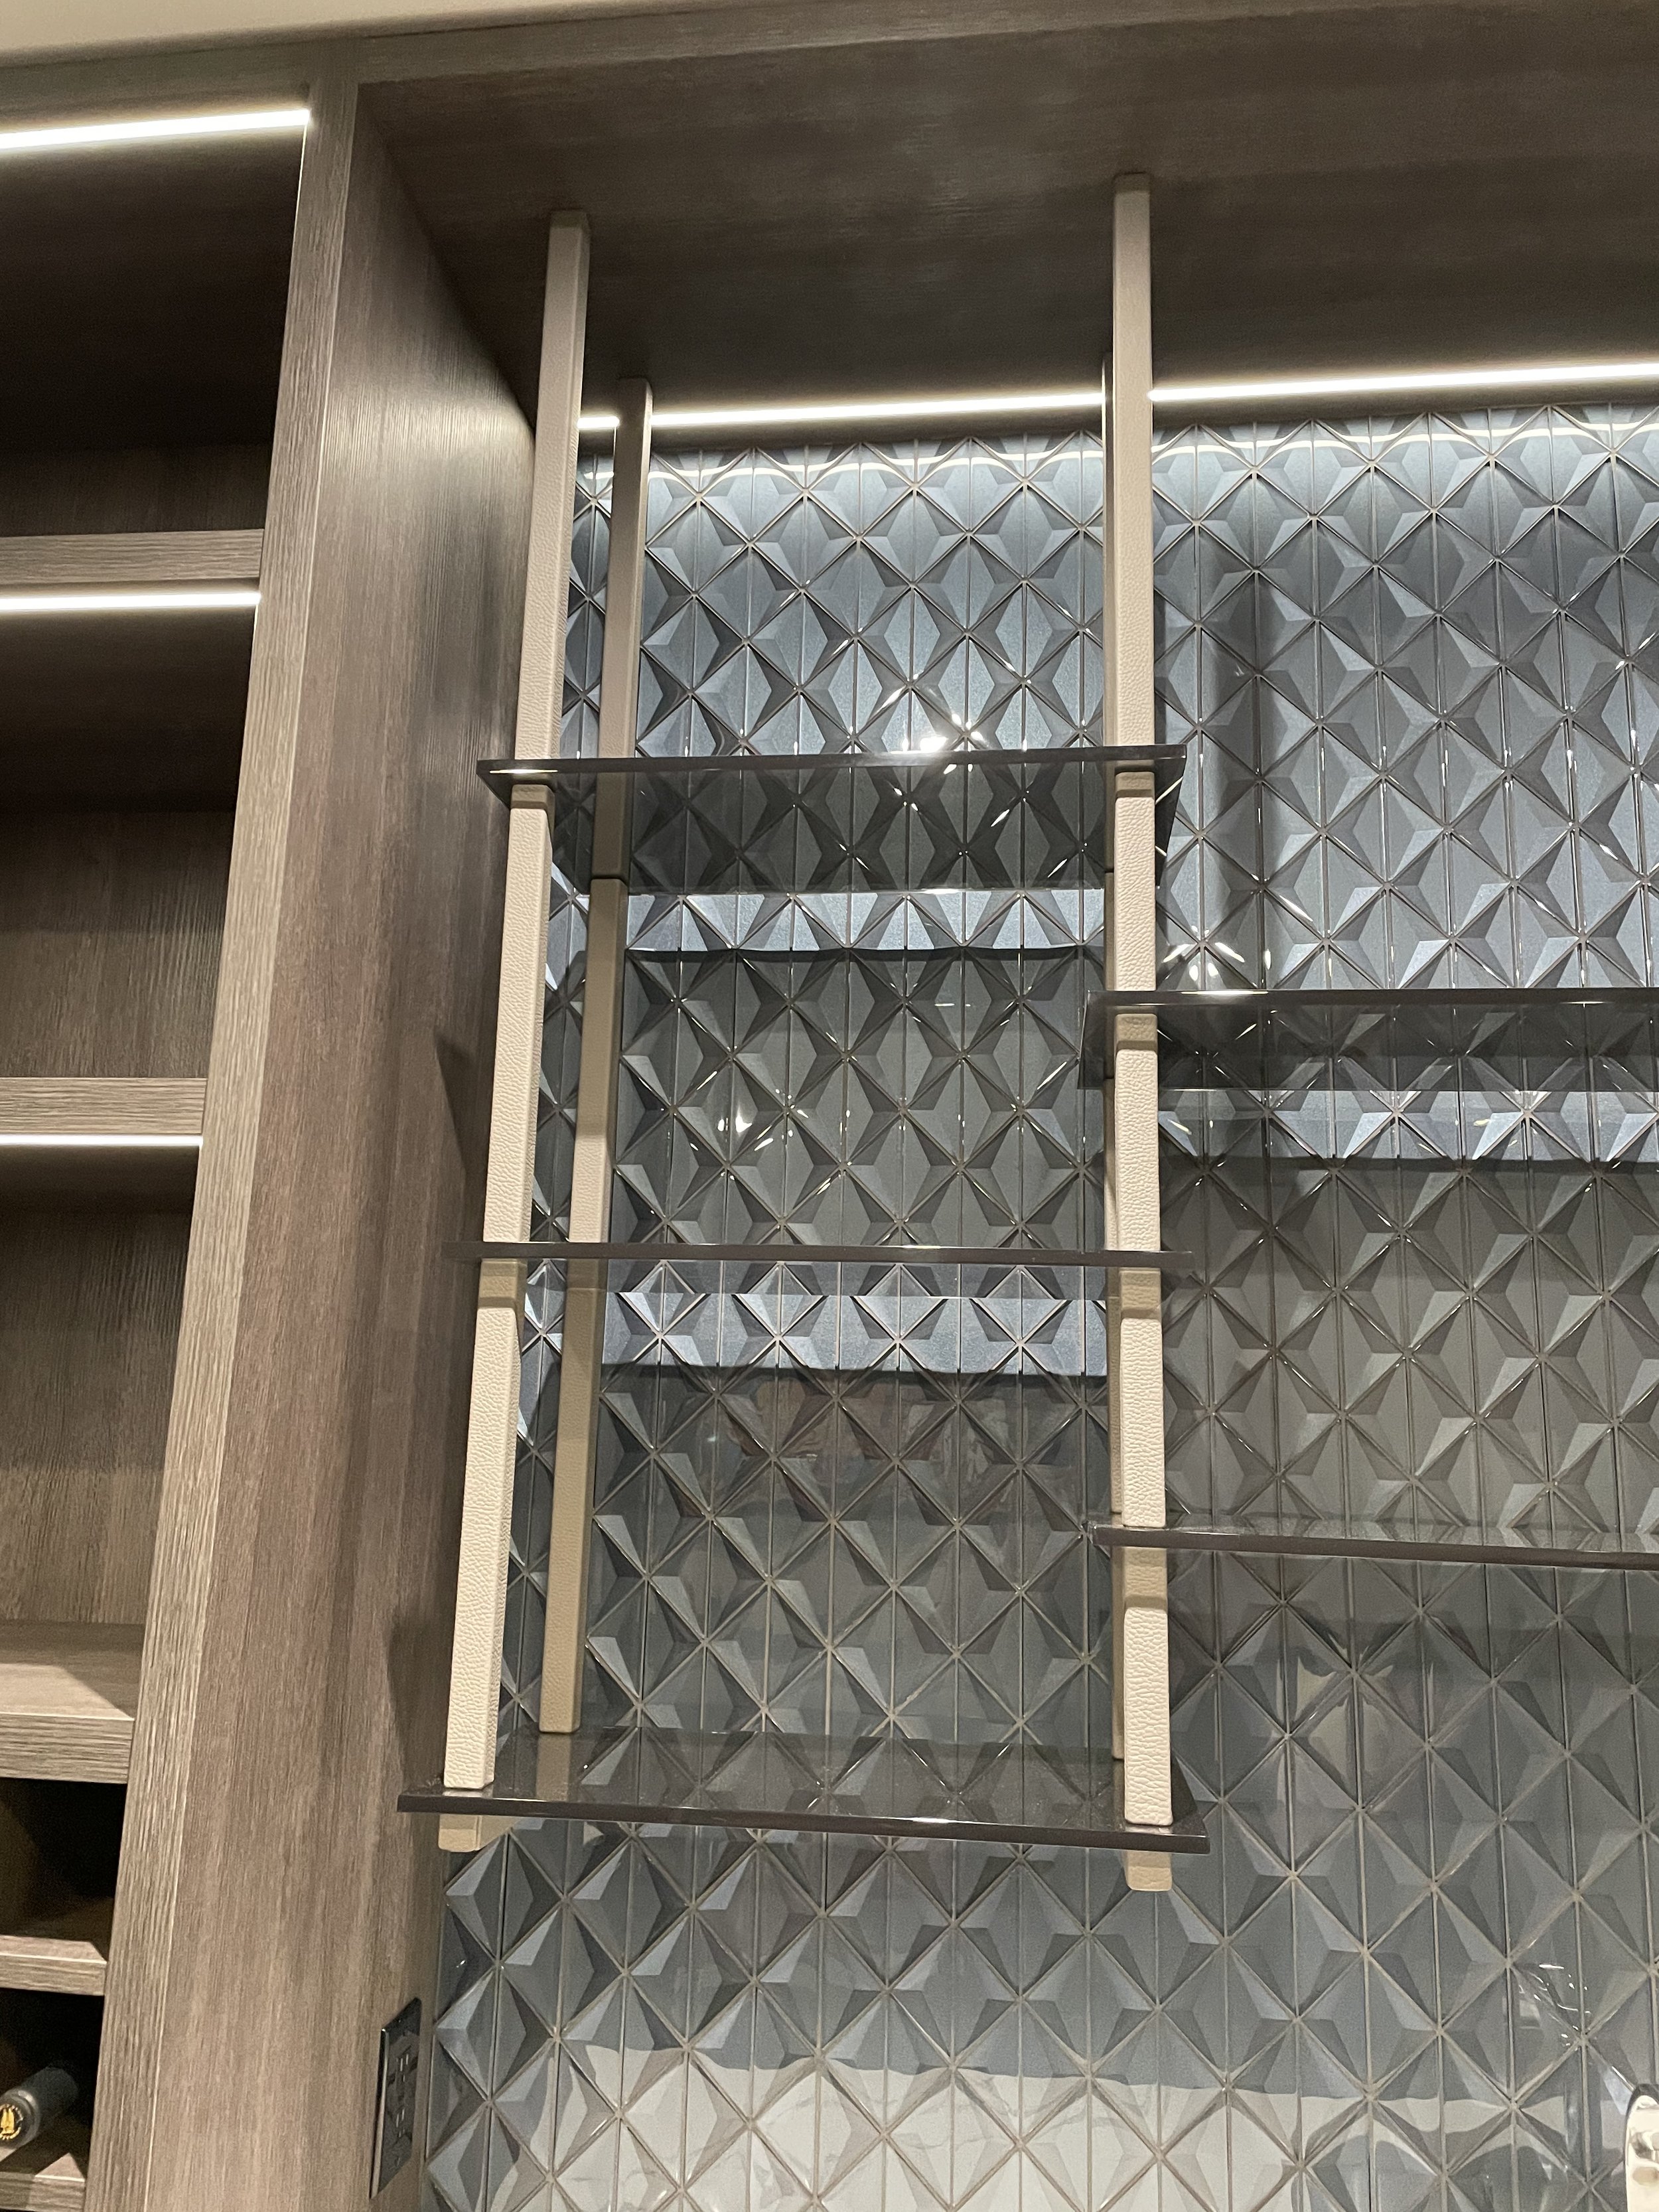
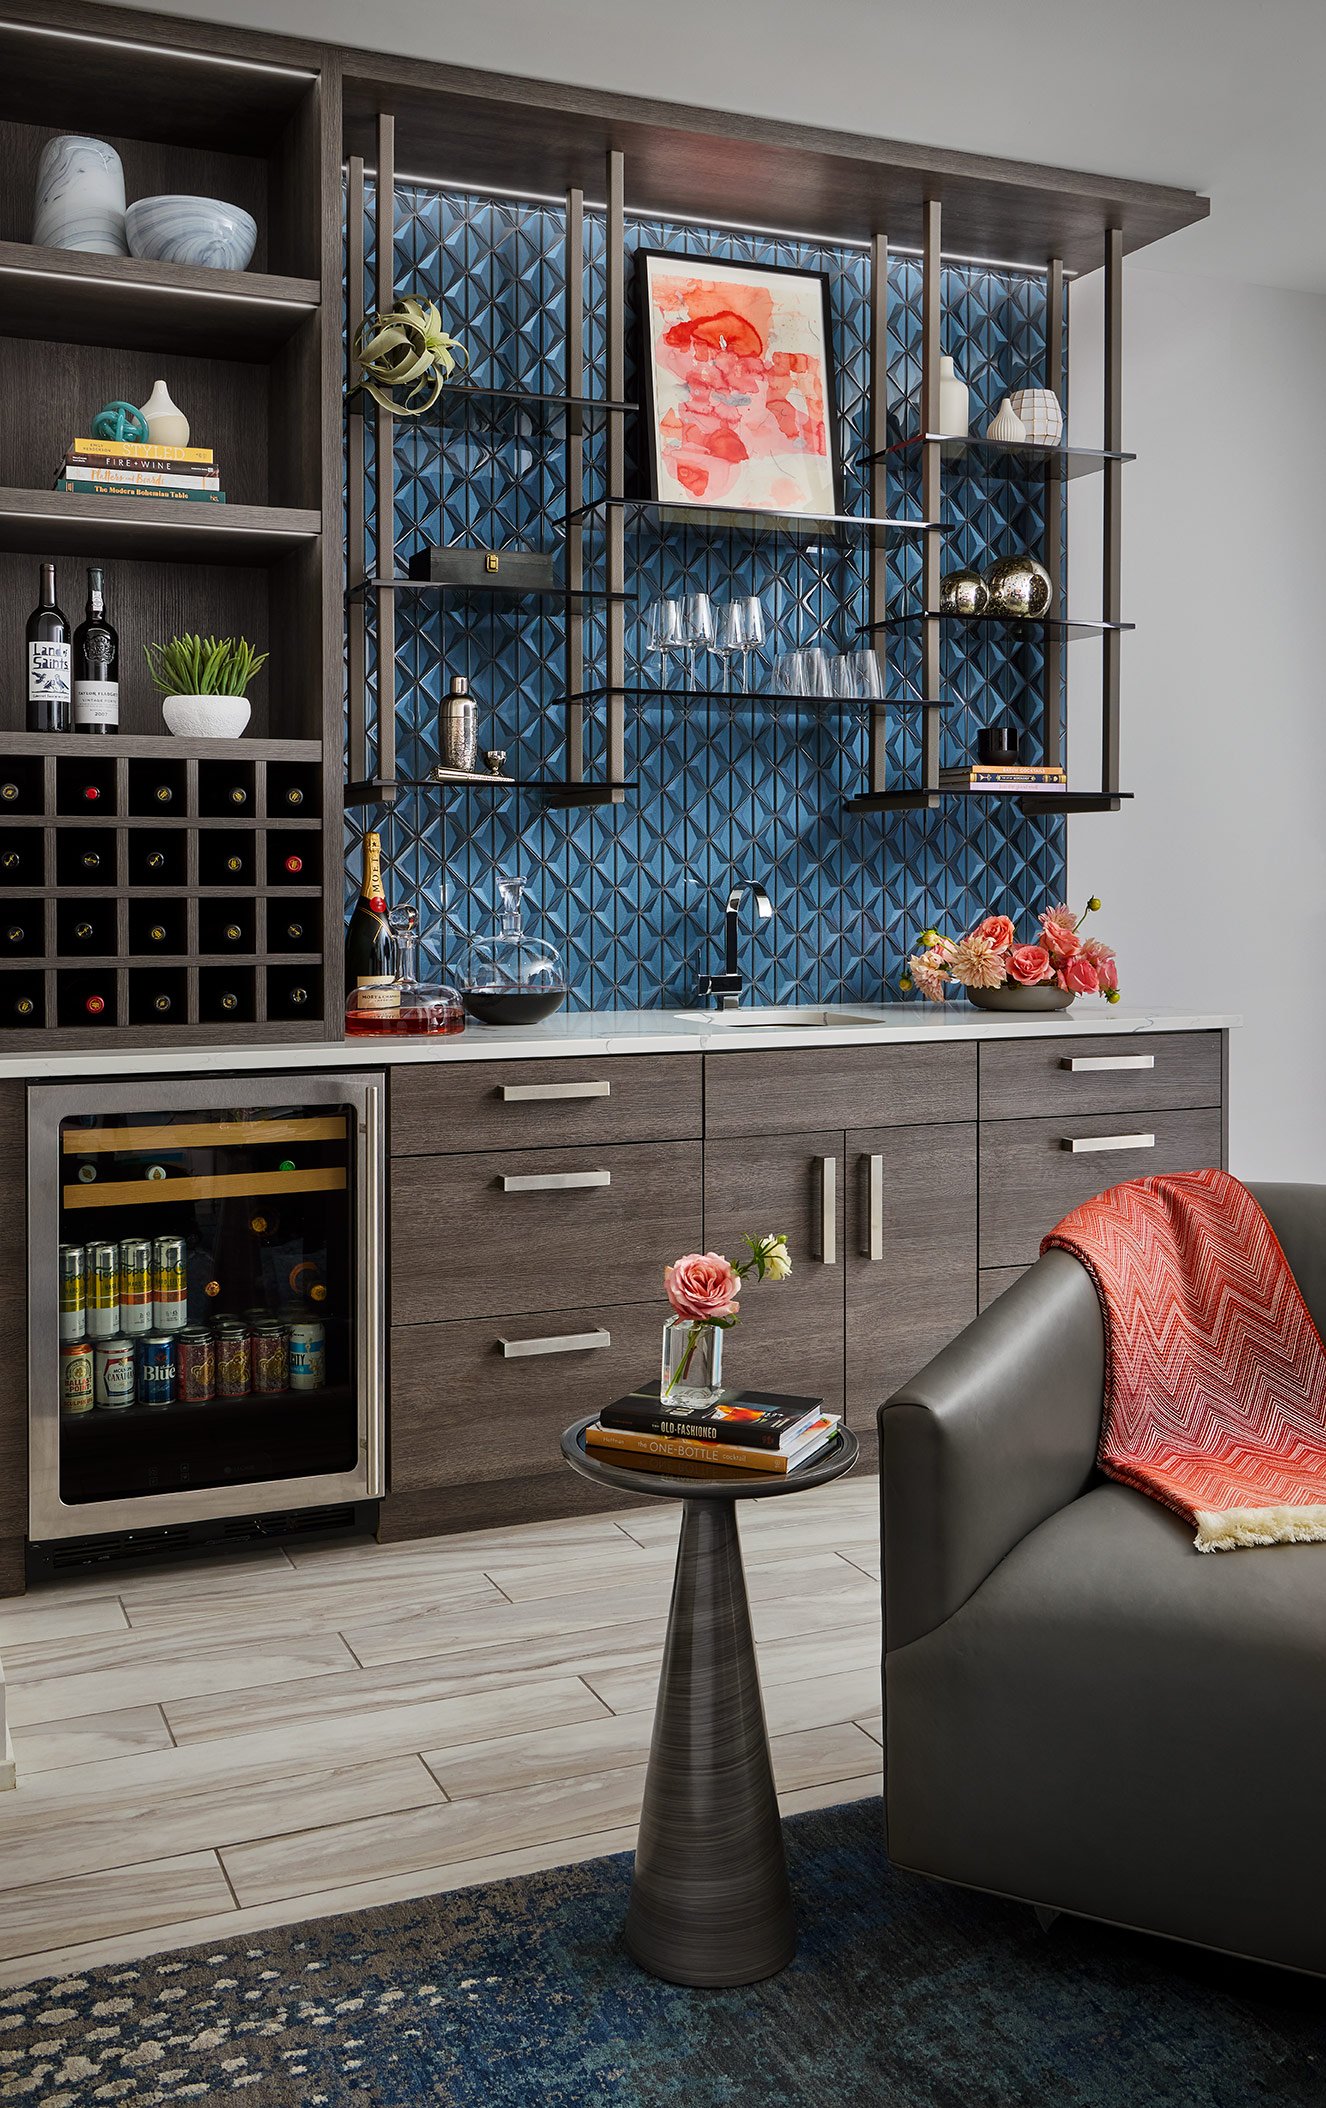
Multi-temperature storage: We designed storage solutions for cold, room temperature, and long-term alcohol storage. In addition, to add storage for our client’s glassware and beverage collection, we custom-designed a suspended shelf system.
Suspended Shelf System: On our custom shelves, we leather-wrapped the posts with a durable waterproof finish with anti-bacterial protection. Perfect for occasional spills or splatters, this leather can easily be wiped down and cleaned. This leather is also Green Guard Certified for Indoor Air Quality Certification and is Nontoxic. These were factors that were considered when selecting materials for a food and drink preparation area.
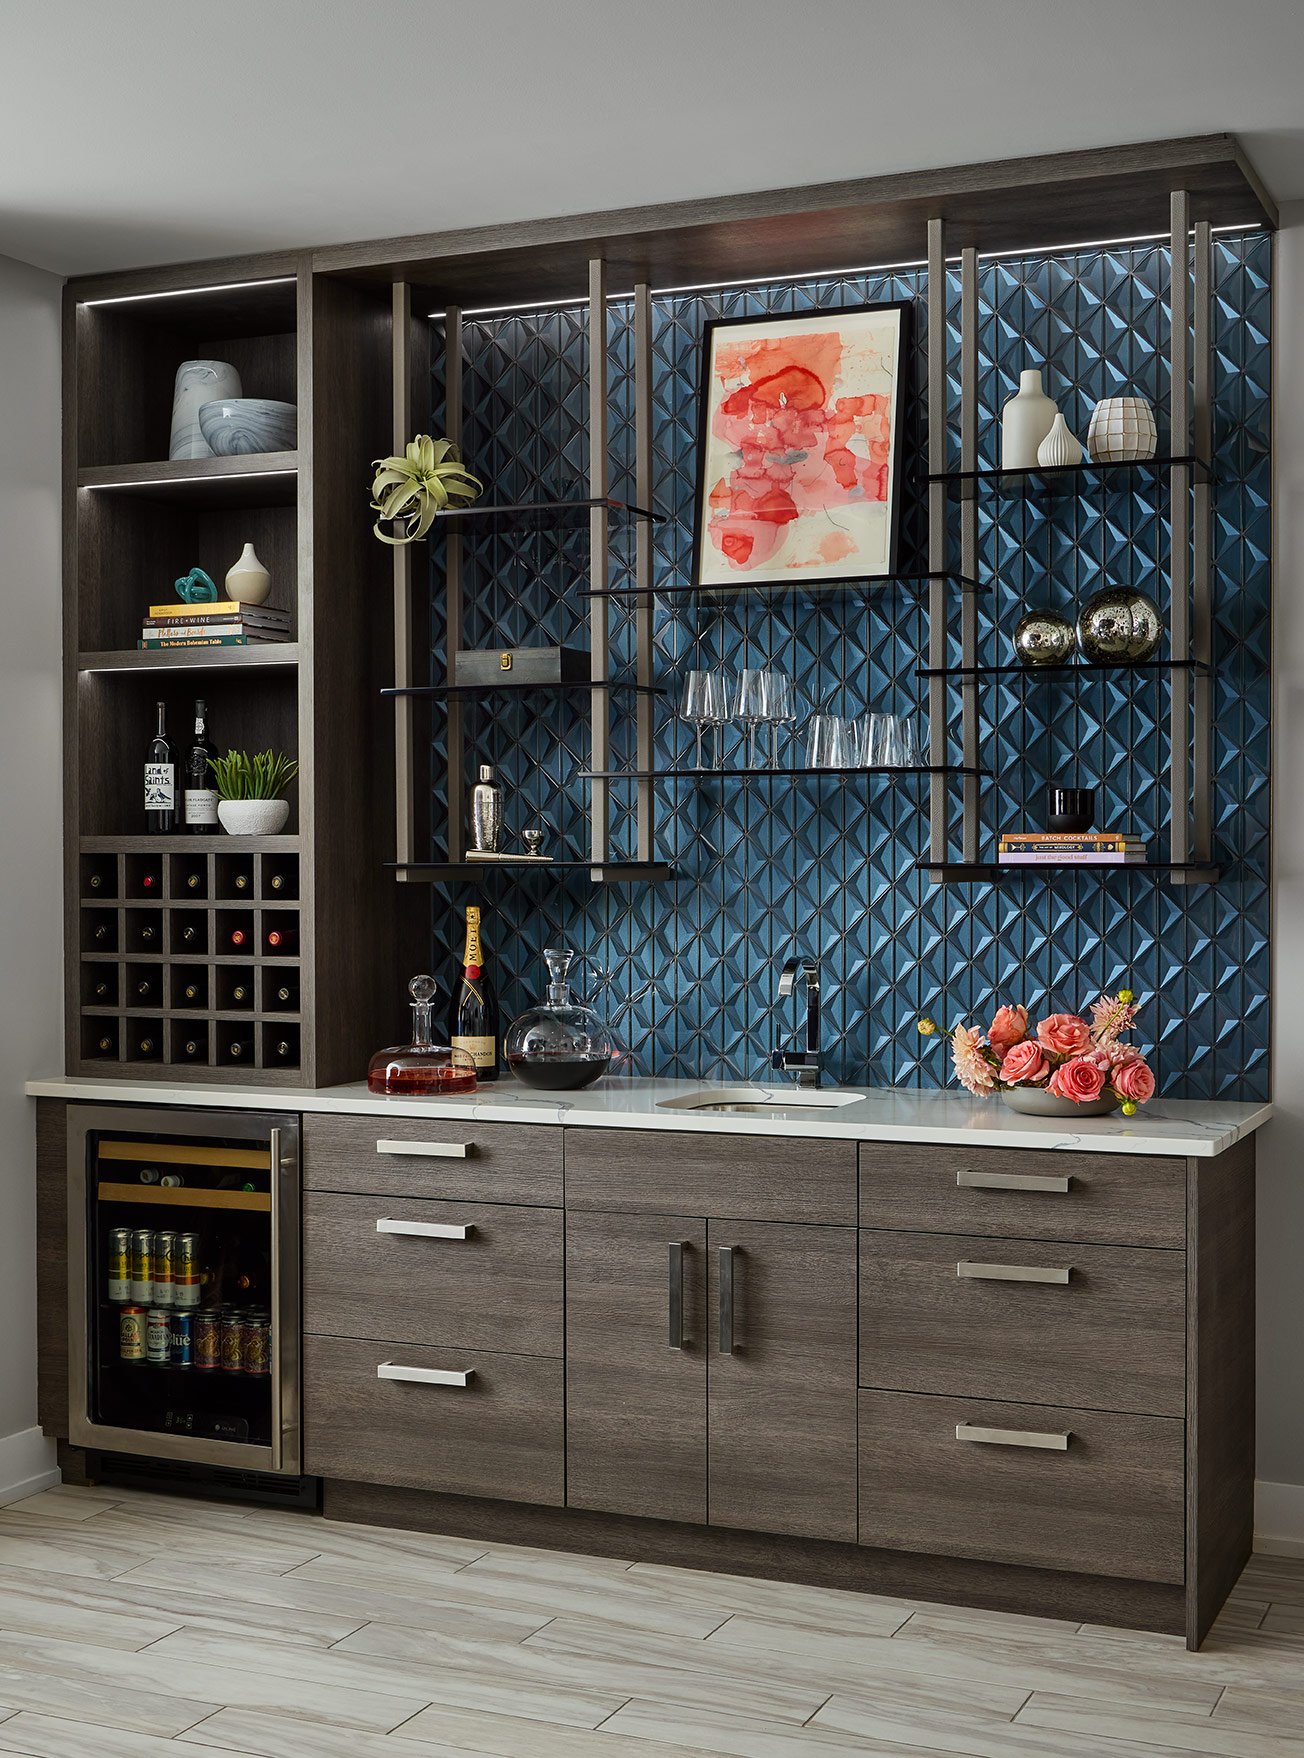
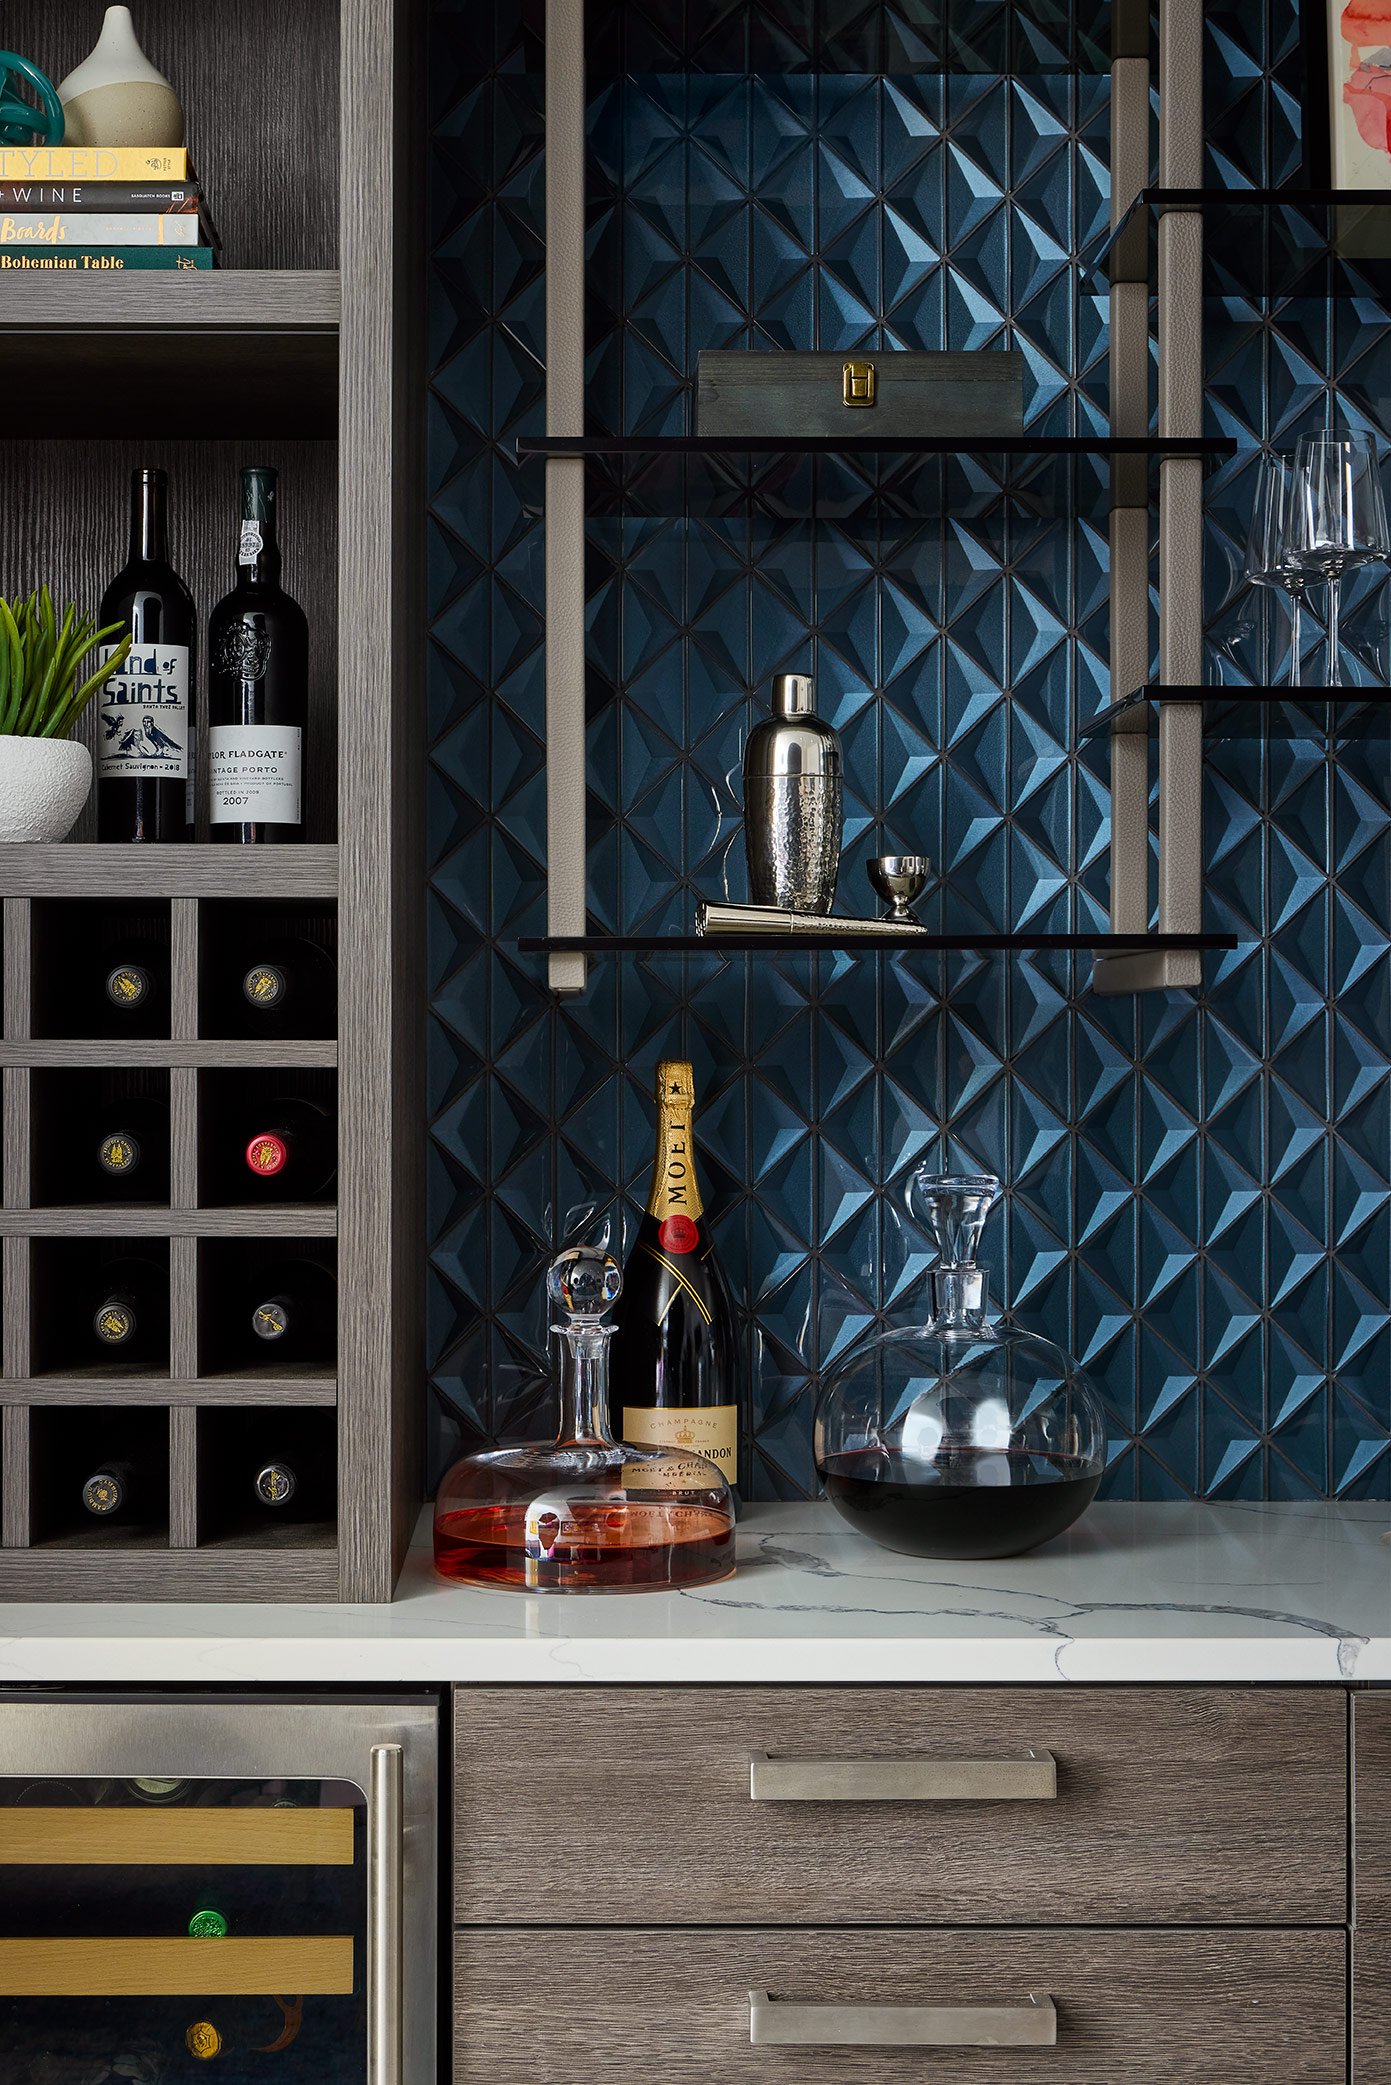
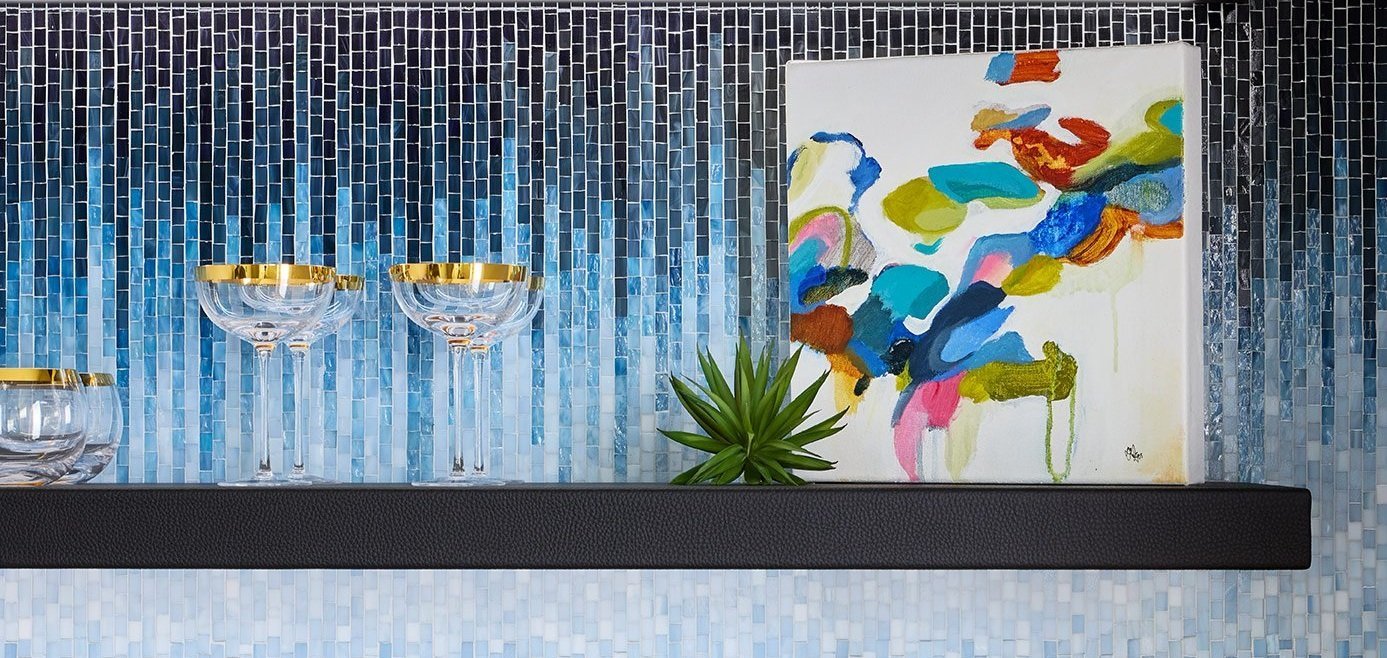
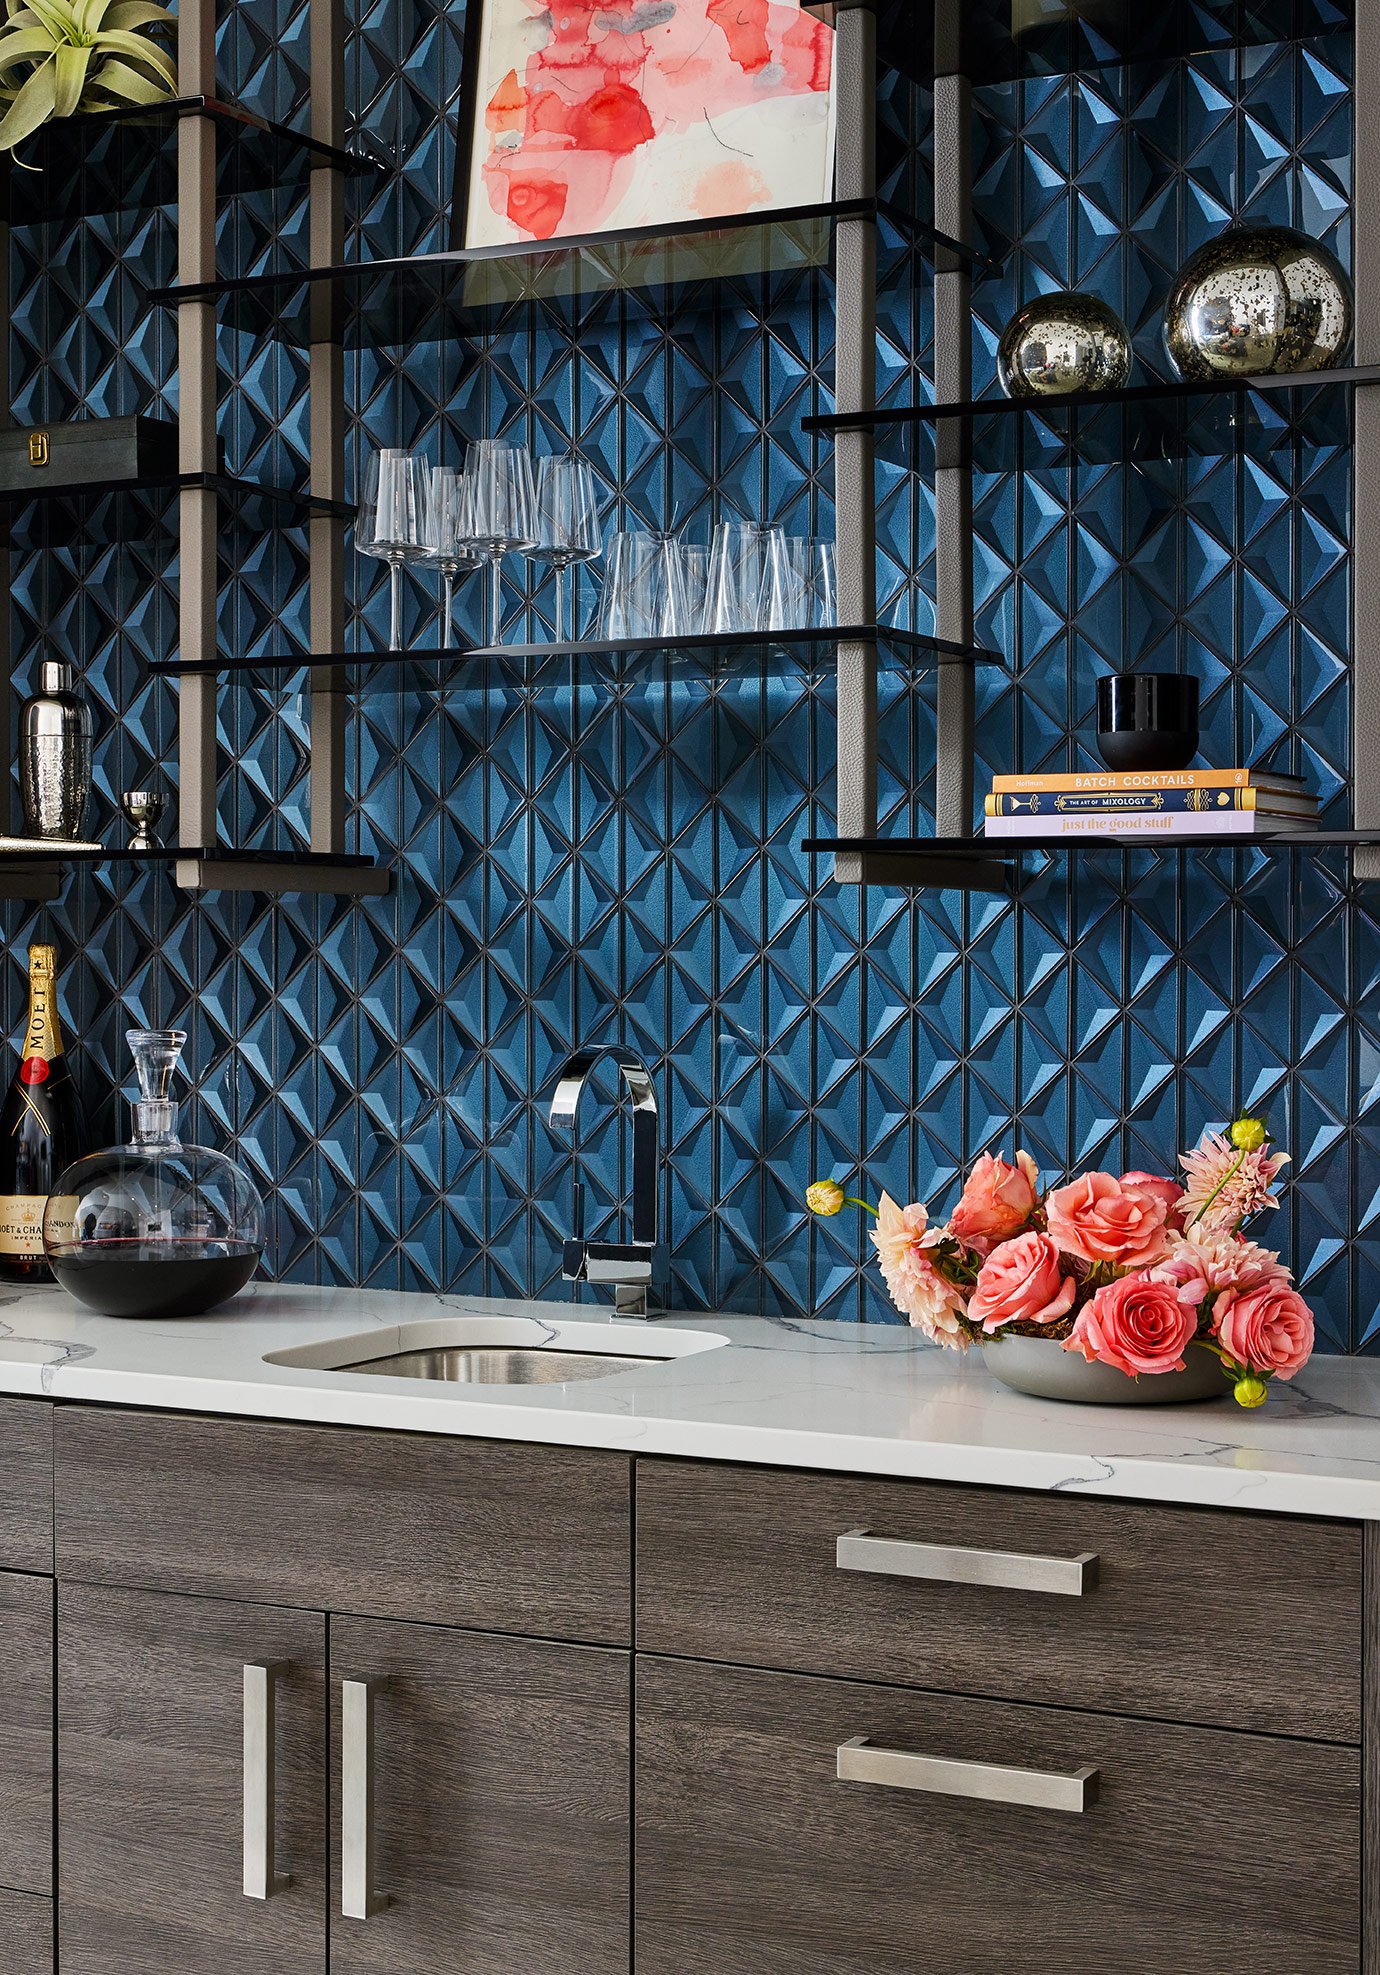
Wall Tile: To make this small space make a big impact and draw in attention, with used a tile that has a 3D quality that mimics ice sheets floating on water. Further depth is added to the tile as the surrounding light bounces around the room. The smoked acrylic shelves are transparent enough that the tile can still be seen through them, but also reflects back beautifully, creating a continuous tile effect.
Lighting: Recessed wall grazing strip lighting highlights the beautiful textures of glass, acrylic, wood, and leather as well as adds functionality to the space.
Repropose Existing Cabinetry: Since this home was newly constructed, we did not want the new base cabinets to just go to waste. Instead, we worked with them, matching our new wood pieces to the color and grain of the existing base cabinets. This was a sustainable way to reuse what was already there and create something beautiful.

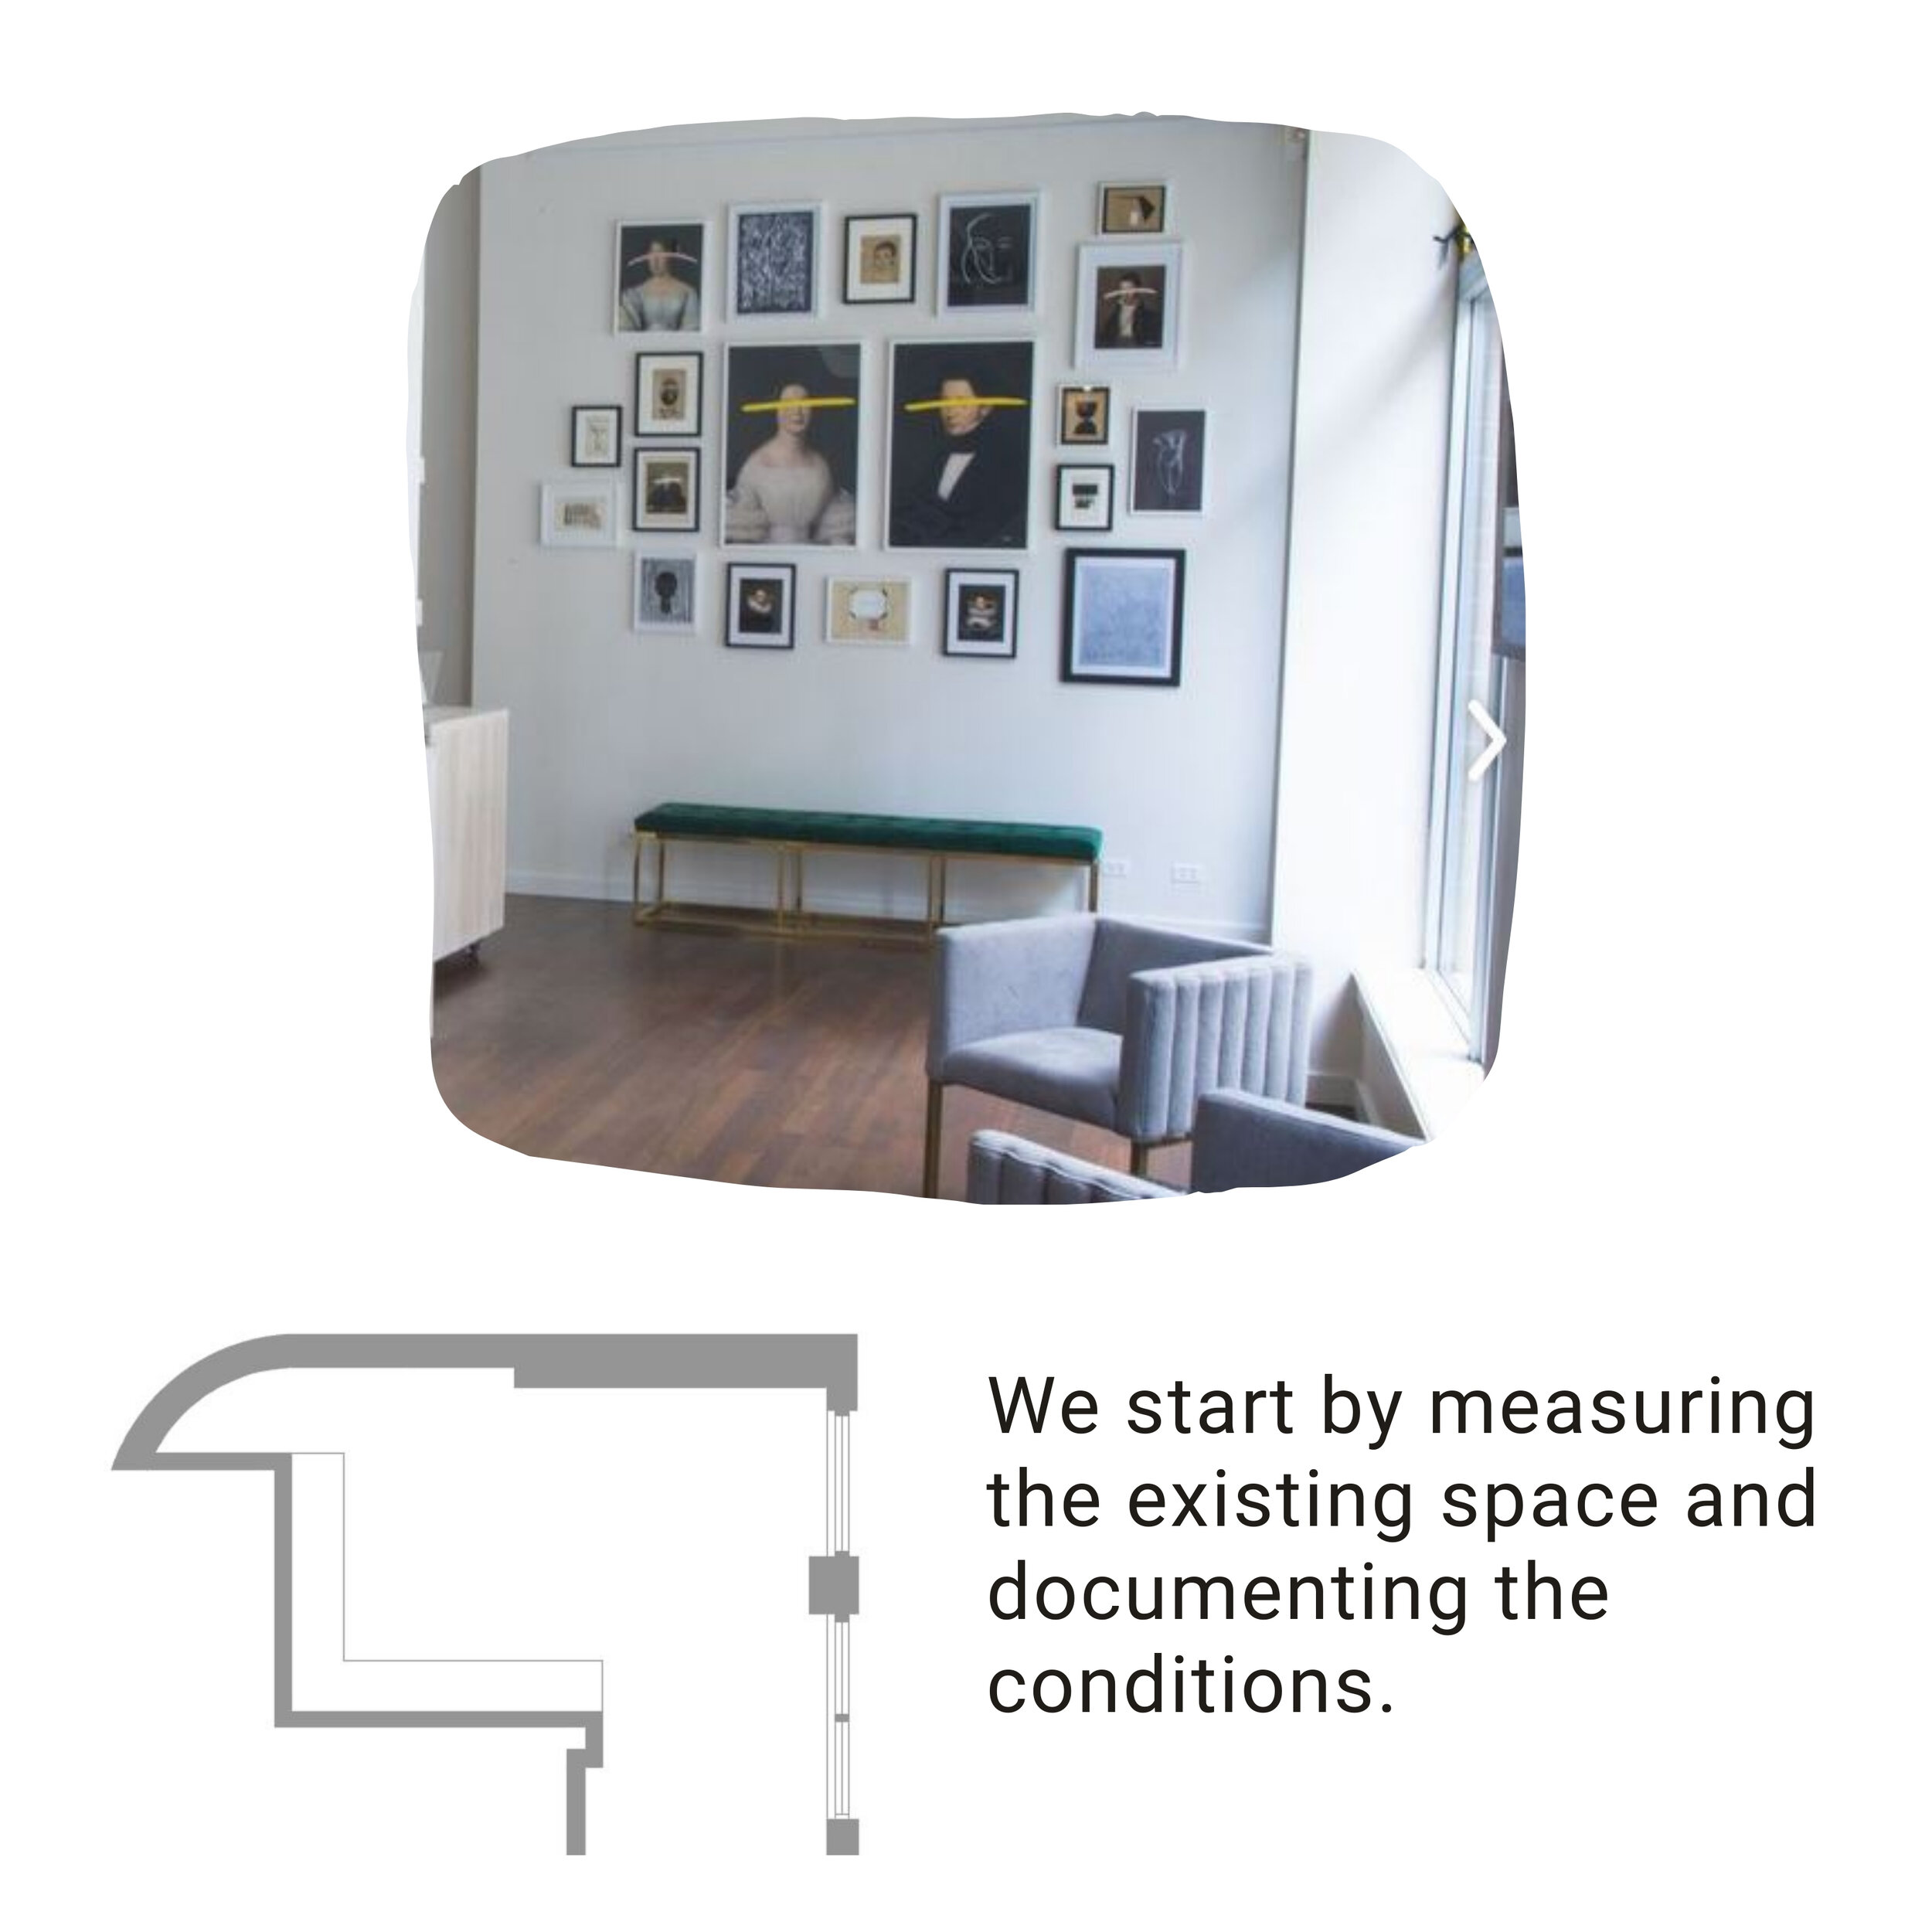
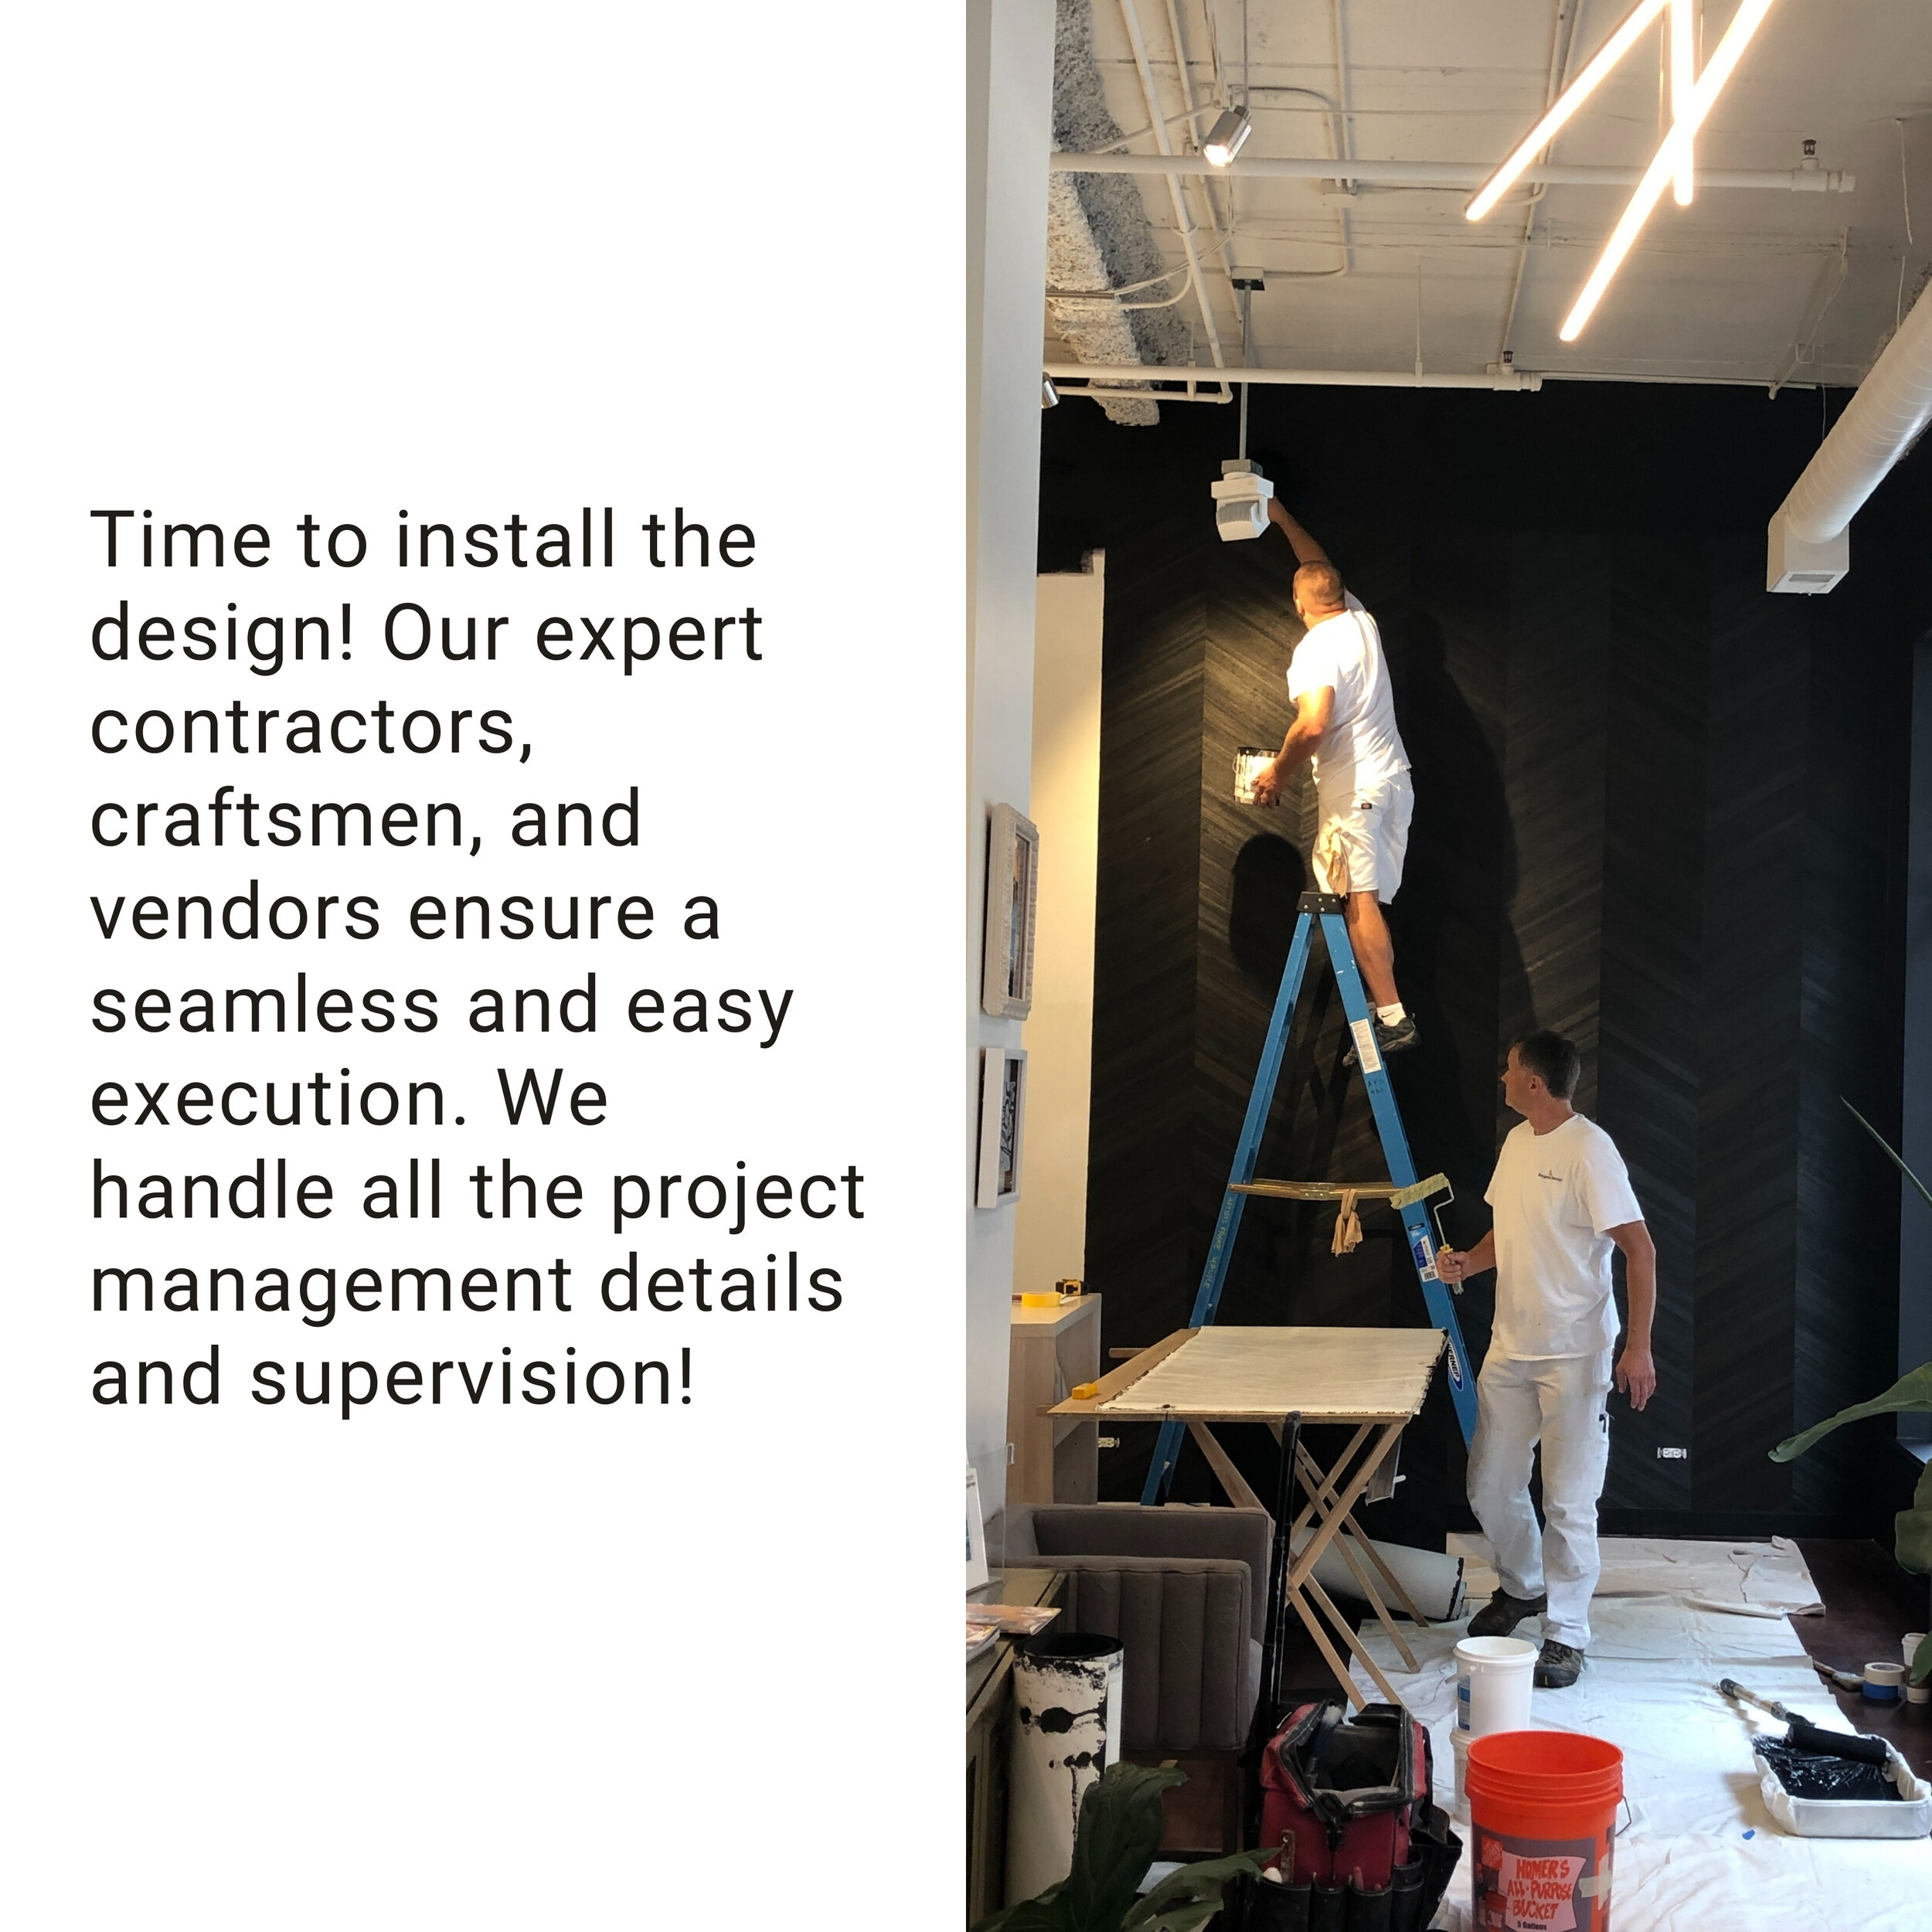
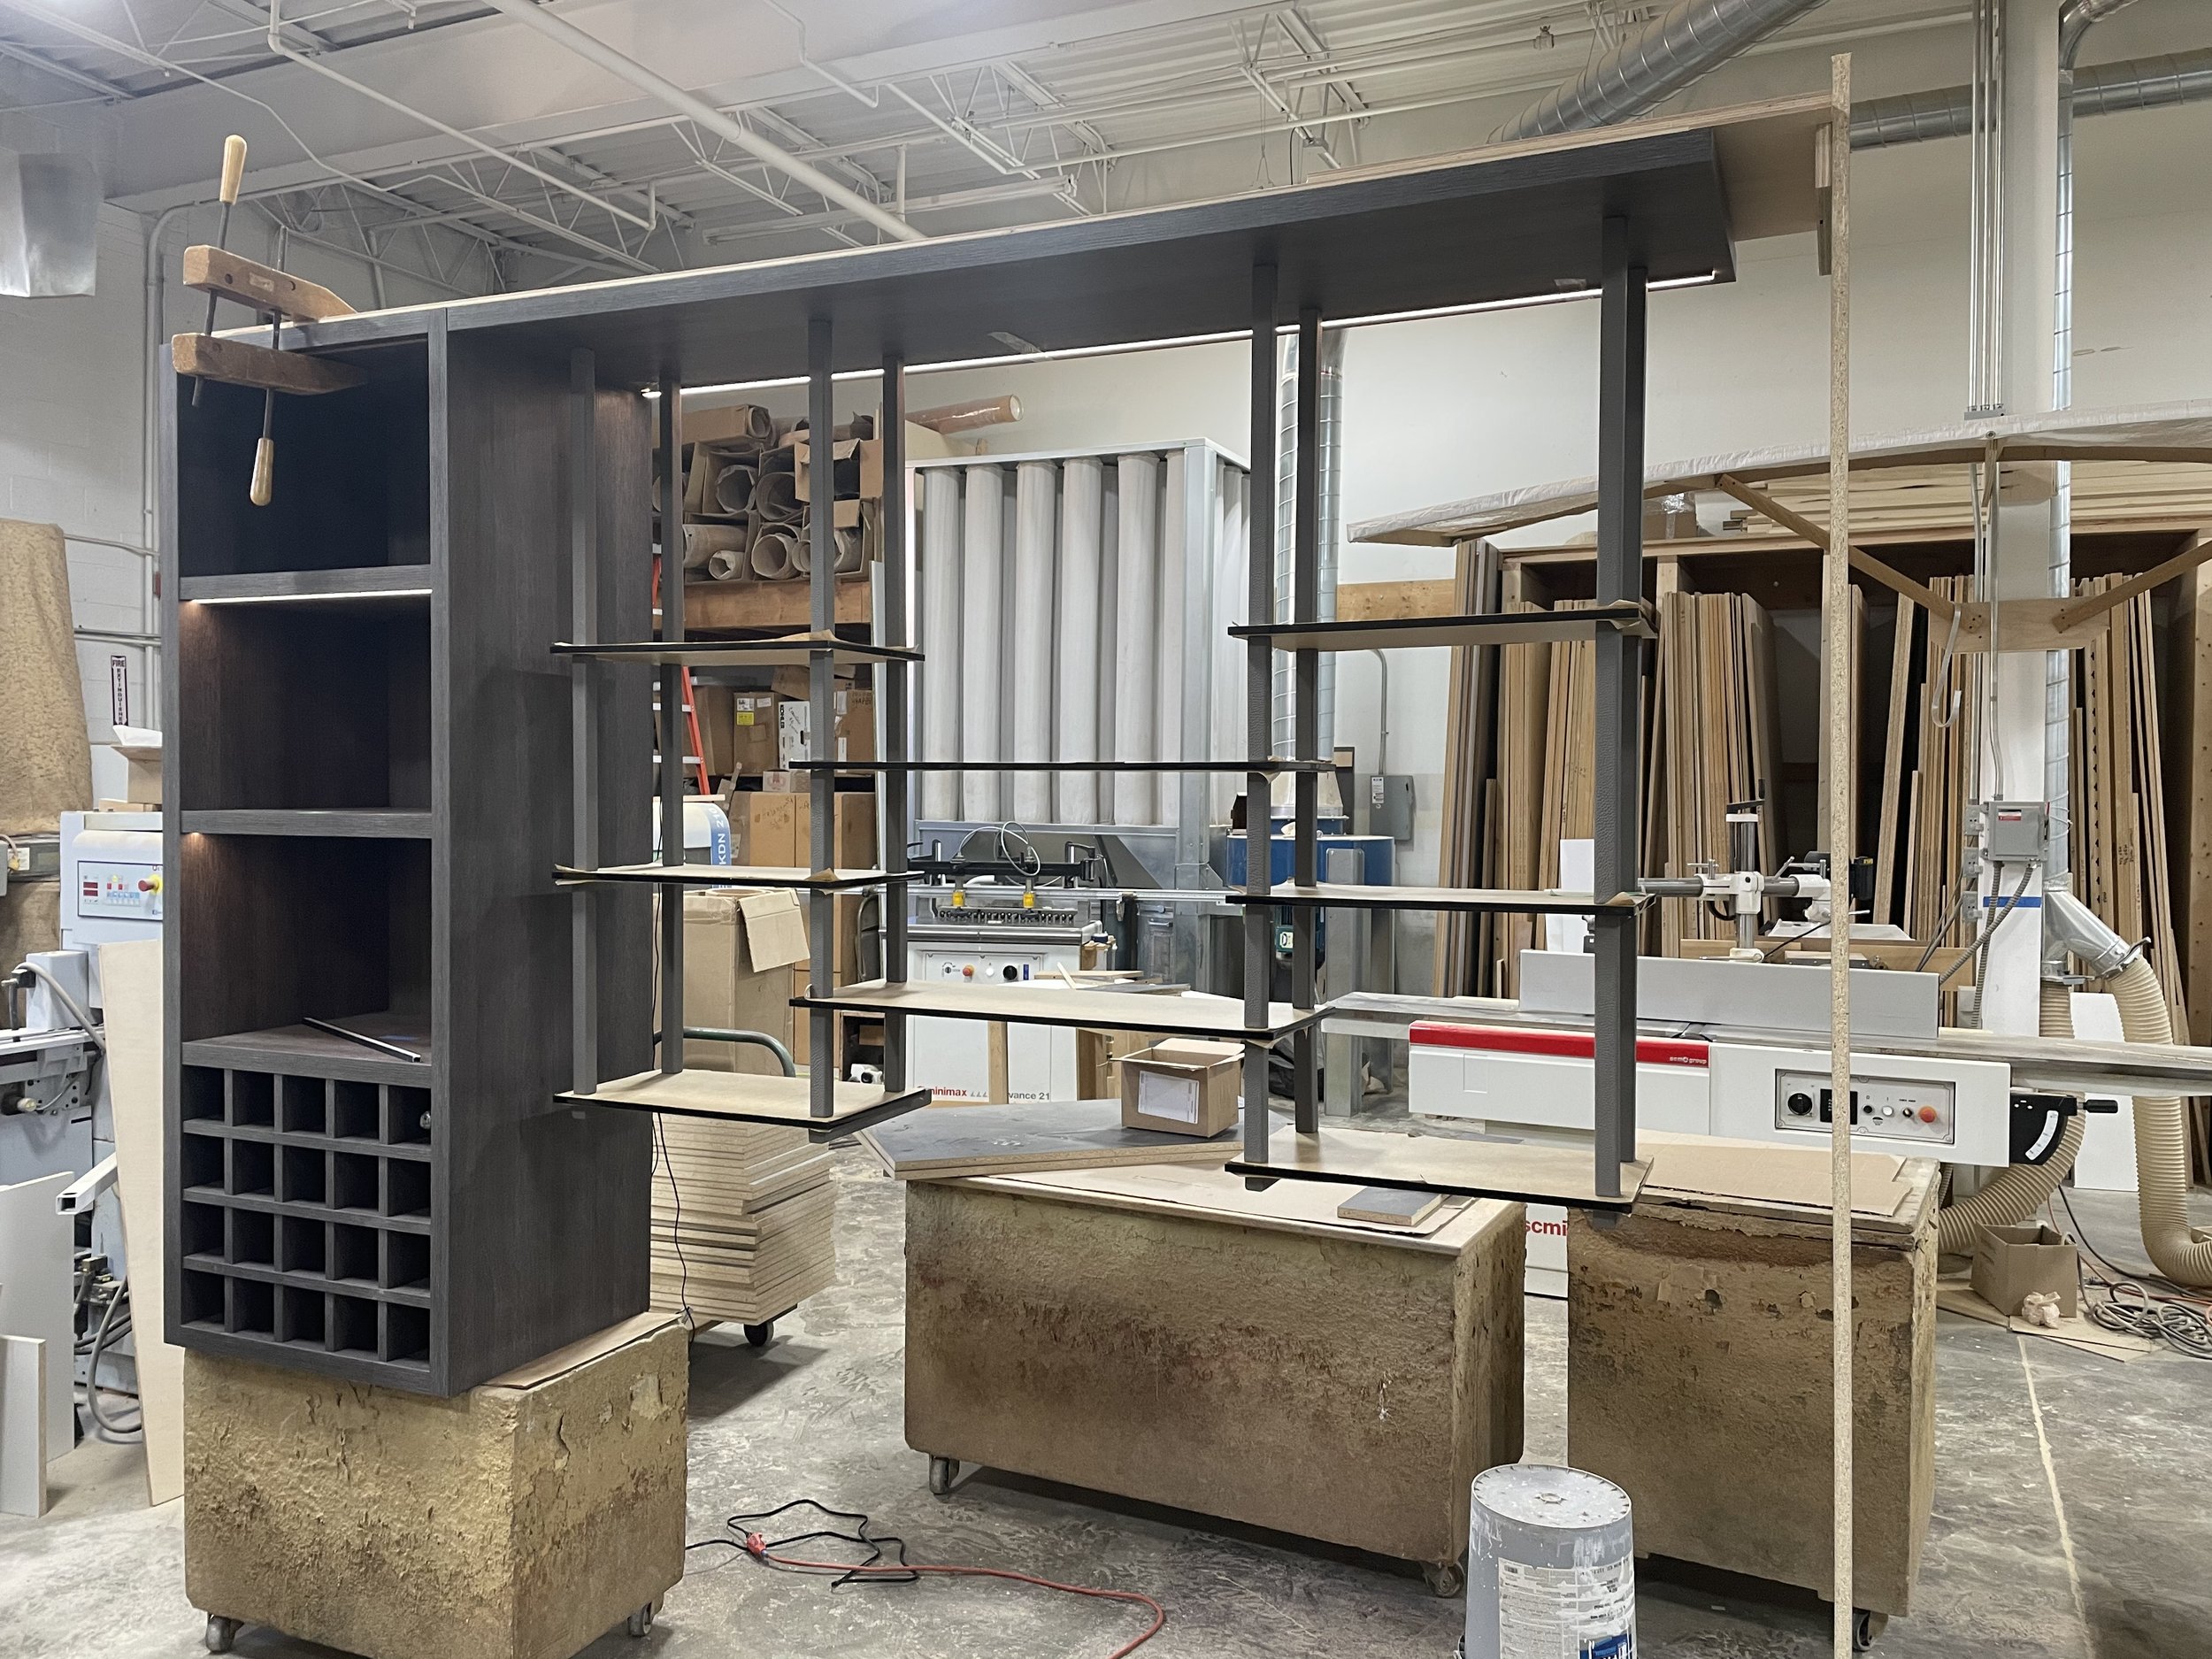
3. Facilitation and Installation
Making sure the design is executed properly is key. Our team walks the job site with the contractor, provides detailed drawings, and inspects with millwork fabrication at the shop regularly to ensure accuracy and quality. Check out some of our project progress shots!


The Before and After Gallery


Making a difference
We took home 1st place in “Millwork Detail” at the ASID Illinois Design Excellence Awards in 2022.
Even more fulfilling than winning the award, we made our client happy. They absolutely love their new downstairs bar and home that we were so fortunate to work on with our client.
It’s always so gratifying as a designer when your vision comes to life and make an impact in our client’s lives!

Ready for us to design you an award-winning space?
Schedule a Design Discovery Call Today!

Our Top 5 Items To Refresh In Your Home For The Spring
Spring is here, which means it’s time to refresh your home! Simple and easy ways to update your home for spring: refresh table décor, cheery florals, greenery and plants, pastel pillows, and bright artwork to welcome in the new season!
Hello, spring!
Spring is here, which means it’s time to refresh your home! There is something about spring that just feels rejuvenating. After months of cold and gloomy weather, a lot of us have an urge to revive our homes and welcome the energy that the new season brings. Spring is a time of renewal and rebirth outdoors; mimicking this in your interior can be simple and easy!
To give your home a fresh new look and feel, you don’t need to break the bank. Read on for our top 5 items to refresh in your home for the spring.

our top 5 items to refresh in your home for the spring
Plants / Fresh Florals and Vases
Bring the outside indoors! Fill vases with your favorite spring flowers and place them around your home: tables, mantles, windowsills, etc.! Add greenery throughout your home by bringing in a new plant or two for a quick space transformation.
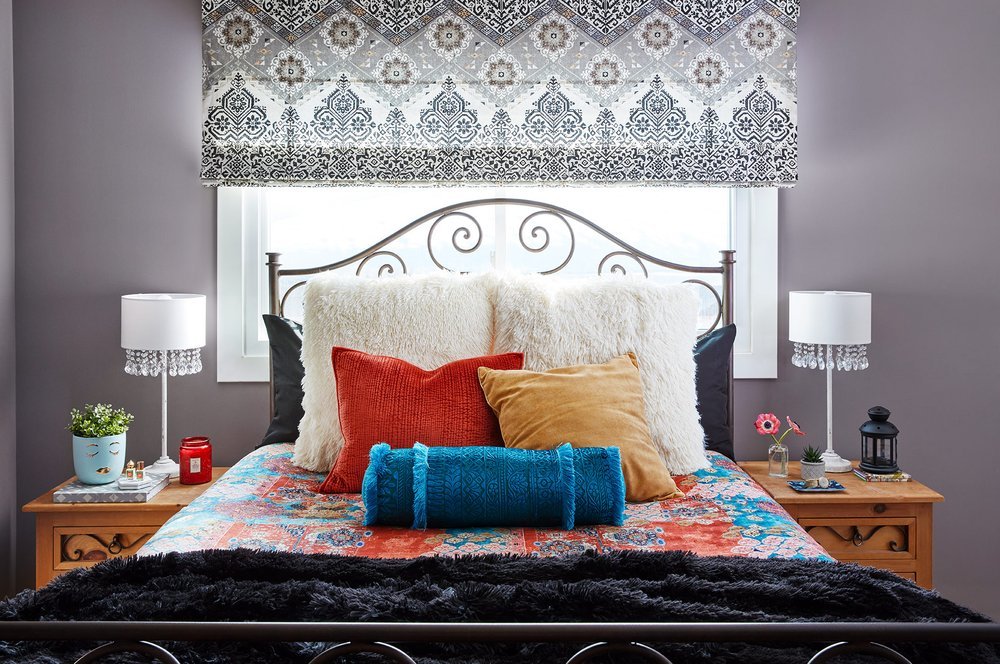
2. Swap Out Your Throws and Bedding
Replace the heavy cable knit blankets and faux fur throws with lighter materials like cotton or linen. As days get warmer, it’s time to swap out our bedding to match the season. Wool, linen, and cotton are all great, breathable fabrics to incorporate in your spring bedding.
3. Light Colors or Pastel Fabrics
It’s time to put away those dark textiles and brighten up your home by adding a splash of color and/or layering the space with neutrals and whites. Don't forget to replace any heavy drapery or shades with lighter ones. To rapidly brighten up your home for spring, try a white linen curtain to capture the longer, sunnier days that come with spring. You can also swap out any dark rugs and towels for brighter ones.
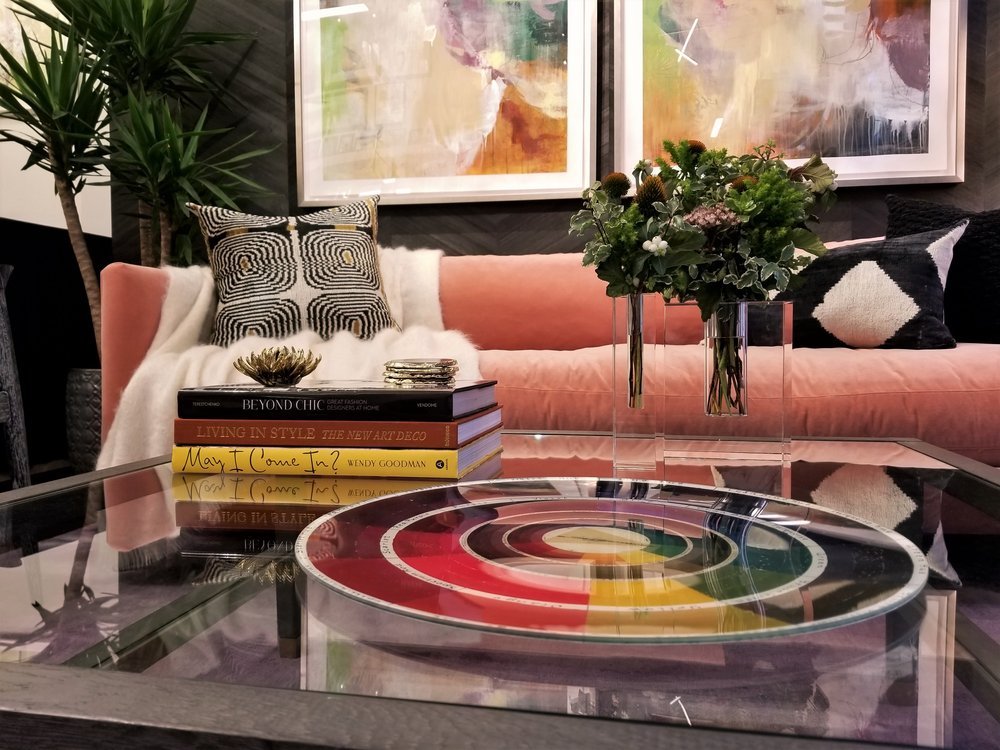
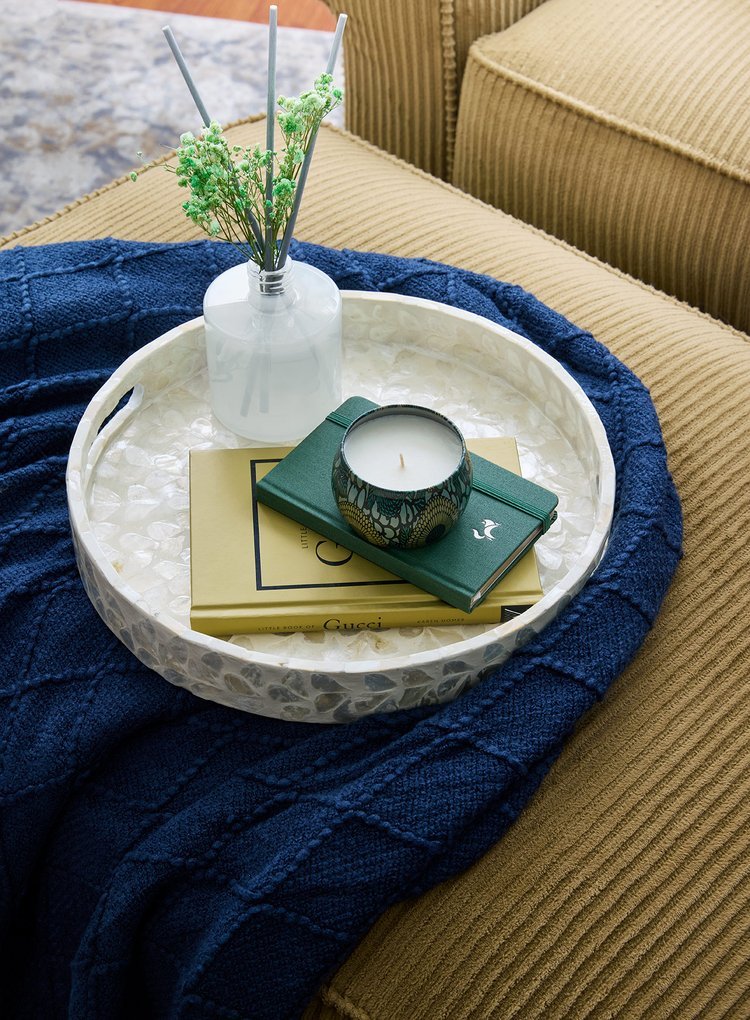
4. Coffee Table, Dining Table, and Shelf Décor
Don’t forget to give your coffee table and shelves a springtime refresh, too. Change out your coffee table books to some fun-colored covers like greens, blues, and pinks for spring. Elevate the atmosphere by switching up your scented candles to a refreshing spring scent. Whether it be floral, fruity, fresh, and woodsy scents – they will instantly make any place feel livelier. Another quick change you can make is in your kitchen and dining areas. Use lighter sets of dinnerware for springtime and pair them with colorful accessories such as pastel napkins or charger plates.
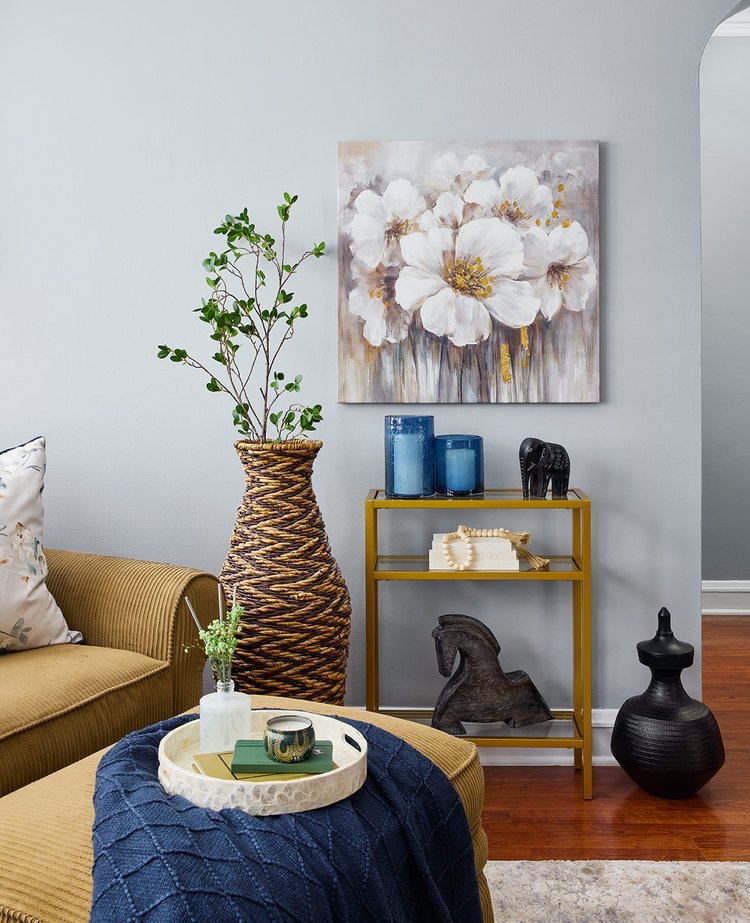
5. Artwork / Swapping Out Family Photos
Changing your artwork, whether it's in your gallery wall, on your kitchen counter, above your mantel, or on a side table, is one of the simplest ways to refresh your home for the spring. For instance, if your foyer table currently displays dark, somber landscape art, replace it with a print that features pastel hues all over. Little adjustments like these can quickly transform your home's drab winter atmosphere into a bright and airy spring vibe.
jumpstart your spring refresh
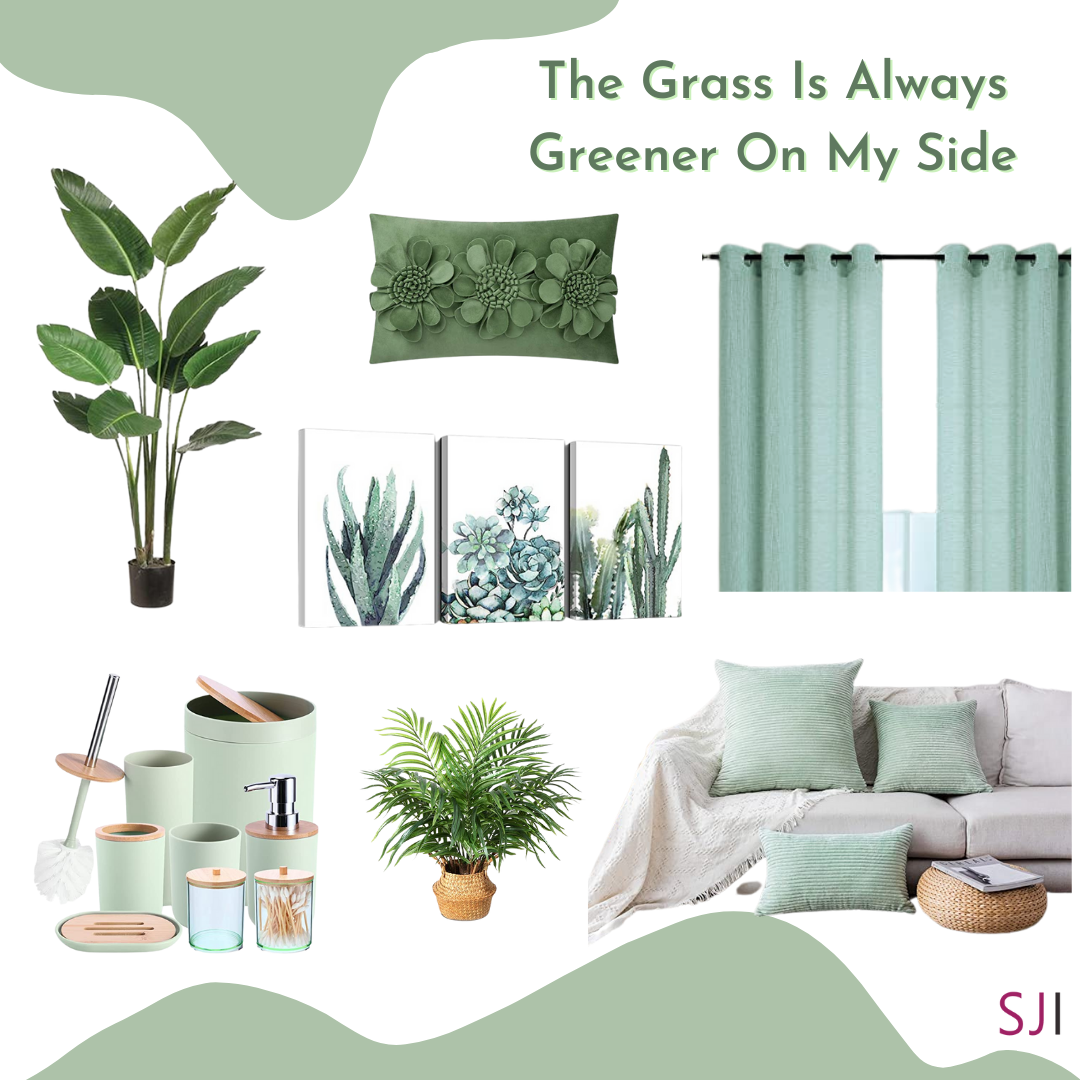
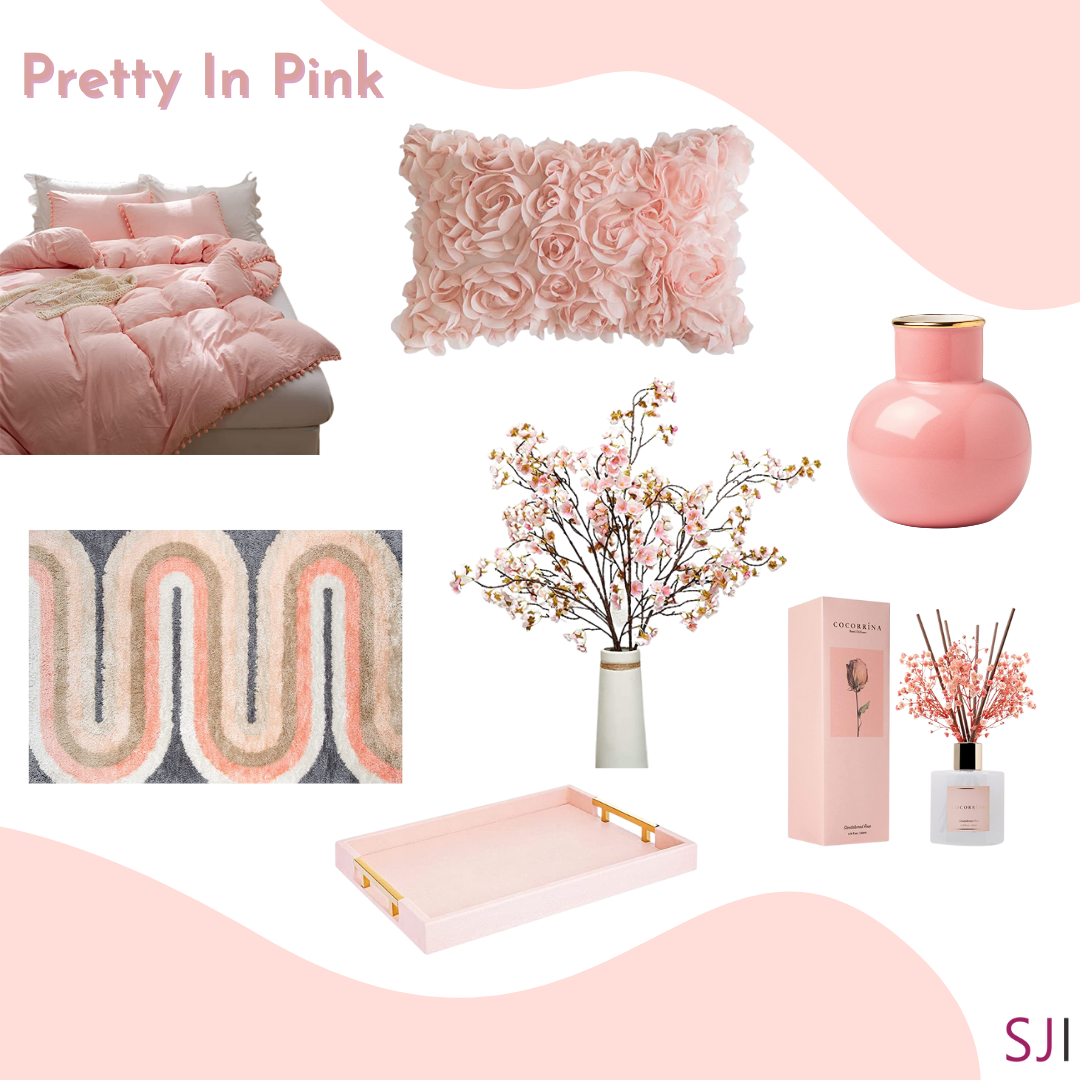
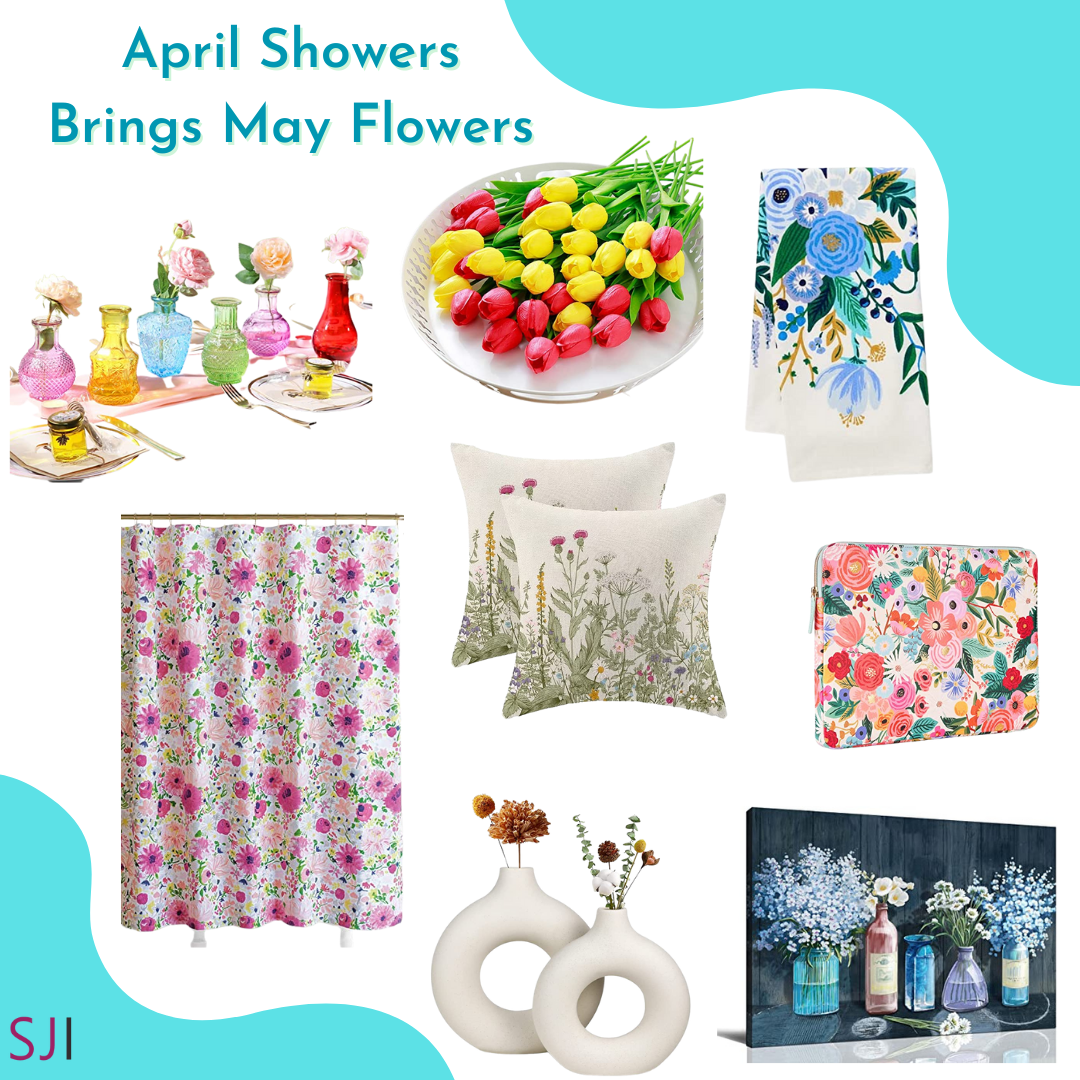
Shop our favorite picks for a spring refresh on Amazon.
We selected our favorite vases, décor, bedding and more!

Ready to refresh your home for spring or summer?
Schedule a Design Discovery Call Today!

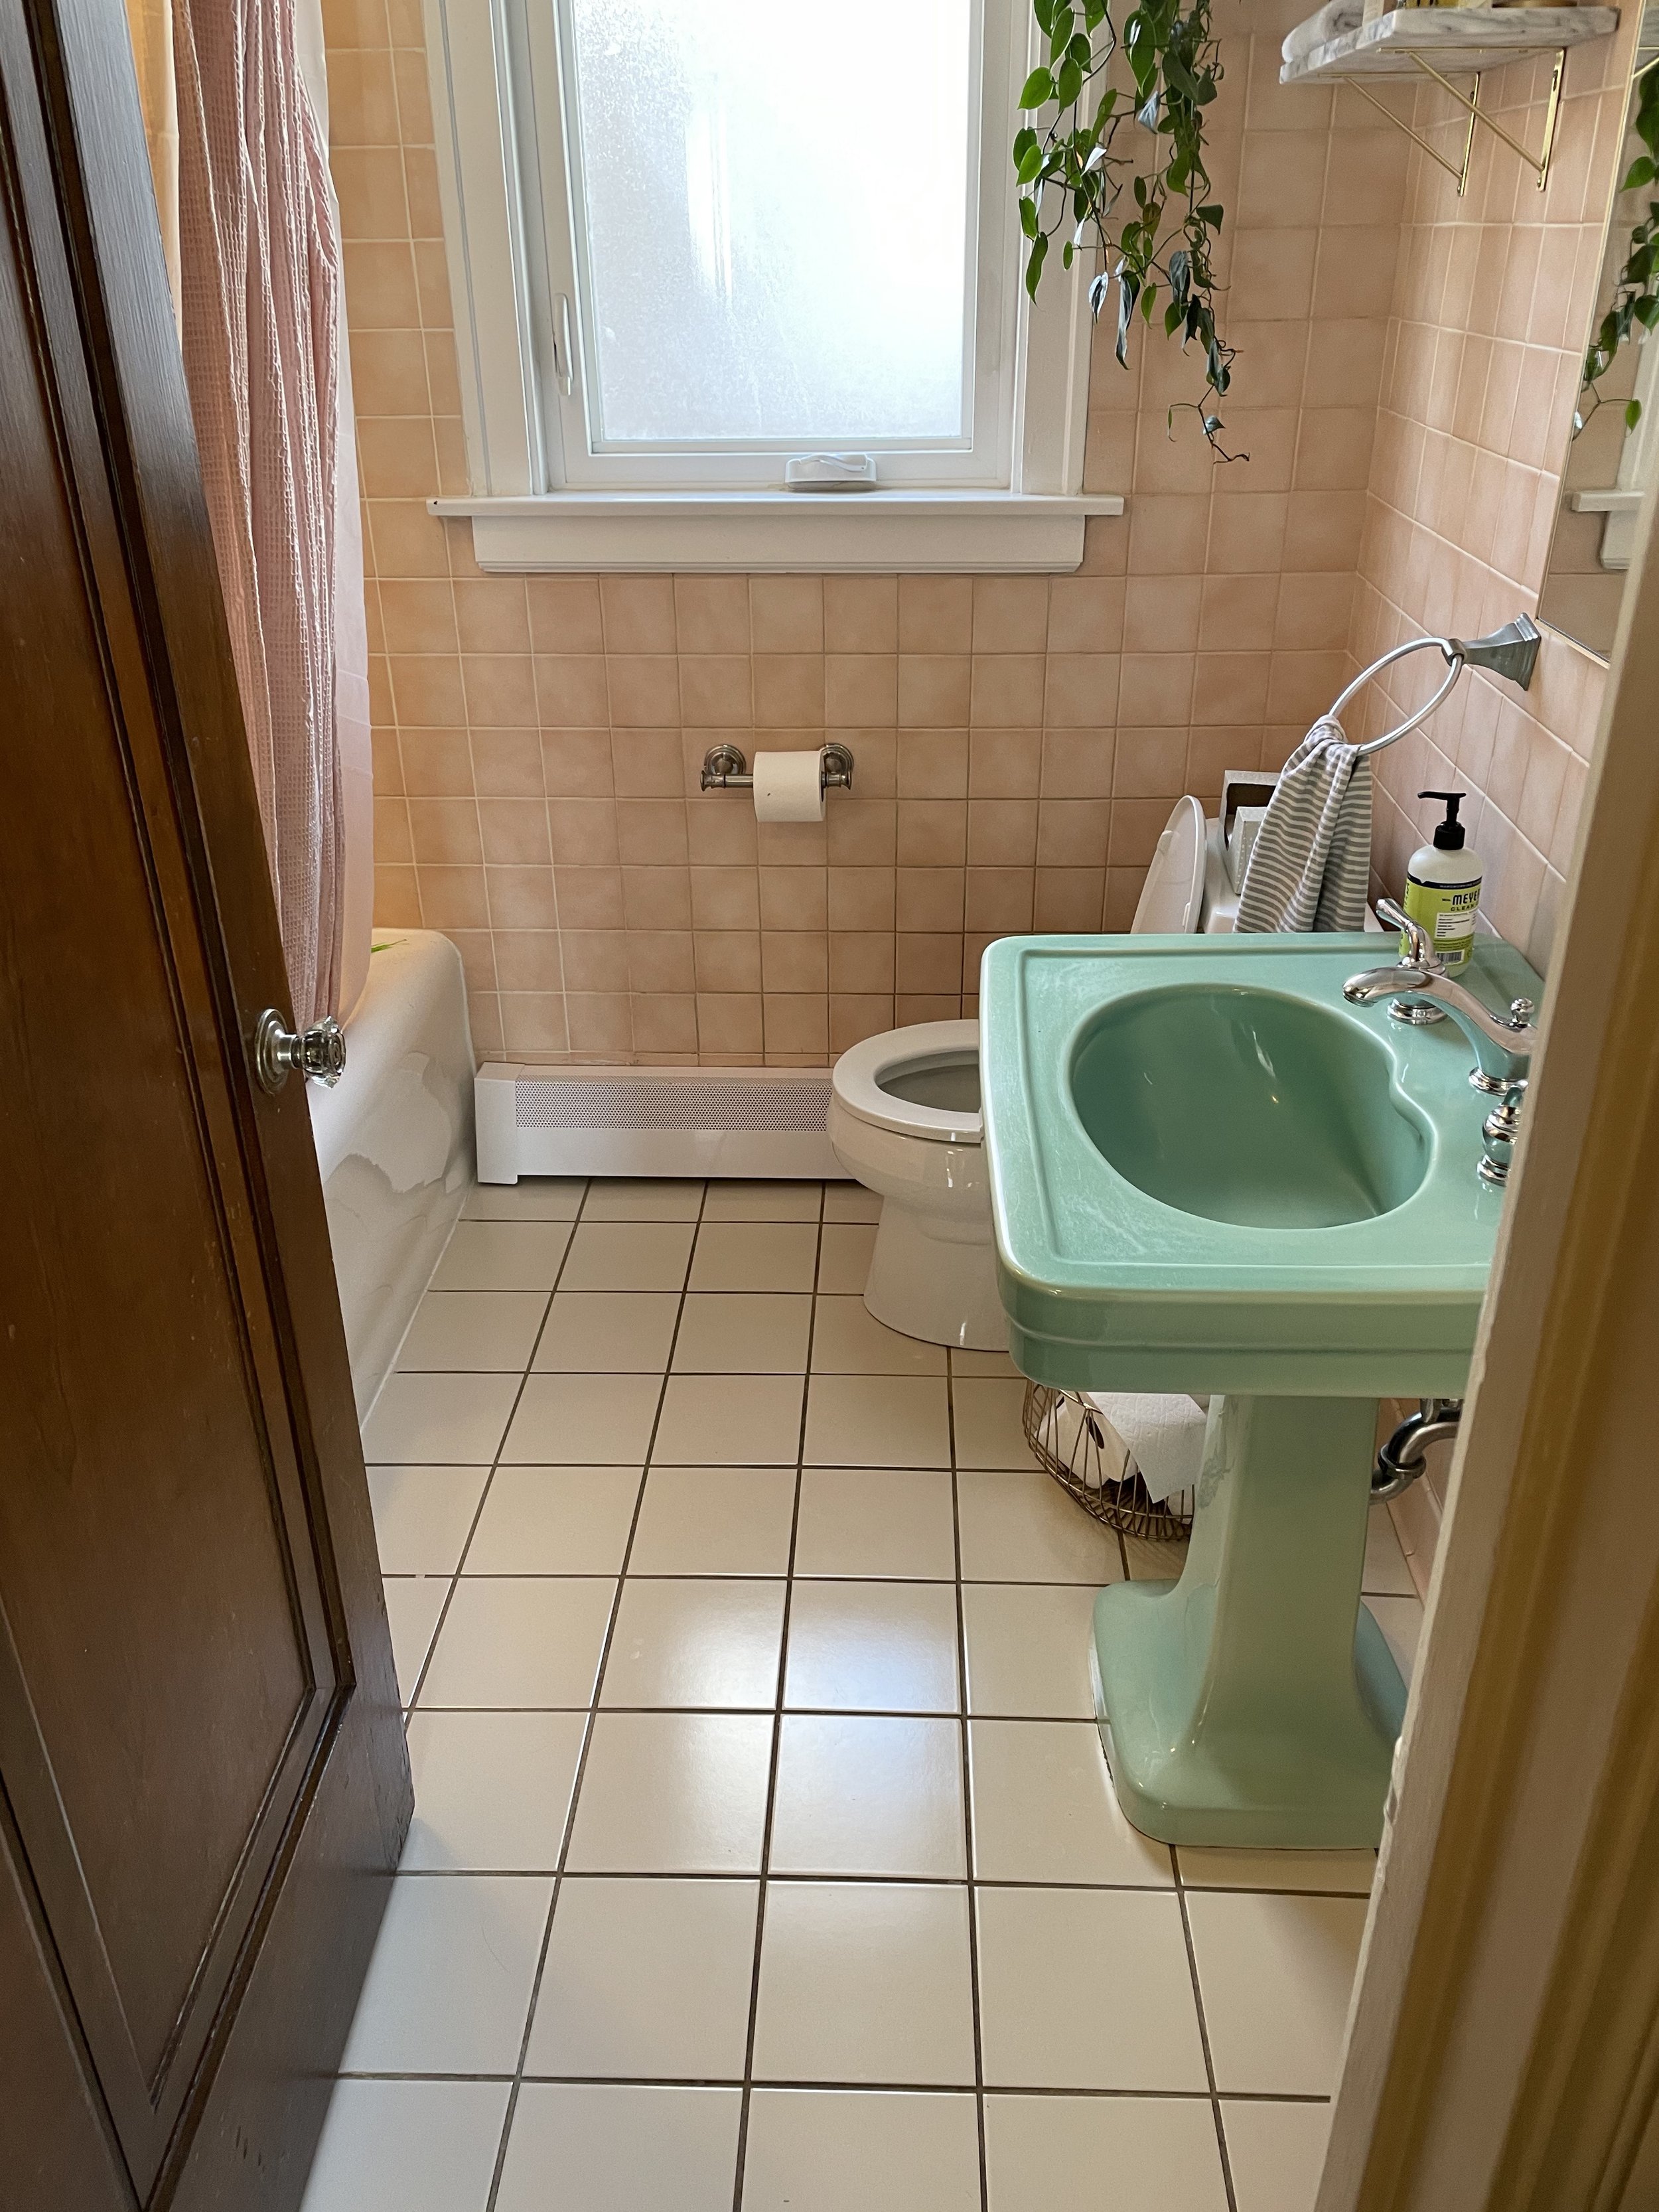
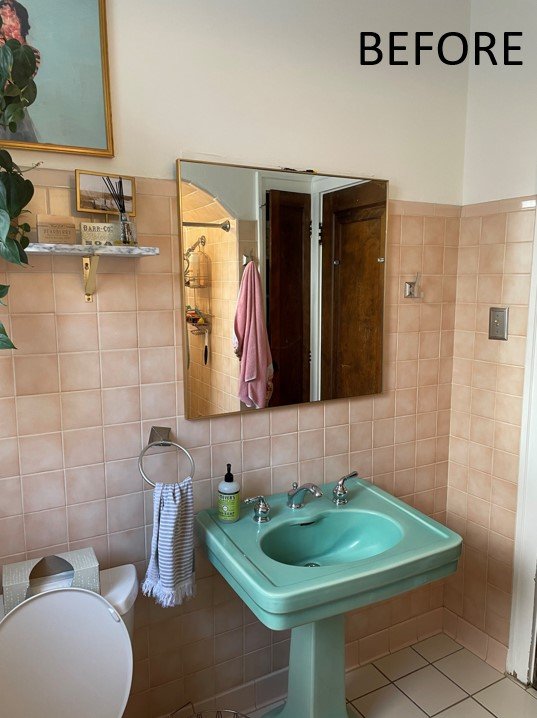
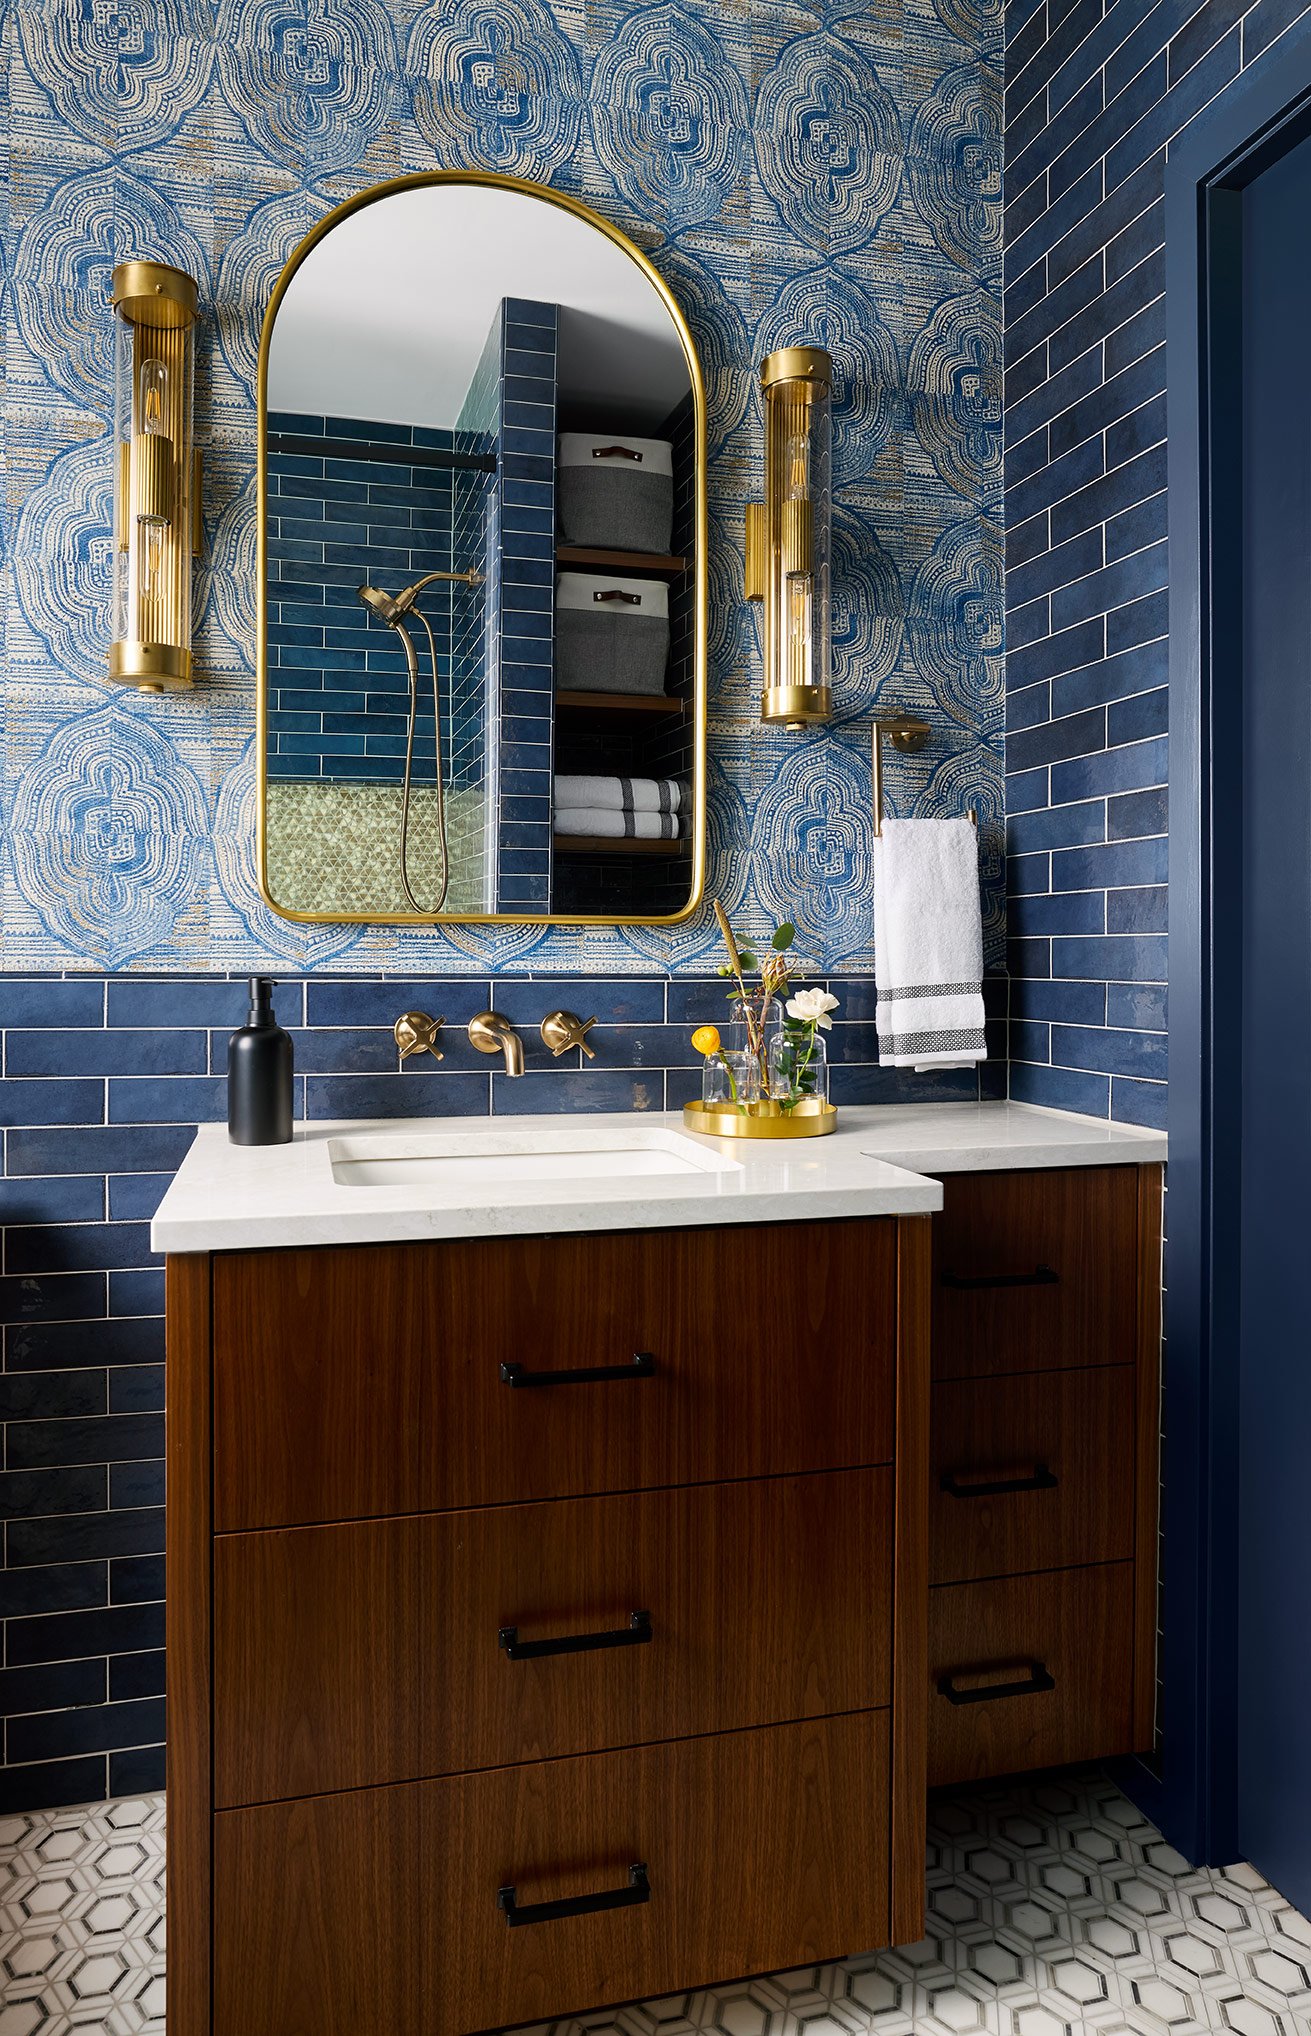
Before and After: Behind The Scenes Of Our Award Winning Bathroom Design
Get a behind-the-scenes look at our award-winning bathroom project.
1st Place Winner: 2022 Celebration of Design - American Society of Interior Designers (ASID) Illinois


the challenge
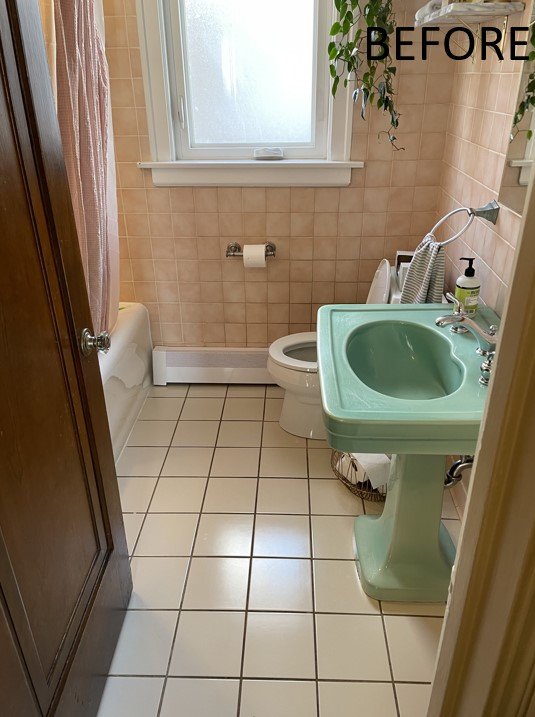
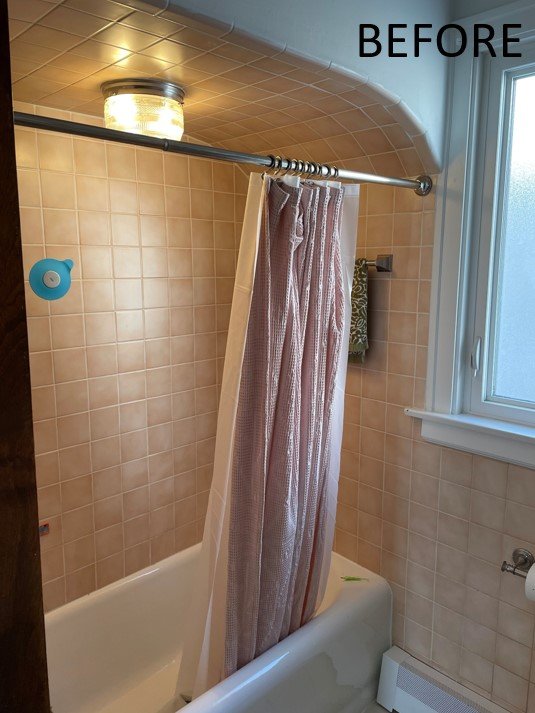
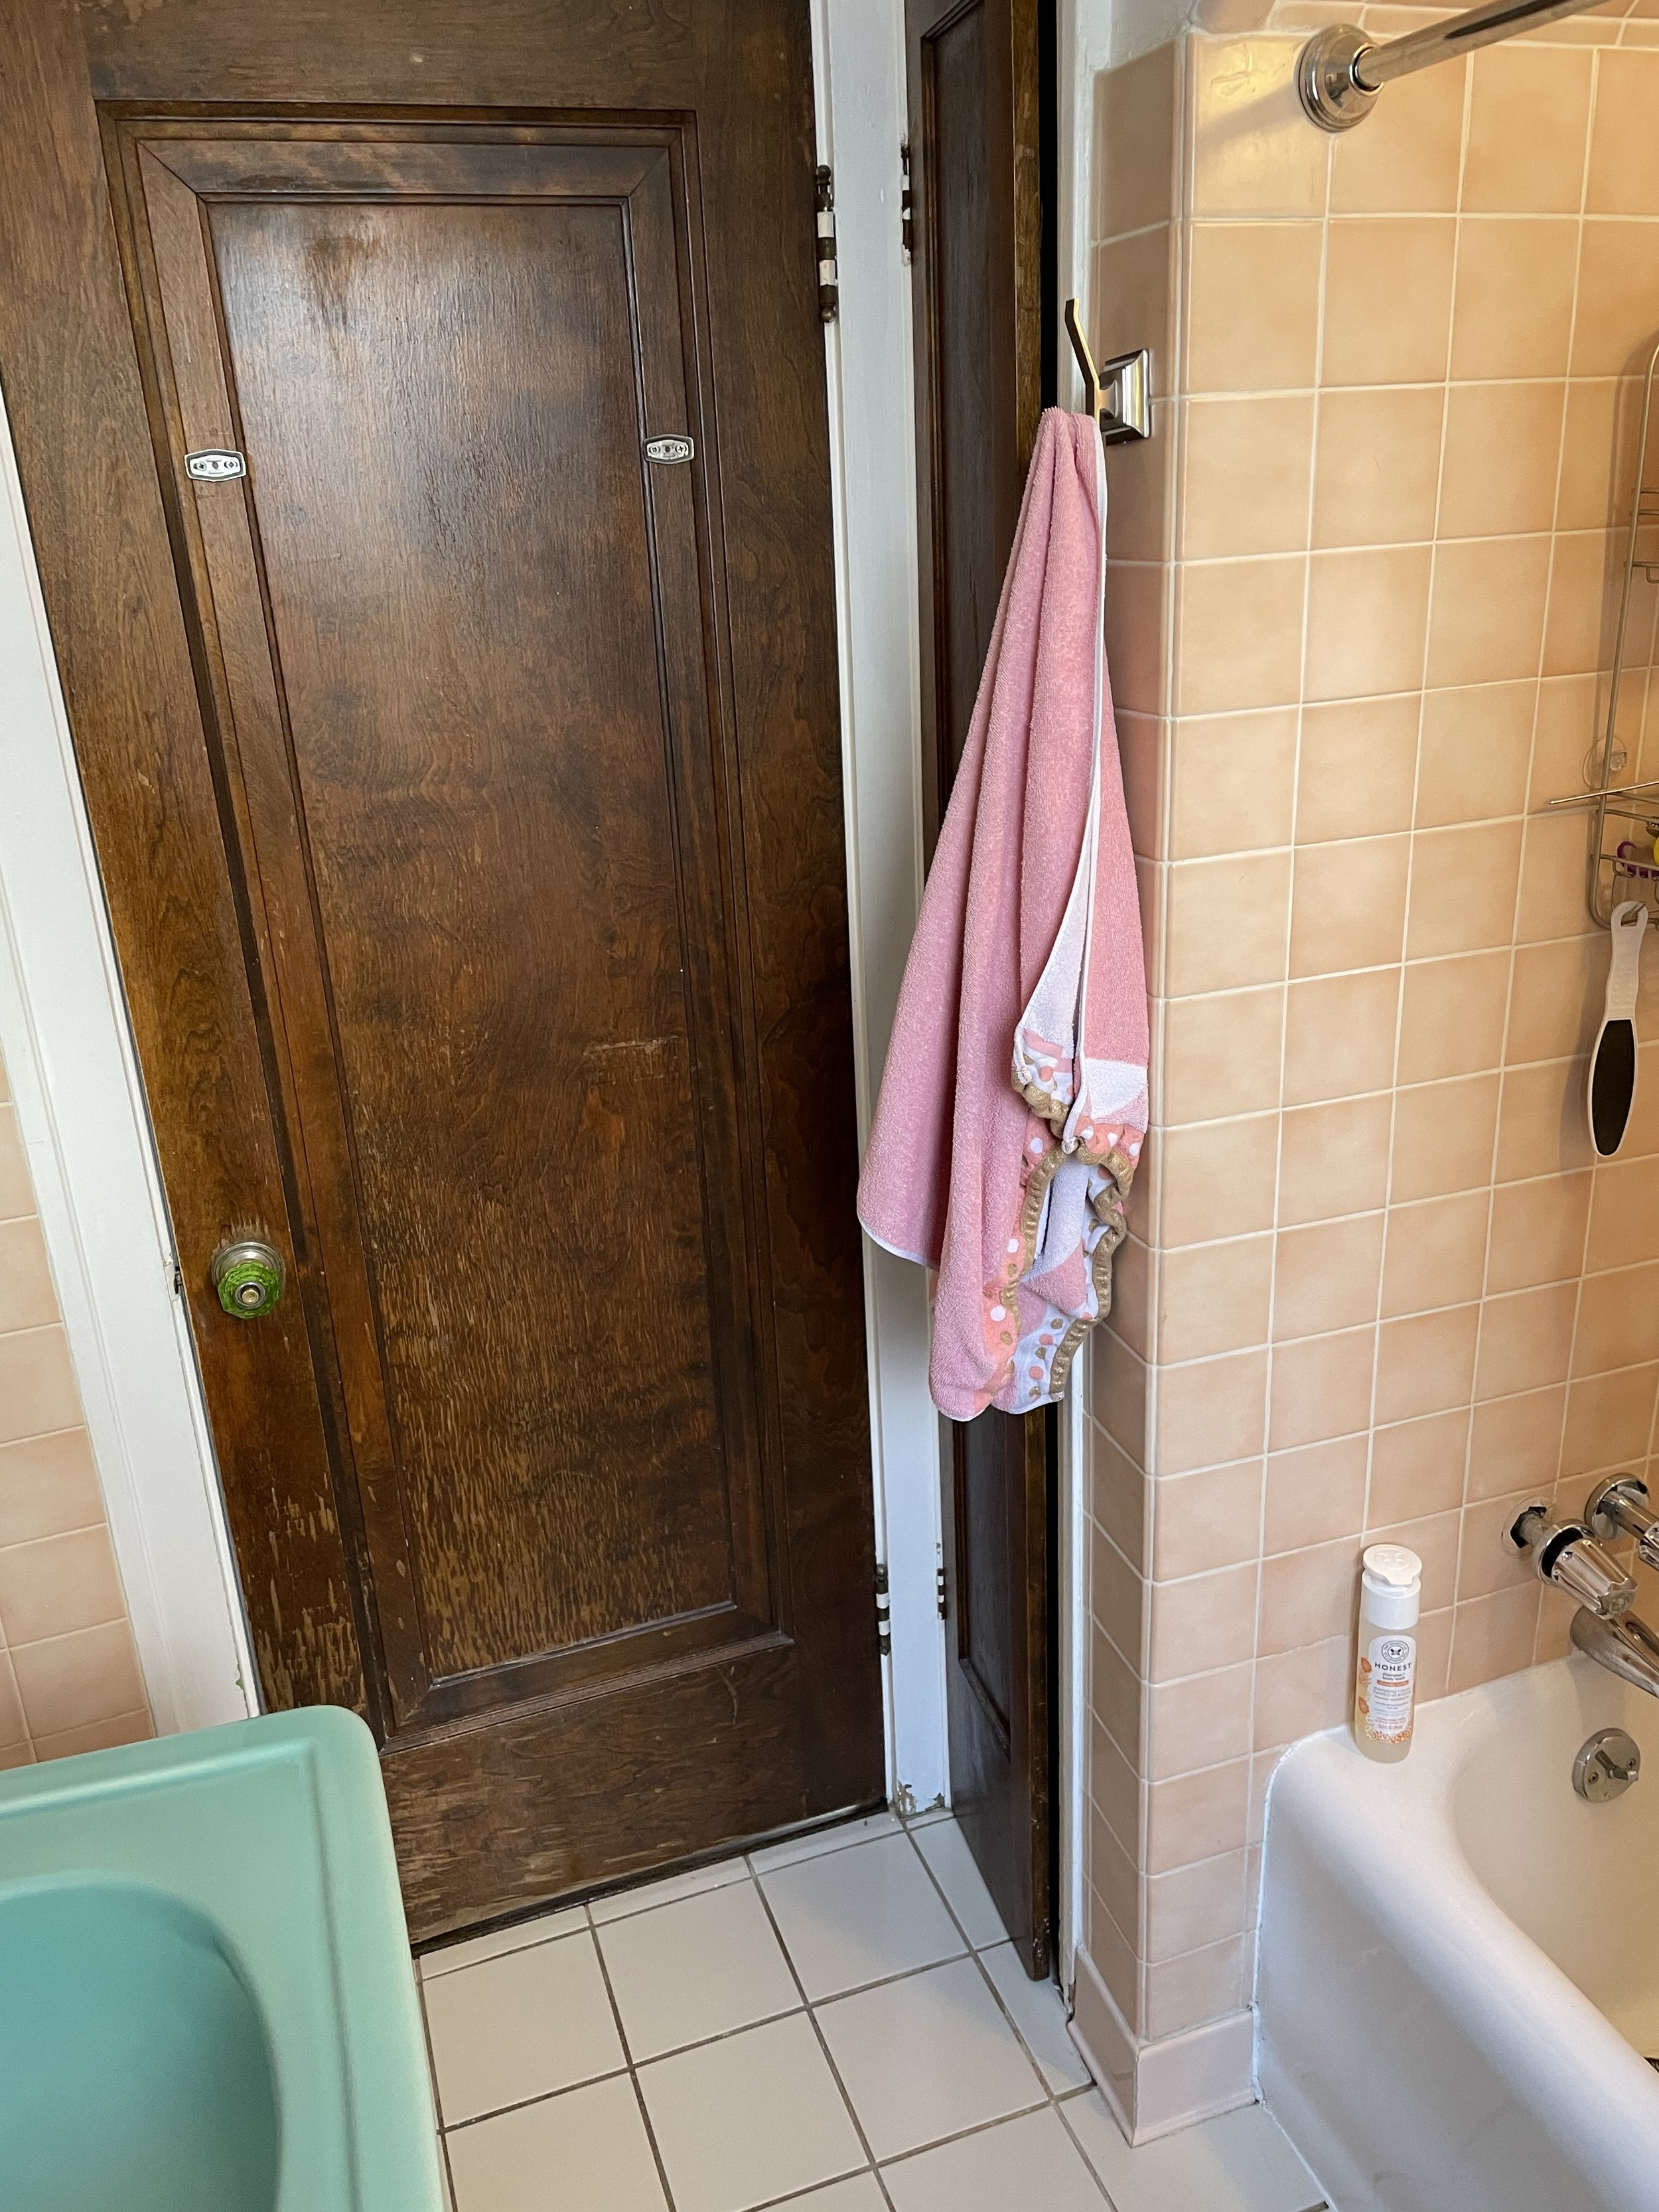
Location: The redesign and construction of this 1926 Chicago vintage bungalow was a fun challenge with lath and plaster walls, no existing electrical outlets, and an existing soffit.
Client: Family of 4 with young children, who love to entertain.
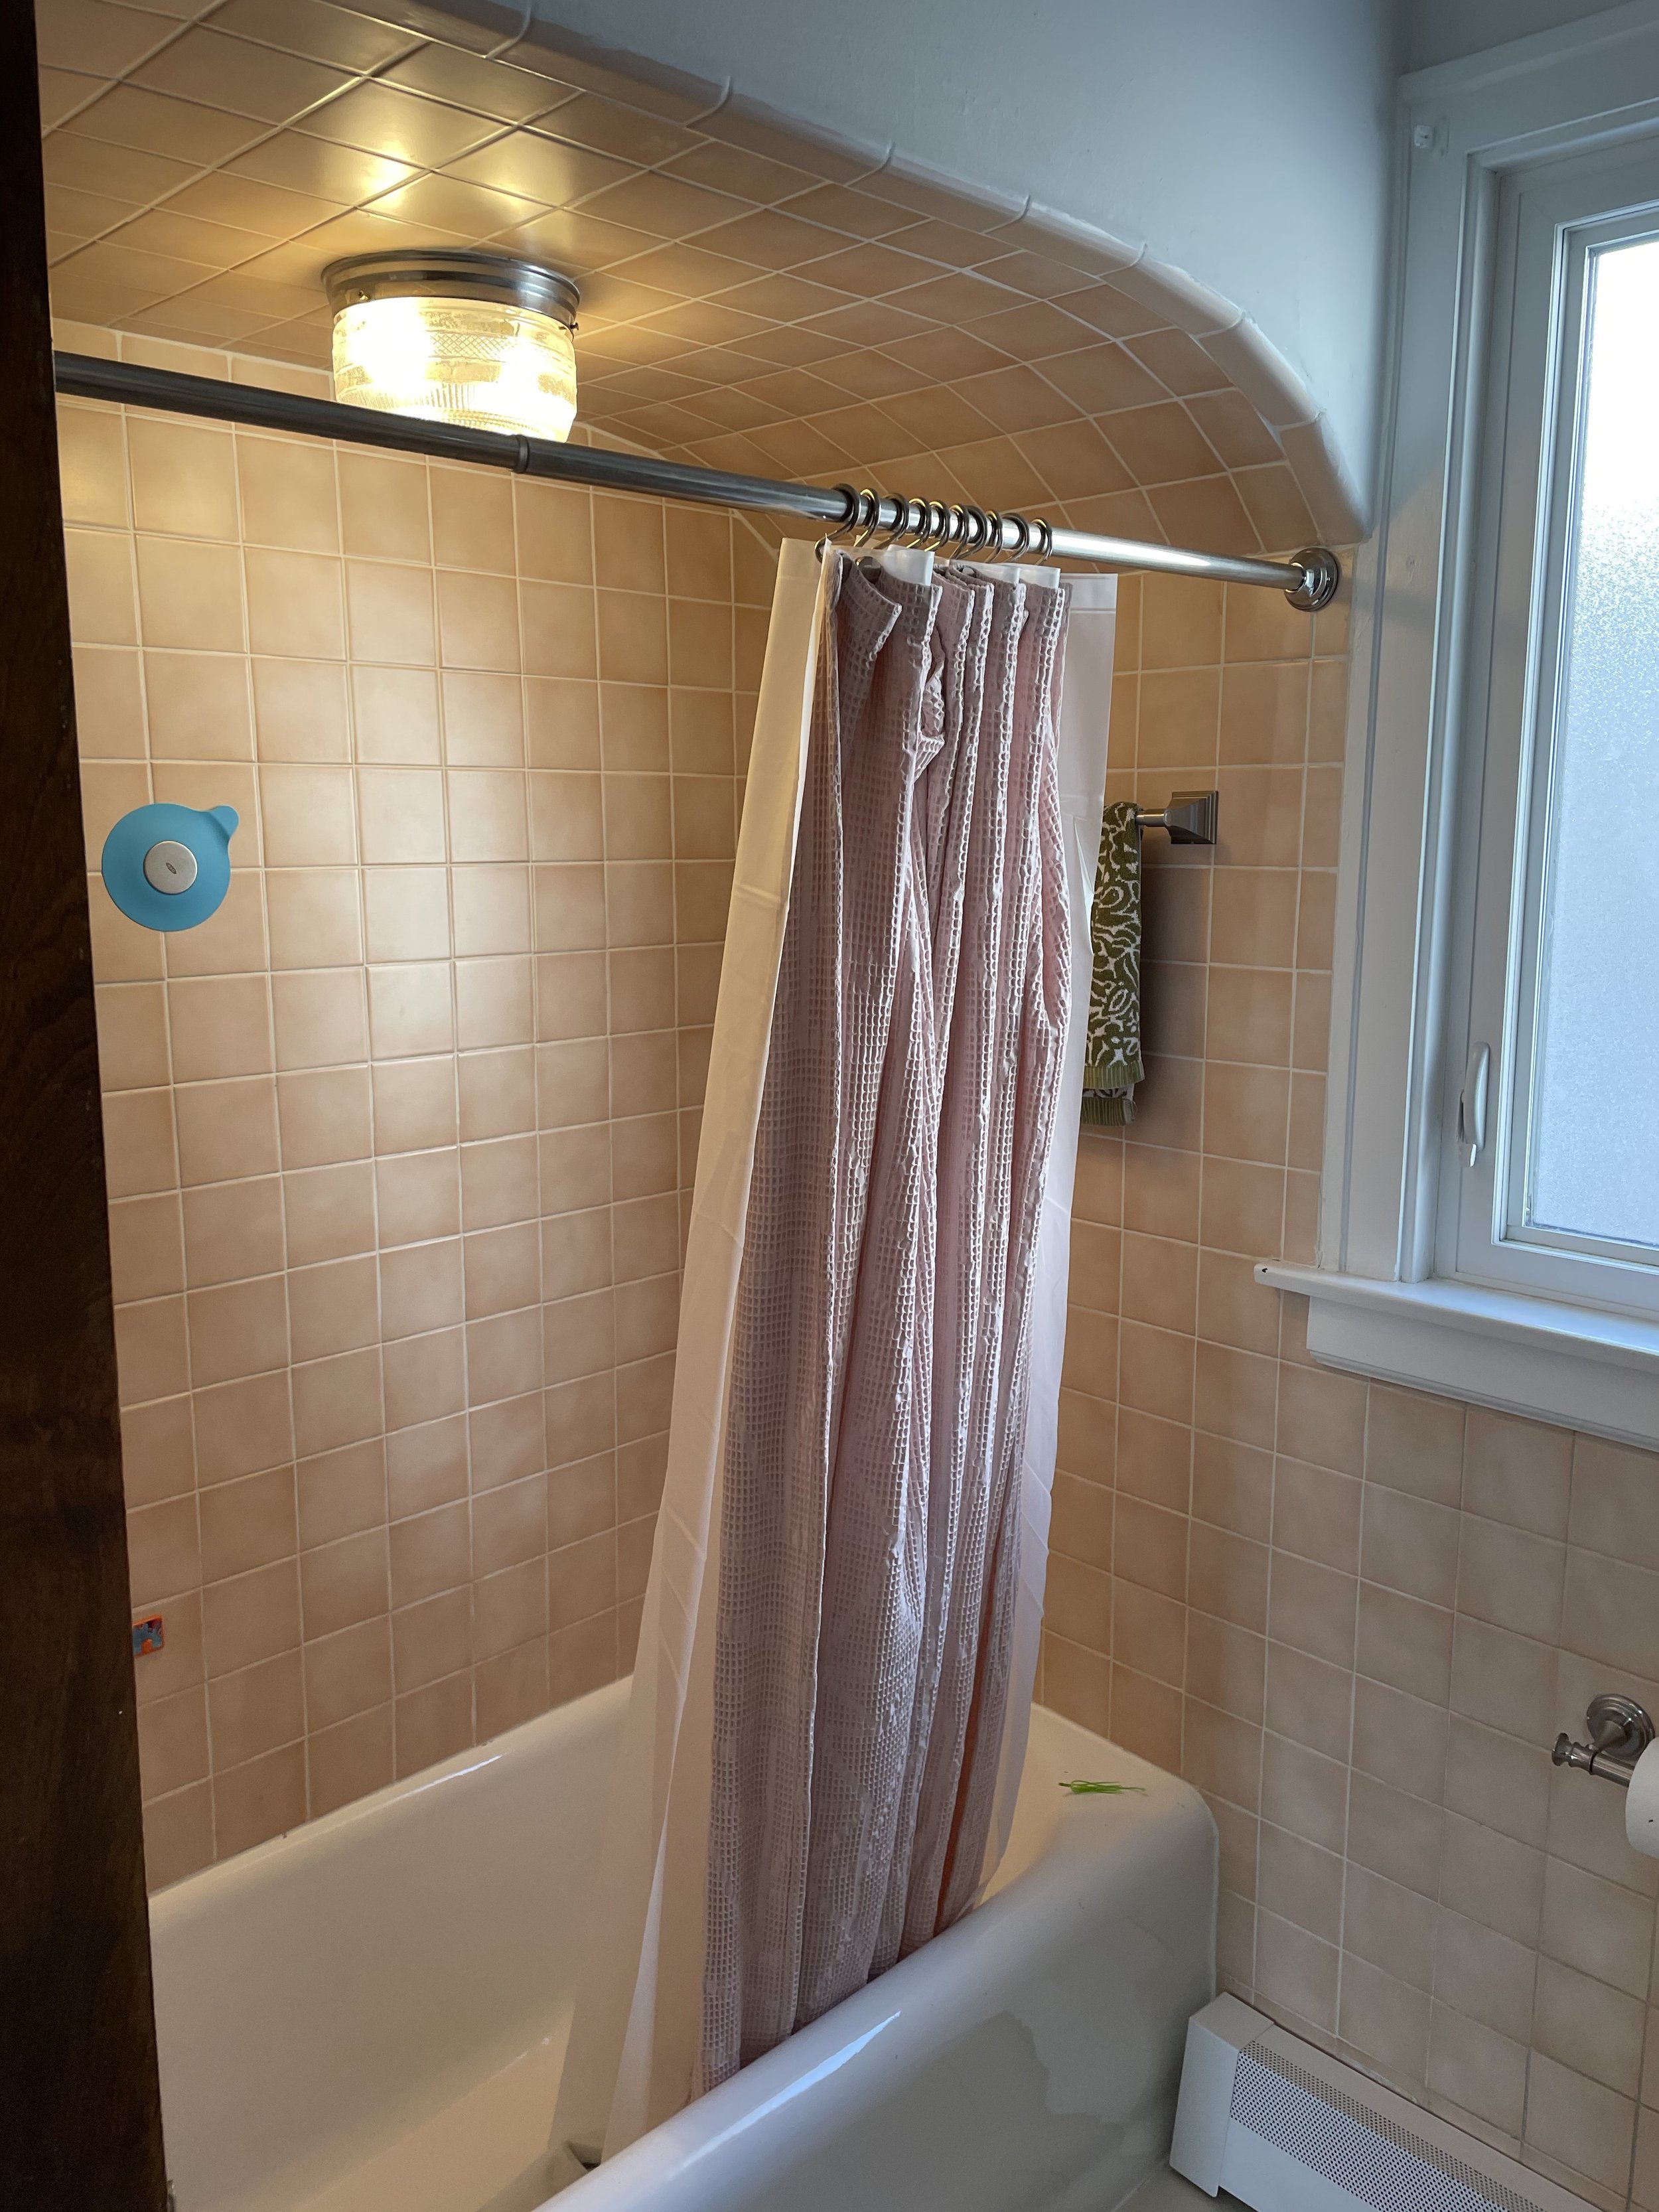
What doesn’t work now: The shower is too small, the tub is not needed, and there are no outlets.
Style: Updated and modern while paying homage to the architectural charm of the home.
Color Palette: Blend with the rest of the home and loves blue!
How do you want it to feel: Enchanting + Organized
Functional Request: Storage
the design process
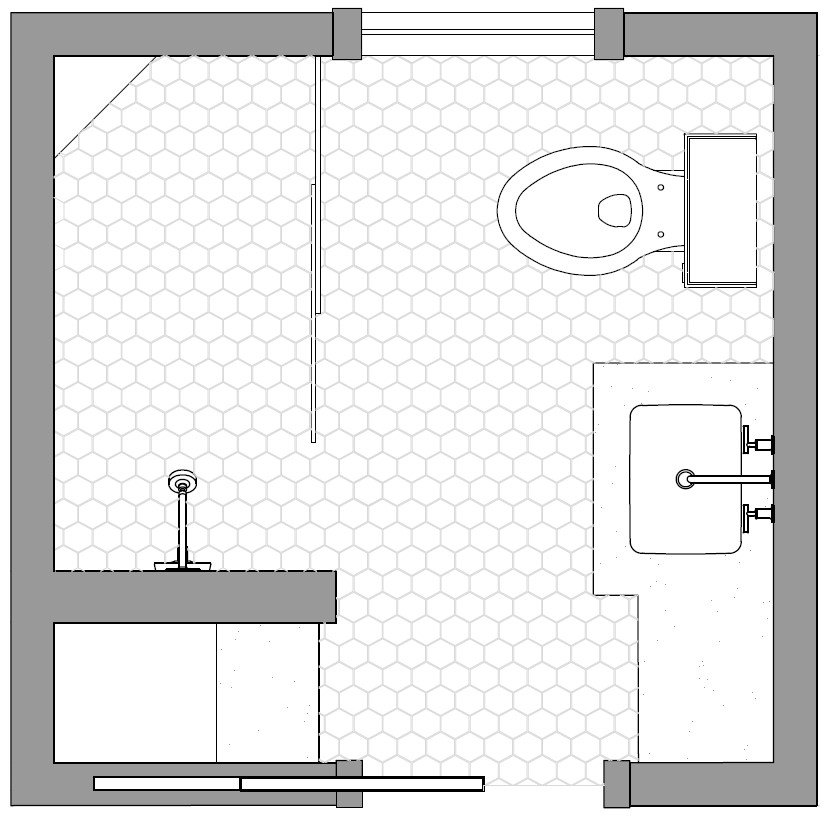
Schematic Design
The existing bathroom had many plumbing and electrical issues that required creative design solutions and relocation. The bathroom did not have one single electrical outlet. With so many modifications, the room had be completely gutted, down to replacing many of the studs.
During schematic design, we needed to ensure we were designing a bathroom with the design elements that were important for our clients: space, cleanliness, and functionality. Some of these elements we incorporated:
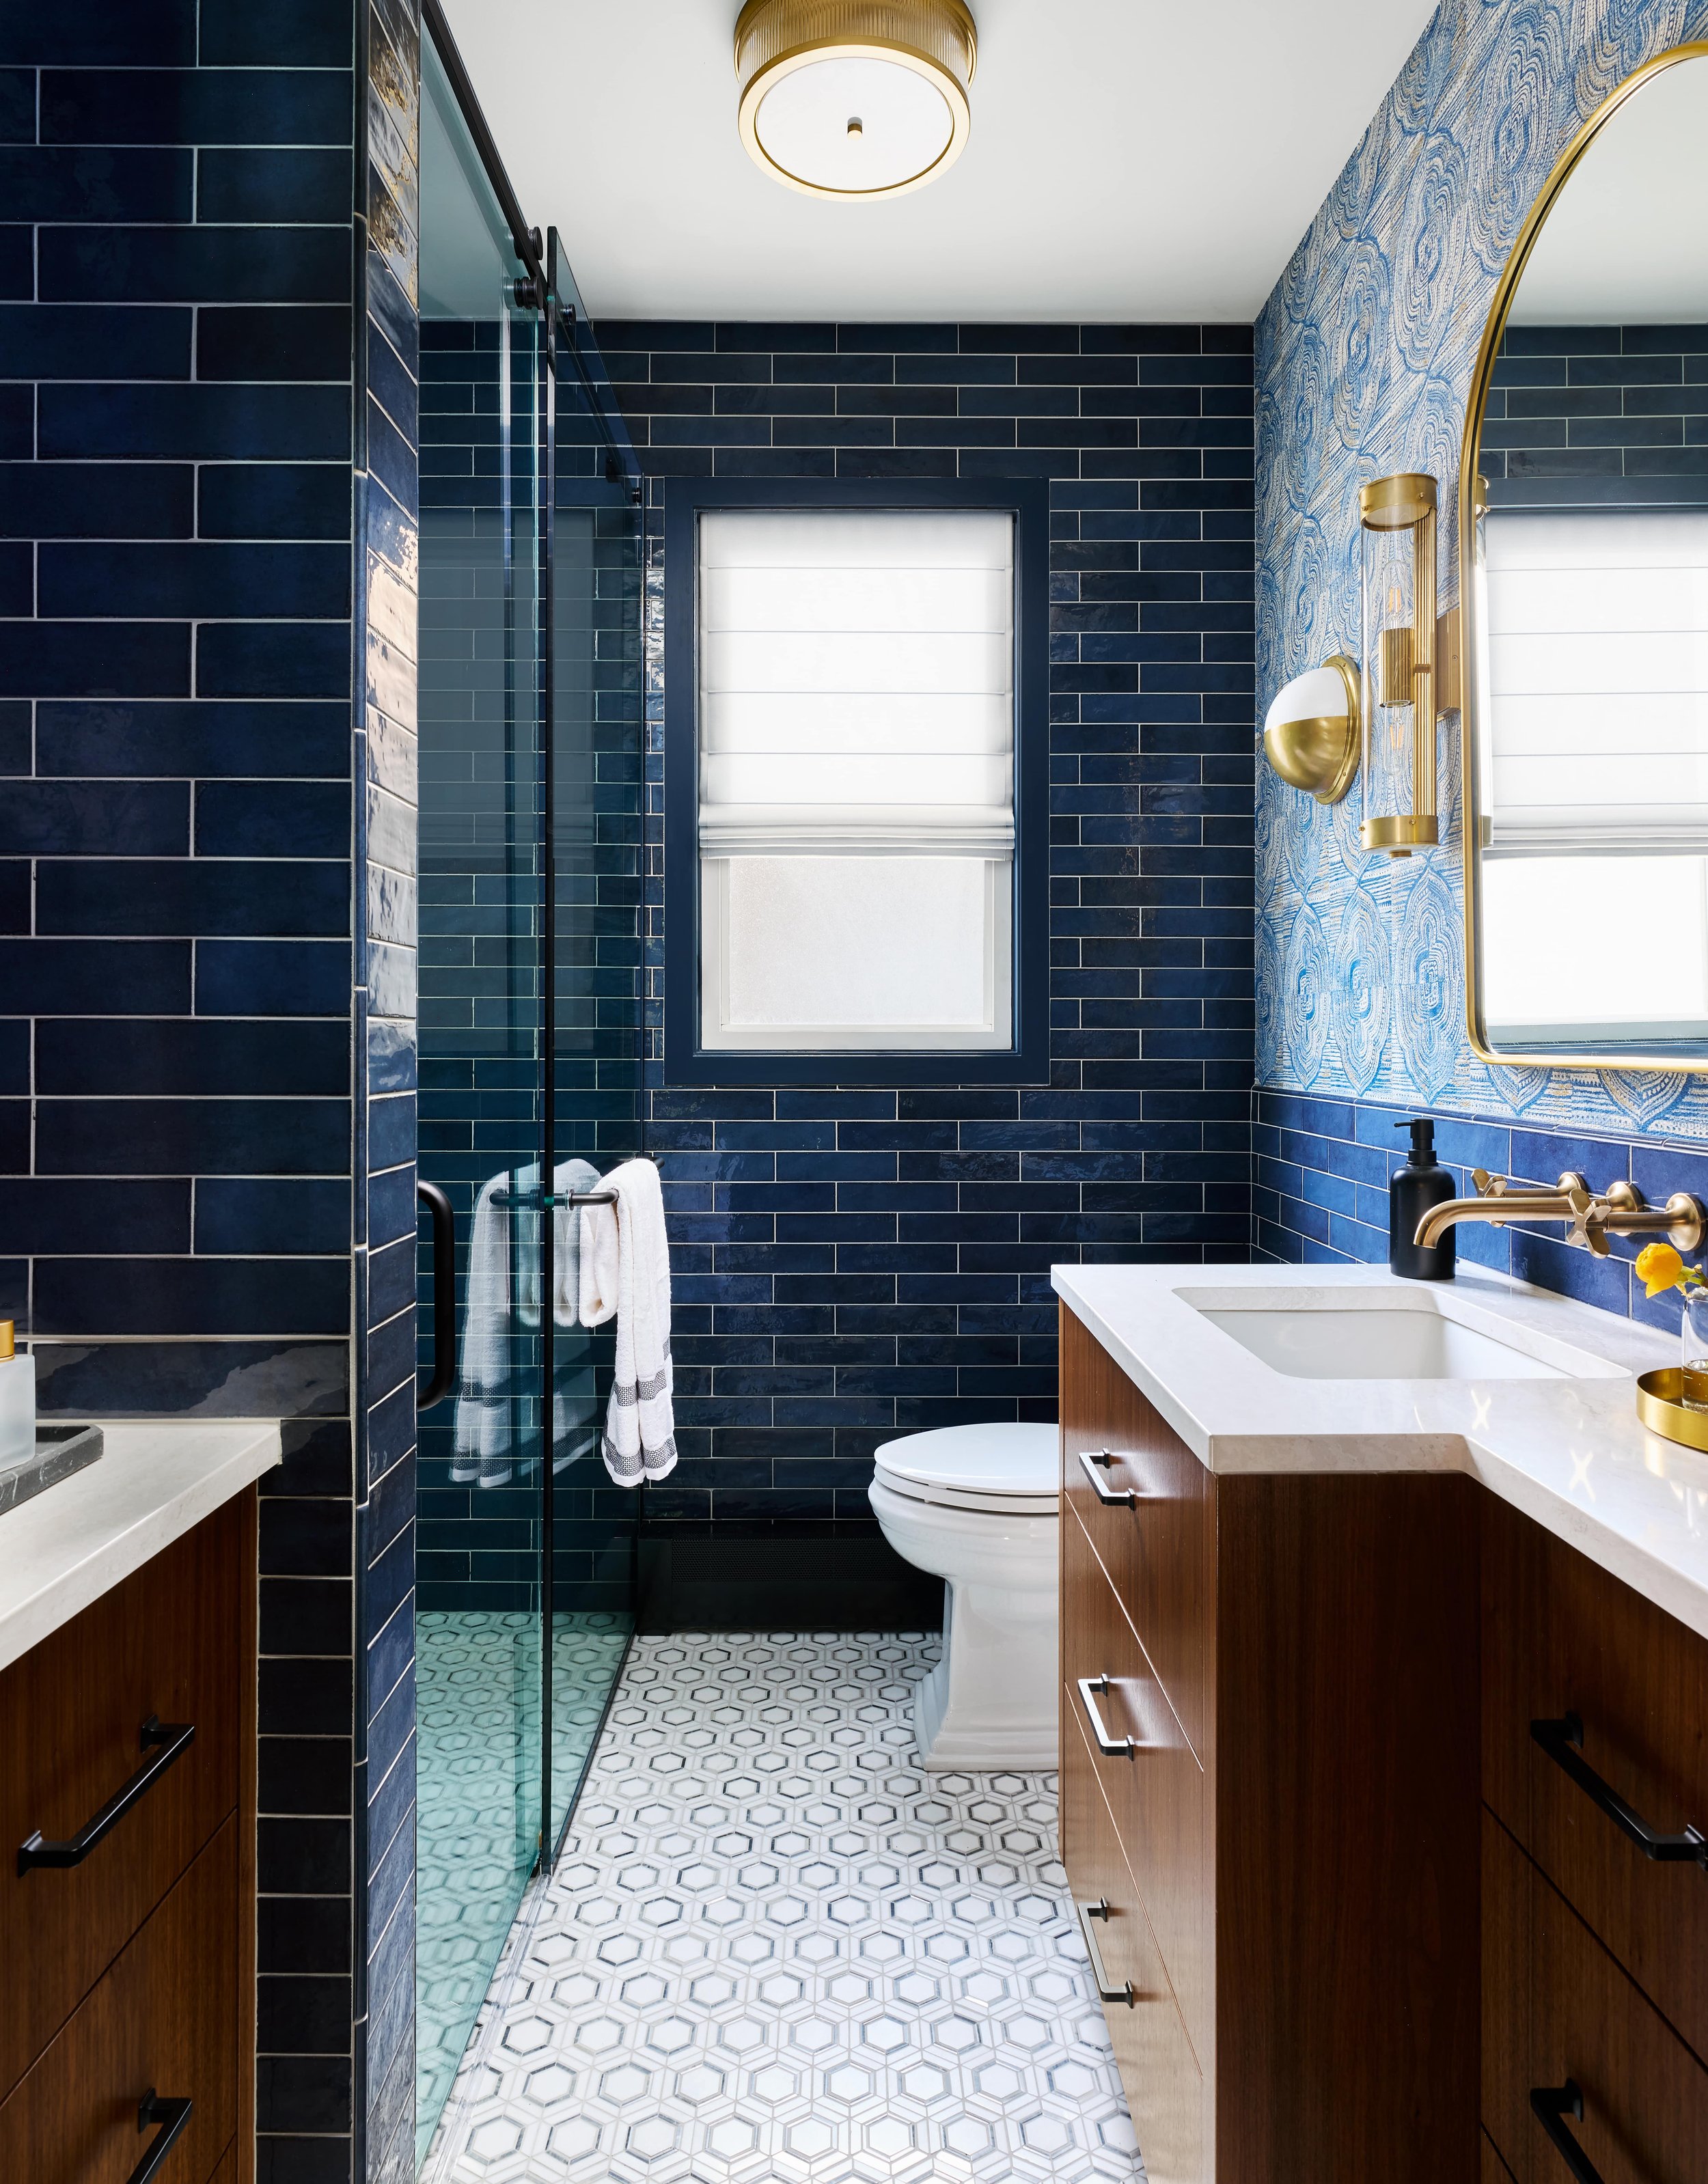
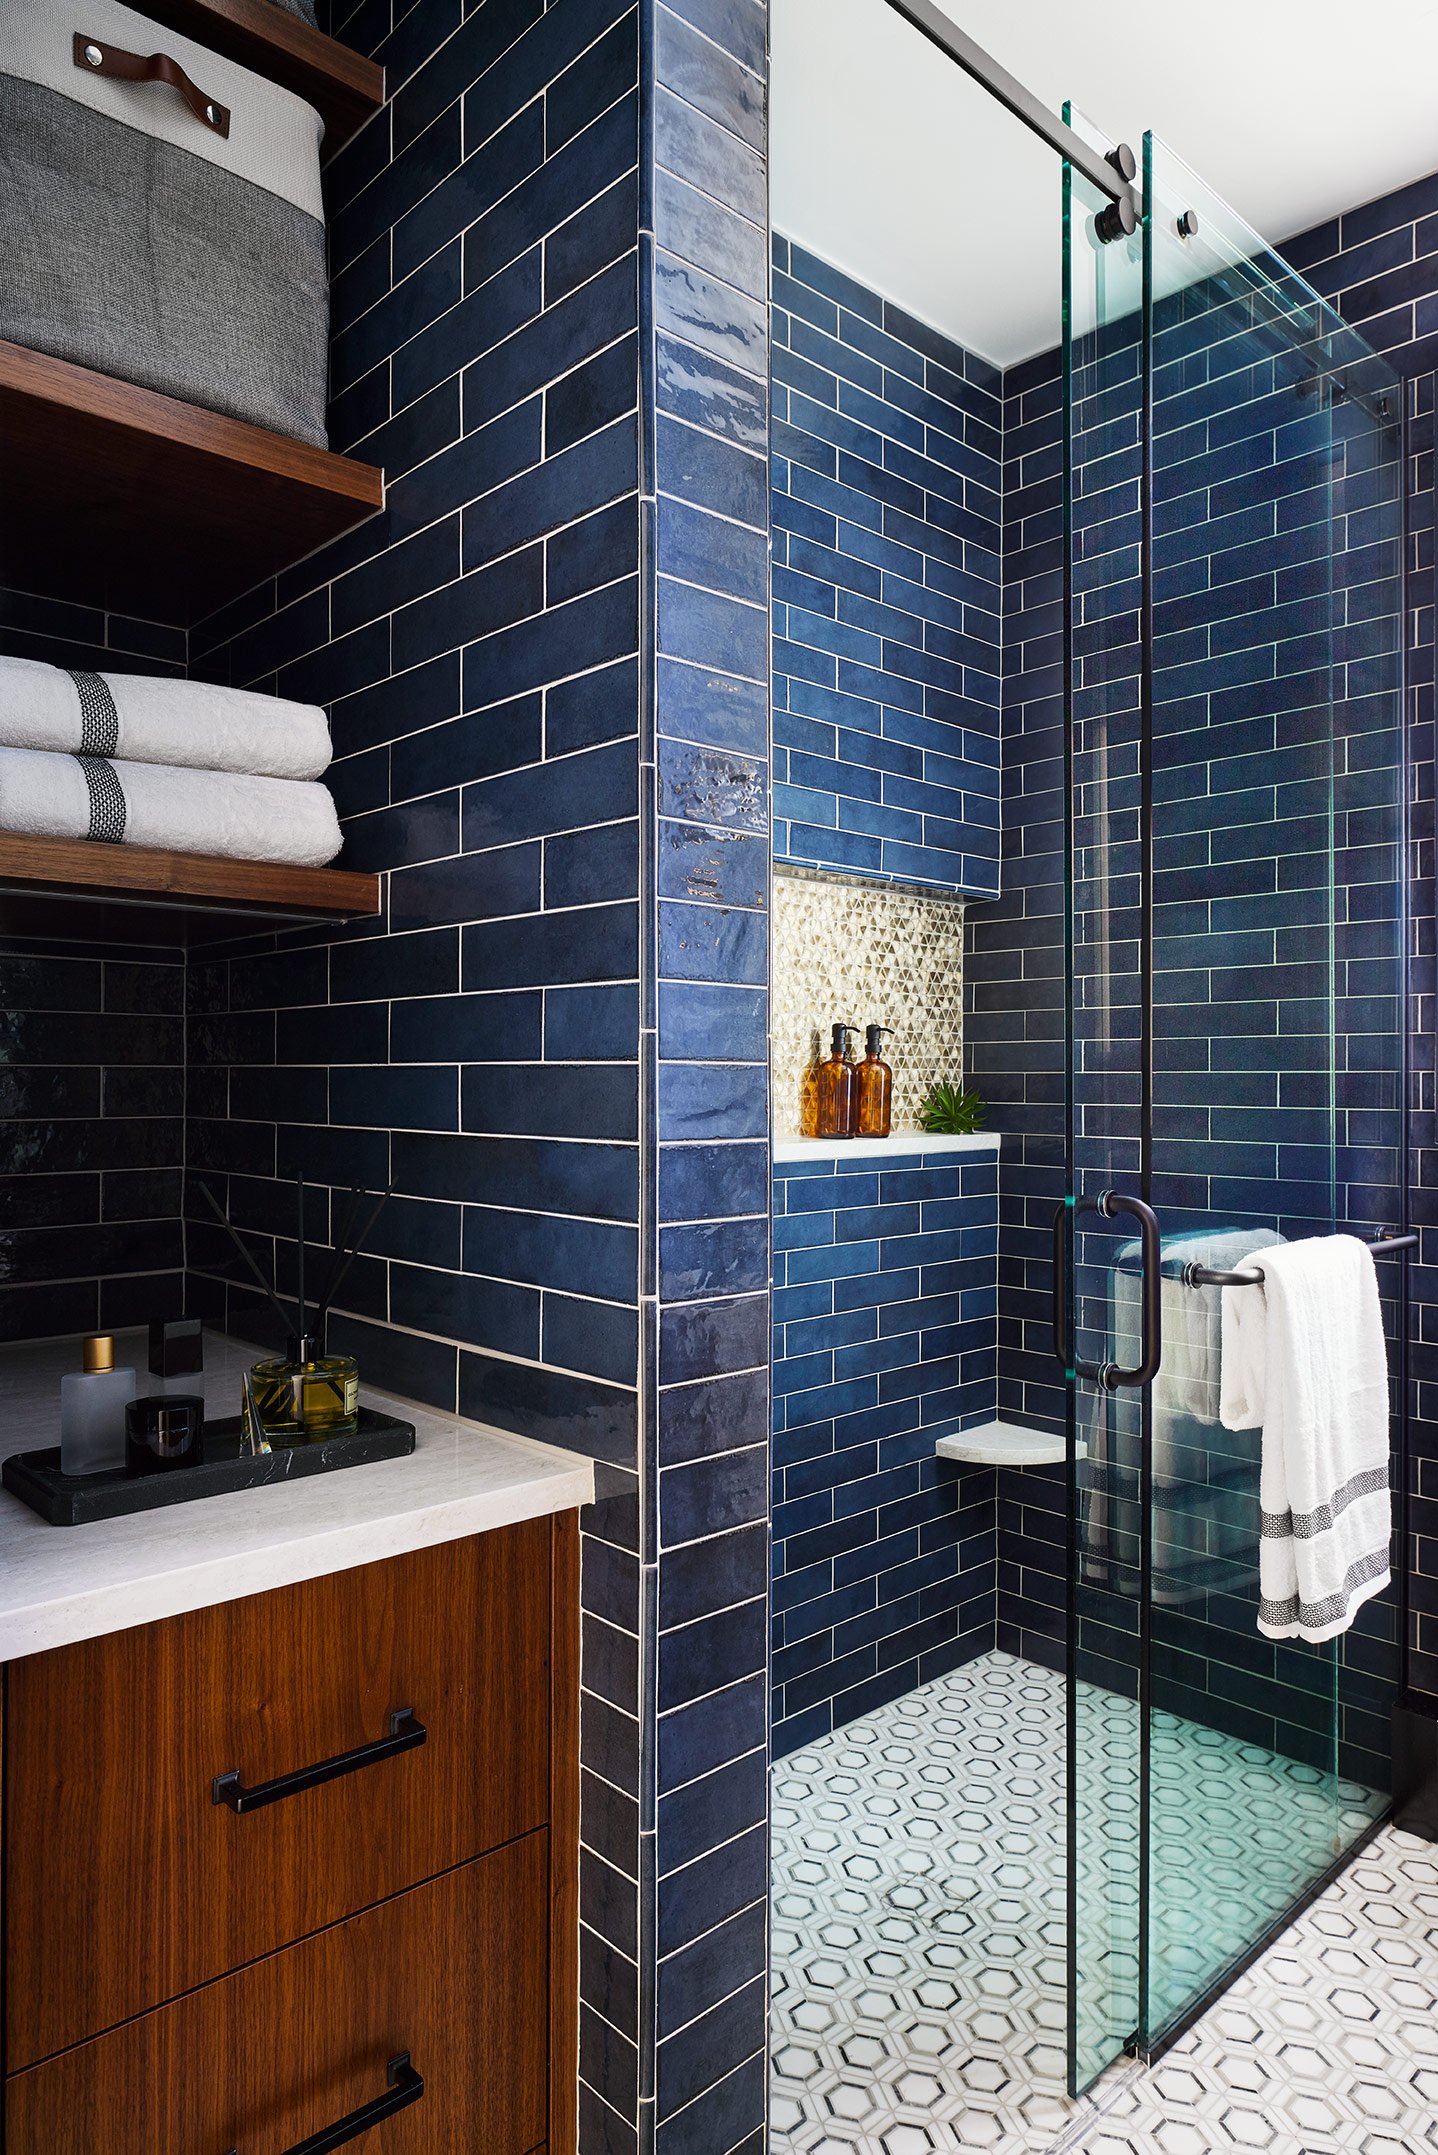
Shower Door: The sliding shower glass door allows for easy access to help their children with a handheld shower head.
Storage: We custom-designed a vanity and added lots of drawer storage and shelving to help our clients stay organized. This pedestal sink was not functional, it lacked counter space and storage and our clients had nowhere to keep their personal items.
Pocket Door: The new pocket door allows for more clearance in the room and didn’t block the storage area when the door is open.
Tall Ceiling: We also demoed the soffit to make the ceiling taller and more spacious. We removed the soffit over the shower which was truncating the room.
Shelving: Drawers and open shelves with baskets created much more functional and accessible storage for our client.
Outlets: New outlets on the left and right vanities.
Task Lighting: New LED Light strips under each shelf.


2. Design Development
In the design concept for this new space, we considered the client's two young children who often get water everywhere when showering. Easy cleaning was a priority and drove many of our design decisions when selecting materials.
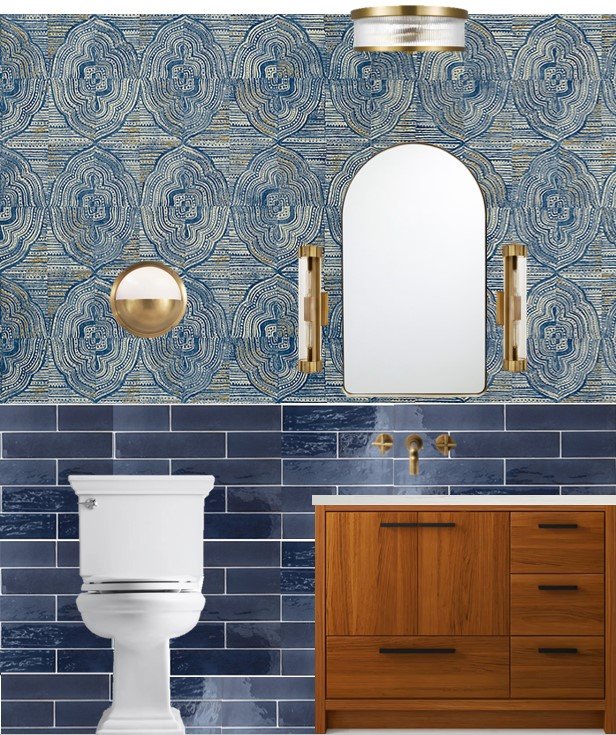
Vinyl Wallpaper: The vinyl wallpaper is wipeable, easy to clean, and adds a beautiful blue and gold rounded motif to the space creating a nice juxtaposition to the tile. This embossed vinyl, the nonwoven wallcovering is washable with just mild soap and water. Perfect for a busy family of four where durability and cleanability needed to be considered.
Quartz Countertop: A quartz countertop also allows for easy clean-up and durability. Additionally, the quartz countertops in this bathroom are manufactured in the United States from a responsibly mined quarry, recycling 100% of the water used from manufacturing and fabrication. It is also Greenguard certified for low VOC emissions and compliant with the Living Building Challenge.
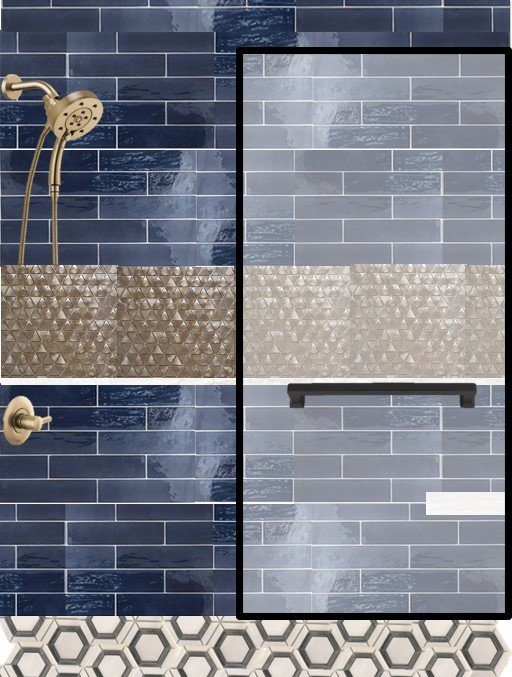
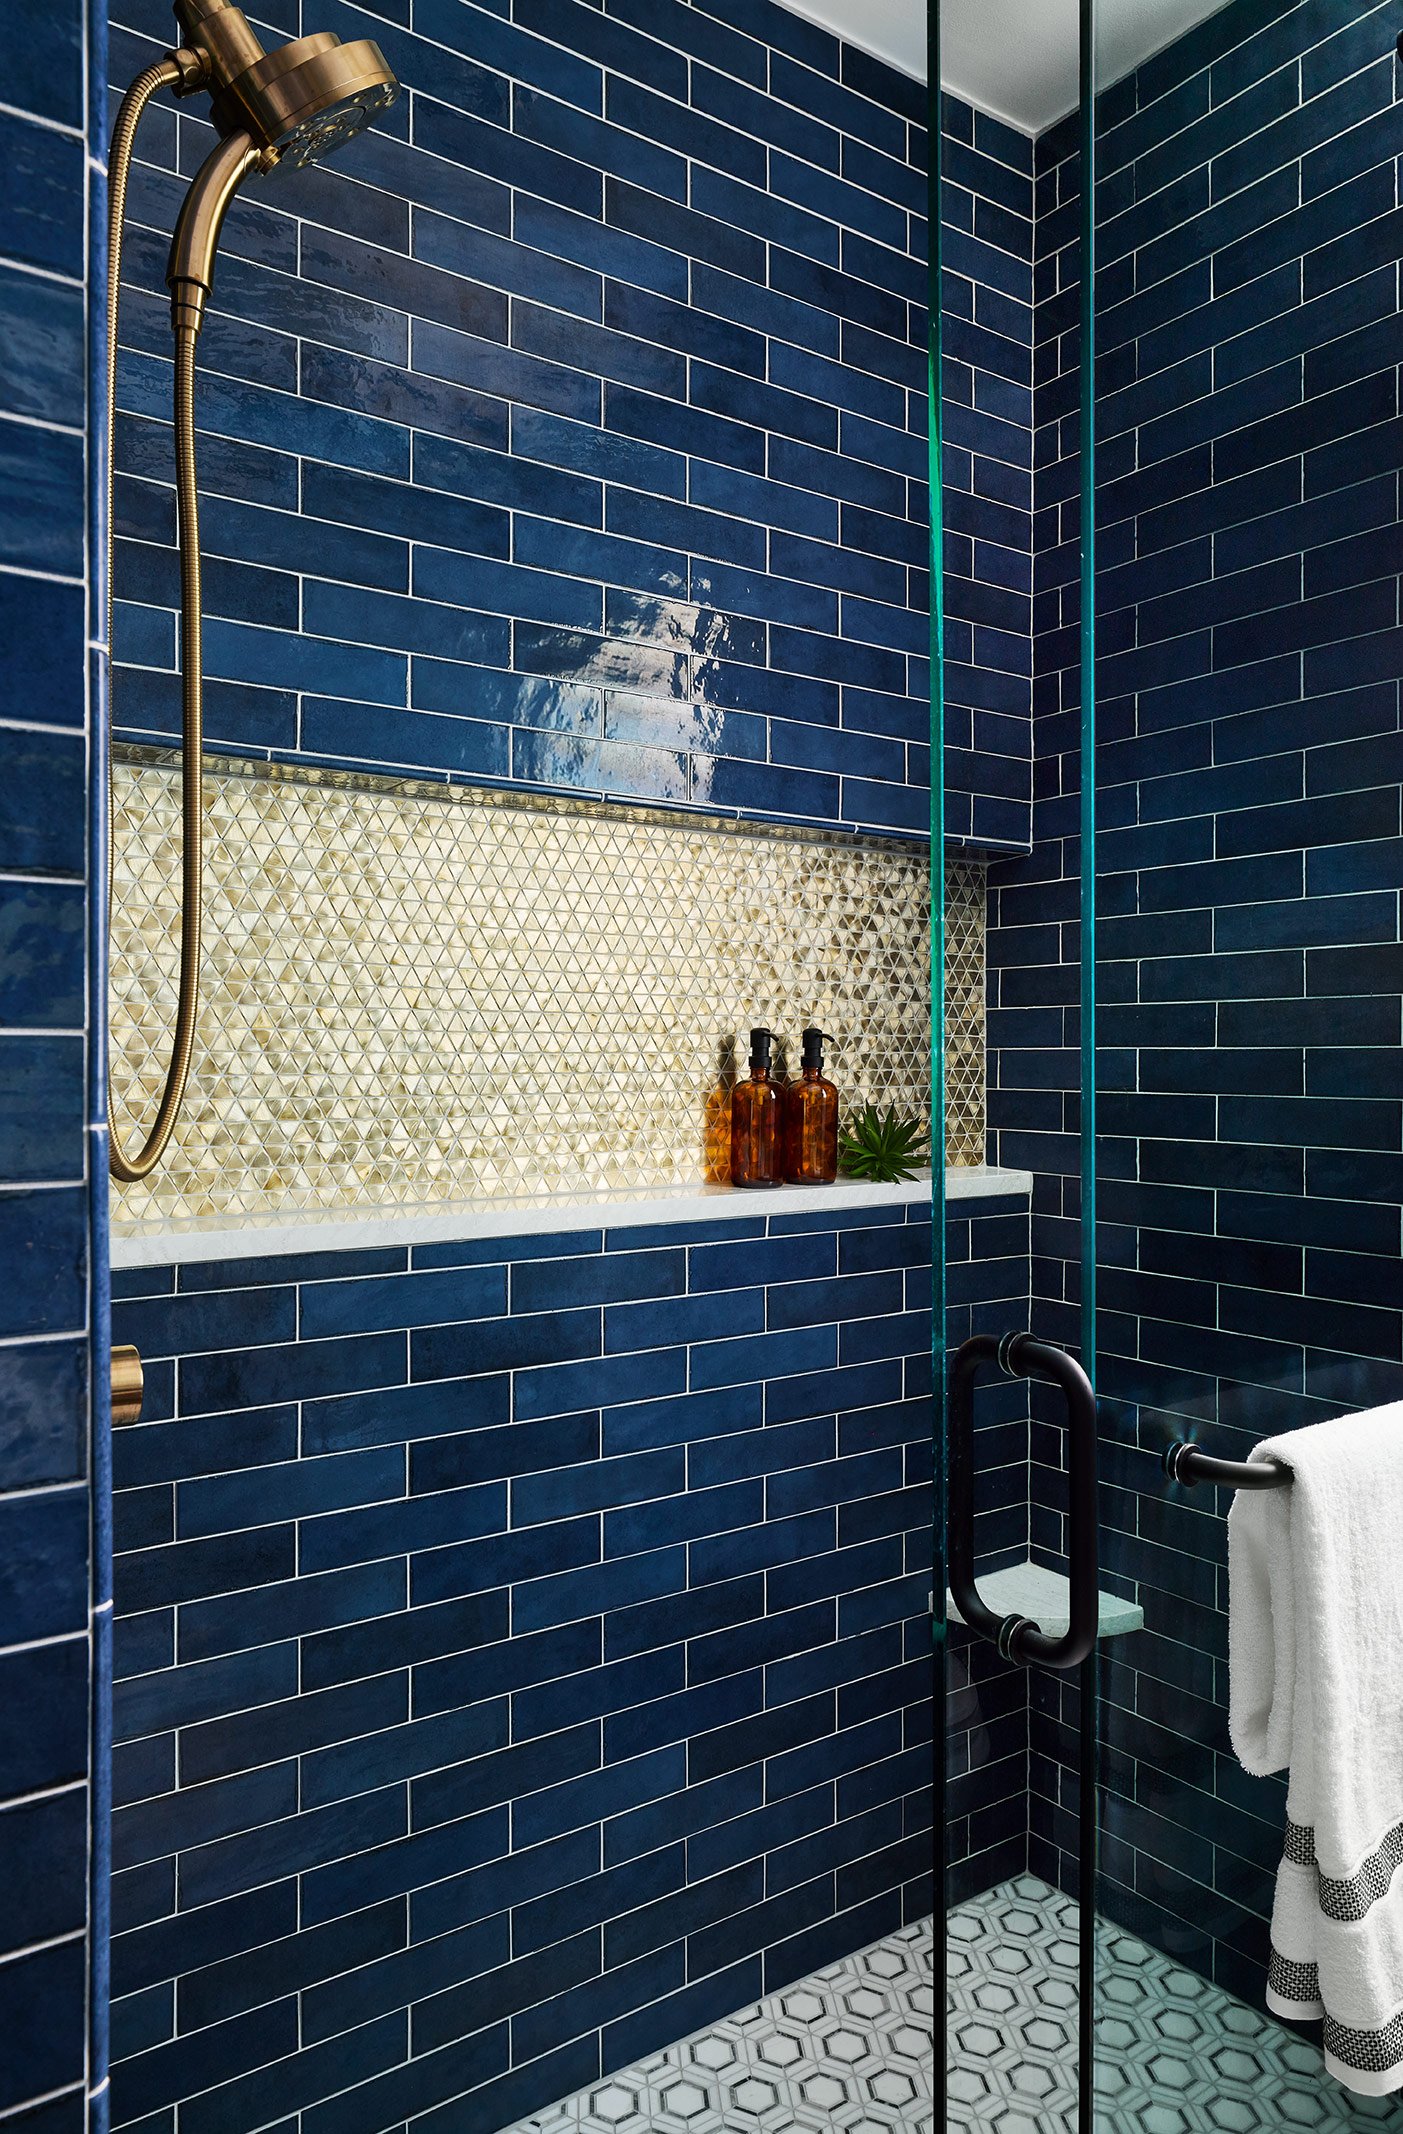
Shower Niche: With lots of bottles of soap for a family of four, having storage in the shower was a priority for our client. This built-in shower niche with geometric accent tile did just the trick with a touch of glam.
Additional design elements we incorporated:
Marble Tile: The marble hexagon tile brings in a beautiful traditional pattern, sealed for protection.
Custom Vanity Storage: The walnut vanity adds warmth to the space in addition to ample storage!
Wall Tile: The variegated blue artisanal tile wraps the room, complimenting a shimmering gold shower niche.
Layered Lighting: Enhanced lighting was another priority for this space. We incorporated layered lighting with overhead lights, sconces, shower fan/can combo, and under-shelf lighting.
Plumbing Technology: The shower head in this bathroom uses H2O Kinetic Technology which controls the water's shape, size, velocity, and thermal dynamics to produce a more luxurious water spray while conserving water. This shower meets WaterSense requirements and provides up to 40% water savings.


3. Facilitation and Installation
Making sure the design is executed properly is key. Our team walks the job site with the contractor, provides detailed drawings and specifications and inspects with work regularly. Check out some of our project progress shots!
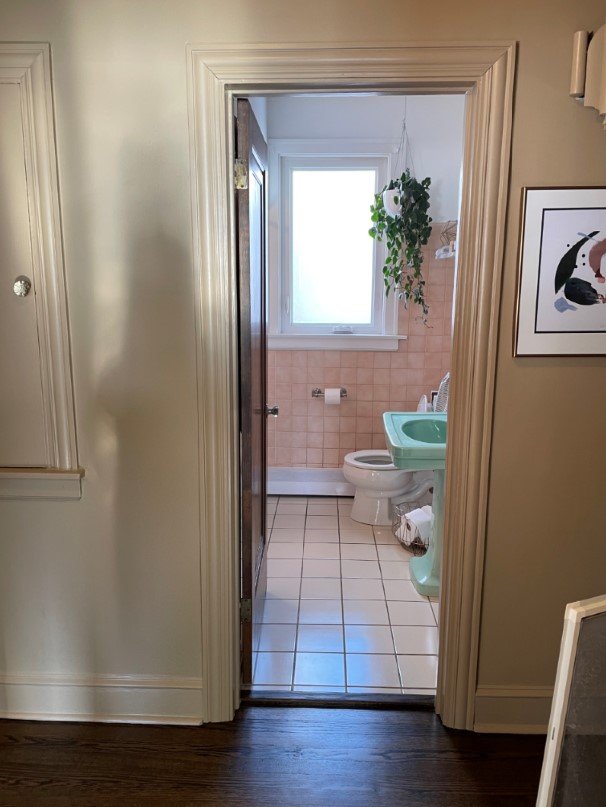

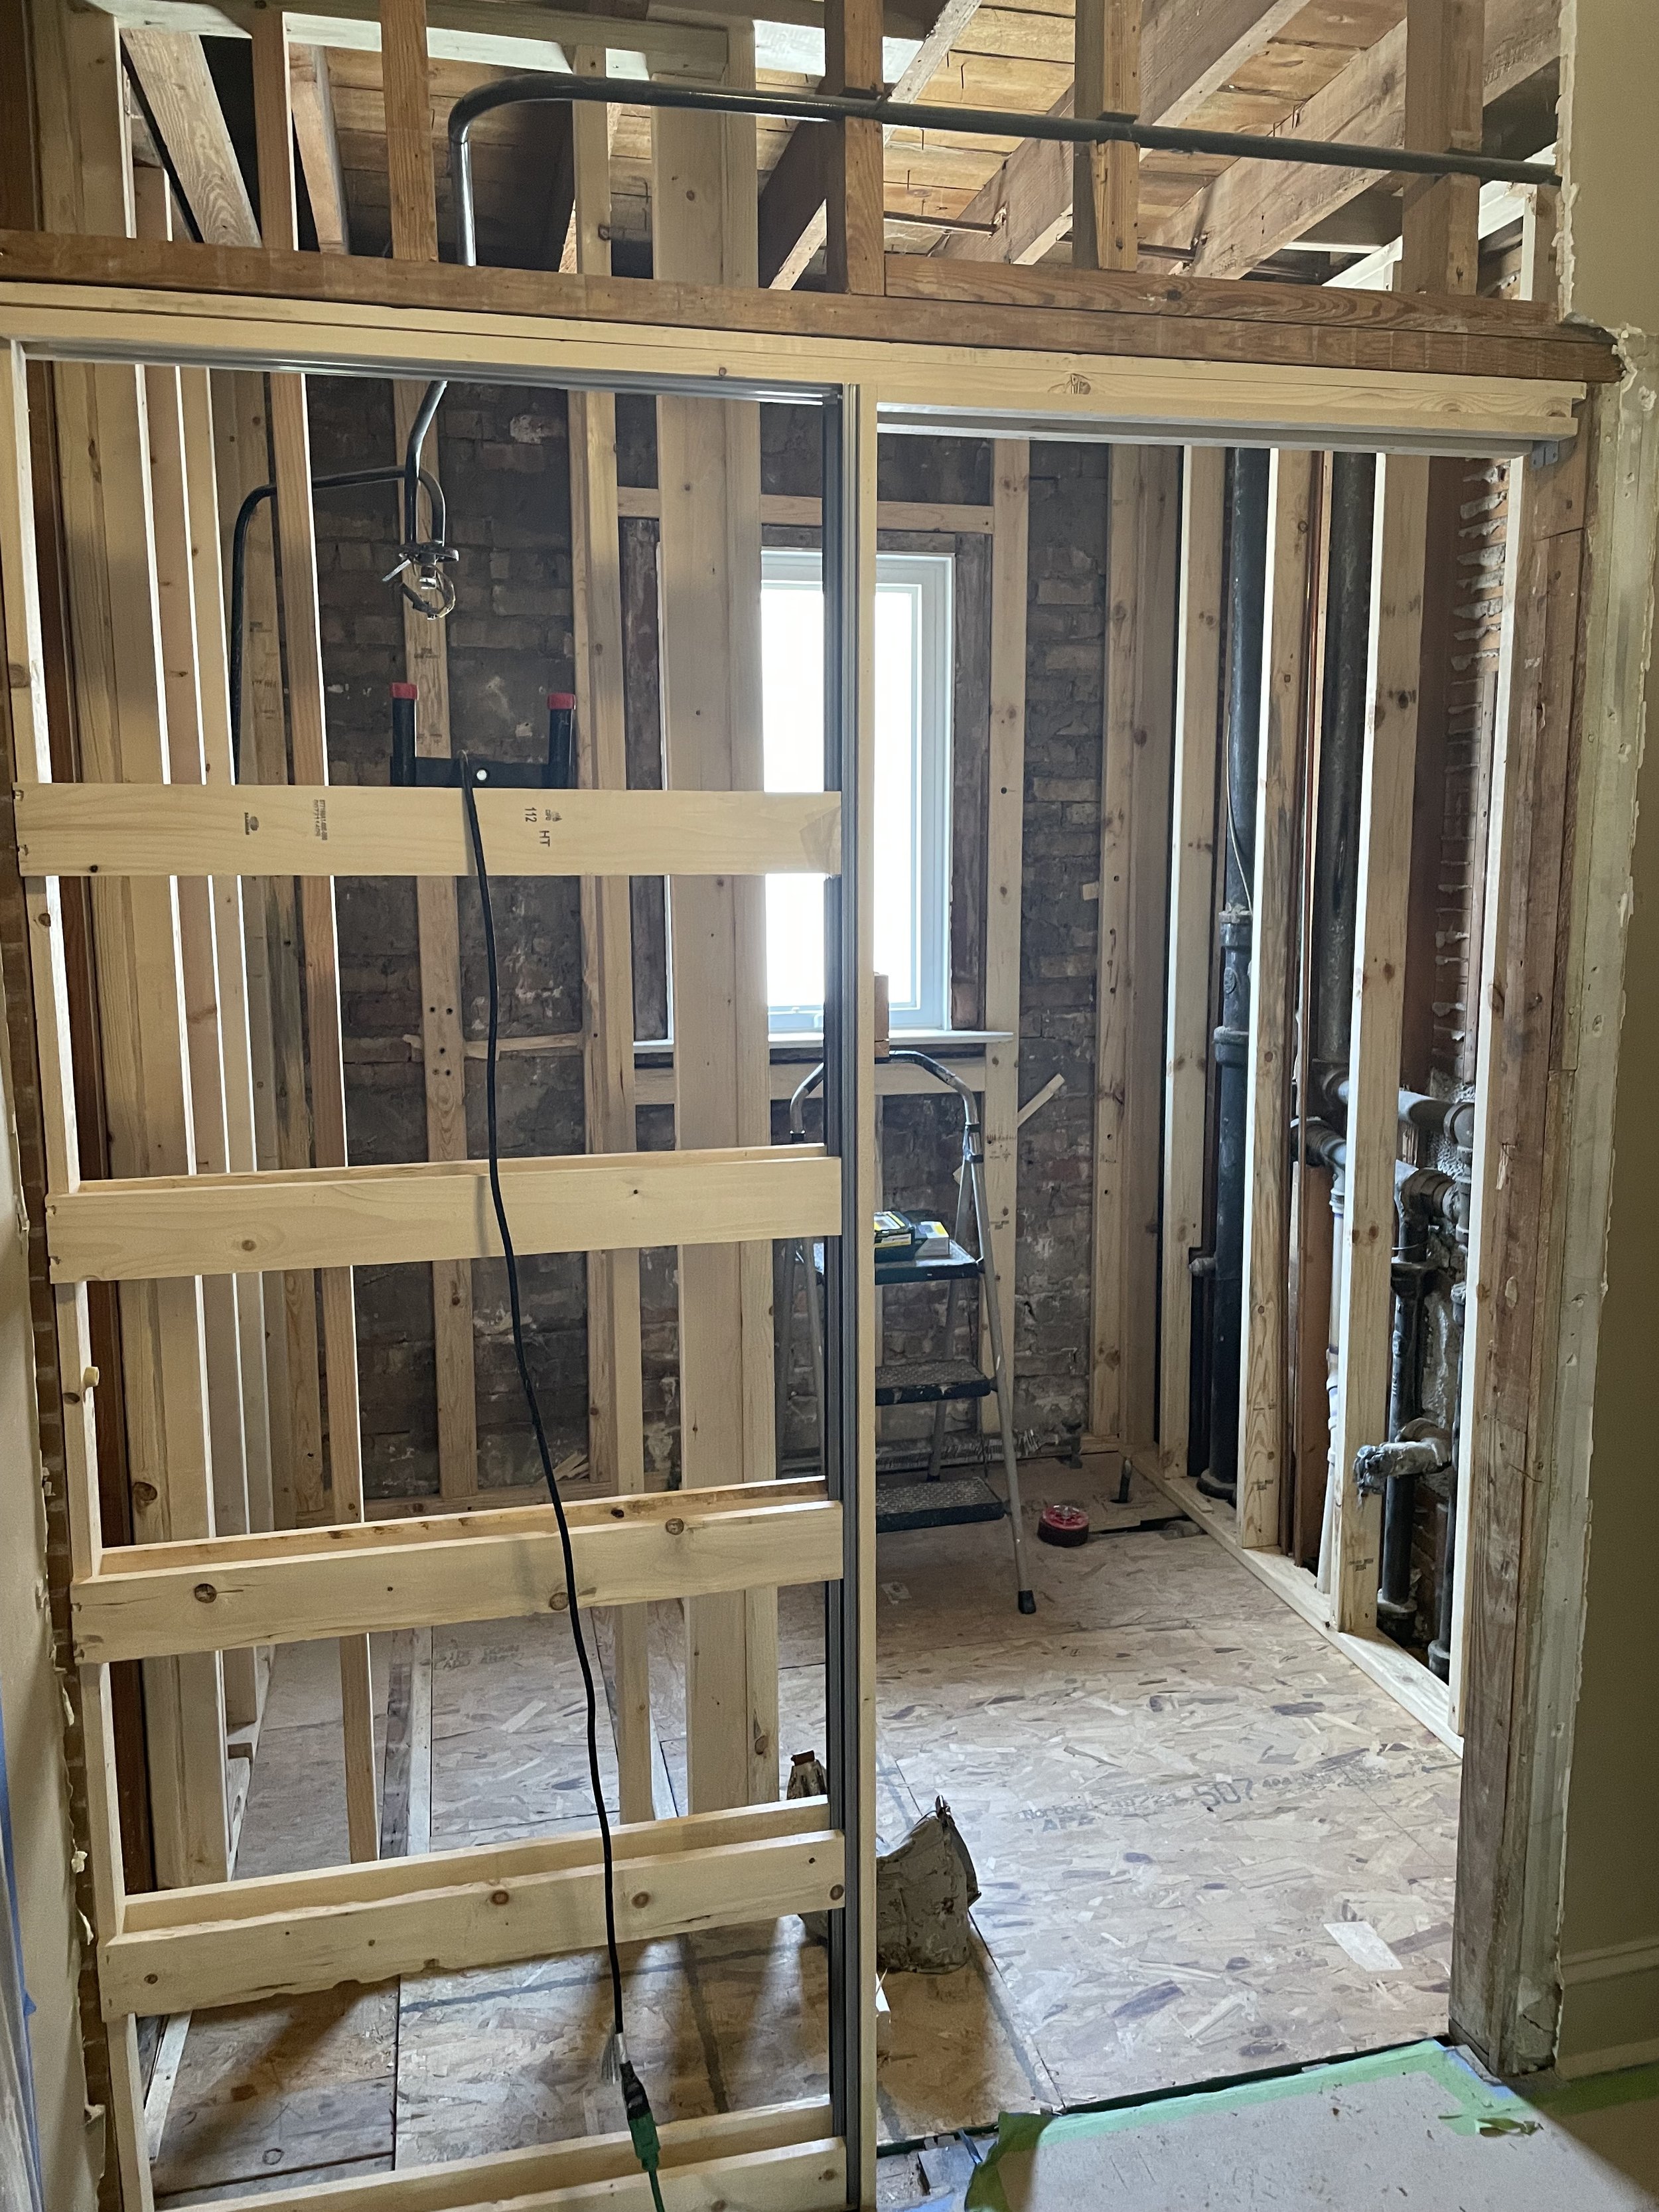
The Before and After Gallery

Making a difference
We took home 1st place in “Best Bathroom” at the ASID Illinois Design Excellence Awards in 2022 for this bathroom remodel.
Even more fulfilling than winning the award, we made our client happy. They absolutely love their new bathroom and we are so grateful that we could help improve their everyday life!
With more storage solutions, an easy access shower, convenient electrical outlets, and more maneuverability space, this new bathroom addressed so many basic everyday functions that the clients needed.
Aesthetically, the beautiful blue tile and wallcovering motif blends nicely with their family room decor and adds just the right charm to their vintage bungalow.
It’s always so gratifying as a designer when your vision comes to life, and this client was particularly fun to work with!
Ready for us to design you an award-winning bathroom?
Schedule a Design Discovery Call Today!

Our Top 5 Tips On How To Work With An Interior Designer
At Sarah Jacquelyn Interiors, we are committed to doing our research and educating the public on the ways that environmental and biological factors play a role in our health and wellness. Your wellness journey starts at home. Read on to learn how to design a wellness space, incorporating the seven WELL concepts for a healthier building.

What does an Interior Designer do?
Interior Design combines artistic and technical solutions to create beautiful spaces. It is the practice of making functional and aesthetically pleasing designs that enhance quality of life in living and working environments. Interior design incorporates space planning, circulation, furniture, lighting, finishes, fixtures, and supporting utilities in accordance with local codes and ordinances.
Designers create spaces that reflect their client’s lifestyles, establish a mood, complement the home's architectural features, and ensure function needs are met.
Additionally, an interior designer builds relationships with reliable suppliers, artisans, vendors, and contractors who carry out the design.


An Interior Designer Can Help You:
Realize your vision
Solidify your ideas
Create a comprehensive and well-planned project
Addresses your functional needs
Offers elegant and practical solutions
Navigate complex building codes and city ordinences
Coordinate with contractors
Ensure the job is done right
Help you stay on budget and schedule
Even if you have a clear idea of what you want your home to look like, an interior designer can help you bring it to life while making sure it is functional and well-planned. As a trained professional, an interior designer can come up with solutions that you might never have thought of as a result of their sharp eye and creative mindset. Paying attention to even the tiniest details will make your space look polished and put together.
Working with an interior designer can be intimidating and overwhelming, but ultimately, they are there to be your advocate and work alongside you to turn your home into an extension of who you are.
Read on to learn our top 5 tips for working with an interior designer.

5 Tips for working with an interior designer
Make Sure It’s A Good Fit
Establish Trust: You’re going to be spending a lot of time with your designer, so you need to trust them and build a relationship with them. They will often see a vision for your space that you’re not able to visualize that will be the perfect solution for your home.
It’s Not Always About Style: You’re not necessarily looking for style, many designers work in a variety of styles to meet their client’s needs. You’re not hiring that designer to duplicate work they have done for a previous client, you're hiring them to create a unique space for you!
Designers Are Your Advocate: They represent your best interest, make sure the contractors are following the drawings, and that the design is being executed accurately. They make sure the pricing is fair from vendors.


2. Be Upfront And Communicate
Creative Direction: Don’t put your designer in a box; Give them your taste and preferences without restricting their creativity. You are hiring them for a reason and they are the expert. Try using magazine pull-outs, Pinterest boards, etc. to provide some direction, even if you only have a hazy idea of what you want.
Have The Budget Conversation: Communicate and establish a budget early and be prepared to spend it. A good designer will educate you on realistic product costs for your project goals.
Focus Your Attention: Make time for your Interior Designer and try to eliminate any distractions during meetings.
Communicate Promptly: Replying to emails, phone calls, and making design decisions in a timely manner are essential to ensure accurate pricing and a seamless project.

3. Expectations
Do Your Homework: Complete any style or budget questionnaires that your designer sends.
Don’t Put On A Show: Leave your house messy, that’s how you and your family live! It’s our job to figure out functional solutions to solve those challenging issues like- never a place for your coat, shoes everywhere, and toys piling up in the living room. We can’t solve a problem if we don’t know it exists.
Don’t Rush Design: Your home is an investment, take your time to go through the process, listen to your designer, and be flexible with the timeline.
Products Get Delayed: Manufacturer back orders, shutdowns, and delays happen. Trust us, we are just as frustrated and on the phone trying to figure out what happened and when it will arrive. We would drive your new dining chairs here ourselves if we could. Lead times should be expected.

4. Utilize Their Skills and Resources
Eliminate Headaches: Your Interior Designer is the expert in design and project management; utilize them to manage all of the individual parties involved in your project (Contractors, Architect, Building Management, etc.) — you’ll thank them later!
The Best Contractors: Always hire contractors recommended by your interior designer. They have a substantial network of highly vetted and recommended tradespeople. Because your interior designer is ultimately the one who collaborates with them, you want someone you can rely on. They know what their contractors can and can’t do and if they can execute the design within your budget.
Trade Only Resources: Interior Designers have exclusive product resources like furniture showrooms, fabrics, and wallcoverings. They can put together a room with items completely unique. It is common for designers not to reveal their trade sources, as these are relationships that have been built and are not available to the general public.
5. Trust The Design Process
Construction Can Be Unpredictable: Recognize that design is not an exact science, it’s an art. It’s the designer’s responsibility to create the ideal plan and handle any problems that may arise, ensuring a smooth process.
See The Whole, Not Just The Parts: Some elements may come in sooner than others, don’t freak out if you’re not head over heels in love with the half-finished product. It’s about how all the pieces come together that makes the space great!
Don’t “Shop” Your Designer: We spend a lot of time developing and sourcing products for your design, so please be respectful. Many “discounted” or “dupe” items online are not as good of quality or even misprinted dye lots. We have your best interest at heart.
Design Experts: Interior designers are literally experts in interior design. You are hiring them for their intellectual property; it’s not a hobby, it’s a profession. Make sure to ask for your designer’s credentials when interviewing potential designers. Things to look for are National Council for Interior Design Qualification (NCIDQ), a Registered Interior Designer, Certified Interior Designer, and a College Education in an Interior Designer Program.
Most importantly, have fun with it! Leave your stress behind and trust your designer; allow yourself to be a little surprised, it’ll all be worth it.

Ready to turn your home into an extension of who you are?
Schedule a Design Discovery Call Today!

Get NCIDQ Certified in 2023!!
If you’re interested in learning more about the NCIDQ Exam, why it’s important, and how it can benefit you as a designer, you’re in the right place!


Hello! I’m so glad you are interested in learning more about the NCIDQ Exam! I’m Sarah Schwuchow, a Registered Interior Designer in Illinois and I passed the NCIDQ exam in the Spring of 2018.
I am also a CIDQ Ambassador, which means I help mentor exam candidates, educate students, and promote the value of NCIDQ certification to the public. I’m on a mission to help other designers pass the NCIDQ exam and become Registered Interior Designers!
If you’re interested in learning more about the NCIDQ Exam, why it’s important, and how it can benefit you as a designer, you’re in the right place!
It’s been 5 years since I earned my NCIDQ certification. This certification has benefited me in numerous ways, from opening my own business to having the confidence and knowledge to effectively communicate on a job site. This exam is not just for commercial interior designers; I use my NCIDQ knowledge every day as a residential interior designer and highly recommend all interior designers work towards this certification.
I always felt there was a need for more NCIDQ mentorship among the design community. After passing the exam, I looked into the CIDQ Ambassadors program where I could provide mentorship to candidates and educate Interior Design students on the value of the NCIDQ exam. I strive to be a resource to other designers, sharing my NCIDQ journey and encouraging them to take the exam.
I have helped many aspiring designers work towards this certification as well. In 2019 I created a study group through ASID to help designers pass the NCIDQ exam. Since then, the group has grown and we now partner with IIDA IL to broaden our reach.
Just starting to think about taking this exam can be a daunting task in itself! I’m here to help break down the requirements and get you on track for taking the exam. Keep reading below for step-by-step instructions on how you can become NCIDQ Certified.
Please note - the statements on this website are my own and not a reflection of CIDQ as an organization. This blog post is intended to be a supplementary guide for your NCIDQ journey. Please visit CIDQ.org for more information regarding qualifications, expectations, current prices, etc. Familiarize yourself with the CIDQ website, eligibility requirements, application process, registration process, and important dates and deadlines!
Application deadline
Applications for the Spring 2023 Exam needed to be
submitted by January 31st and July 31st for the Fall 2023 Exam.
Do NOT submit your application until you are ready to begin sitting for the NCIDQ Examination. Your testing windows are based on application approval.

What is NCIDQ Certification and Who is CIDQ?
CIDQ History
CIDQ was created by the American Institute of Interior Designers (AID) and the National Society of Interior Designers (NSID) in the late 1960s. The group officially incorporated as a not-for-profit in 1974 and was the basis for issuing credentials to Interior Design professionals. The AID and NSID would eventually merge to become what is now the American Society of Interior Designers. CIDQ went on to run as an independent organization, which administers the NCIDQ exam
What Does NCIDQ Mean?
The NCIDQ exam stands for the National Council for Interior Design Qualification. This is a globally recognized exam and the highest standard an Interior Designer can earn. The NCIDQ Exam was created by the Council for Interior Design Qualification (CIDQ). Once you pass all three sections (IDFX, IDPX, Practicum) of the the NCIDQ Exam, you become an NCIDQ Certificate Holder. You can then use the NCIDQ appellation after your name: Sarah Schwuchow, NCIDQ. The exam is offered for the entire months of April and October at Prometric Testing Centers. All three sections of the exam are now computerized.
Why Does NCIDQ Certification Matter?
NCIDQ Certification matters because it is an indicator of our proficiency and knowledge.
The Interior Design profession is still relatively young at only about 100 years old.
We are still working towards reasonable regulation, the title acts, practice acts, stamping abilities, and legislative rights for our profession.
NCIDQ Certification helps to create a standard to ensure designers have the knowledge, education, and experience to create spaces that meet codes, regulations, ADA requirements, health, safety, and welfare.
I am proud to be an NCIDQ Certified Interior Designer that can contribute to the development of the Interior Design profession as a whole.
From a legislative standpoint in Illinois, it is critical that we ensure the “Registered Interior Designers Act'' stays in effect, as many legal benefits come with this title such as lien rights.
In 2022, a major advancement in our profession was made. Governor Pritzker signed historic legislation that establishes practice rights for interior designers in Illinois. Read more Here.

10 Reasons Why You Should Take the NCIDQ Exam
NCIDQ Certification sets you apart from unqualified designers and decorators.
It is an indicator of your proficiency and knowledge.
NCIDQ Certification shows your commitment to the Interior Design profession.
You’ll earn respect among your colleagues, employers, and clients.
You’ll have the potential to earn more money and promotions, as many firms require NCIDQ Certification.
Increasing the number of registered/licensed designers elevates our profession.
NCIDQ Certification helps with legislation and Interior Design rights.
In Illinois, you must be an NCIDQ Certificate Holder to become a Registered Interior Designer, which gives you lien rights and practice rights now!
Registered Interior Designers in Illinois now have the right to file liens. Unregistered designers and decorators do not hold this right.
“To date, more than 30,000 people around the world have earned NCIDQ Certification, the gold standard for interior design professionals” (CIDQ.org).
What’s on the NCIDQ Exam?
“The strenuous requirements of the NCIDQ Examination give clients and employers added confidence in the caliber of work from NCIDQ Certified designers” (CIDQ.org).
The NCIDQ examination is no walk in the park. The level of difficulty proves that an NCIDQ designer possesses the knowledge and expertise for building systems, codes, construction standards, contract administration, design application, professional practice, and project coordination.
The exam is broken down into 3 parts: Interior Design Fundamentals (IDFX), Interior Design Professionals Exam (IDPX), and Practicum. Each section measures a candidate’s knowledge and proficiency on different topics related to health, safety, and welfare. All exams are taken during the entire month of April and October. Applicants have five years to complete all three exams.
Fundamentals Exam (IDFX)
Eligibility: Candidates can take this part of the exam before completing their work experience hours. This exam can be taken as early as a student’s final year of school for a Bachelors's or Masters's program.
Exam Format: 125 multiple-choice questions (100 Scored and 25 Pilot Questions)
Exam Length: 3 Hours
Application Fee for IDFX Only: $95.00
Registration Fee: $295.00
Testing Location: Remote Protectoring or Prometric Facility
Passing Score: 500 (Scores are weighted and on a scale of (200-800)

Professional Exam (IDPX)
Eligibility: Candidates must complete their education and work hours before applying for this exam. *WORK EXPERIENCE IS CHANGING IN 2024
Exam Format: 175 multiple-choice questions (150 Scored and 25 Pilot Questions)
Exam Length: 4 Hours
Application Fee for IDPX and Prac Only: $145.00
Application Fee for all 3 Sections: $225.00
IDPX Registration Fee: $355.00
Testing Location: Remote Protectoring or Prometric Facility
Passing Score: 500 (Scores are weighted and on a scale of 200-800)

Practicum (PRAC)
Eligibility: Candidates must complete their education and work hours before applying for this exam. *WORK EXPERIENCE IS CHANGING IN 2024
Exam Format: 114 Questions (105 scored, 9 Pilot Questions), Interactive computerized exam consisting of 3 case studies: large commercial, small commercial, and multi-family residential. No AutoCAD, or Hand Drawing.
Exam Length: 4 Hours
Application Fee for IDPX and Prac Only: $145.00
Application Fee for all 3 Sections: $225.00
Practicum Registration Fee: $460.00
Testing Location: Prometric Facility
Passing Score: 500 (Scores are weighted and on a scale of 200-800)

How Long do I have to Take the Exams?
ALL THREE SECTIONS: Must be passed within 10 exam administrations ( About 5 Years)
IDFX ONLY: Must be passed within 4 exam administrations + IDPX & PRACTICUM (2nd stage for IDFX ONLY applicants): Must be passed within 10 exam administrations.
Exam testing windows are April and October
Ready to Take the Exam?
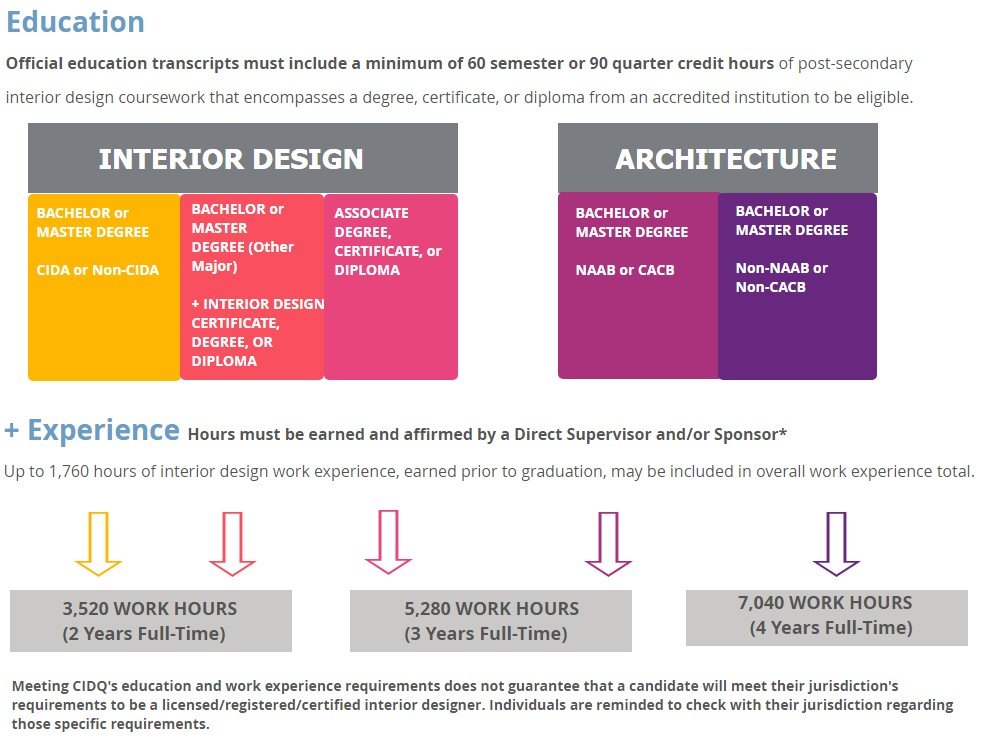
Step 1: Eligibility Requirements
First things first—are you qualified to take the NCIDQ Exam? Visit the CIDQ website for full eligibility path requirements based your education and work experience. Work Experience will be changing for 2024!

Step 2: Create an Account
Before you can apply, you must create an account with CIDQ. Click here to register and then log in with instructions received in your email. If you have trouble, email inquiries@cidq.org for help.

Step 3: Applying for the Exam
There are two route options for applying for the NCIDQ Exam:
Option 1: Apply only for the IDFX. If you apply just for the IDFX now, you will need to submit another application for the IDPX and Practicum once you finish your work experience hours.
Application Fee for IDFX only: $95.00 (Second application for IDPX and Prac will be $145.00)
Option 2: Apply for all three sections.
Application Fee for all 3 Sections: $225.00
Applications are a one-time fee. Your application will also require you to submit an official transcript from your institution and your work experience (for IDPX & Practicum). Make sure you leave enough time for your sealed official transcripts to arrive, as any incomplete applications will not be considered after the deadline and you’ll have to wait until the next testing season.
Step 4: Registering and Scheduling Your Exam
Once your application has been approved, you will receive an email notifying you that you that can register for the exam and schedule a date at a Prometric Testing Center. Make sure to register early so you can lock in your preferred exam date!
From this point, you have 10 testing windows to pass all three sections of the NCIDQ exam. If you are only taking the IDFX, you must pass that exam within 4 exam windows. The second stage (IDPX and Practicum) must then be completed within 10 testing windows. Any scores older than 5 years are automatically voided. Registration fees occur each time you take an exam.
Exam Fees
IDFX: $295.00
IDPX: $355.00
PRAC: $460.00
Step 5: Studying
Make sure you leave yourself adequate time to study for this exam. I recommend at least 10 weeks and join a study group. Qpractice are ID Conquer are a great online resource to help you stay on schedule. Stay tuned for my upcoming blog post on my tips and tricks for studying for the NCIDQ Exam!


Join the more than 30,000 people around the world that have earned their NCIDQ Certification!
“Sarah has so much valuable knowledge and creativity to share as a designer. She will take the time to sit down and explain everything no matter what phase of the design process you are in. Sarah played a huge role in my success while studying for the NCIDQ. She was enthusiastic, motivating and genuinely cared. Working alongside Sarah and her team will make the entire process a positive and memorable experience!”

Reduce Stress in 2023 with a Dedicated Wellness Room
At Sarah Jacquelyn Interiors, we are committed to doing our research and educating the public on the ways that environmental and biological factors play a role in our health and wellness. Your wellness journey starts at home. Read on to learn how to design a wellness space, incorporating the seven WELL concepts for a healthier building.


Health and wellness at home
One of my passions as an Interior Designer is understanding how our environment can impact our health and well-being. During 2020, one of my hobbies became indoor gardening, which quickly grew into a full room being taken over by 50+ plants. Since then, I have moved to a new home where I have built a Wellness Room into my personal garden oasis.
In today’s world, staying healthy in body and mind can be challenging. We’re constantly being faced with something that throws our balance off and this in turn affects our quality of life. Being able to improve your self-care in the convenience of your home is priceless.
Excess clutter and a home that is in constant disarray can lead to a closed-in feeling and induce more anxiety. Designating an area in your home for a place to chill out can help clear your mind and reduce stress. It’s important to keep in mind environmental and biological factors when designing a wellness space. This space should be more than a place to retreat back to relax after a long day; it should also be a space that promotes health and wellness for your body.
I have always been interested in understanding how the environment can impact health and well-being. WELL is a commitment to advancing human health in buildings and communities, using evidence-based medical research by scientists, medical professionals, wellness teachers, and architects.
At Sarah Jacquelyn Interiors, we are committed to doing our research and educating the public on the ways that environmental and biological factors play a role in our health and wellness.
Your wellness journey starts at home. Read on to learn how to design a wellness space, incorporating the seven WELL concepts for a healthier building.

10 Steps to Creating Your Wellness Room

AIR: Get an Air Purifier
We spend 90% of our time indoors, therefore indoor air quality is vitally important. Indoor air quality issues can diminish work productivity, and overall health, and cause sick building syndrome.
An air filter with an activated carbon filter can absorb pollutants and VOCs. Here’s my favorite: LEVOIT Air Purifiers
2. WATER: Reduce Contaminants with a Water Filter
Clean drinking water is vital for optimal health. Water helps our body transport nutrients and waste, regulates temperature, and serves as a shock absorber for the brain.
Lead and mercury in our drinking water have been linked to developmental delays, learning disabilities, high blood pressure, and kidney problems.
Organic contaminants like Benzene and PCBs are linked to cancer, immune deficiencies, and nervous system difficulties.
Carbon filters like Brita are effective at removing these and other harmful chemicals.
3. HOBBIES: Food for Your Soul
It’s important to give yourself permission to spend time doing things you love. They help you clear your mind, relax, reduce stress, and can give you feelings of great satisfaction.
Your wellness room is a great place to create a hobby area that can help improve your quality of life. Hobby spaces can be anything you want. A large table to work from is important if your hobby includes puzzles or building Legos.
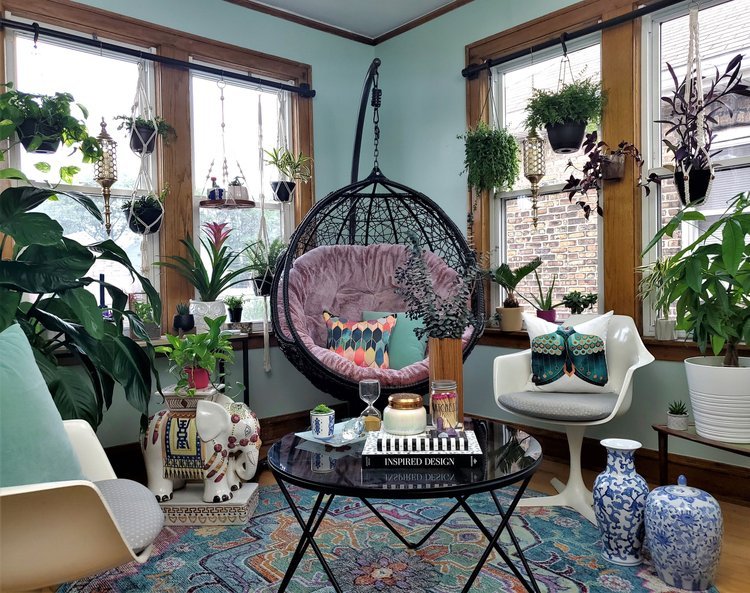
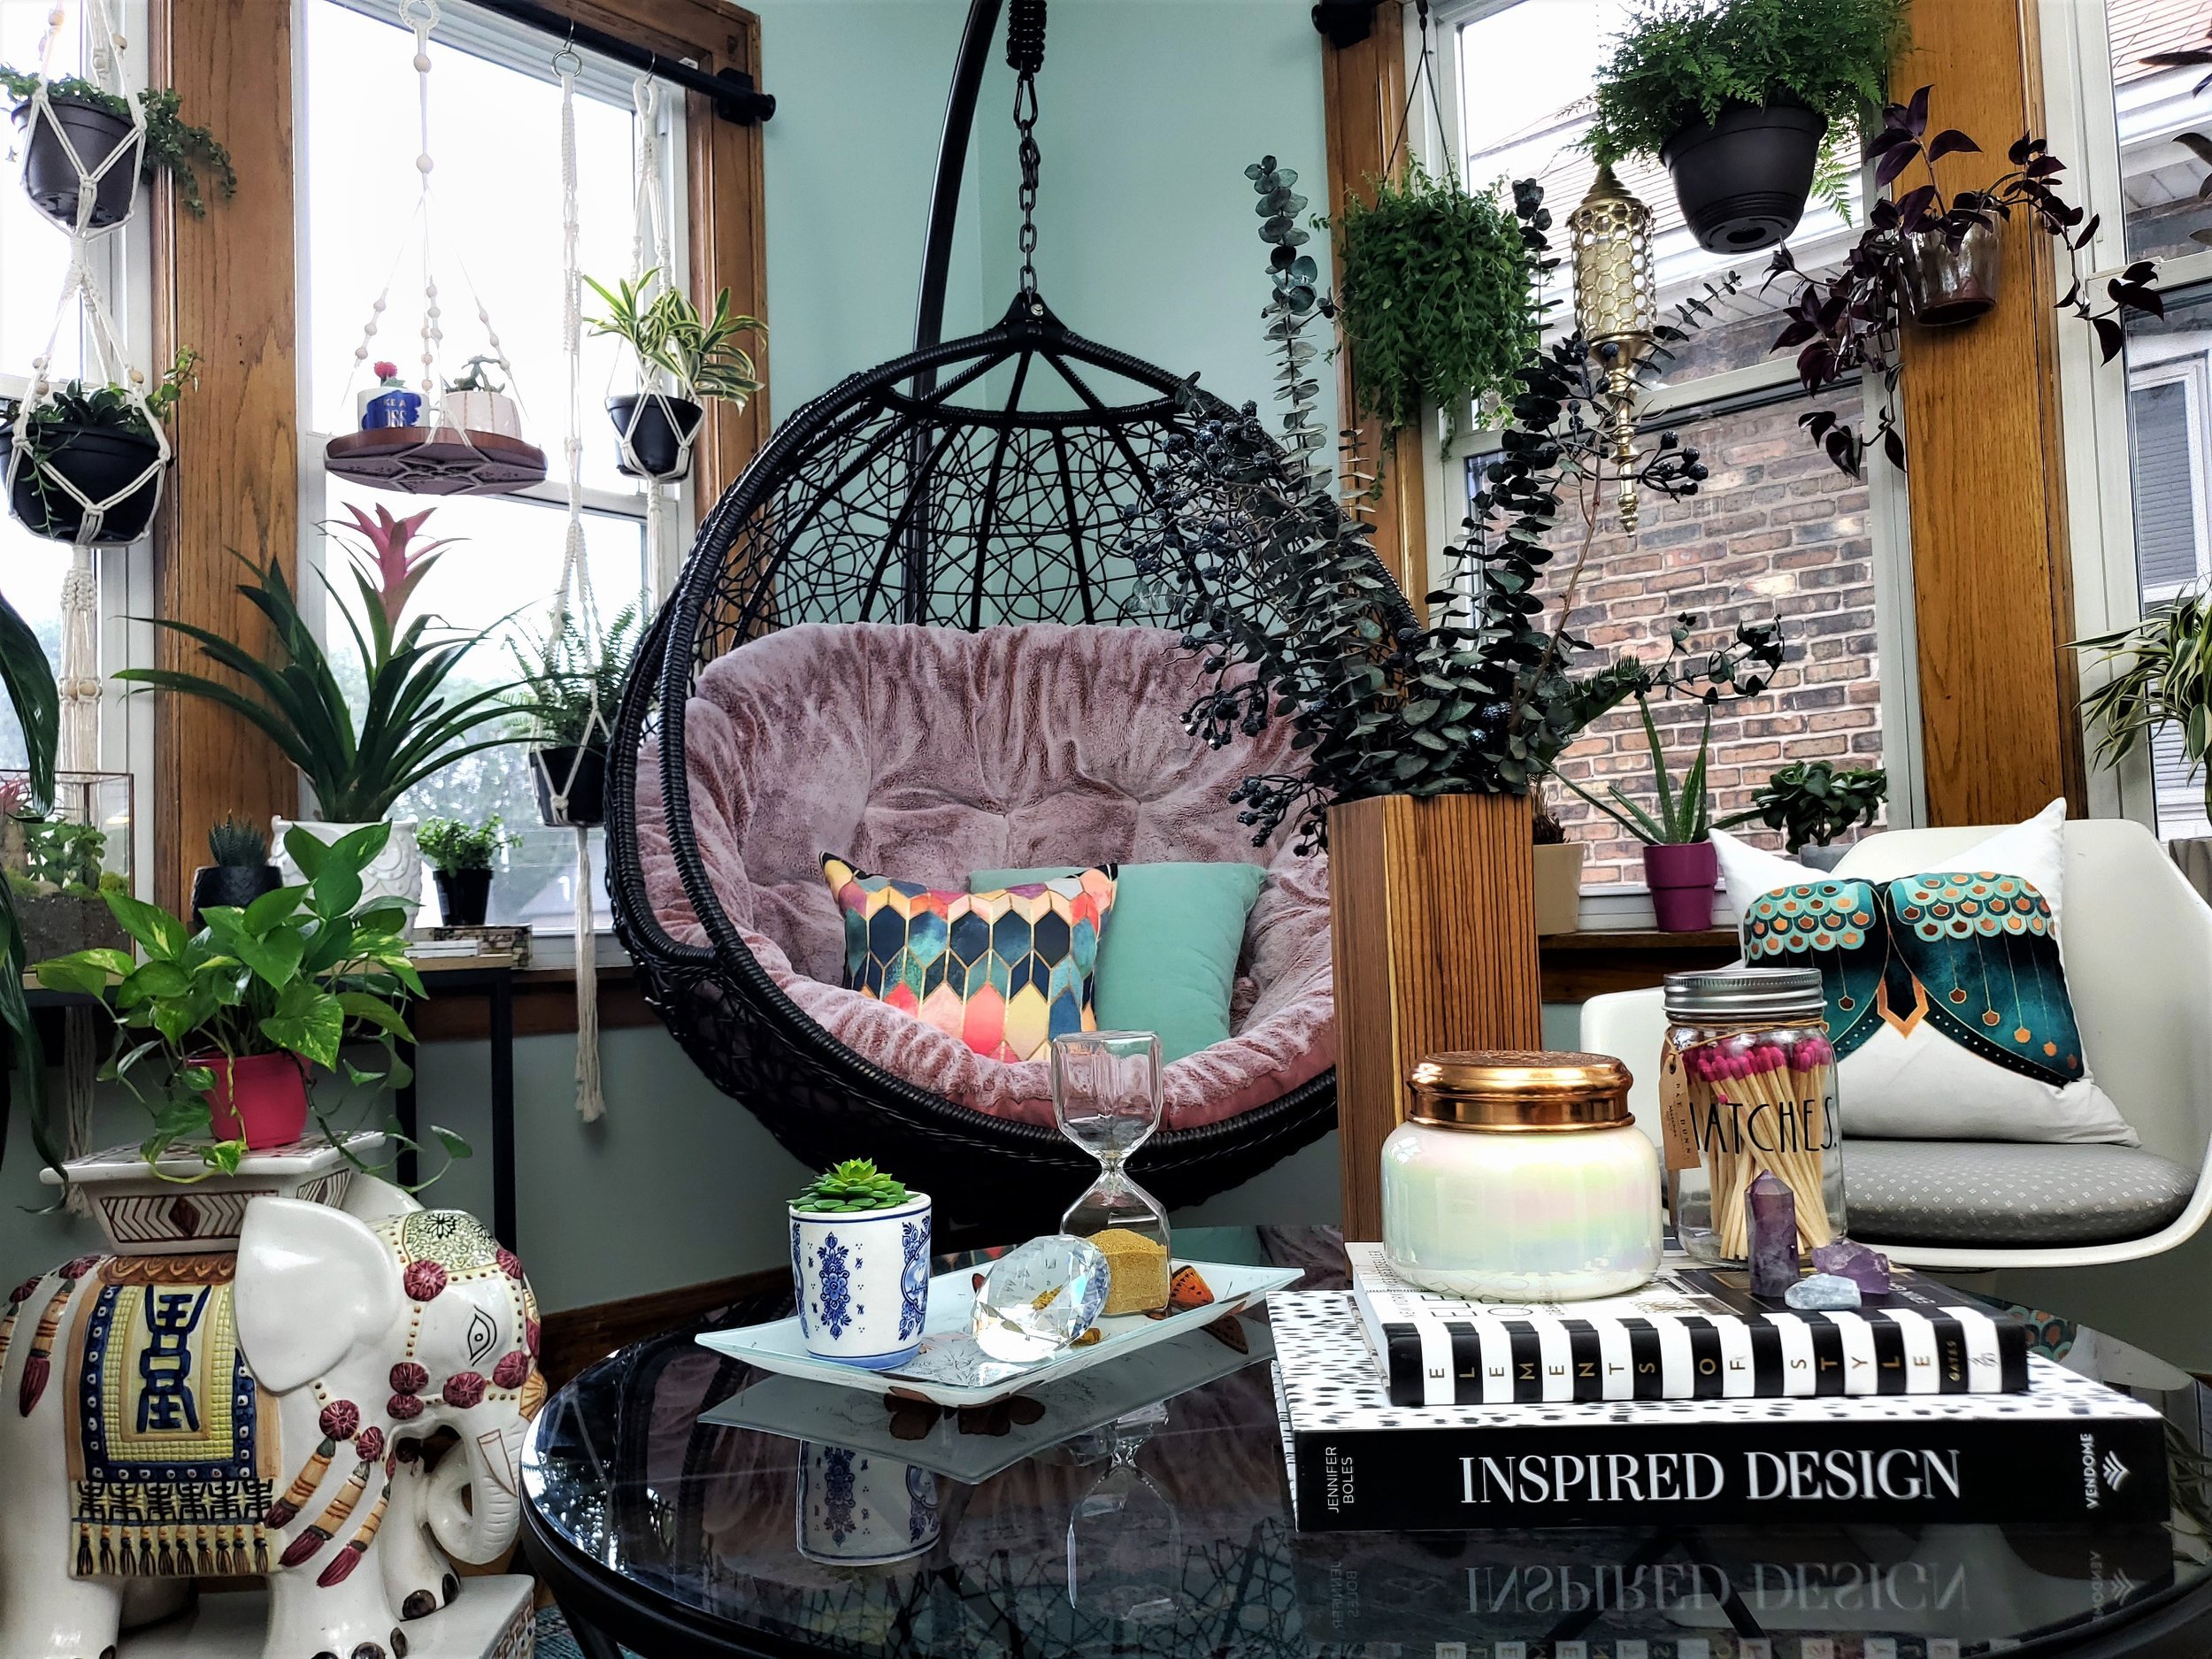
Most hobbies are enjoyed sitting down, so a nice comfy chair or sofa is essential. I love cozying up in my hanging chair in the early morning with a cup of coffee and a book.
Here are some of my favorites:


4. MIND: The Importance of Meditation
Mindfulness and meditation are great tools to help train your mind to focus.
Meditation spaces don’t need to be large, but they should incorporate things that help you relax. Lay a mat down in your wellness room for a designated space and to remind you to take a few moments to relax every day.
I love using to Calm App for daily medication and balance.
Another great way to promote mindfulness is to create a health and wellness library. Include books and magazines on self-care, personal development, recipes, and educational topics to help you live a more balanced life.
5. COMFORT: Improve Your Health

Graphic: EZ Living Interiors
Comfort can be physical, mental, thermal, acoustic, or olfactory comfort (smell).
An environment that prioritizes comfort can help you focus more and perform better.
Design an environment that considers ergonomics: furniture that is designed and arranged in a way that enables people to work more efficiently and comfortably.
My favorite way to embrace comfort in my wellness room is by cozying up with a soft throw blanket, making sure the temperature is just right, adding some ambient music, and turning on some citrus essential oils.
6. LIGHTING: Natural Light is Critical to Our Health

Graphic: EZ Living Interiors
Light is vitally important in the design of any space, not just visually but also physically.
All light, even indoor light, affects our bodies. Since we spend 90% of our time indoors, improper lighting can impact our phase cycles and cause issues with our sleep.
As humans, our bodies run on a 24-hour cycle called a circadian rhythm. We need exposure both to light and darkness to maintain healthy cycles.
Our bodies respond to external cues (zeitgebers) that align with physiological functions in the solar cycle. Light is one of the most important zeitgebers, as it keeps our bodies internal clock synchronized.
Make sure your wellness room location has access to natural light, not just for plants, but for you as well!
7. BIOPHILLIC DESIGN: Blending the Inside and Outside
When putting together your wellness room, consider using organic shapes, patterns, and colors. Immerse yourself in a luscious garden of soft greens.
Bring the outdoors in with colorful succulents, pothos, monstera, and more types of plants!
This supports cognitive function, physical health, and psychological well-being.
Adding a wellness room is a great way to incorporate Biophilia into your home.
8. FITNESS: Wellness for Your Body
Wellness encompasses so many aspects of our lives.
Add weights, a hula hoop, an elliptical, or a treadmill to your wellness room.
Leave these items accessible and out to remind yourself to use them.
Adding a full-length mirror in the room can also help with your daily fitness routine.
9. NOURISHMENT: Mindful Snacks in Your Wellness Room
Nutrition plays a major role in chronic disease prevention.
2.7 million people die people die annually worldwide due to insufficient fruit and vegetable intake
Having a space to take a break and snack mindfully without TV or other distractions is critically important to your daily health.
Try having a fresh smoothie packed with fruits and veggies in your wellness room to relax. Stay mindful by turning off all devices and sitting quietly, enjoying the moment.

10. DECOR: Design to Make you Smile
Add art you’ve collected or even made yourself to this space.
Objects from your travels for good memories can also boost your mood.
Paint the walls a cheerful color that invigorates and inspires.
A Healing Crystal Zen Garden, is a great element to add a relaxing and beautiful element to the space.
Try incorporating decorative accessories, photos, and other meaningful pieces into your wellness room.
“We’re not designing places to live. We’re designing how we live. Leading research demonstrates that the way our buildings are designed, constructed and maintained has a profound impact on how we live. When we design our buildings, we define how we sleep, what we eat and how we feel throughout the day. ”
Get Inspired!
Photos: Sarah Jacquelyn Interiors, Maryline Damour, Ashton Woods, Sean Litchfield
Shop the look
We’ve made it easy to jump-start your wellness room with our picks from Amazon. We call it Boho Home Oasis!
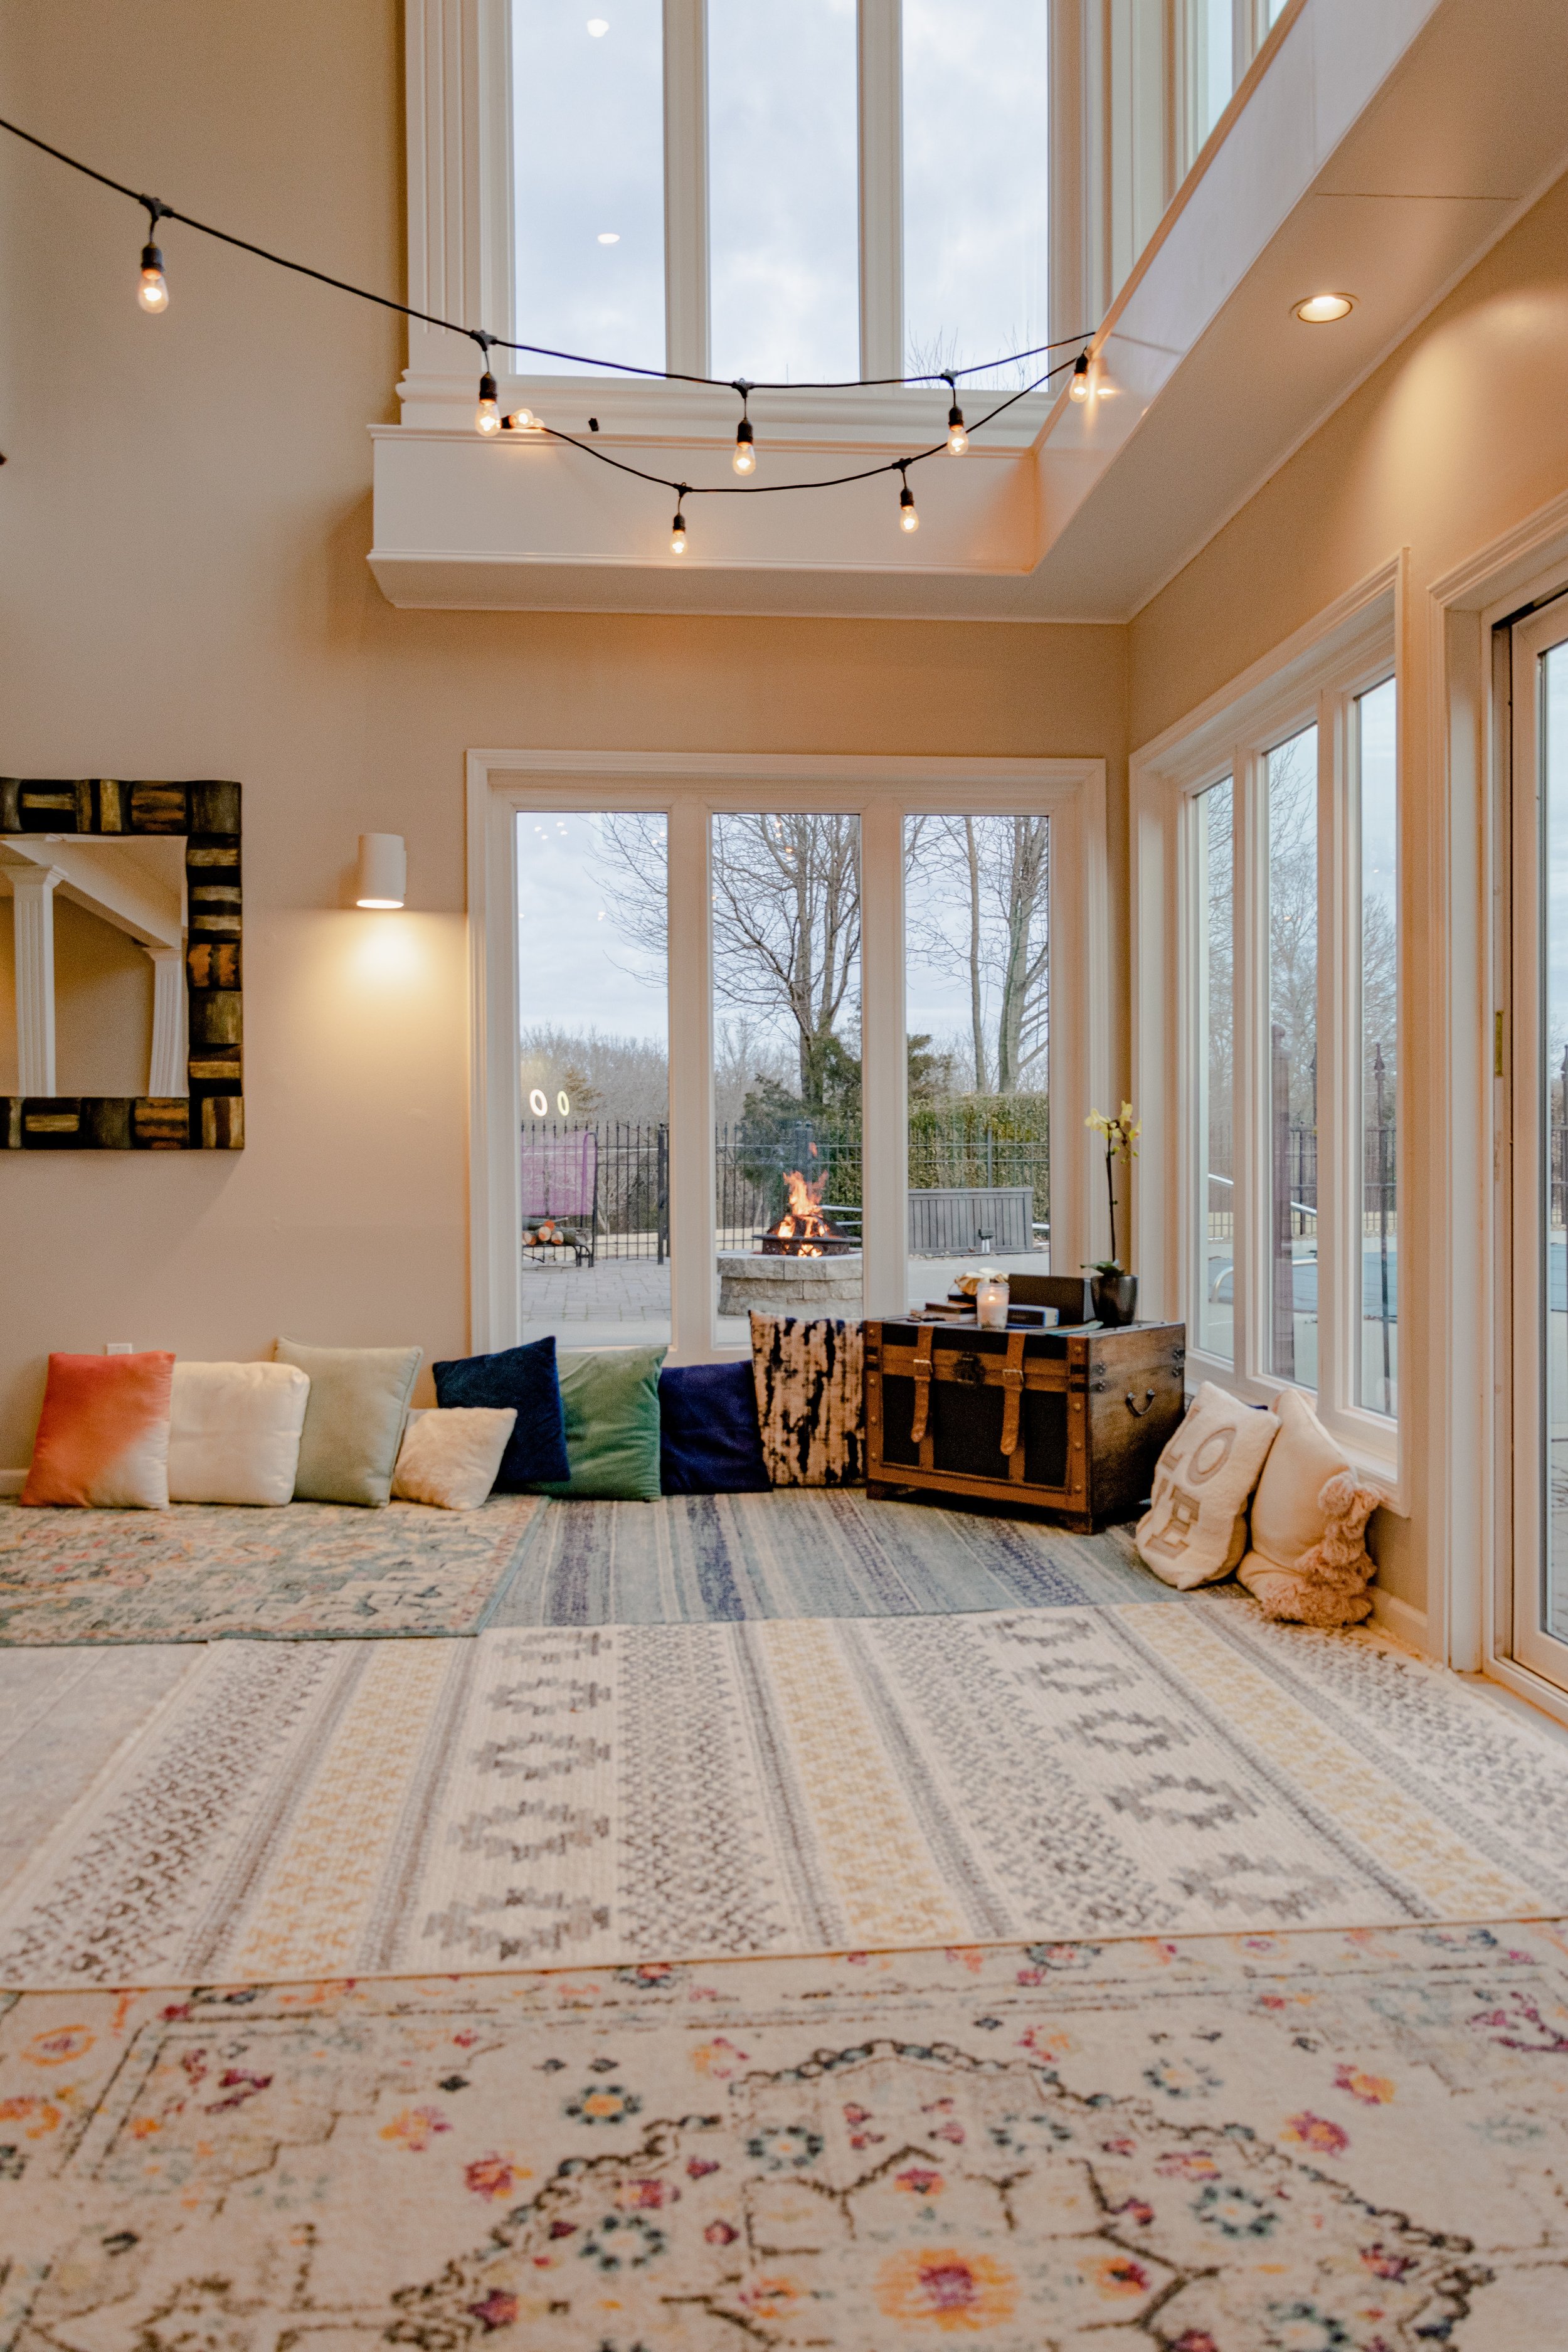
This room provides a relaxing, quiet space for the morning or evening. It has a comfy reading chair, plants to bring in oxygen, large windows spilling with sunlight, art, and photos that bring us joy, candles, a zen garden, a stretching mat, adult coloring books, crystals, and a lamp with color temperature adjustment.
Love this room? Shop the look on Amazon!


Need Help Creating Your Own Wellness Space? Schedule a Design Discovery Call Today!
Benjamin Moore's Color of the Year 2023
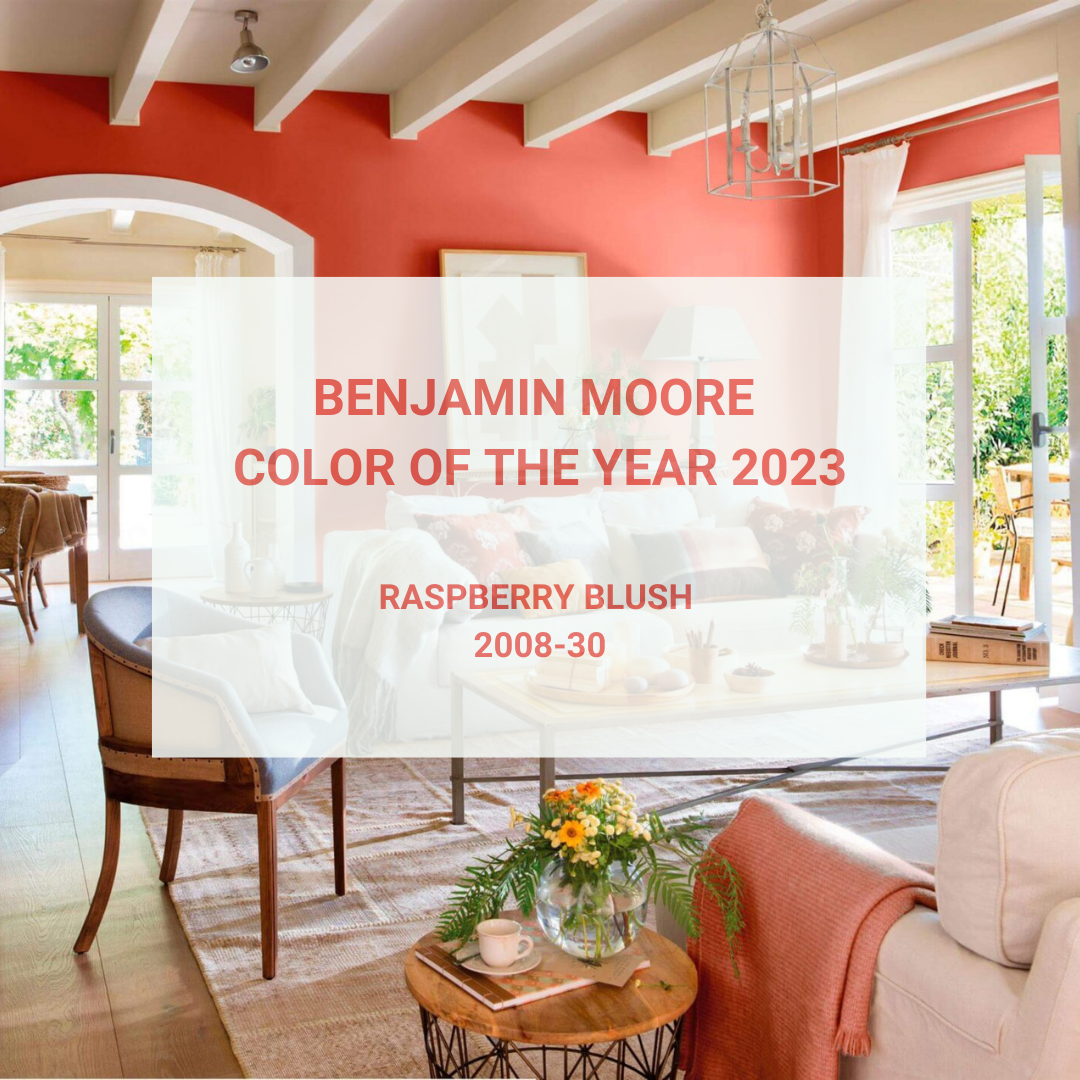
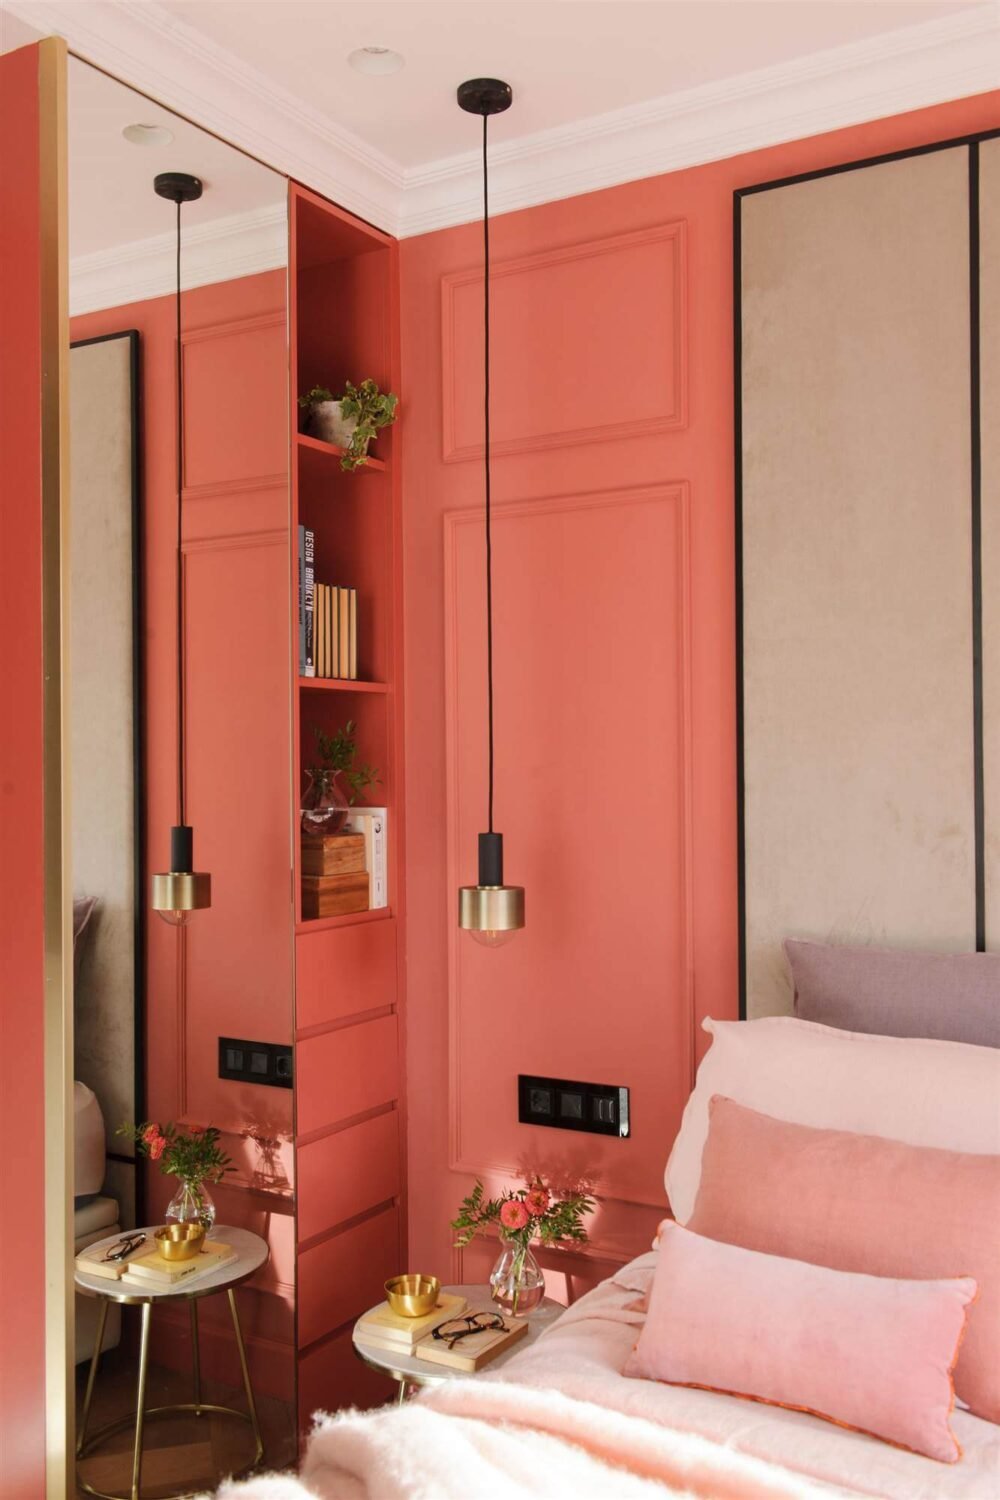
Benjamin Moore revealed their Color of the Year for 2023: Raspberry Blush 2008-30. The “vivacious shade of coral tinged with pink” is one that can bring a sense of electric optimism to any room.

Photo: el Mueble
Benjamin Moore revealed their Color of the Year for 2023: Raspberry Blush 2008-30. The “vivacious shade of coral tinged with pink” is one that can bring a sense of electric optimism to any room. Benjamin Moore teamed up with electro-funk duo Chromeo to bring us the color of the year and demonstrate the ever-changing role color has in regards to self-expression, similarly to music.
Here’s what we think of the new Color of the Year!

Raspberry Blush 2008-30
How To Use Raspberry Blush
Raspberry Blush can be used in just about every way you can imagine. With such a bold, stand-out color, you can either use it to add a splash of color to a space or go bolder by using it as the main focal color.
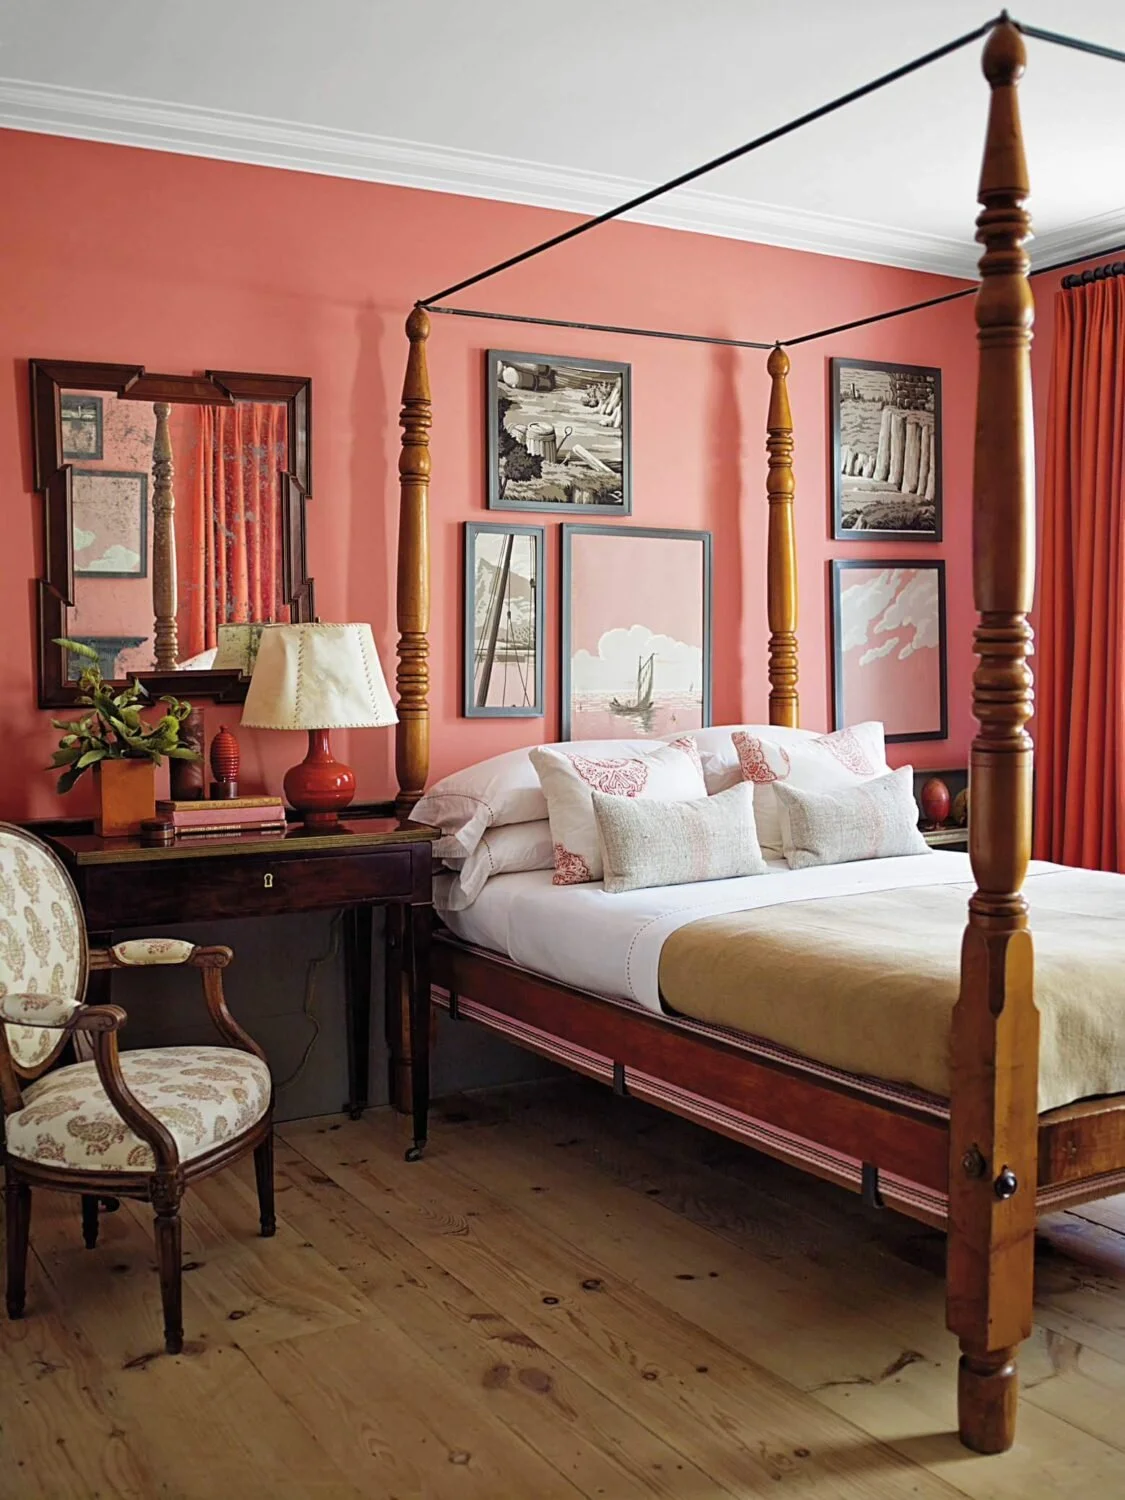
We would love to see Raspberry Blush used as a vibrant accent wall. This is an easy way to liven up your neutral space with a splurge of color. Raspberry Blush pairs well with the neutral, softer colors we have been seeing the last few years, making it an easy choice to bring in a bold color to change up the space.
When we see coral shades, we tend to think of modern spaces, however, Raspberry Blush is unique in a way that it can be used even in a traditional setting. Take a look at the living room from el Mueble (cover photo). The bright, bold, coral accent wall works well in this setting with more traditional interiors and rustic touches.
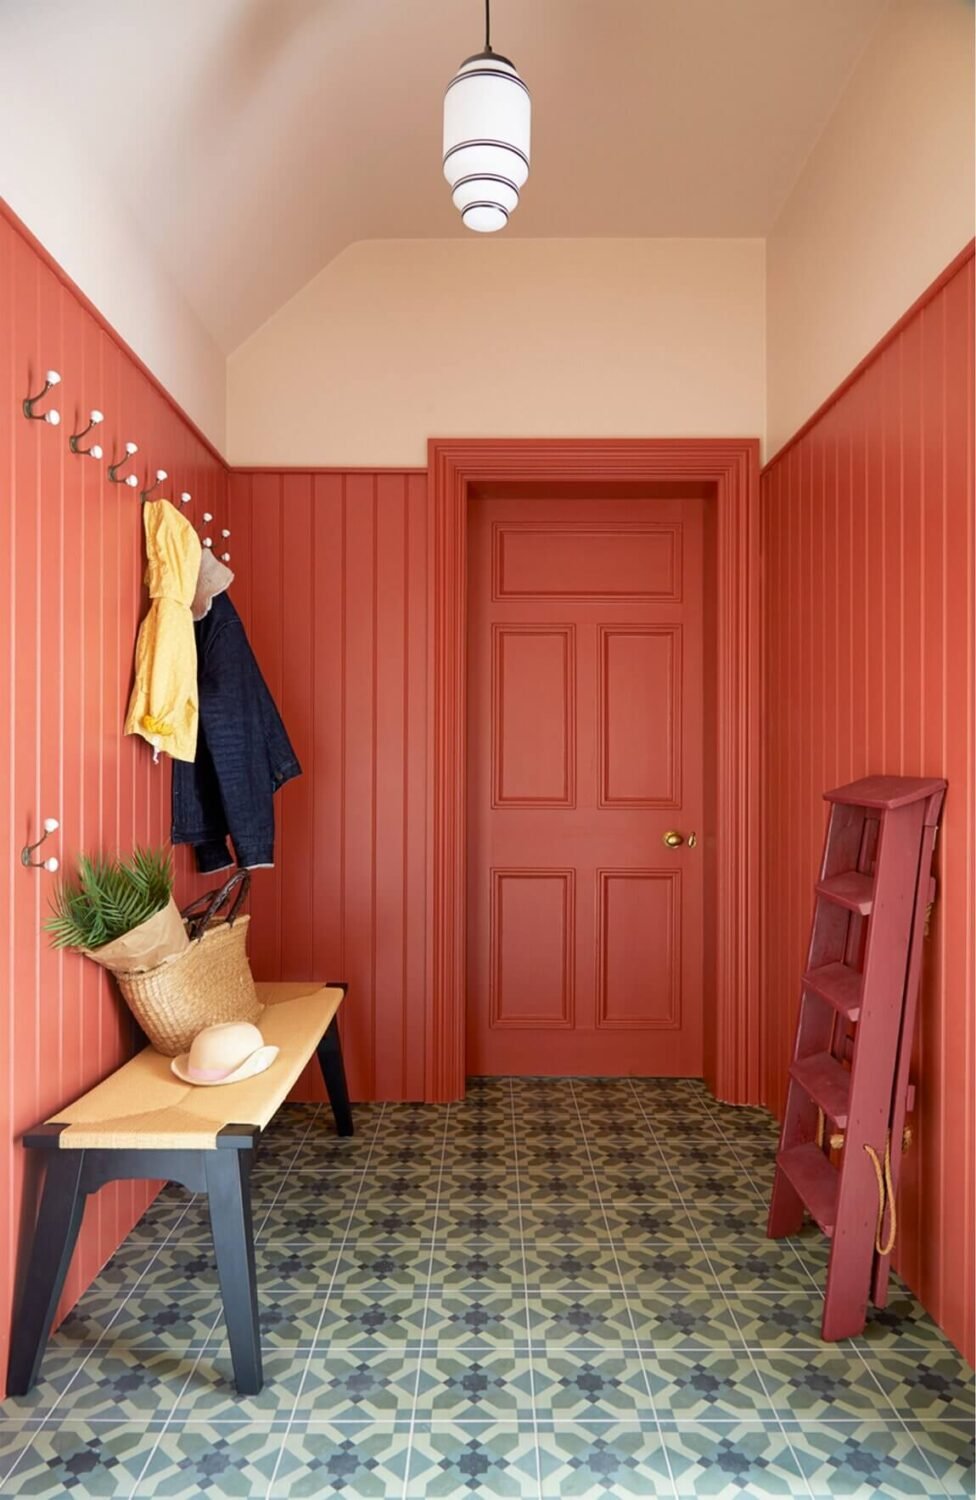
The possibilities are endless with a color like Raspberry Blush. Use it in a small space to extend to look of a room and make it feel more spacious. Or use it to add a bright, modern look to your kitchen. Raspberry Blush can be used in even the most unexpected rooms, just take a look at that lively mudroom!
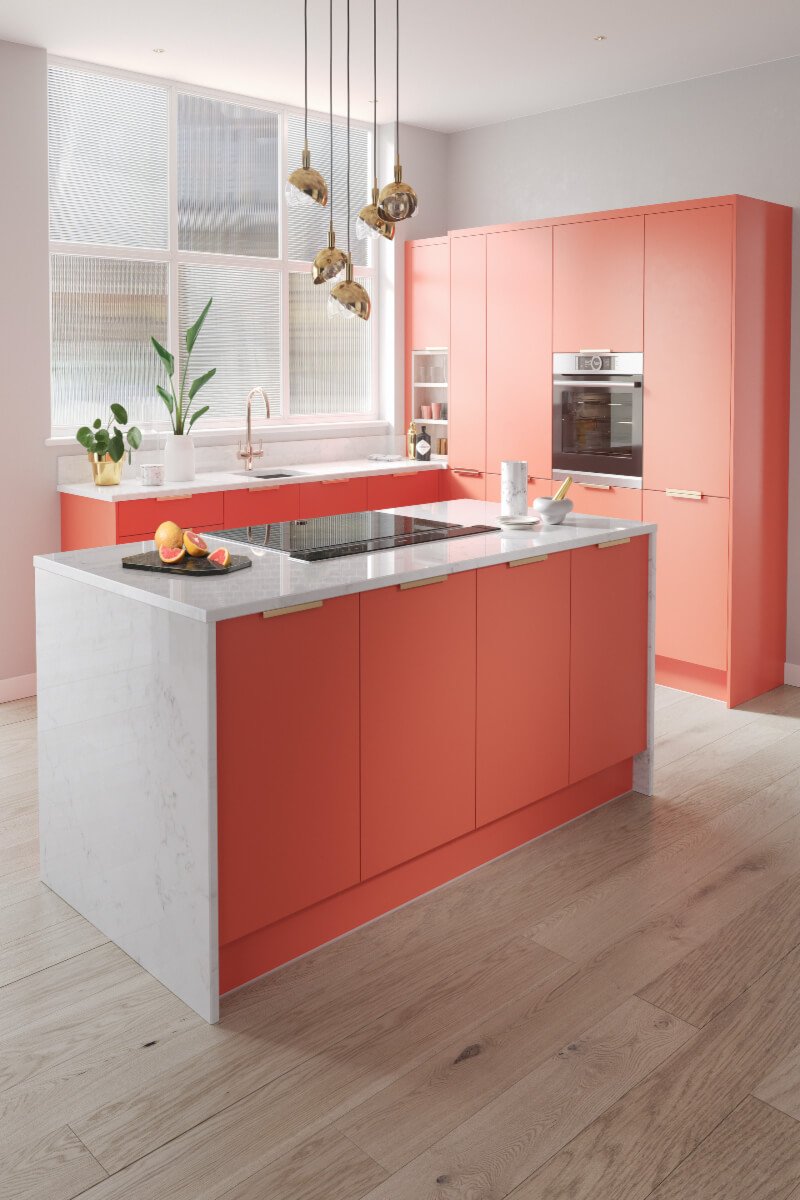
Photos: photo: Fiona Duke Interiors, El Mueble, Wren Kitchens, Eric Piasecki
The Benjamin Moore Palette of 2023
Benjamin Moore also revealed their Color Trends 2023 palette, which includes great companion hues for Raspberry Blush. With colors from black and white to green and blue, the Color Trends palette offers a little something for everyone!
According to Benjamin Moore, “Bring individuality to your space and discover the transformative power of paint with sumptuous hues inspired by the bold strokes of modern art, the natural changes that occur in metal over time, and the desire to express ourselves through color.”
Each color was chosen for its distinctive personality and presence. The eight confident hues offer creativity, and inspiration, and push us to look beyond tradition to experience truly exceptional color.

For those who prefer less of a commitment
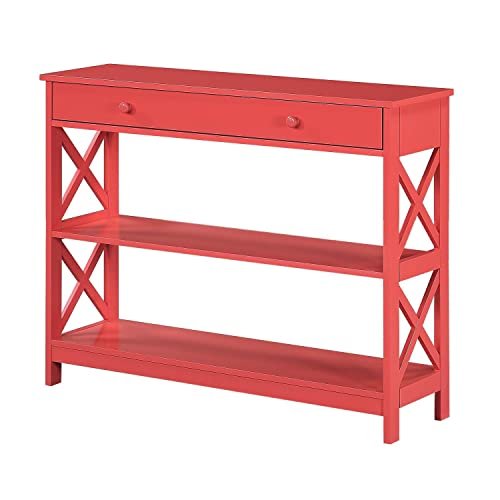
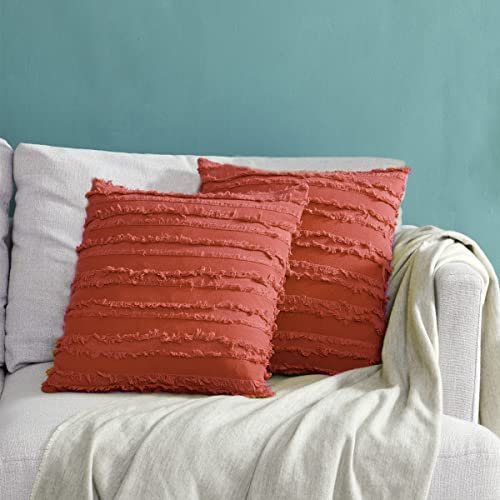
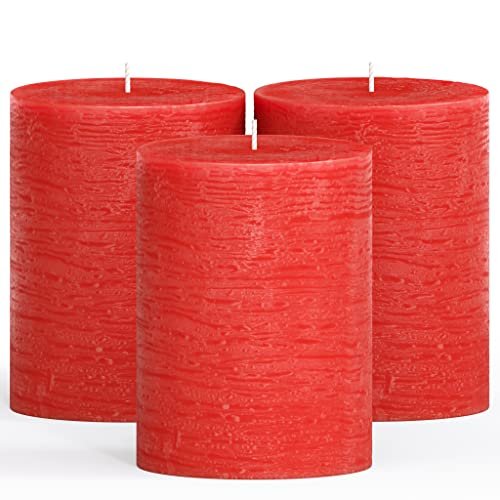
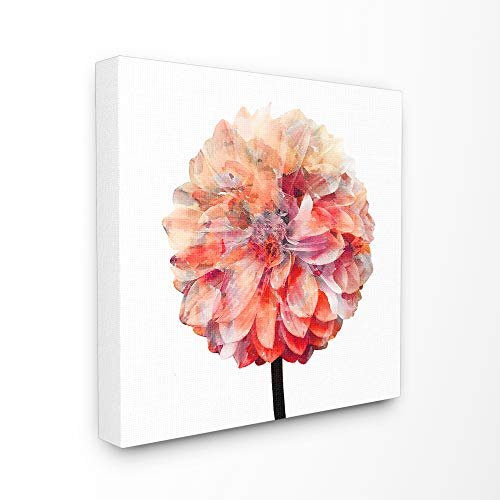
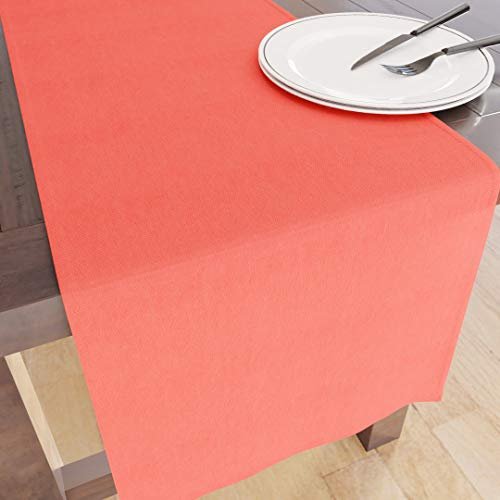
If painting isn’t an option or if you prefer a smaller commitment, you can still implement Raspberry Blush into your home through decor! Add a splash of color through accessories like throw blankets, tables, baskets, vases, or candles. Or bring life to your walls with coral shades in your art!
Shop our top Amazon picks for Raspberry Blush inspired home décor!


Need help finding the perfect paint palette for your space? Book one of our Designer On Call packages today!

Sherwin-William's Color of the Year 2023
Sherwin-Williams just revealed it’s Color of the Year for 2023: Redend Point SW9081. The blush-beige undertones in Redend Point bring a sense of calm and warmth to a space, making it such a versatile color choice. Sherwin-Williams describes Redend Point as a “minimal, calming, and intriguing.” As a part of their Colormix® Forecast for 2023, Redend Point is one shade you can find in TERRA—a collection of hues that “embrace regeneration, creativity, care, connection, and joy.” Here’s what we think of the new Color of the Year!
Sherwin-Williams just revealed it’s Color of the Year for 2023: Redend Point SW9081. The blush-beige undertones in Redend Point bring a sense of calm and warmth to a space, making it such a versatile color choice. Sherwin-Williams describes Redend Point as a “minimal, calming, and intriguing.” As a part of their Colormix® Forecast for 2023, Redend Point is one shade you can find in TERRA—a collection of hues that “embrace regeneration, creativity, care, connection, and joy.” Here’s what we think of the new Color of the Year!

SHERWIN WILLIAMS

Redend Point SW9081 - Sherwin-Williams
Why We Love It!
Redend Point is neutral enough to use in any room with the right compliments. The earthy, cozy color makes a room feel inviting and grounded at the same time. The new-age neutral brings in a pop of color that traditional whites or eggshells lack, which makes it the perfect choice for those with a minimalist style who are desiring something new.
Redend Point is a natural transition from the classic neutrals we have been seeing the last decade as homeowners are moving towards warmer whites, beiges, pinks, and browns.

SHERWIN WILLIAMS
"Redend Point was inspired by the idea of finding beauty beyond ourselves. It is a heartening hue that invites compassion and connection into any space. The color is a natural choice for those looking for a warm and joyful neutral in both interiors and exteriors." - Sue Wadden, director of color marketing at Sherwin-Williams

SHERWIN WILLIAMS
How to Use it
Redend Point can be used in practically any room, which is one of the reasons we love it. This color could potentially be used in every room, tying in the entire home cohesively, creating a warm, inviting space throughout. It is also a great alternative for someone who tends to stay away from bold, loud colors but still wants an alternative to classic neutral shades.
As a color rooted with an earthy tone, this color would be perfect for an oasis space where you can relax and unwind, making it perfect for a reading nook or bedroom.
Sue Wadden, director of color marketing at Sherwin-Williams suggests using Redend Point alongside “natural-looking textiles and organic materials like wood and clay” to really bring out the colors earthiness.
“Redend Point is an incredibly versatile color, so it can come to life in so many different spaces," Wadden says. "It can create a warm and inviting entryway and a relaxing bedroom when used on all four walls. Redend Point can also make a big impact when used in small ways, such as an accent color on a ceiling or on a piece of furniture.” - Sue Wadden, director of color marketing at Sherwin-Williams
Love the color? Shop our top Amazon picks for Redend Point!


Need help finding the perfect paint palette for your space? Schedule a design consultation today!

Bianka Daehler: ASID Illinois At- Large Director
We are excited to announce that our Senior Interior Designer, Bianka Daehler has been nominated and voted in as the At-Large Director for the ASID Illinois Chapter.
We are excited to announce that our Senior Interior Designer, Bianka Daehler has been nominated and voted in as the At-Large Director for the American Society of Interior Designers Illinois Chapter.
Her two year term will begin on October 1st, 2022. Bianka began her journey as an ASID member while in school at the Illinois Institute of Art Chicago. As she progressed in her career, Bianka realized that she wanted to pursue a path toward NCIDQ certification and rejoined ASID, which provided resources and connections to others on the same journey.
Interior Design rights and legislation sparked Bianka’s interest in pursuing a path of leadership. Her goals are to enhance the design community by increasing the number of Registered Interior Designers, provide resources for those pursuing NCIDQ certification, and help advance the legislative rights of interior designers. She plans to connect and collaborate with other organizations to unify the expansive Chicago design community.
Bianka currently serves as the Chicago Peer Group Leader, where she hosts monthly meet-ups for ASID designers and industry partners.
This is her last year studying for the NCIDQ exam. Upon passing the Prac exam this spring, Bianka will become NCIDQ Certified and Register with the State of Illinois.
ASID has so much to offer!
Interested in learning more about ASID? ASID members can get involved with committees and volunteer groups, attend peer group meetings, educational lectures and advocacy events, seek mentorship or become mentors, and learn leadership and professional development skills. We, as a design team, would not be where we are today without the support of the American Society of Interior Designers. We look forward to being able to give back in every way we can so we may continue to support the design community.
If you’re interested in becoming more involved in ASID, please reach out! Bianka@SarahJacquelynInteriors.com


Everything You Need to Know About the 2022 NCIDQ Exam
If you’re interested in learning more about the NCIDQ Exam, why it’s important, and how it can benefit you as a designer, you’re in the right place! I’m Sarah Schwuchow, a Registered Interior Designer in Illinois and I passed the NCIDQ exam in the Spring of 2018. I am also a CIDQ Ambassador, which means I help mentor exam candidates, educate students, and promote the value of NCIDQ certification to the public. I’m on a mission to help other designers pass the NCIDQ exam and become Registered Interior Designers!

Hello! I’m so glad you are interested in learning more about the NCIDQ Exam!
I’m Sarah Schwuchow, a Registered Interior Designer in Illinois and I passed the NCIDQ exam in the Spring of 2018.
I am also a CIDQ Ambassador, which means I help mentor exam candidates, educate students, and promote the value of NCIDQ certification to the public. I’m on a mission to help other designers pass the NCIDQ exam and become Registered Interior Designers!
If you’re interested in learning more about the NCIDQ Exam, why it’s important, and how it can benefit you as a designer, you’re in the right place!
It’s been 4 years since I earned my NCIDQ certification. This certification has benefited me in numerous ways, from opening my own business, to having the confidence and knowledge to effectively communicate on a job site. This exam is not just for commercial interior designers; I use my NCIDQ knowledge everyday as a residential interior designer and highly recommend all interior designers work towards this certification.
I always felt there was a need for more NCIDQ mentorship among the design community. After passing the exam, I looked into the CIDQ Ambassadors program where I could provide mentorship to candidates and educate Interior Design students on the value of the NCIDQ exam. I strive to be a resource to other designers, sharing my NCIDQ journey and encouraging them to take the exam.
I have helped many aspiring designers work towards this certification as well. As the 2019 ASID Illinois NCIDQ Committee Chair, I lead a study group of 5 designers towards NCIDQ success. Everyone in our study group passed their exams! Since then, the ASID Illinois Chapter has hosted a study group session every testing season and has even partnered with IIDA to broaden the outreach to the design community.
Just starting to think about taking this exam can be daunting task in itself! I’m here to help break down the requirements and get you on track for taking the exam. Keep reading below for step by step instructions on how you can become NCIDQ Certified.
Please note - the statements on this website are my own and not a reflection of CIDQ as an organization. This blog post is intended to be a supplementary guide for your NCIDQ journey. Please visit CIDQ.org for more information regarding qualifications, expectations, current prices, etc. Familiarize yourself with the CIDQ website, eligibility requirements, application process, registration process, and important dates and deadlines!
Applications for the Spring 2022 Exam needed to be
submitted by January 31st and July 31st for the Fall 2022 Exam.
What is NCIDQ Certification and Who is CIDQ?
The NCIDQ exam stands for the National Council for Interior Design Qualification. This is a globally recognized exam and the highest standard an Interior Designer can earn. The NCIDQ Exam was created by the Council for Interior Design Qualification (CIDQ). Once you pass all three sections (IDFX, IDPX, Practicum) of the the NCIDQ Exam, you become an NCIDQ Certificate Holder. You can then use the NCIDQ appellation after your name: Sarah Schwuchow, NCIDQ. The exam is offered for the entire months of April and October at Prometric Testing Centers. Remote proctoring is available for the IDFX and IDPX Exams. All three sections of the exam are now computerized- no hand drafting!

CIDQ History
CIDQ was created by the American Institute of Interior Designers (AID) and the National Society of Interior Designers (NSID) in the late 1960s. The group officially incorporated as a not-for-profit in 1974 and was the basis for issuing credentials to Interior Design professionals. The AID and NSID would eventually merge to become what is now the American Society of Interior Designers. CIDQ went on to run as an independent organization, which administers the NCIDQ exam
Why Does NCIDQ Certification Matter?
NCIDQ Certification matters because it is an indicator of our proficiency and knowledge. The Interior Design profession is still relatively young at only about 100 years old. We are still working towards reasonable regulation, title acts, practice acts, stamping abilities, and legislative rights for our profession. NCIDQ Certification helps to create a standard to ensure designers have the knowledge, education, and experience to create spaces that meet codes, regulations, ADA requirements, health, safety, and welfare. I am proud to be an NCIDQ Certified Interior Designer that can contribute to the development of the Interior Design profession as a whole
The NCIDQ exam was always a vital goal of mine and I admired design professionals who held the credentials. In the State of Illinois, you must be an NCIDQ Certificate holder to become a Registered Interior Designer. From a legislative standpoint in Illinois, it is critical that we ensure the “Registered Interior Designers Act'' stays in effect, as many legal benefits come with this title such as lien rights. I wanted to be part of the advocacy efforts, increasing our Registered Interior Designer numbers, and supporting the ASID and IIDA chapters who continuously educate the public on Interior Designs' impact on health, safety and welfare.
10 Reasons Why You Should Take the NCIDQ Exam
NCIDQ Certification sets you apart from unqualified designers and decorators.
It is an indicator of your proficiency and knowledge.
NCIDQ Certification shows your commitment to the Interior Design profession.
You’ll earn respect among your colleges, employers and clients.
You’ll have the potential to earn more money and promotions, as many firms require NCIDQ Certification.
Increasing the number of registered/licensed designers elevates our profession.
NCIDQ Certification helps with legislation and Interior Design rights.
In Illinois, you must be an NCIDQ Certificate Holder to become a Registered Interior Designer.
Registered Interior Designers in Illinois now have the right to file liens. Unregistered designers and decorators do not hold this right.
“To date, more than 30,000 people around the world have earned NCIDQ Certification, the gold standard for interior design professionals” (CIDQ.org).
What’s on the NCIDQ Exam?
“The strenuous requirements of the NCIDQ Examination give clients and employers added confidence in the caliber of work from NCIDQ Certified designers” (CIDQ.org).
The NCIDQ examination is no walk in the park. The level of difficulty proves that a NCIDQ designer possesses the knowledge and expertise for building systems, codes, construction standards, contract administration, design application, professional practice, and project coordination.
The exam is broken down into 3 parts: Interior Design Fundamentals (IDFX), Interior Design Professionals Exam (IDPX), and Practicum 2.0. Each section measures a candidate’s knowledge and proficiency on different topics related to health, safety, and welfare. All exams are taken during the entire month of April and October. Applicants have five years to complete all three exams.
Fundamentals Exam (IDFX)
Eligibility: Candidates can take this part of the exam before completing their work experience hours. This exam can be taken as early as a student’s final year of school for a Bachelors or Masters program.
Exam Format: 125 multiple choice questions (100 scored and 25 unscored pilot questions)
Exam Length: 3 Hours
Application Fee for IDFX Only: $95.00
Registration Fee: $295.00
Passing Score: 500 (Scores are weighted and on a scale of (200-800)

Professional Exam (IDPX)
Eligibility: Candidates must complete their education and work hours before applying for this exam.
Exam Format: 175 multiple choice questions (150 scored and 25 unscored pilot questions)
Exam Length: 4 Hours
Application Fee for IDPX and Prac Only: $145.00
Application Fee for all 3 Sections: $225.00
IDPX Registration Fee: $355.00
Passing Score: 500 (Scores are weighted and on a scale of 200-800)

Practicum 2.0 (PRAC)
Eligibility: Candidates must complete their education and work hours before applying for this exam.
Exam Format: Interactive computerized exam consisting of 3 case studies: large commercial, small commercial, and multi-family residential
Exam Length: 4 Hours
Application Fee for IDPX and Prac Only: $145.00
Application Fee for all 3 Sections: $225.00
Practicum Registration Fee: $460.00
Passing Score: 500 (Scores are weighted and on a scale of 200-800)

What’s New for 2022?
Interior Design Fundamentals Exam and Interior Design Professional Exam
The IDFX and IDPX are now available for remote proctoring! Remote proctoring is an exam delivery method administered by Prometric, CIDQ’s test delivery vendor, which provides candidates with the option of taking the IDFX or IDPX exams in a convenient location (i.e., at home) versus at a Prometric test center. Participating in a remotely proctored exam can only occur if your testing environment and computer systems meet Prometric requirements.
Practicum Exam
The Practicum Exam uses new codes, no longer will you use the 18 page NCIDQ codes for this exam. Instead, you will reference real life codes from IBC. You are not expected the completely memorize all of these codes, but should be familiar with them, know how to reference and apply the codes. Click here to view the codes!


Ready to Take the Exam?
Step 1: Eligibility Requirements

First things first—are you qualified to take the NCIDQ Exam? Visit the CIDQ website for full eligibility path requirements based your education and work experience.
Step 2: Create an Account
Before you can apply, you must create an account with CIDQ. Click here to register and then log in with instructions received in your email. If you have trouble, email inquiries@cidq.org for help.
Step 3: Applying for the Exam
There are two route options for applying for the NCIDQ Exam:
Option 1: Apply only for the IDFX. If you apply just for the IDFX now, you will need to submit another application for the IDPX and Practicum once you finish your work experience hours.
Application Fee for IDFX only: $95.00 (Second application for IDPX and Prac will be $145.00)
Option 2: Apply for all three sections.
Application Fee for all 3 Sections: $225.00
Applications are a one time fee. Your application will also require you to submit an official transcript from your institution and your work experience (for IDPX & Practicum 2.0). Make sure you leave enough time for your sealed official transcripts to arrive, as any incomplete applications will not be considered after the deadline and you’ll have to wait until the next testing season.
Step 4: Registering and Scheduling Your Exam
Once your application has been approved, you will receive an email notifying you that you that can register for the exam and schedule a date at a Prometric Testing Center. Make sure to register early so you can lock in your preferred exam date!
From this point, you have 10 testing windows to pass all three sections of the NCIDQ exam. If you are only taking the IDFX, you must pass that exam within 4 exam windows. The second stage (IDPX and Practicum) must then be completed within 10 testing windows. Any scores older than 5 years are automatically voided. Registration fees occur each time you take an exam.
Registration Fees
IDFX: $295.00
IDPX: $355.00
PRAC: $460.00
Step 5: Studying
Make sure you leave yourself adequate time to study for this exam. I recommend at least 10 weeks and join a study group. Qpractice is a great online resource to help you stay on schedule. Stay tuned for my upcoming blog post on my tips and tricks for studying for the NCIDQ Exam!
Join the more than 30,000 people around the world that have earned their NCIDQ Certification!
“Having an NCIDQ has helped me further develop my professional career in many ways. Overall, I look at new projects with better insight, knowledge, and have more confidence in the work I am providing to our clients.”
“NCIDQ validates you as a professional designer to your clients, peers, and the public.”

RNDD Gallery Walk Vignette at Eggersmann
We had such an exciting night this past Friday at the River North Design District’s 6th Annual Fall Gallery Walk! Our vignette was featured at the eggersmann showroom and showcased the intriguing and emotional work of Bobbi Meier.
We had such an exciting night this past Friday at the River North Design District’s 6th Annual Fall Gallery Walk! Our vignette was featured at the eggersmann showroom and showcased the intriguing and emotional work of Bobbi Meier.
The walk featured 20 showrooms exhibiting designer vignettes from Chicago’s top designers, showcasing living settings highlighting artwork created by some of the brightest stars in the art world today.
We are also pleased to announce that our vignette was awarded Best Vignette Design!
Here are some highlights from our opening night on Friday!


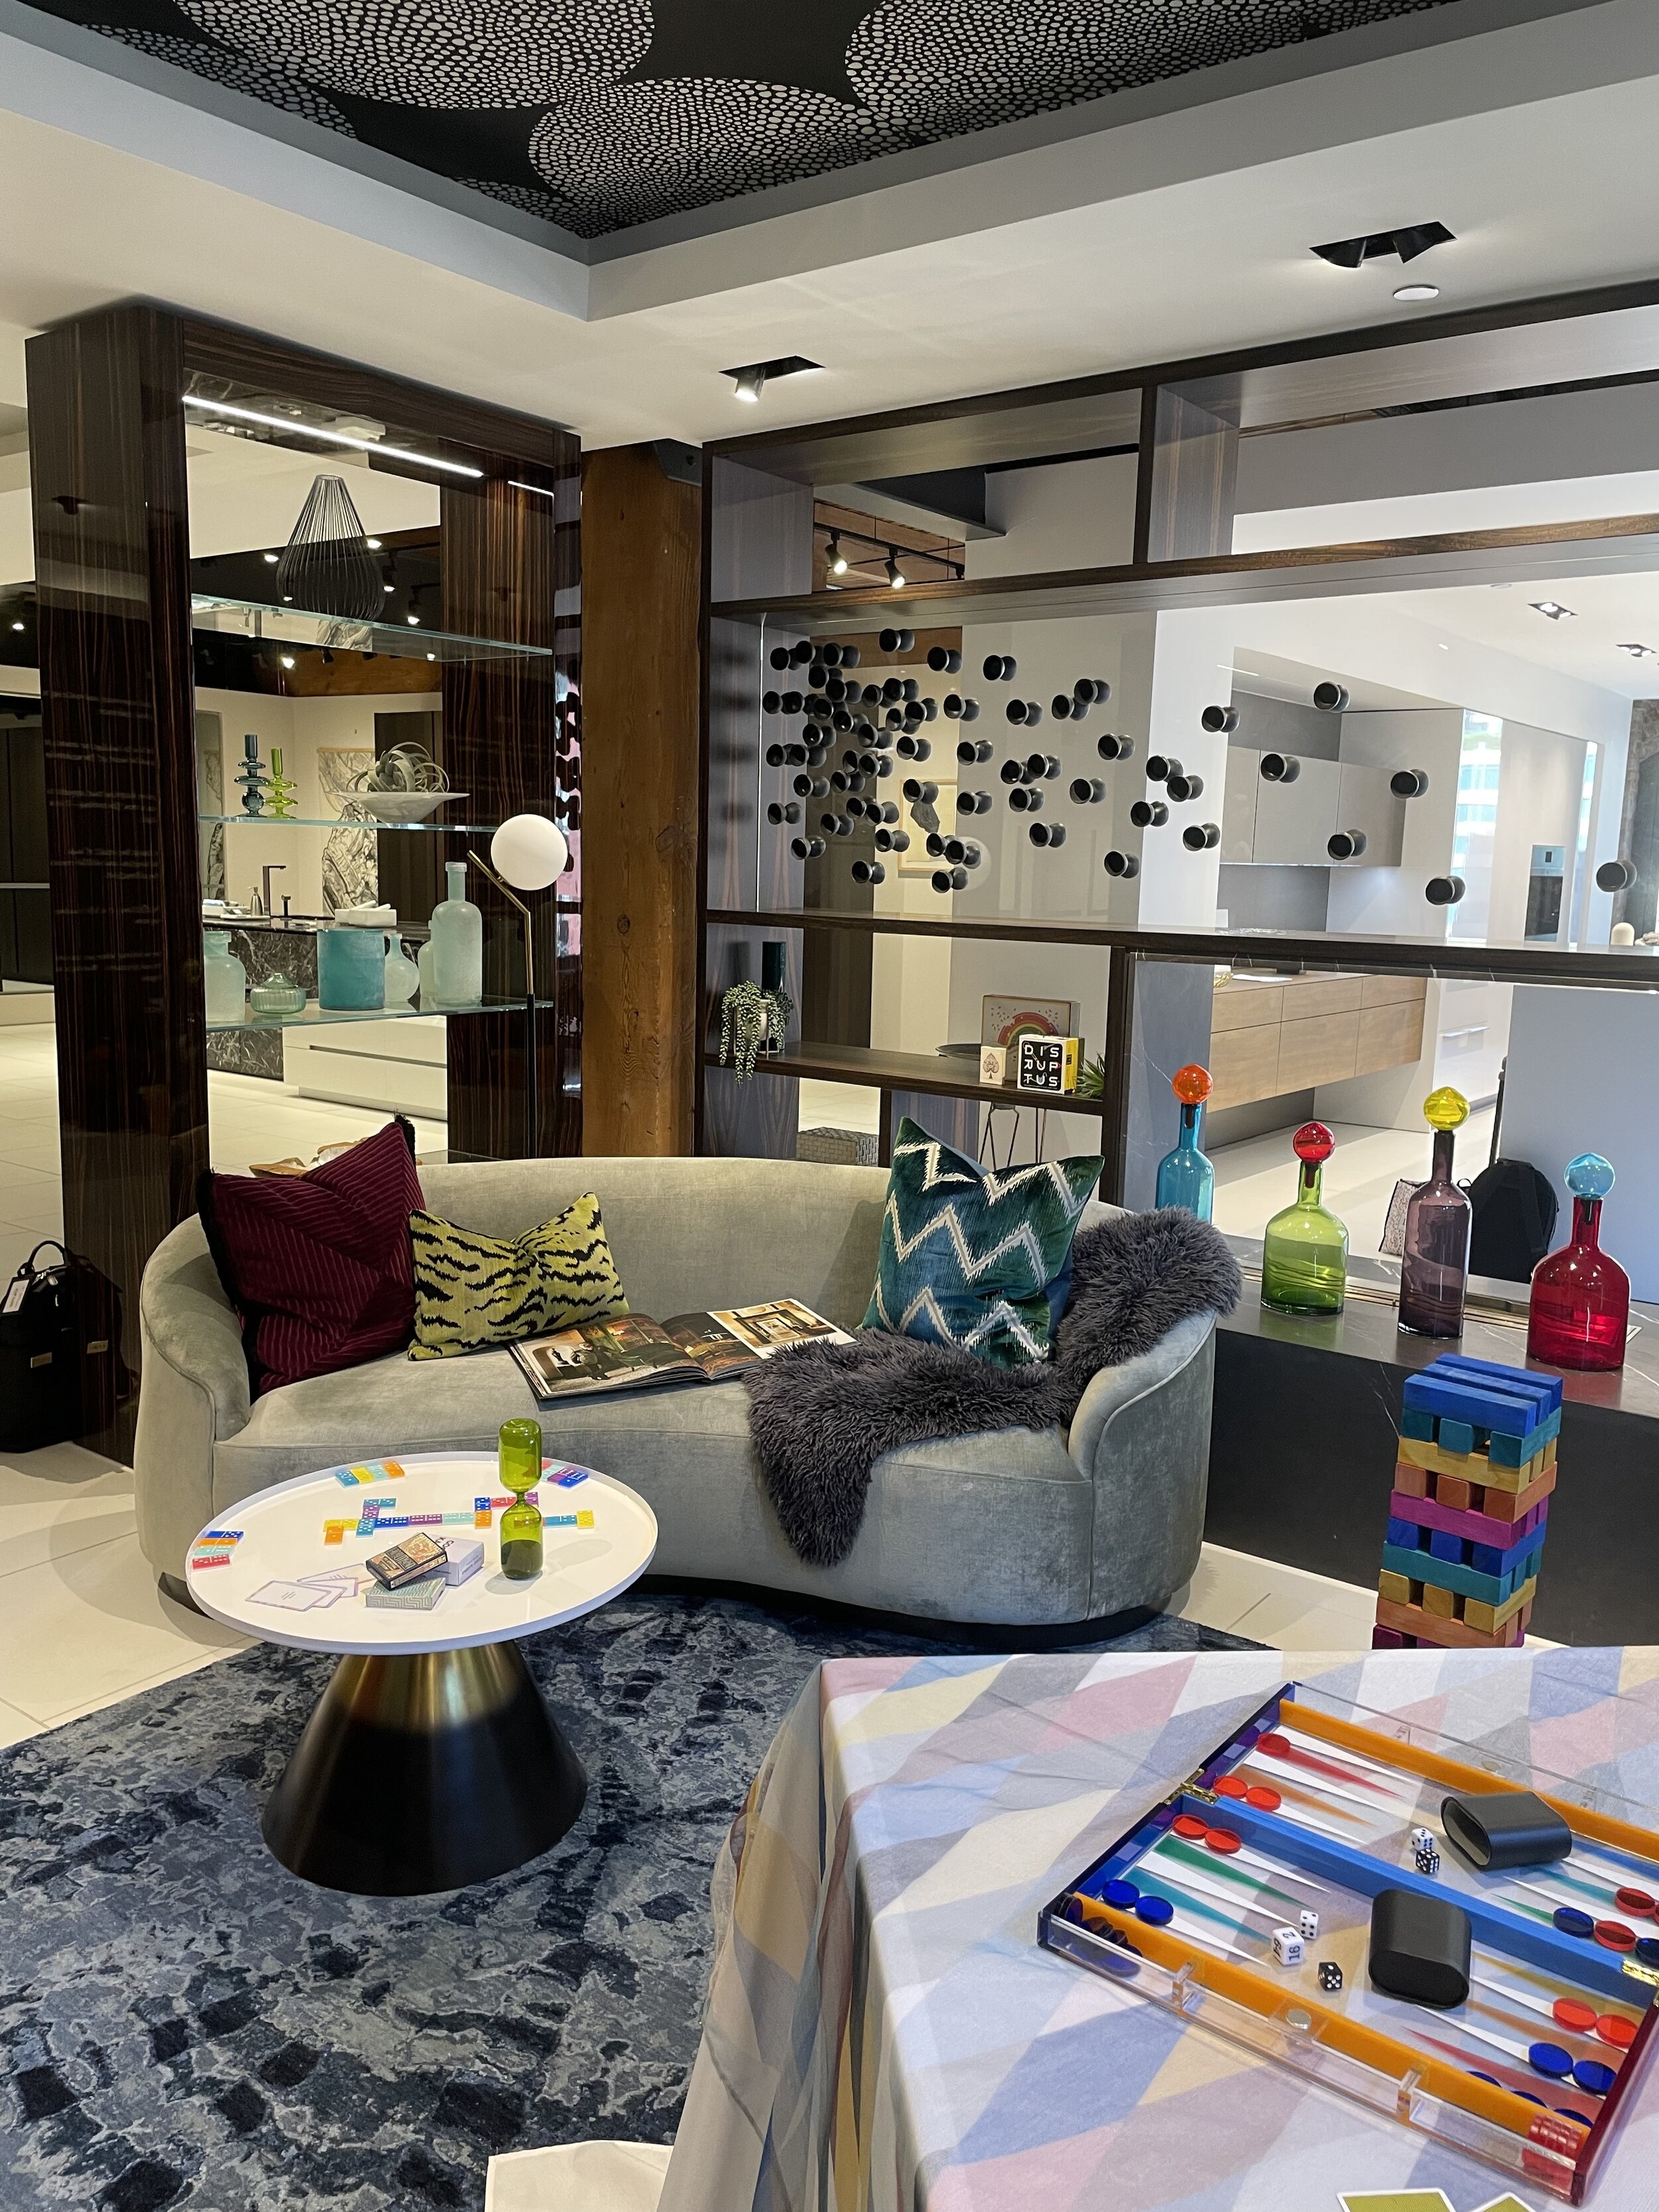

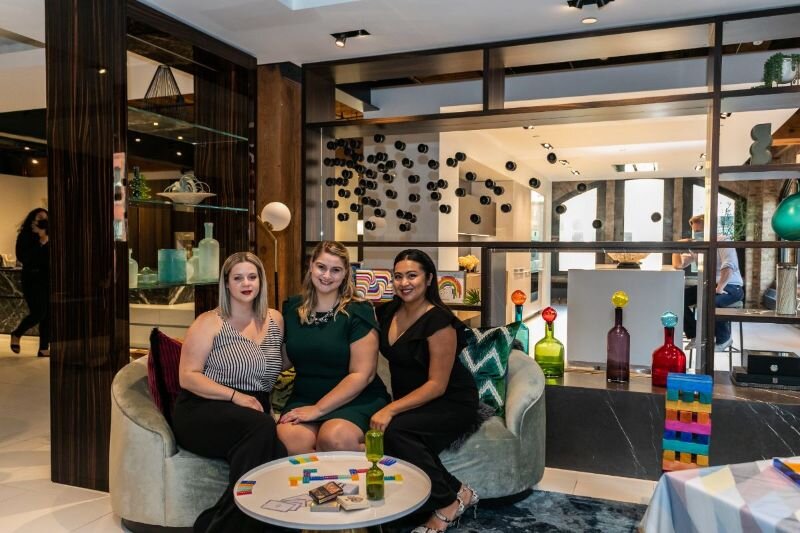


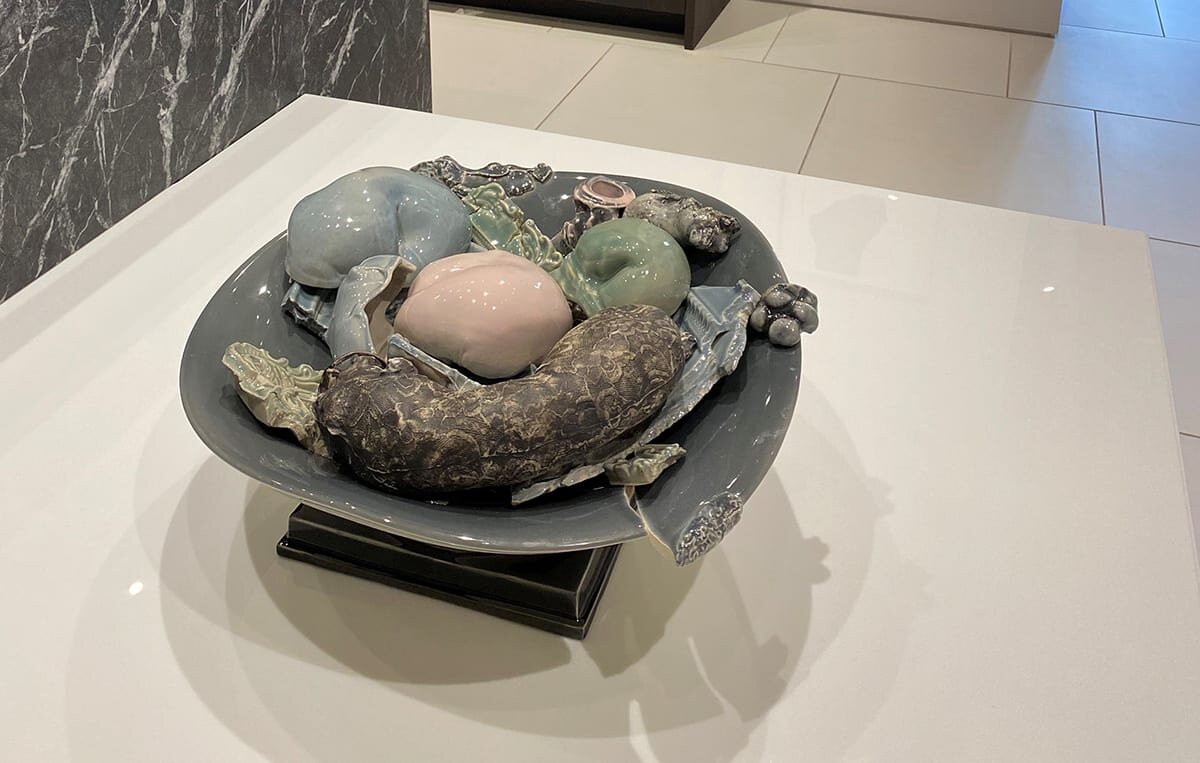

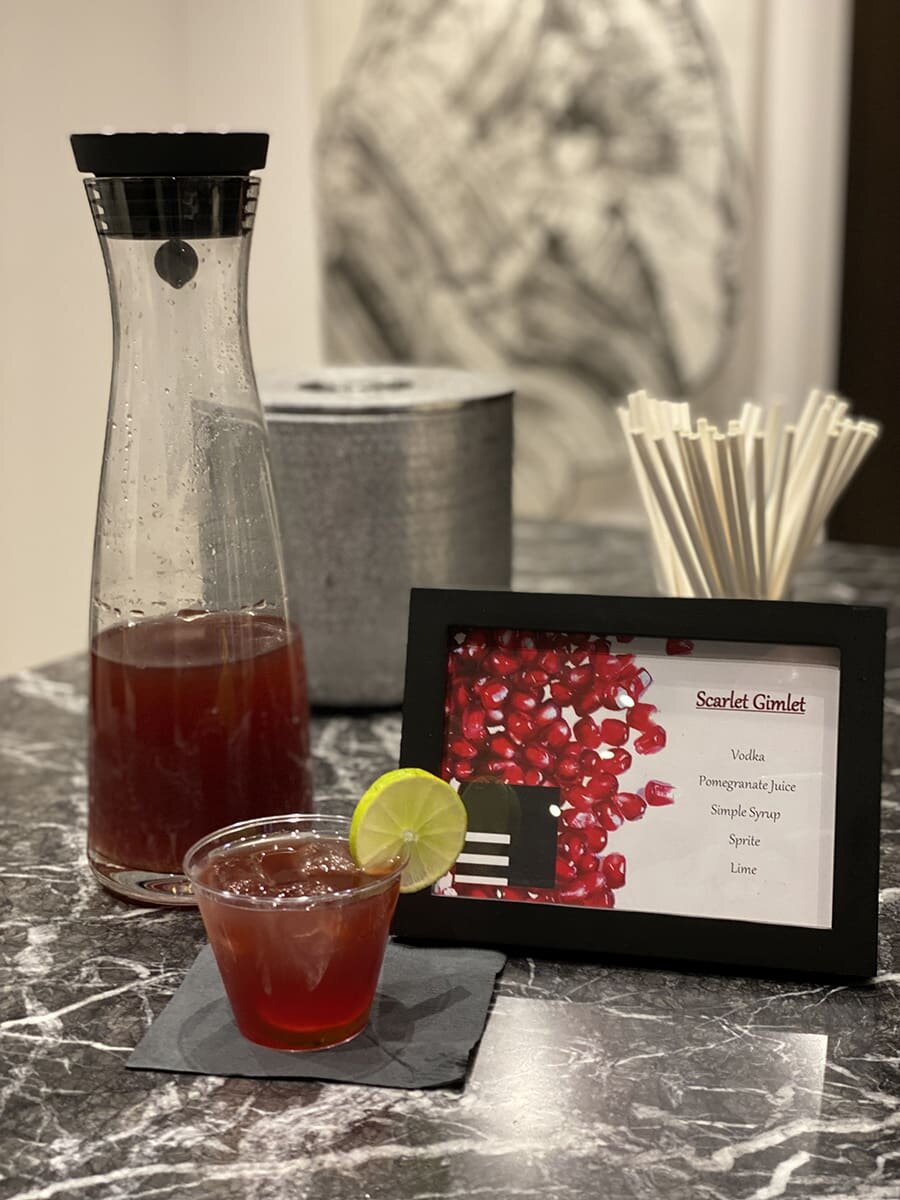


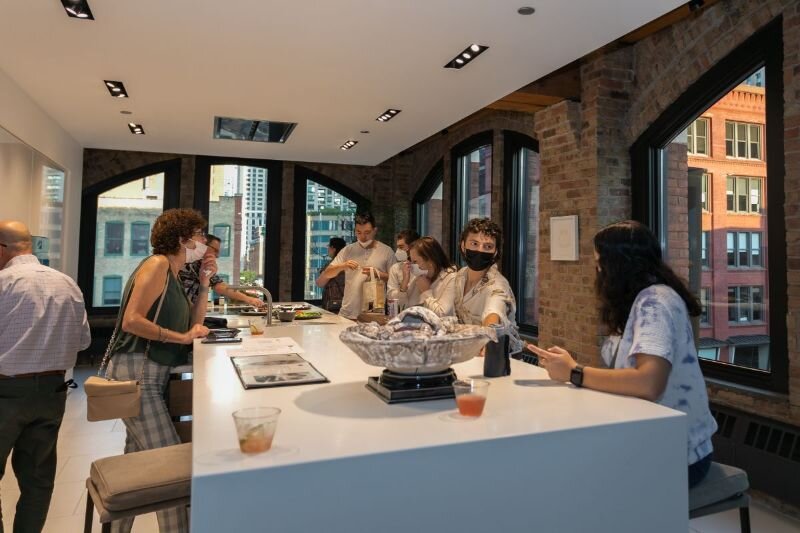
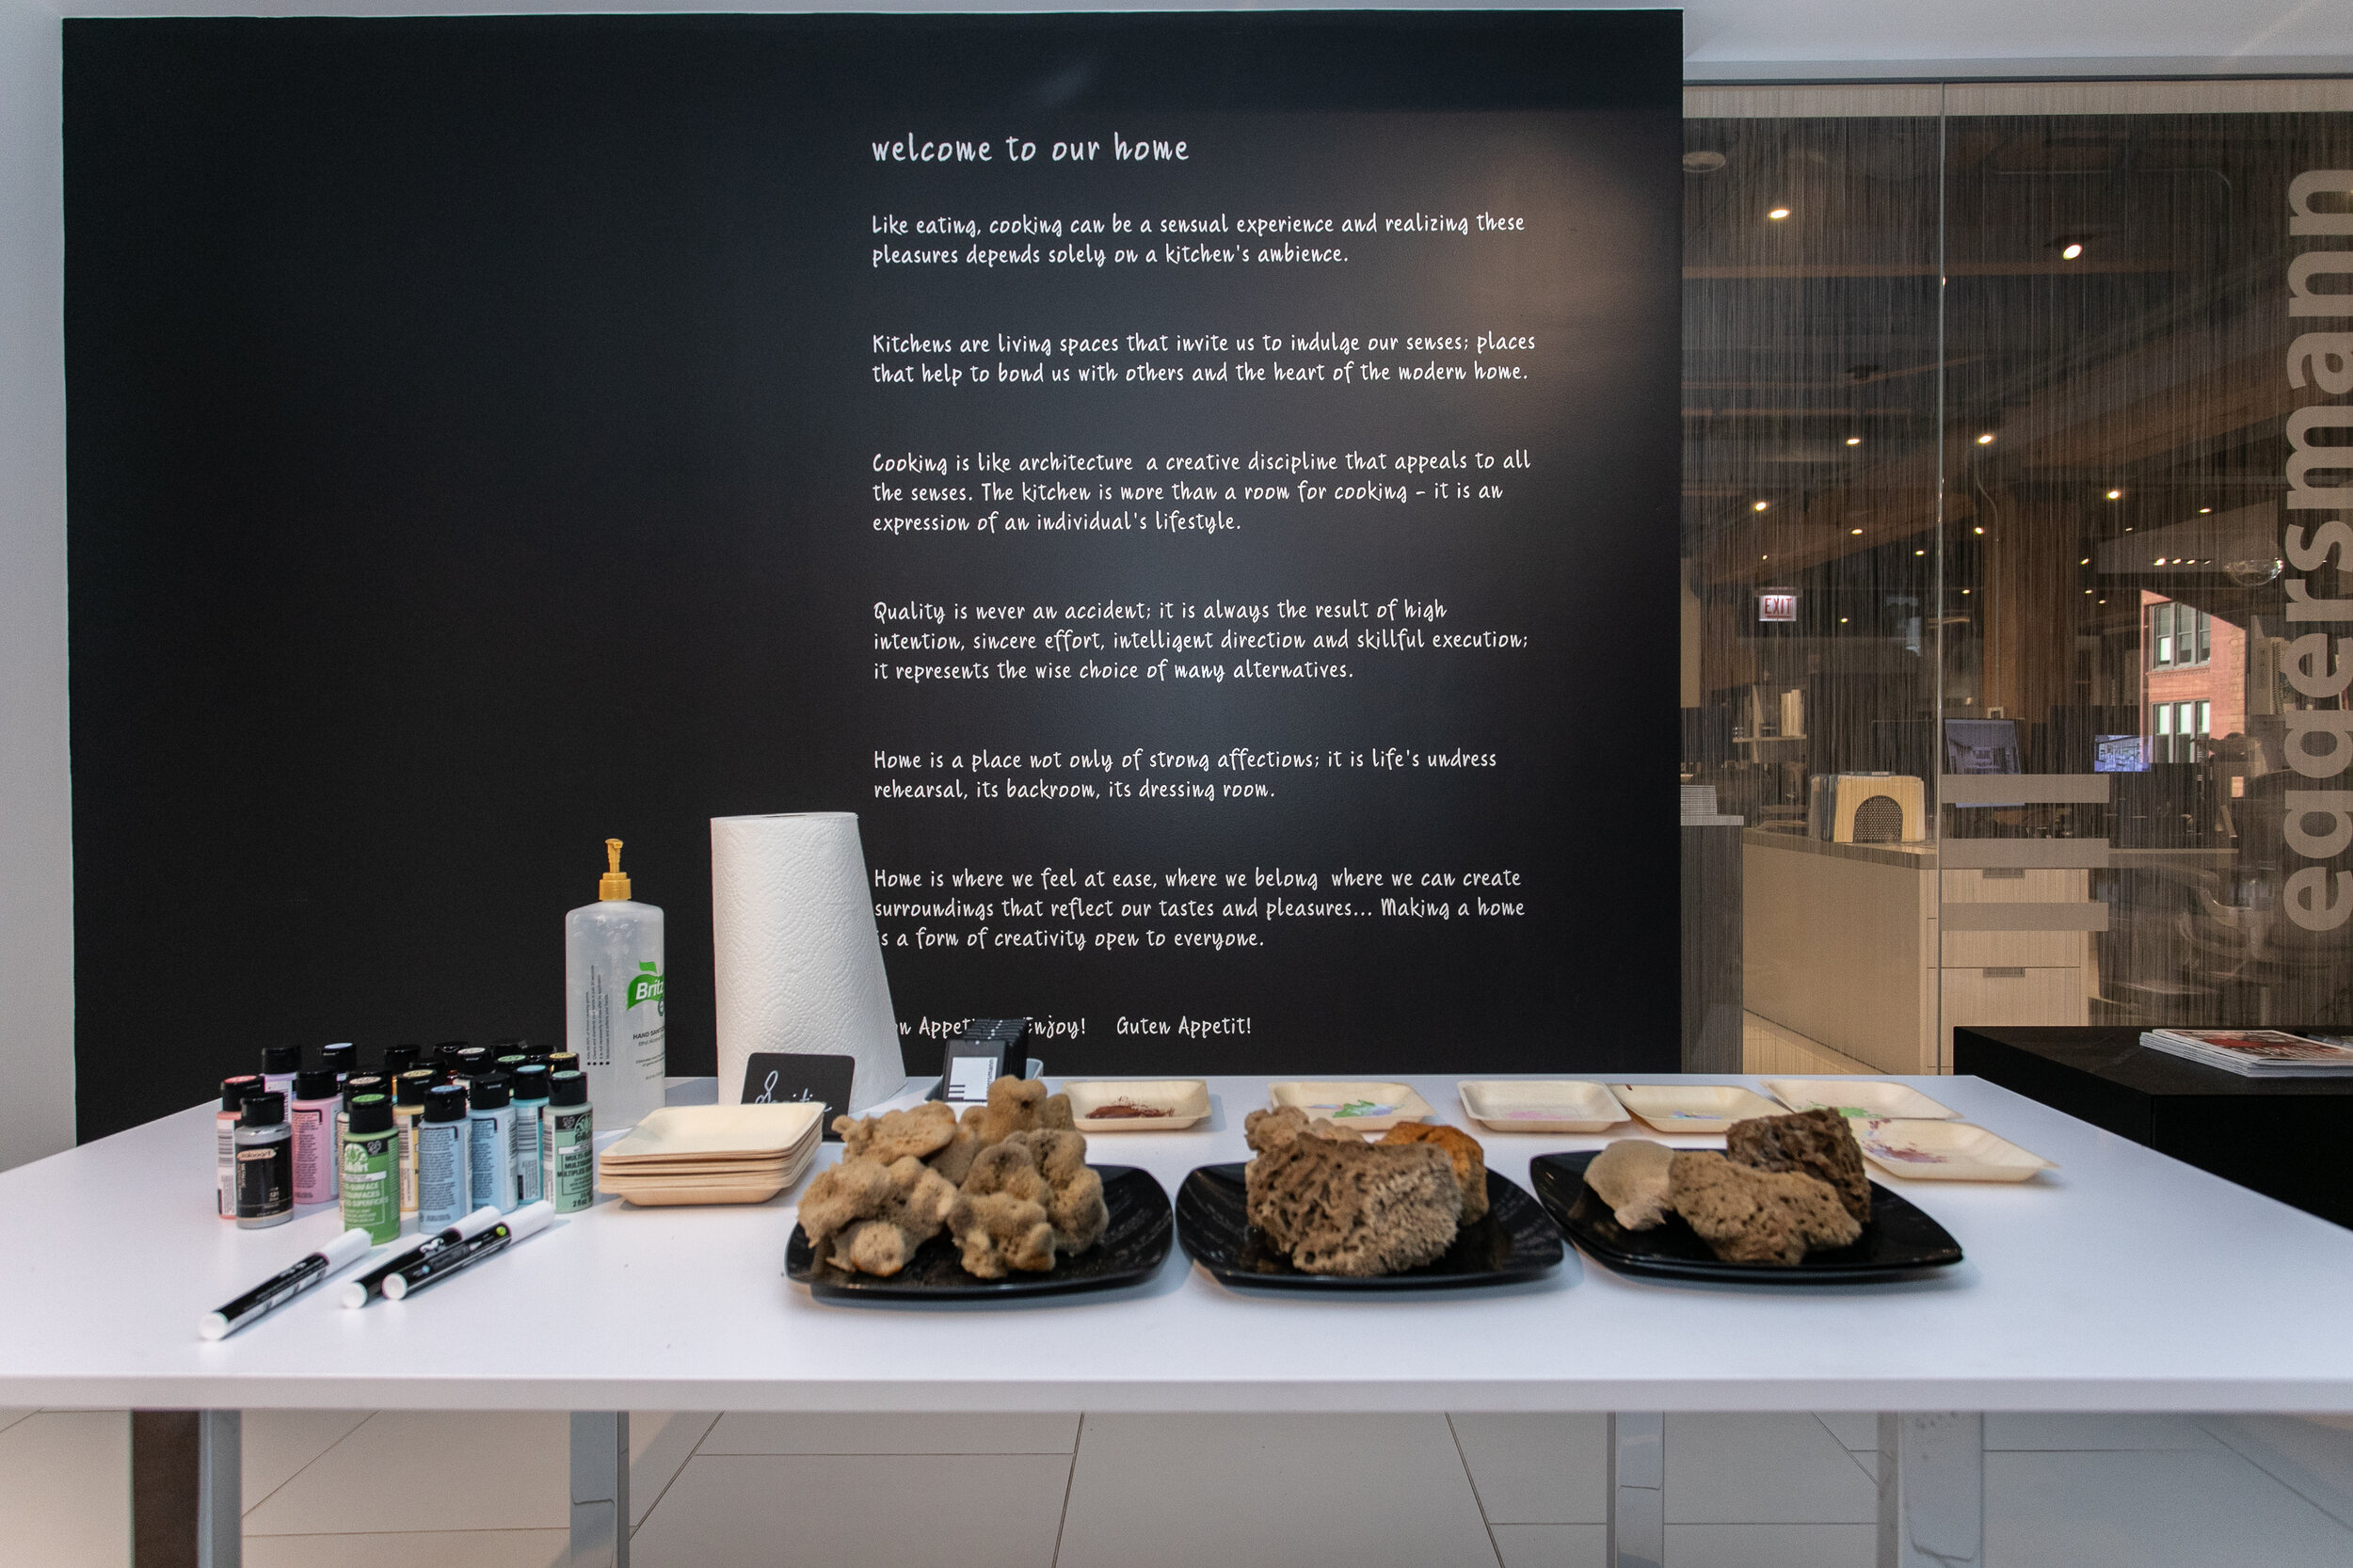

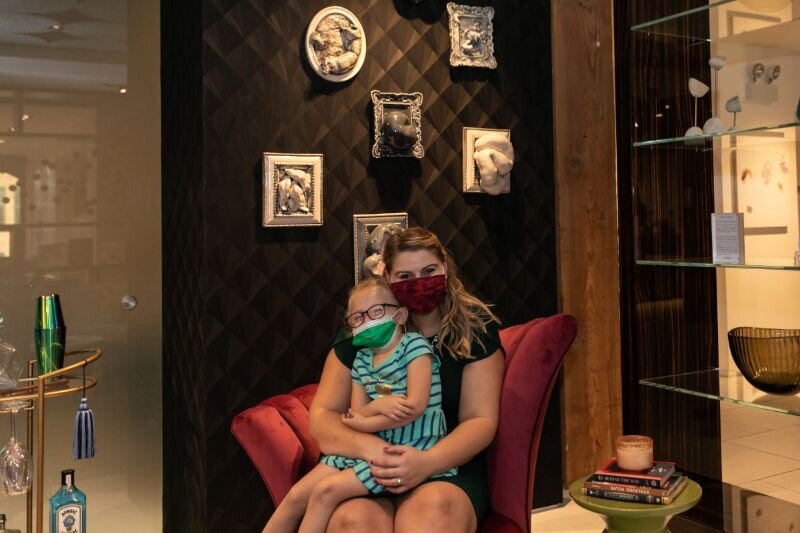
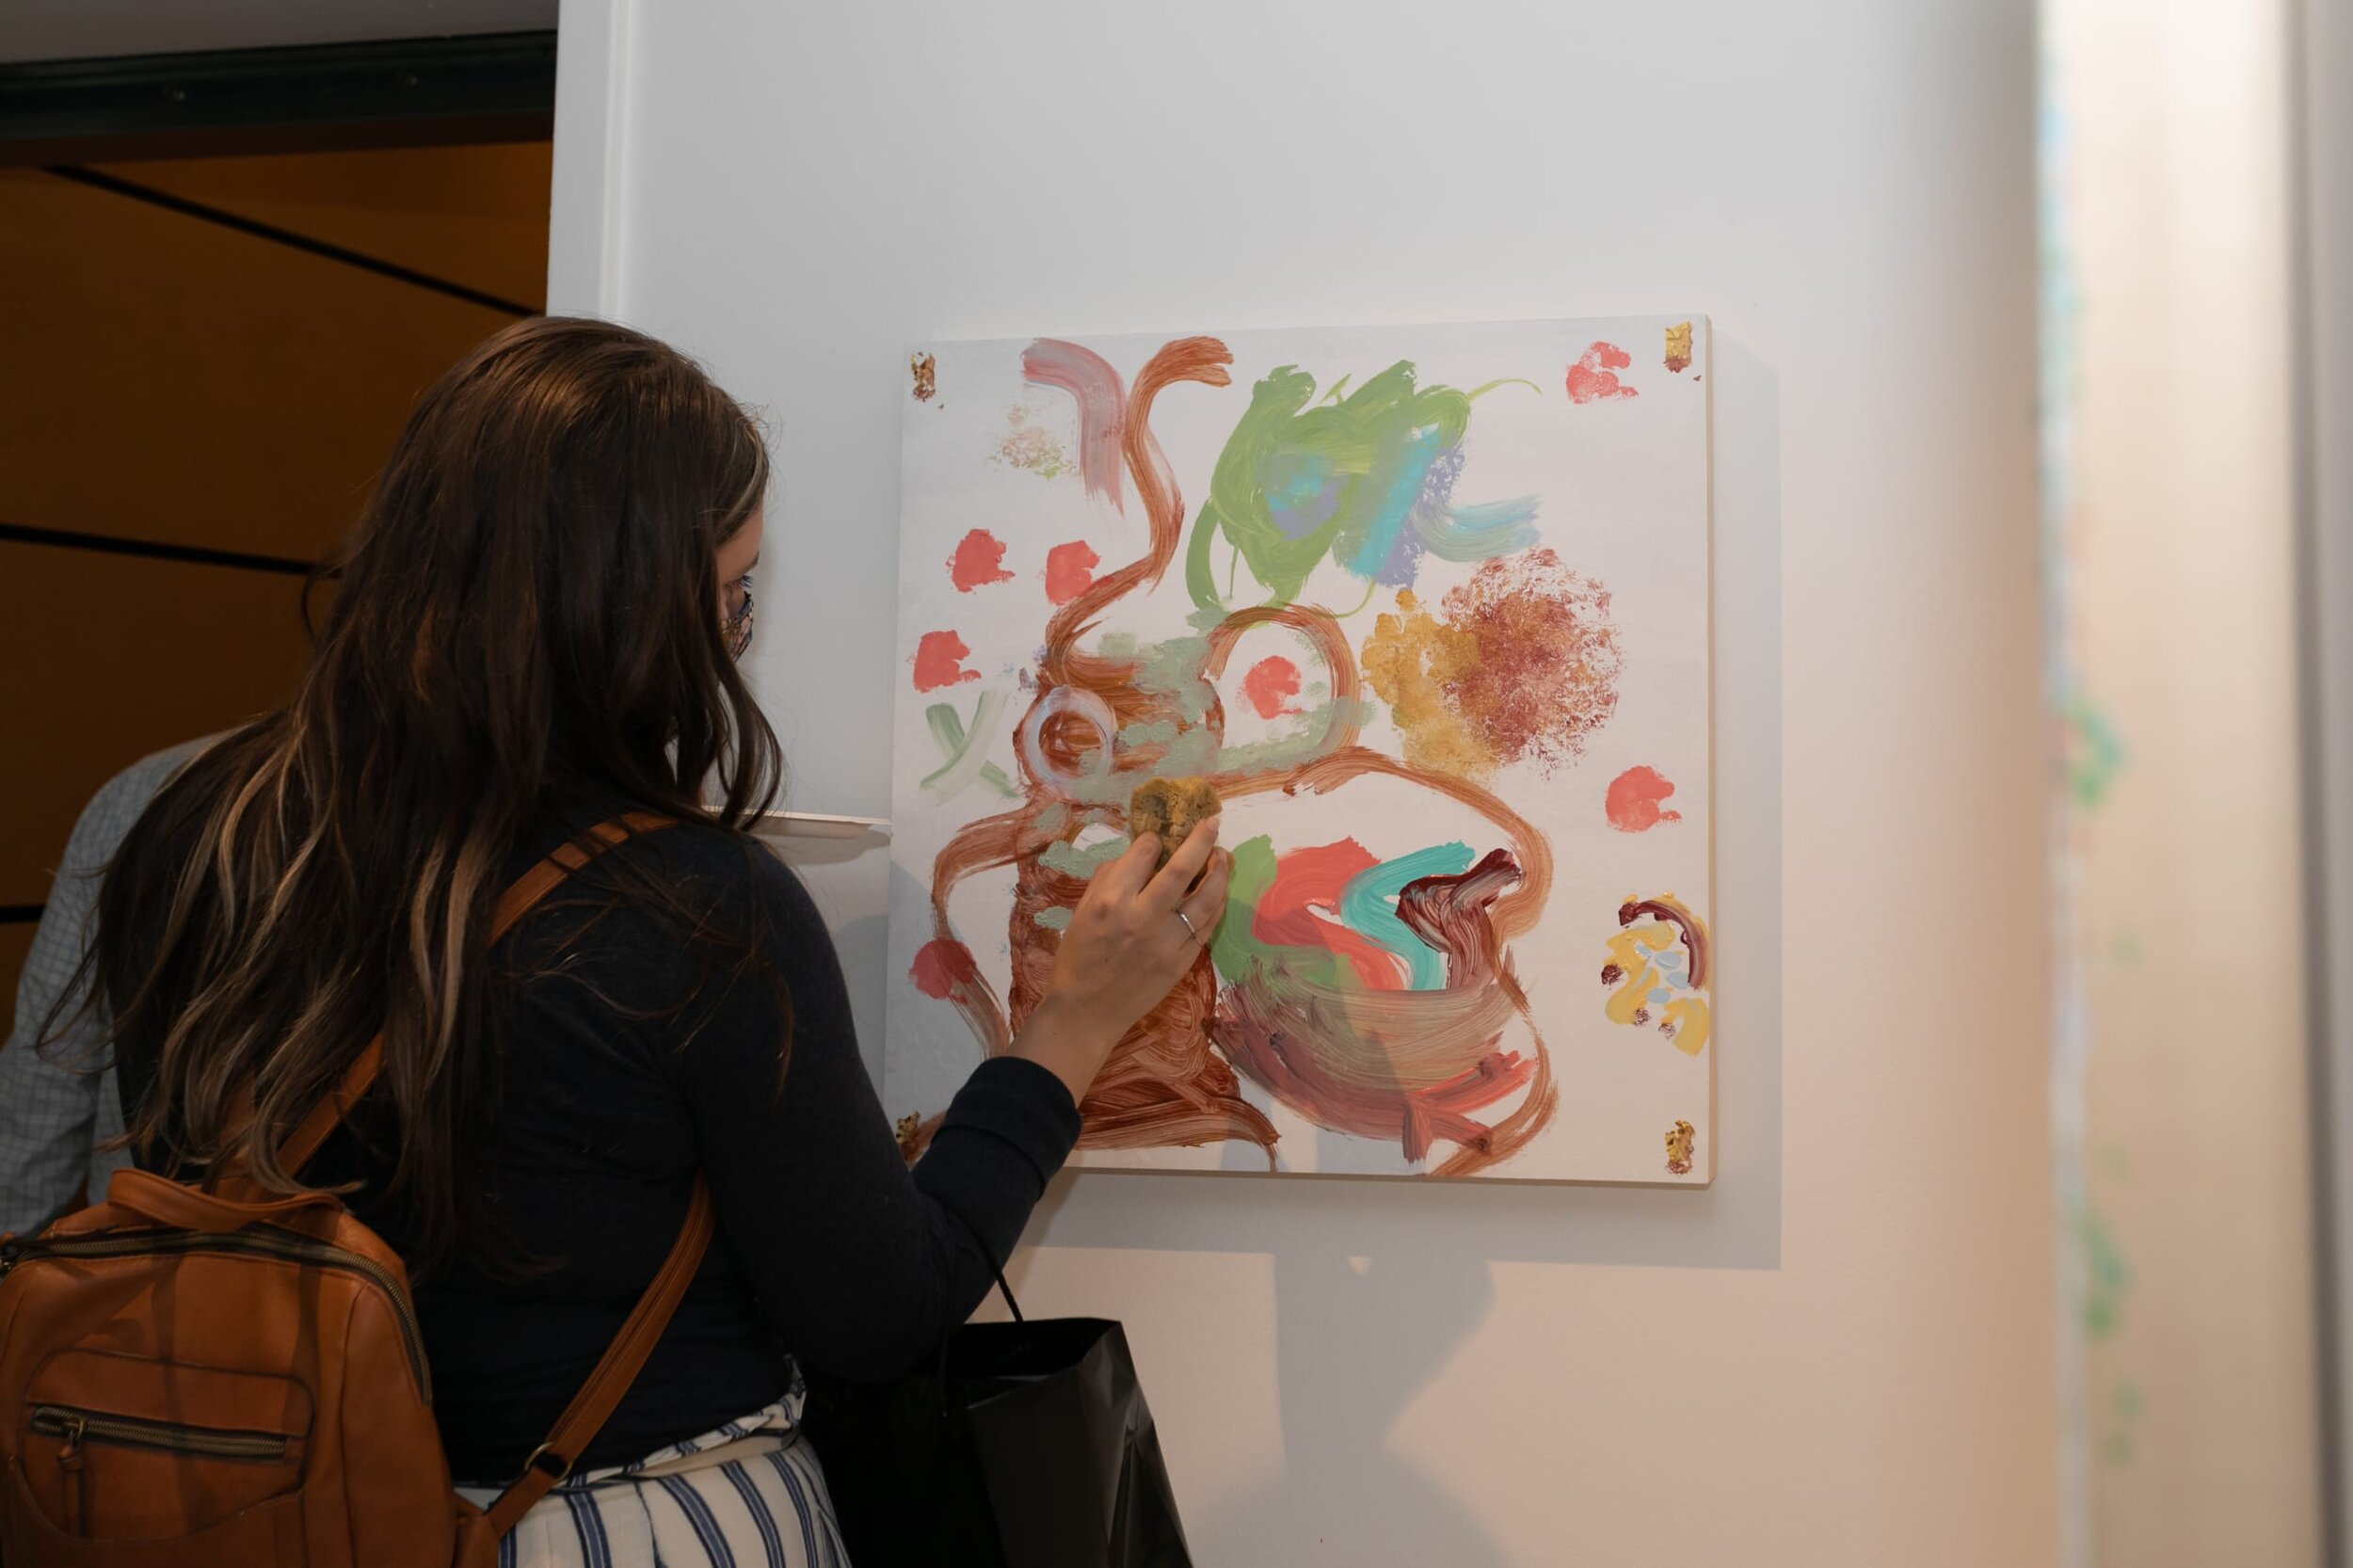
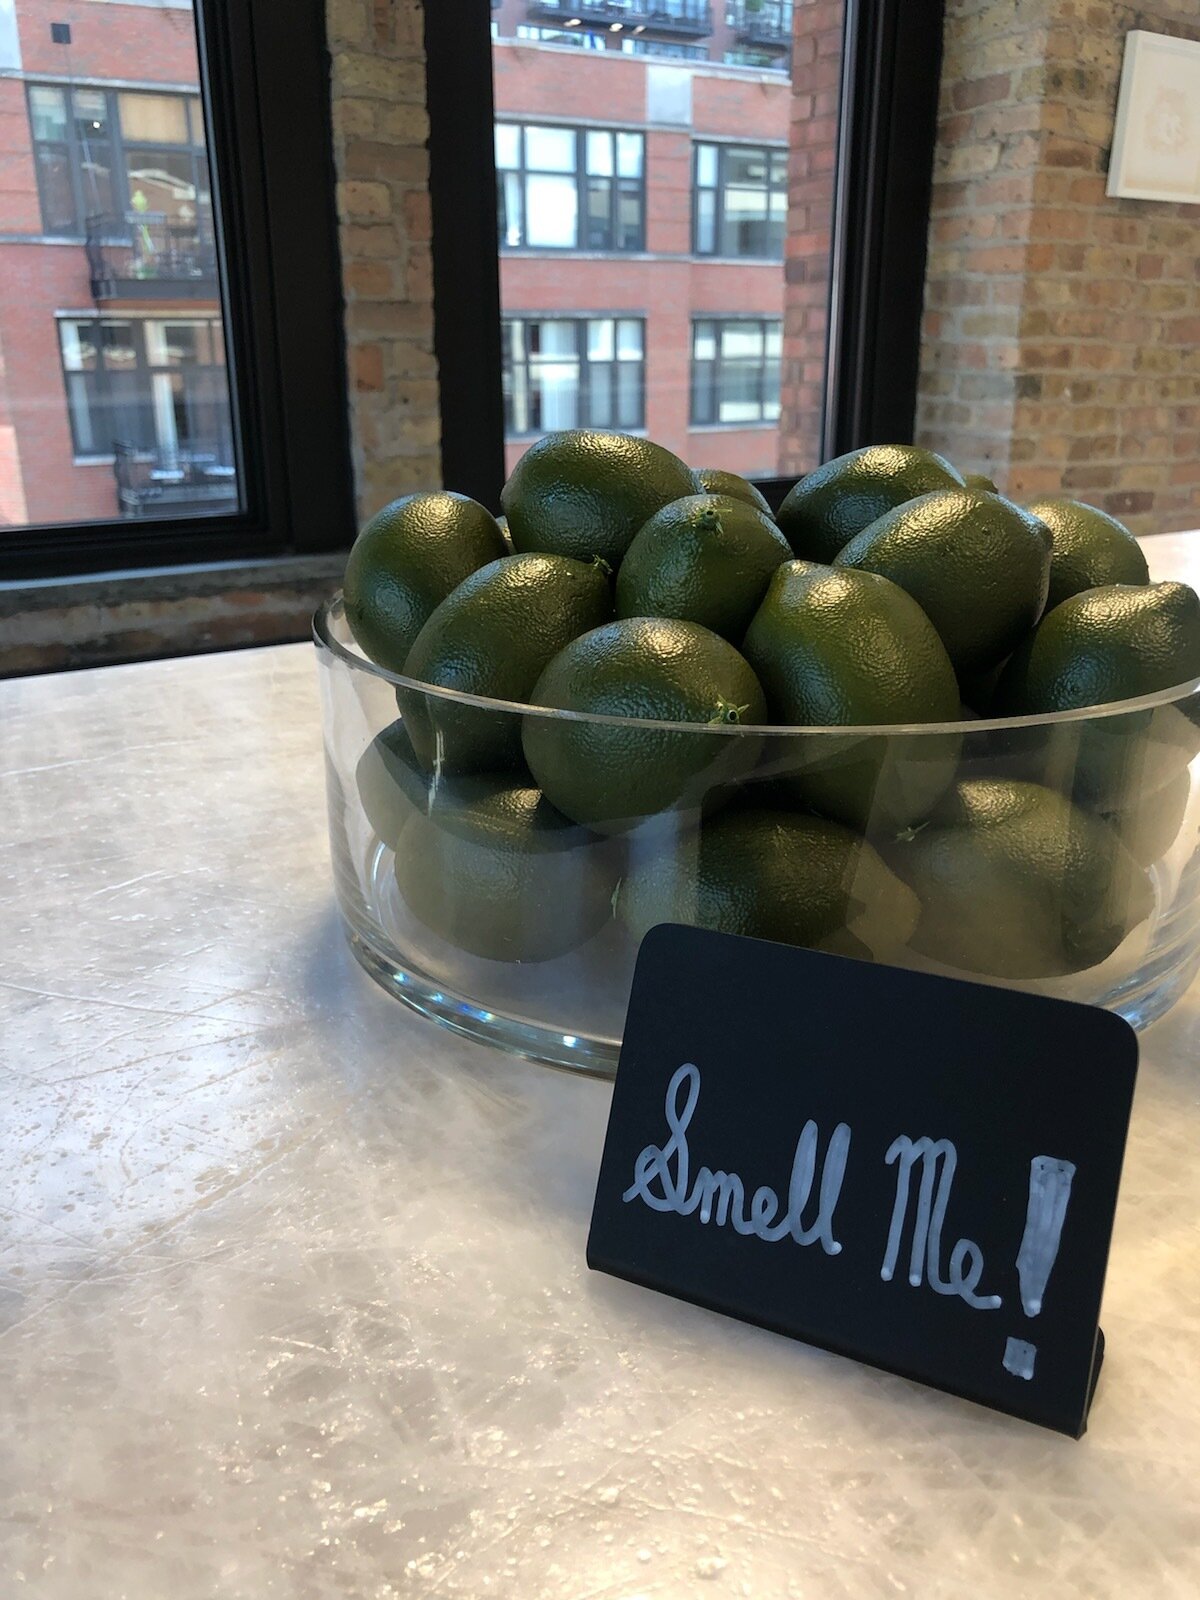


Our Concept Statement
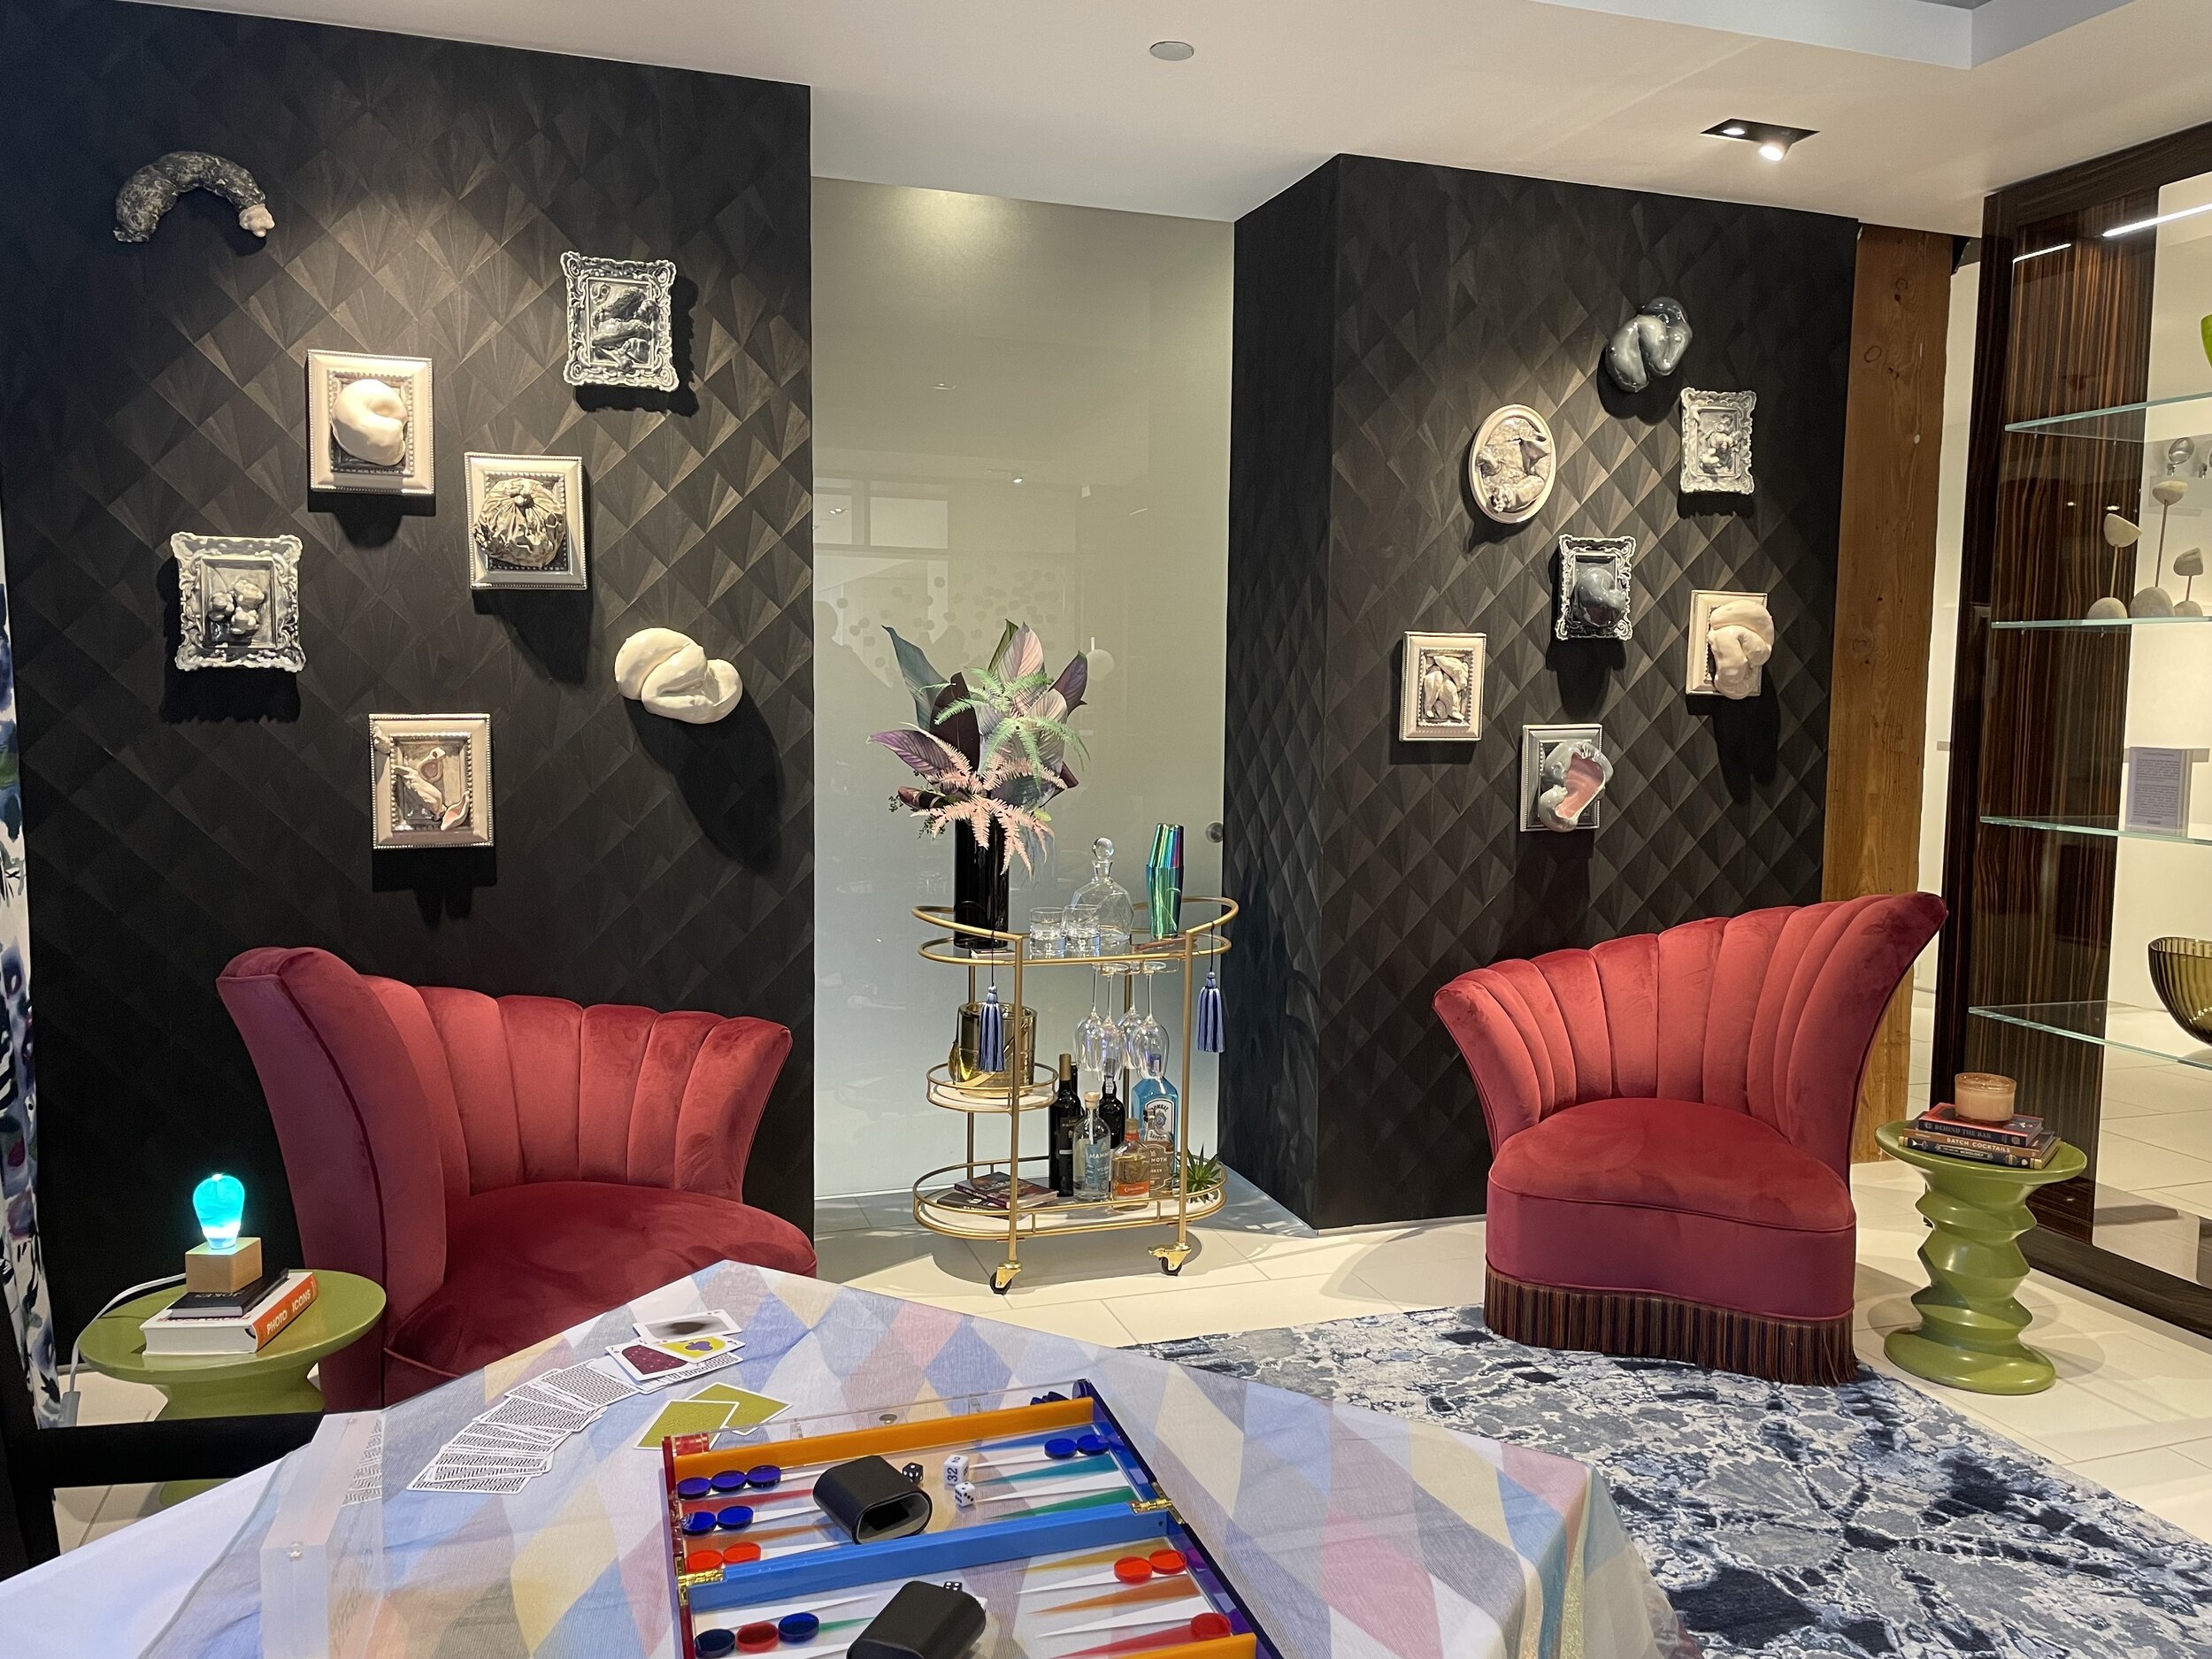
Our vignette, featuring Bobbi Meier’s series Family Portraits, captures the emotional chaos of a family game night. This drawing room is a space to feel; intense colors, textures, and patterns meld together seamlessly to create an atmosphere of excitement and energy that is on the verge of spilling over into madness.
Family Portraits is a series of objects spilling from frames and cast in porcelain. Bobbi Meier writes that “the frame becomes a device to bring tidiness to a messy situation. It simultaneously attempts to entrap and protect an object, which cannot be contained: underlying emotional chaos.” This vignette is a playful take on Meier’s work, inviting you to indulge in an evening of lively gameplay; let loose, have a cocktail, and spill the emotions that emerge during a competitive family game night.


Meet the artist, Bobbi Meier of salonlb.

“Producing work that is sensuous, slightly frightening, and grotesquely humorous has become a means to engage discomfort and anger with situations that cannot be changed.”
Bobbi Meier is a Chicago-based visual artist. She works in various mediums such as sculpture, collage, drawing, photography, and most recently, performance. Her work is realized through provocative use of materials such as pantyhose, spandex, porcelain, and found home furnishings, embedding themes of emotional history, struggle, and loss in its making. (salonlb.com)


Surrender Your Senses
This was truly an evening of the senses!
Sight
Beautiful eye-catching colors, designs, and intriguing art pieces were everywhere.
Taste
A signature cocktail, the Scarlet Gimlet, savory h'orderves, and decadent desserts were indulged in throughout the evening.
Touch
The eggersmann team prepared an interactive coral sponge artwork for guests to add their own colors, texture, and interpretation. The pieces were then raffled off in a social media hashtag challenge!
Smell
While guests explored the exhibit, we invited them to smell three very different scents of Zest, Smoked Woods, & Meadow.
Sound
A carefully designed playlist surrounded the studio space with a mix of upbeat tempos and contemporary hits.
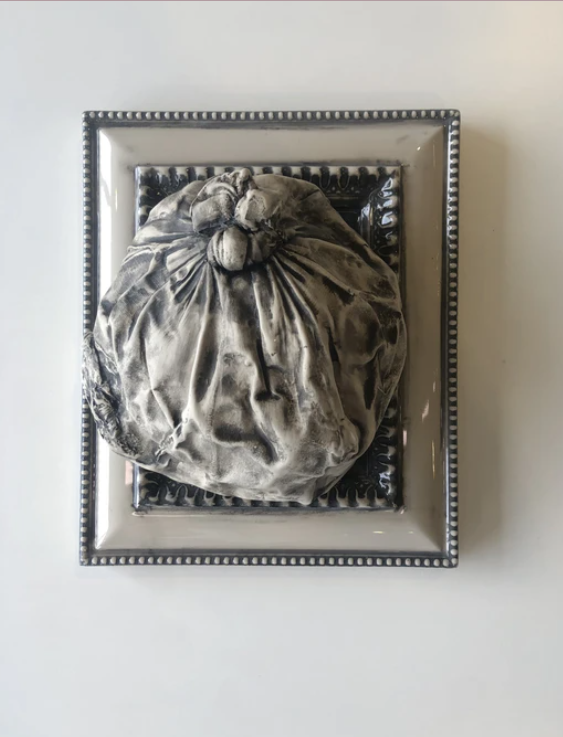

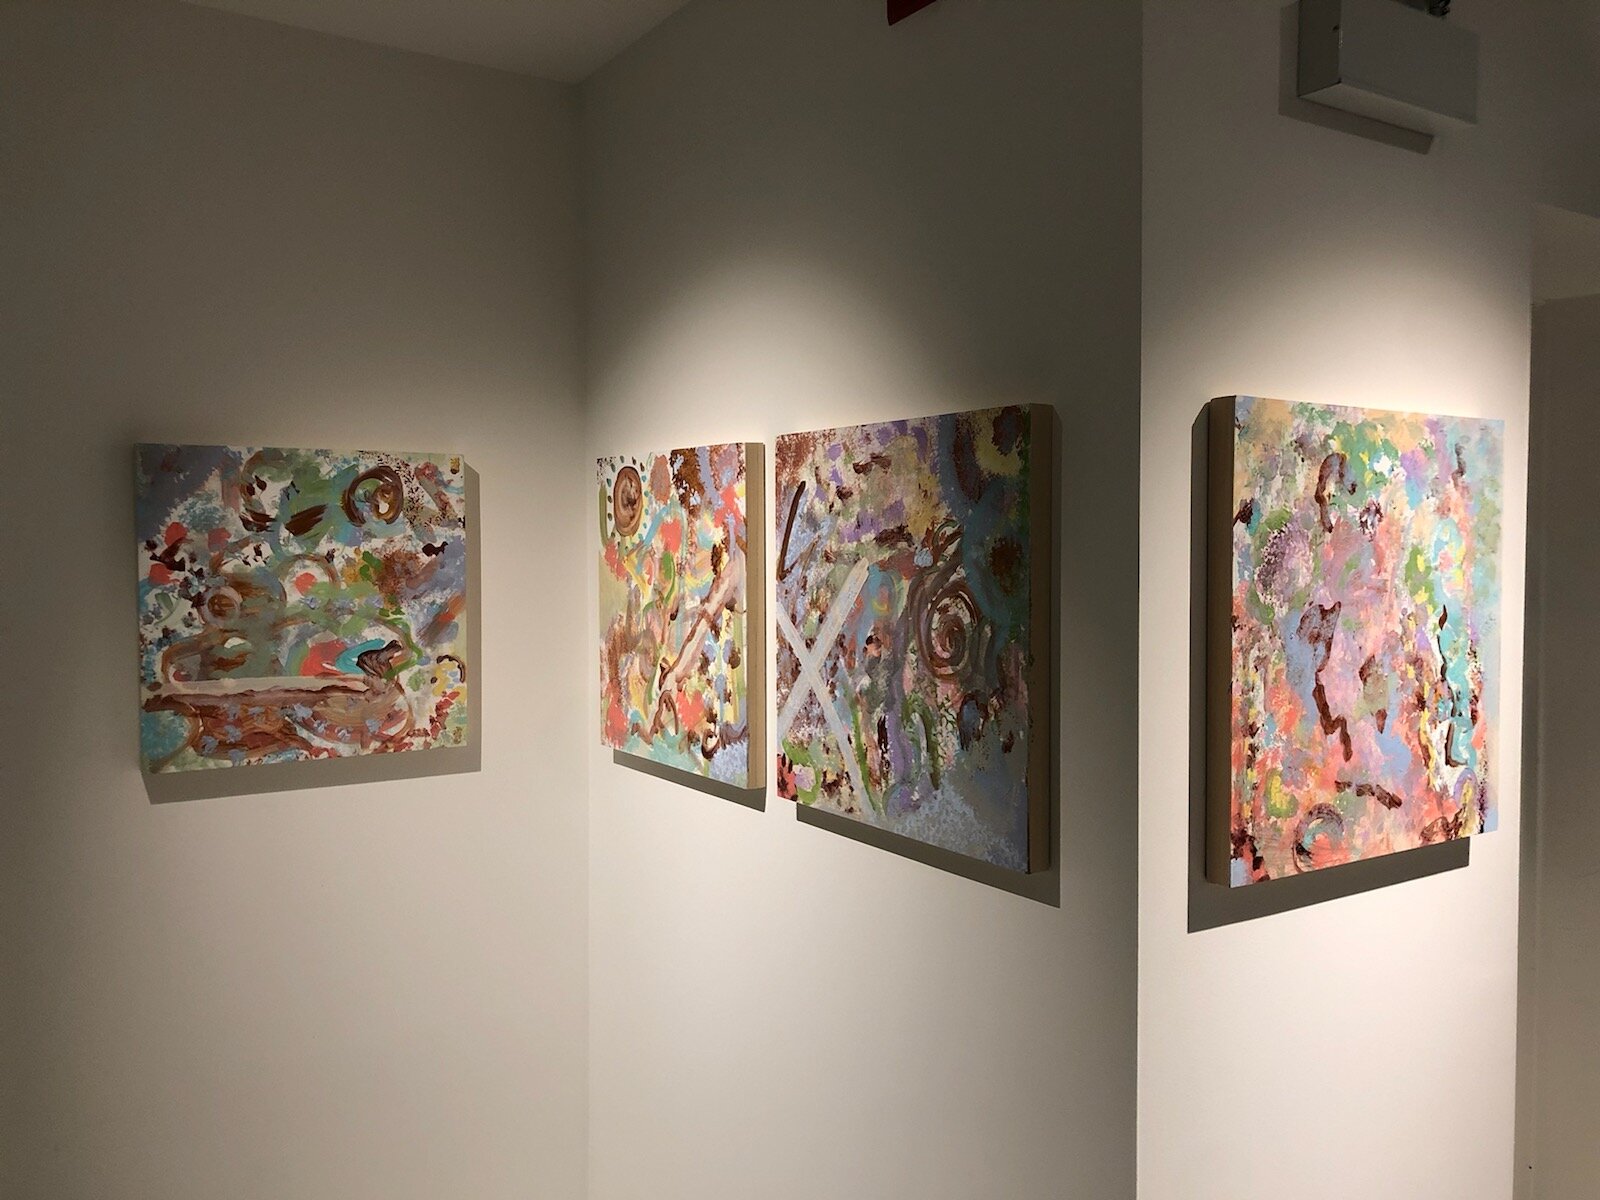
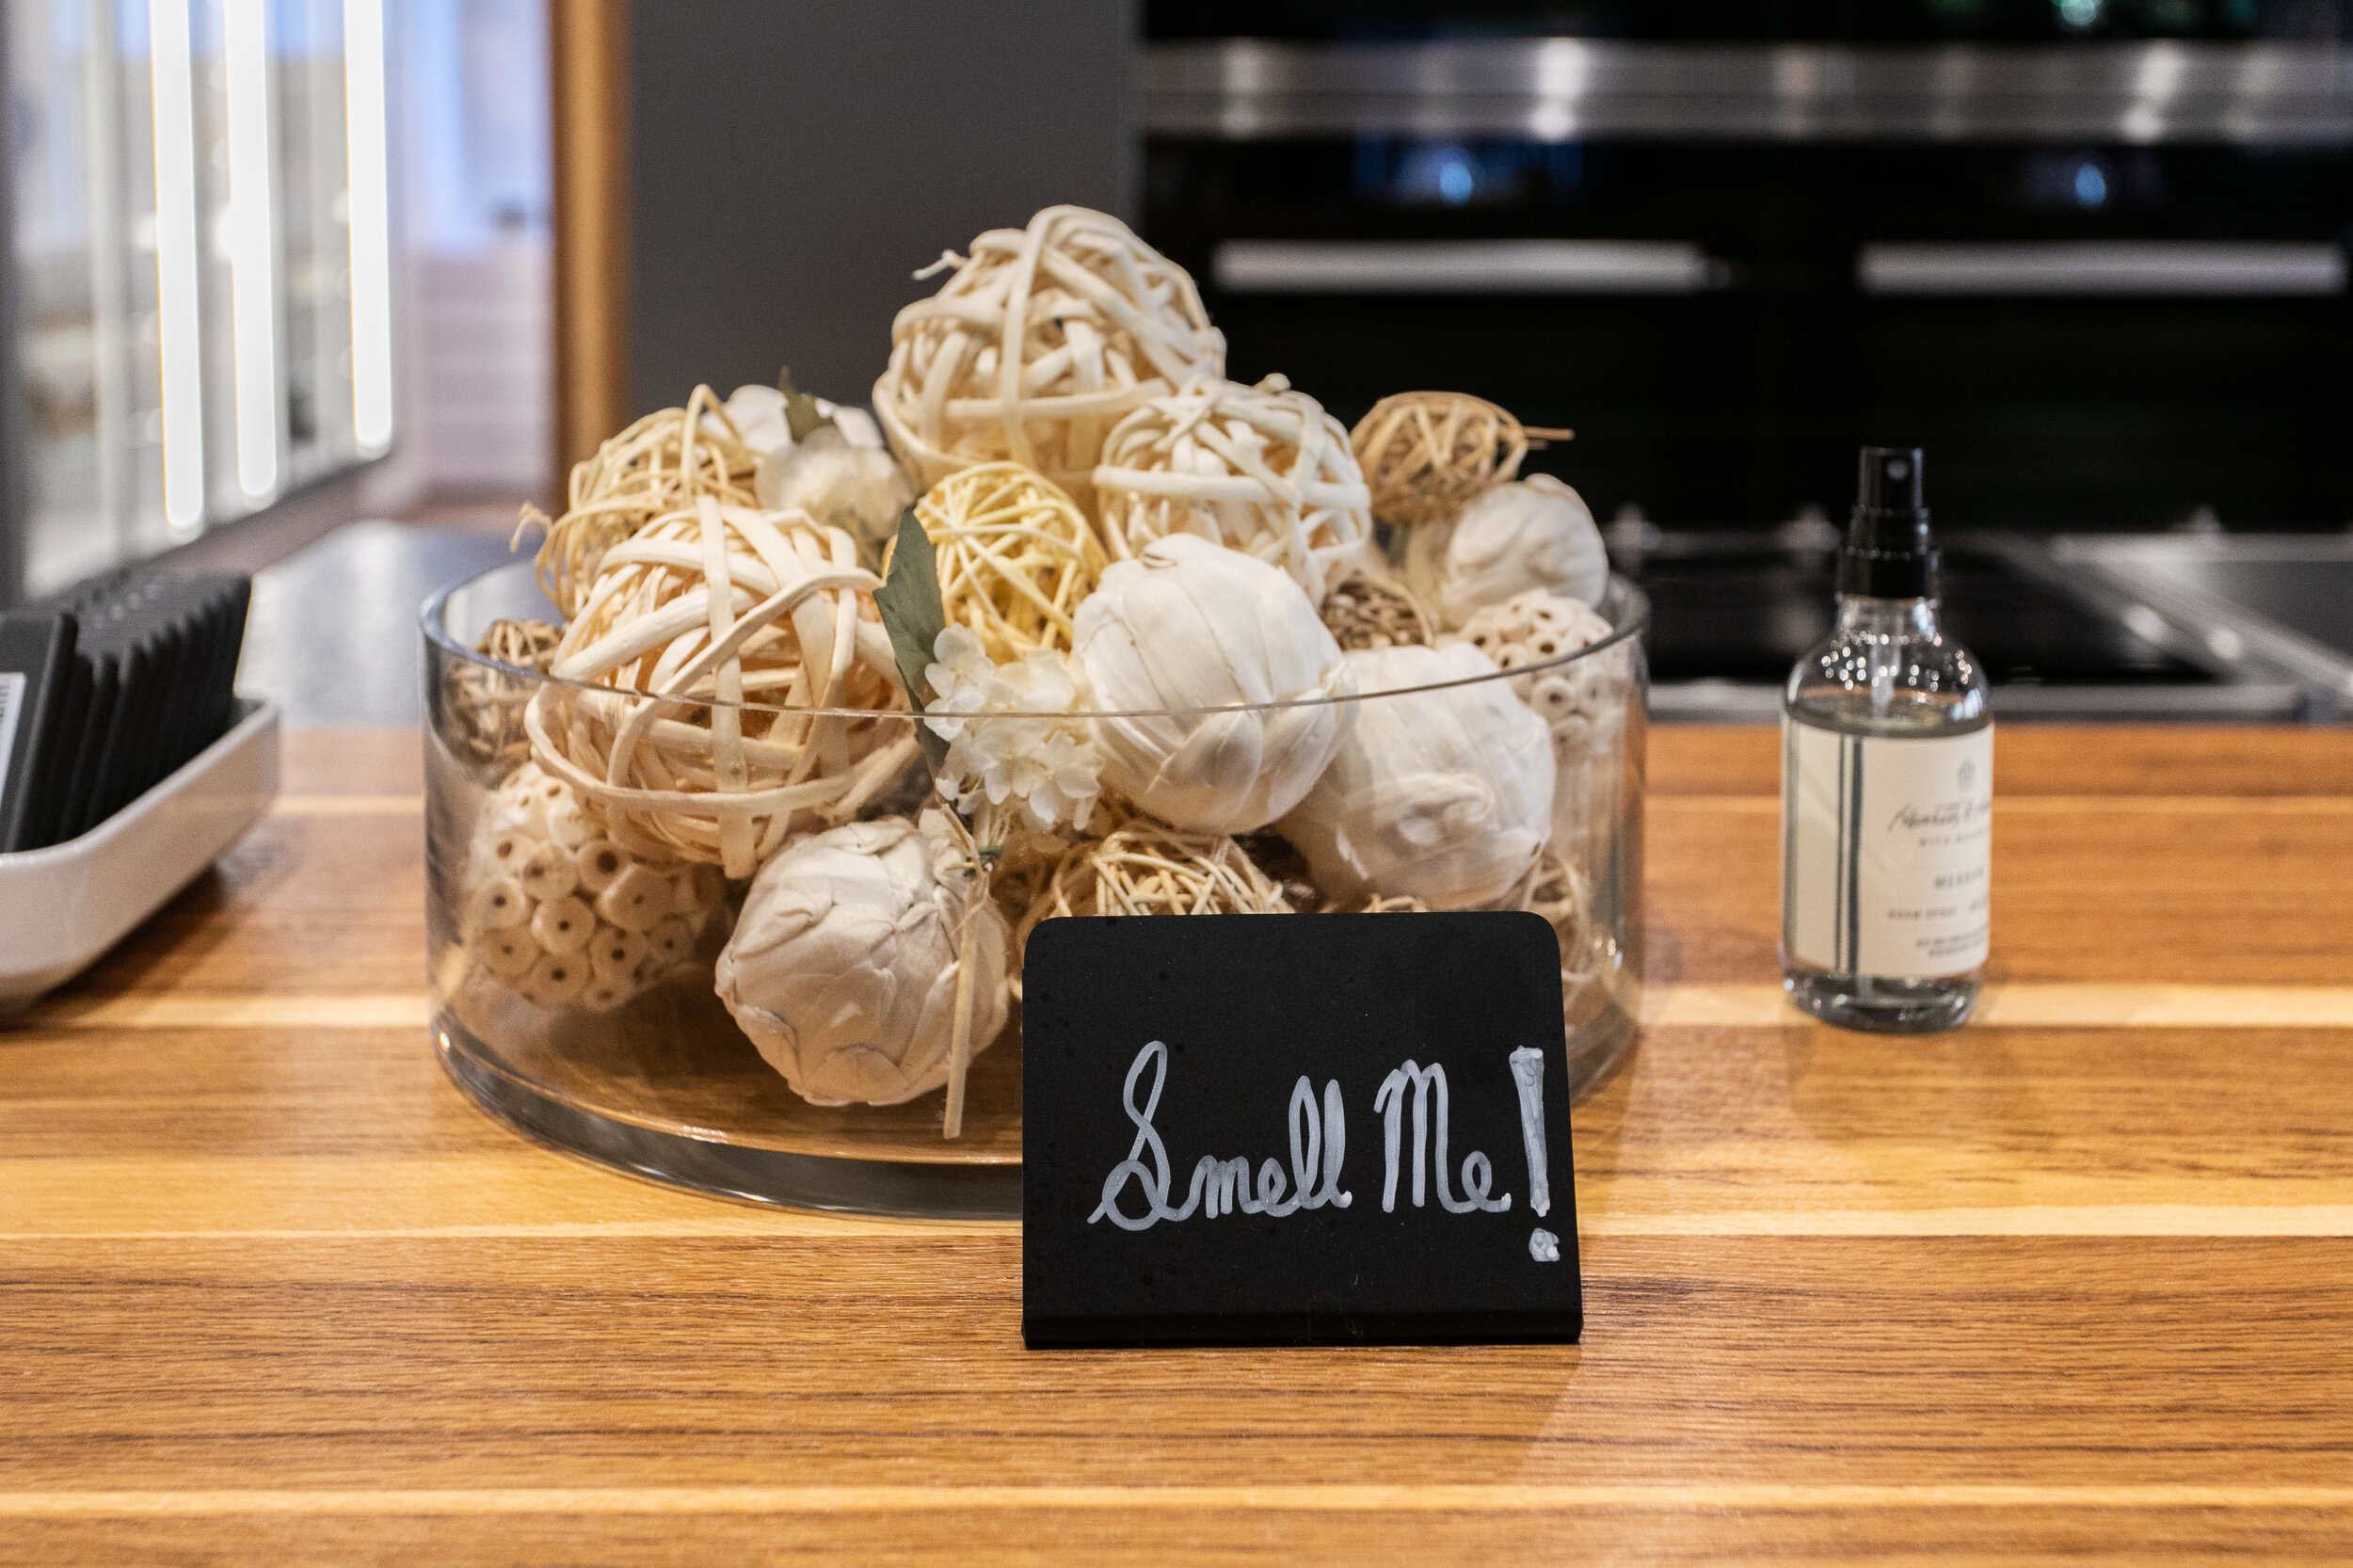

Missed us last Friday? There’s still time to see our vignette!
The Fall Gallery Walk vignettes will be up in each showroom through October 11.
Make sure you stop by eggersmann at 300 W Hubbard St 4th floor and take a look!

We could not have had such a successful opening night without the help of many hard working individuals! We owe a huge “thank you” to all our contributors!
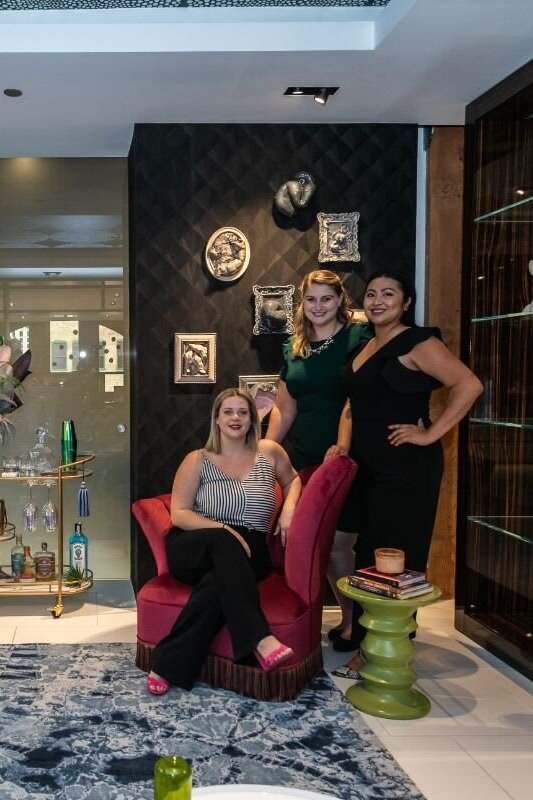

Our Favorite Decorative Hardware Right Now
Decorative hardware is the jewelry of the space! Whether you’re redesigning your entire home or just giving one of your rooms a refresh, use decorative hardware to add a little beauty and personality.
Decorative hardware is the jewelry of the space! Whether you’re redesigning your entire home or just giving one of your rooms a refresh, use decorative hardware to add a little beauty and personality.
Here are some of the pieces we are loving right now!
Modern Matter: Harrison Knob
Why we love it: It’s got texture, color, and character! We love adding metal accents to a make a design statement. Plus, it’s completely customizable; choose from eight gemstones and three different finishes. These vibrant colors are everything!

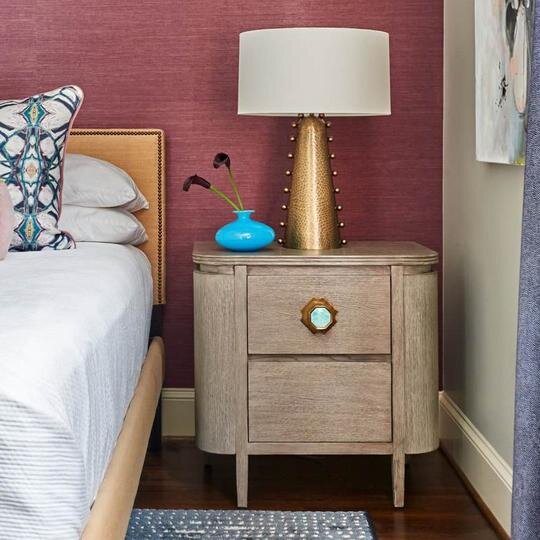

Modern Matter: Dogwood Custom Knob - Patina
Why we love it: This delicate looking flower adds a feminine and timeless touch to any furniture piece. While we absolutely love the patina, this knob is also available in three finishes and your choice of seven different semi-precious stones.


Modern Matter: Kravet Dylan Pull - Polished Brass
Why we love it: These pulls are sure to add luxurious vibes to any room. We love mixing metals into our designs and we are totally here for this polished brass.


AUZ Design Studio: Small Pyramid Square Knob
Why we love it: These modern square copper knobs add personality to any furniture piece. The finish is so unique and the textured lines on top are subtle and delicate.

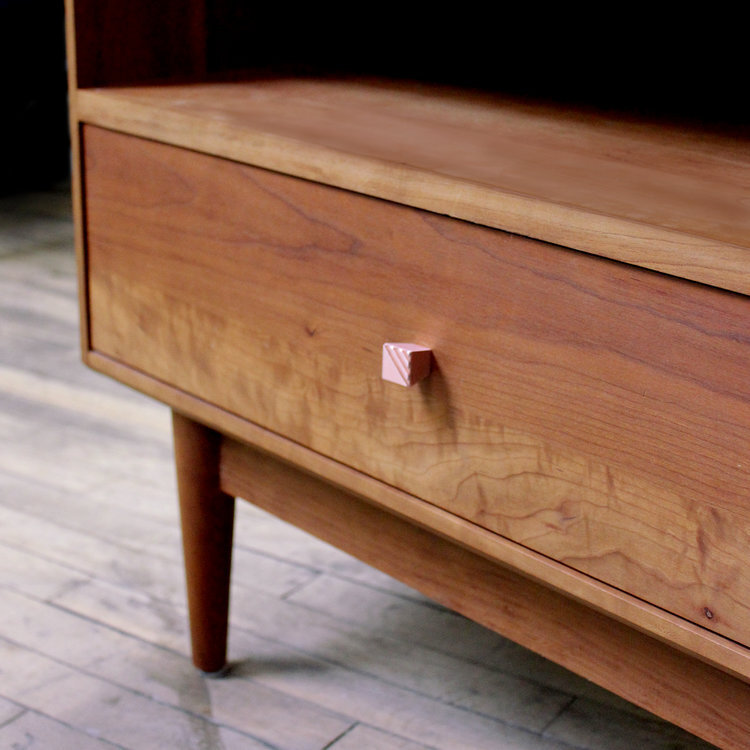
Rocky Mountain Hardware: Emerald Cabinet Knob
Why we love it: This crafted hardware has exquisite detail with a handmade look. Perfect for kitchen cabinets in a traditional or transitional design.

Rejuvenation: Kennaston Drawer Pull
Why we love it: The sleek design of these pulls adds chic interest. We love the mix of leather and brass! These would be the perfect addition to a sophisticated kitchen.


Need help selecting the perfect decorative hardware for your home? Schedule a design consultation today!