


Paint Sheens 101
So you’ve selected a paint color! But now you've got another decision to make, what sheen to use. You pull out the little chart that shows the gloss levels increasing, but where to start? You decide that semi gloss is durable, and buy enough for your walls, ceiling, and moldings, one easy decision - right?
So you’ve selected a paint color! You’ve even researched what brand of paint to buy that will keep your home healthy! But now you've got another decision to make, what sheen to use. You pull out the little chart that shows the gloss levels increasing, but where to start? A quick Google search will tell you to never paint your walls in high-traffic areas with anything less than semi-gloss. So you decide that semi-gloss is durable, and buy enough for your walls, ceiling, and moldings, one easy decision - right?
YIKES - this is a disaster waiting to happen. You will end up with a shiny, reflective envelope full of imperfections. I guarantee you will not be happy with this choice.
I see this dilemma far too often with homeowners. Choosing the right finish the first time can save you time, money, and headaches.
Many factors go into selecting the perfect sheen for your application. First, let’s review the basics of sheen. Keep in mind, every paint company will have a different version of these terms and the order of increasing sheen intensity may vary.

The Basics of Paint Sheen
Flat Paint/Matte Paint - No Shine

Flat paint provides a rich depth of color and is great for less than perfect surfaces. Flat paint has the most pigment and will provide the most coverage. Since there is no shine, the light is absorbed rather than reflected. Matte paint is one step up in sheen from flat, but still very low luster. Typically, Flat or Matte finish is the least cleanable option and not good for high traffic areas.
Eggshell - Slight Luster
Not surprisingly, this finish is similar to egg shells. Eggshell offers a real depth of color with a soft and polished look. Good quality Eggshell paint is easy to clean, covers wall imperfections nicely, and is good for moderate to high traffic areas.
Satin - Velvety Luster
Satin is easy to clean, great for high traffic areas, but shows imperfections on flat surfaces. Can be used on walls of high traffic areas or on wood elements.
Semi Gloss - Subtle Shine
Semi Gloss is durable and stands up to repeated cleanings. This finish is often recommended for molding and trims, but can easily show imperfections on flat surfaces.
High Gloss - The Most Shine
High Gloss paint offers a durable finish. It is typically the most easy to clean out of all the paint finishes. High Gloss paint is super shiny and light reflecting. It’s often used for wood elements like cabinets, trims, and doors. Be careful with high gloss though, as it will show all imperfections! While it can be a beautiful look if your walls or ceilings are prepped correctly, it can turn into a disaster very quickly. Surfaces that take high gloss must be perfectly flat with zero imperfections. High Gloss paint requires preparation and a lot of labor to create the perfect end product.
Designer Secrets
A good rule of thumb is that the higher the sheen, the higher the shine and the easier the surface will be to clean. But many advancements in paint technology today allow for lower sheens to be just as durable and cleanable as their shiny counterparts. I’m going to share some tricks of the trade and what I typically use on my client home projects.
Ceilings
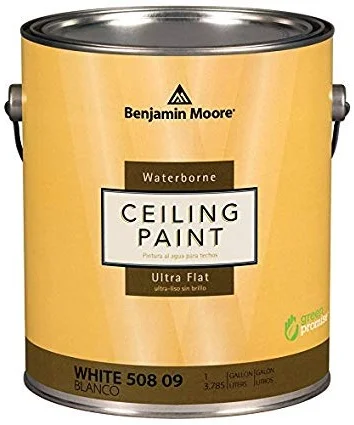
For ceilings, I always use flat paint. Since there is no sheen, it hides imperfections and has a beautiful depth of color. Ceilings tend to be uneven and a flat paint will hide those problem areas and will make the surface look uniform. My absolute favorite product for ceilings is Benjamin Moore Ultra Flat Water Borne Ceiling Paint. It provides a flawless finish and is the flattest finish offered by Benjamin Moore. It is Zero VOC and Engineered with Gennex® Color Technology. Check out my previous post “What’s in Your Paint” for more information on selecting a paint for a healthy home.


Walls
For the walls, I like to use an eggshell finish. It allows for easier clean-ability, but is not too shiny. For walls, I love to use Benjamin Moore Aura in Eggshell finish. It’s a rich and thick paint that provides full coverage, and a beautiful finish with great durability. Good for high traffic areas and it can stand up to repeated washing with no color rub off. It’s a paint and primer in one, mildew resistant, and Zero VOC.
Doors, Baseboards, Trims, Casings, Moldings
I like a satin finish for these wood elements. It’s very durable so it will hold up to normal every day wear and tear. My favorite product for this is Benjamin Moore Aura in a Satin Finish. It’s also great for high traffic areas and it can stand up to repeated washing with no color rub off. It’s also a paint and primer in one, mildew resistant, and Zero VOC.
Bathrooms
Painting a bathroom can be tricky, especially if you don’t want to use a glossy finish everywhere to avoid mildew! Benjamin Moore has a wonderful line of paint called Aura Bath and Spa in a Matte finish. It’s specially formulated for high humidity environments and is mildew resistant. It can stand up to repeated washing with no color rub off. I use this paint on both ceilings and walls in bathrooms for crisp low sheen look.

Cabinets
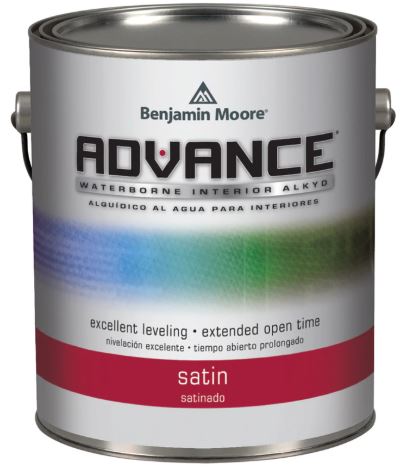
Painting kitchen cabinets is a very technical skill and requires proper preparation. Kitchen cabinets are one of the most commonly touched surfaces and get the most wear. Cabinets must be prepped properly by an experienced painter, primed twice, and then painted. Advance by Benjamin Moore is my “go to” for cabinet painting. As for finish, a paint with some shine is the way to go for durability, so I would avoid Flat paint for this application.
Need More Help with Paint?

Need help selecting paint colors, finishes, or environmentally friendly products?
Paint sheens, Interior paint finishes, Exterior paint finishes, Gloss paint, Matte paint, Satin paint, Eggshell paint, Flat paint, Choosing the right paint sheen, Paint sheen guide, Understanding paint finishes, Best paint sheen for [specific surfaces or rooms], Pros and cons of different paint sheens, How to apply different paint sheens, Paint sheen recommendations, Paint sheen comparison, High-gloss paint, Low-sheen paint, Semi-gloss paint, Durable paint finishes

Get NCIDQ Certified in 2023!!
If you’re interested in learning more about the NCIDQ Exam, why it’s important, and how it can benefit you as a designer, you’re in the right place!


Hello! I’m so glad you are interested in learning more about the NCIDQ Exam! I’m Sarah Schwuchow, a Registered Interior Designer in Illinois and I passed the NCIDQ exam in the Spring of 2018.
I am also a CIDQ Ambassador, which means I help mentor exam candidates, educate students, and promote the value of NCIDQ certification to the public. I’m on a mission to help other designers pass the NCIDQ exam and become Registered Interior Designers!
If you’re interested in learning more about the NCIDQ Exam, why it’s important, and how it can benefit you as a designer, you’re in the right place!
It’s been 5 years since I earned my NCIDQ certification. This certification has benefited me in numerous ways, from opening my own business to having the confidence and knowledge to effectively communicate on a job site. This exam is not just for commercial interior designers; I use my NCIDQ knowledge every day as a residential interior designer and highly recommend all interior designers work towards this certification.
I always felt there was a need for more NCIDQ mentorship among the design community. After passing the exam, I looked into the CIDQ Ambassadors program where I could provide mentorship to candidates and educate Interior Design students on the value of the NCIDQ exam. I strive to be a resource to other designers, sharing my NCIDQ journey and encouraging them to take the exam.
I have helped many aspiring designers work towards this certification as well. In 2019 I created a study group through ASID to help designers pass the NCIDQ exam. Since then, the group has grown and we now partner with IIDA IL to broaden our reach.
Just starting to think about taking this exam can be a daunting task in itself! I’m here to help break down the requirements and get you on track for taking the exam. Keep reading below for step-by-step instructions on how you can become NCIDQ Certified.
Please note - the statements on this website are my own and not a reflection of CIDQ as an organization. This blog post is intended to be a supplementary guide for your NCIDQ journey. Please visit CIDQ.org for more information regarding qualifications, expectations, current prices, etc. Familiarize yourself with the CIDQ website, eligibility requirements, application process, registration process, and important dates and deadlines!
Application deadline
Applications for the Spring 2023 Exam needed to be
submitted by January 31st and July 31st for the Fall 2023 Exam.
Do NOT submit your application until you are ready to begin sitting for the NCIDQ Examination. Your testing windows are based on application approval.

What is NCIDQ Certification and Who is CIDQ?
CIDQ History
CIDQ was created by the American Institute of Interior Designers (AID) and the National Society of Interior Designers (NSID) in the late 1960s. The group officially incorporated as a not-for-profit in 1974 and was the basis for issuing credentials to Interior Design professionals. The AID and NSID would eventually merge to become what is now the American Society of Interior Designers. CIDQ went on to run as an independent organization, which administers the NCIDQ exam
What Does NCIDQ Mean?
The NCIDQ exam stands for the National Council for Interior Design Qualification. This is a globally recognized exam and the highest standard an Interior Designer can earn. The NCIDQ Exam was created by the Council for Interior Design Qualification (CIDQ). Once you pass all three sections (IDFX, IDPX, Practicum) of the the NCIDQ Exam, you become an NCIDQ Certificate Holder. You can then use the NCIDQ appellation after your name: Sarah Schwuchow, NCIDQ. The exam is offered for the entire months of April and October at Prometric Testing Centers. All three sections of the exam are now computerized.
Why Does NCIDQ Certification Matter?

NCIDQ Certification matters because it is an indicator of our proficiency and knowledge.
The Interior Design profession is still relatively young at only about 100 years old.
We are still working towards reasonable regulation, the title acts, practice acts, stamping abilities, and legislative rights for our profession.
NCIDQ Certification helps to create a standard to ensure designers have the knowledge, education, and experience to create spaces that meet codes, regulations, ADA requirements, health, safety, and welfare.
I am proud to be an NCIDQ Certified Interior Designer that can contribute to the development of the Interior Design profession as a whole.
From a legislative standpoint in Illinois, it is critical that we ensure the “Registered Interior Designers Act'' stays in effect, as many legal benefits come with this title such as lien rights.
In 2022, a major advancement in our profession was made. Governor Pritzker signed historic legislation that establishes practice rights for interior designers in Illinois. Read more Here.

10 Reasons Why You Should Take the NCIDQ Exam
NCIDQ Certification sets you apart from unqualified designers and decorators.
It is an indicator of your proficiency and knowledge.
NCIDQ Certification shows your commitment to the Interior Design profession.
You’ll earn respect among your colleagues, employers, and clients.
You’ll have the potential to earn more money and promotions, as many firms require NCIDQ Certification.
Increasing the number of registered/licensed designers elevates our profession.
NCIDQ Certification helps with legislation and Interior Design rights.
In Illinois, you must be an NCIDQ Certificate Holder to become a Registered Interior Designer, which gives you lien rights and practice rights now!
Registered Interior Designers in Illinois now have the right to file liens. Unregistered designers and decorators do not hold this right.
“To date, more than 30,000 people around the world have earned NCIDQ Certification, the gold standard for interior design professionals” (CIDQ.org).
What’s on the NCIDQ Exam?
“The strenuous requirements of the NCIDQ Examination give clients and employers added confidence in the caliber of work from NCIDQ Certified designers” (CIDQ.org).
The NCIDQ examination is no walk in the park. The level of difficulty proves that an NCIDQ designer possesses the knowledge and expertise for building systems, codes, construction standards, contract administration, design application, professional practice, and project coordination.
The exam is broken down into 3 parts: Interior Design Fundamentals (IDFX), Interior Design Professionals Exam (IDPX), and Practicum. Each section measures a candidate’s knowledge and proficiency on different topics related to health, safety, and welfare. All exams are taken during the entire month of April and October. Applicants have five years to complete all three exams.
Fundamentals Exam (IDFX)
Eligibility: Candidates can take this part of the exam before completing their work experience hours. This exam can be taken as early as a student’s final year of school for a Bachelors's or Masters's program.
Exam Format: 125 multiple-choice questions (100 Scored and 25 Pilot Questions)
Exam Length: 3 Hours
Application Fee for IDFX Only: $95.00
Registration Fee: $295.00
Testing Location: Remote Protectoring or Prometric Facility
Passing Score: 500 (Scores are weighted and on a scale of (200-800)

Professional Exam (IDPX)
Eligibility: Candidates must complete their education and work hours before applying for this exam. *WORK EXPERIENCE IS CHANGING IN 2024
Exam Format: 175 multiple-choice questions (150 Scored and 25 Pilot Questions)
Exam Length: 4 Hours
Application Fee for IDPX and Prac Only: $145.00
Application Fee for all 3 Sections: $225.00
IDPX Registration Fee: $355.00
Testing Location: Remote Protectoring or Prometric Facility
Passing Score: 500 (Scores are weighted and on a scale of 200-800)

Practicum (PRAC)
Eligibility: Candidates must complete their education and work hours before applying for this exam. *WORK EXPERIENCE IS CHANGING IN 2024
Exam Format: 114 Questions (105 scored, 9 Pilot Questions), Interactive computerized exam consisting of 3 case studies: large commercial, small commercial, and multi-family residential. No AutoCAD, or Hand Drawing.
Exam Length: 4 Hours
Application Fee for IDPX and Prac Only: $145.00
Application Fee for all 3 Sections: $225.00
Practicum Registration Fee: $460.00
Testing Location: Prometric Facility
Passing Score: 500 (Scores are weighted and on a scale of 200-800)

How Long do I have to Take the Exams?
ALL THREE SECTIONS: Must be passed within 10 exam administrations ( About 5 Years)
IDFX ONLY: Must be passed within 4 exam administrations + IDPX & PRACTICUM (2nd stage for IDFX ONLY applicants): Must be passed within 10 exam administrations.
Exam testing windows are April and October
Ready to Take the Exam?
Step 1: Eligibility Requirements
First things first—are you qualified to take the NCIDQ Exam? Visit the CIDQ website for full eligibility path requirements based your education and work experience. Work Experience will be changing for 2024!

Step 2: Create an Account
Before you can apply, you must create an account with CIDQ. Click here to register and then log in with instructions received in your email. If you have trouble, email inquiries@cidq.org for help.

Step 3: Applying for the Exam
There are two route options for applying for the NCIDQ Exam:
Option 1: Apply only for the IDFX. If you apply just for the IDFX now, you will need to submit another application for the IDPX and Practicum once you finish your work experience hours.
Application Fee for IDFX only: $95.00 (Second application for IDPX and Prac will be $145.00)
Option 2: Apply for all three sections.
Application Fee for all 3 Sections: $225.00
Applications are a one-time fee. Your application will also require you to submit an official transcript from your institution and your work experience (for IDPX & Practicum). Make sure you leave enough time for your sealed official transcripts to arrive, as any incomplete applications will not be considered after the deadline and you’ll have to wait until the next testing season.
Step 4: Registering and Scheduling Your Exam
Once your application has been approved, you will receive an email notifying you that you that can register for the exam and schedule a date at a Prometric Testing Center. Make sure to register early so you can lock in your preferred exam date!
From this point, you have 10 testing windows to pass all three sections of the NCIDQ exam. If you are only taking the IDFX, you must pass that exam within 4 exam windows. The second stage (IDPX and Practicum) must then be completed within 10 testing windows. Any scores older than 5 years are automatically voided. Registration fees occur each time you take an exam.
Exam Fees
IDFX: $295.00
IDPX: $355.00
PRAC: $460.00
Step 5: Studying
Make sure you leave yourself adequate time to study for this exam. I recommend at least 10 weeks and join a study group. Qpractice are ID Conquer are a great online resource to help you stay on schedule. Stay tuned for my upcoming blog post on my tips and tricks for studying for the NCIDQ Exam!


Join the more than 30,000 people around the world that have earned their NCIDQ Certification!
“Sarah has so much valuable knowledge and creativity to share as a designer. She will take the time to sit down and explain everything no matter what phase of the design process you are in. Sarah played a huge role in my success while studying for the NCIDQ. She was enthusiastic, motivating and genuinely cared. Working alongside Sarah and her team will make the entire process a positive and memorable experience!”

Everything You Need to Know About the 2022 NCIDQ Exam
If you’re interested in learning more about the NCIDQ Exam, why it’s important, and how it can benefit you as a designer, you’re in the right place! I’m Sarah Schwuchow, a Registered Interior Designer in Illinois and I passed the NCIDQ exam in the Spring of 2018. I am also a CIDQ Ambassador, which means I help mentor exam candidates, educate students, and promote the value of NCIDQ certification to the public. I’m on a mission to help other designers pass the NCIDQ exam and become Registered Interior Designers!

Hello! I’m so glad you are interested in learning more about the NCIDQ Exam!
I’m Sarah Schwuchow, a Registered Interior Designer in Illinois and I passed the NCIDQ exam in the Spring of 2018.
I am also a CIDQ Ambassador, which means I help mentor exam candidates, educate students, and promote the value of NCIDQ certification to the public. I’m on a mission to help other designers pass the NCIDQ exam and become Registered Interior Designers!
If you’re interested in learning more about the NCIDQ Exam, why it’s important, and how it can benefit you as a designer, you’re in the right place!
It’s been 4 years since I earned my NCIDQ certification. This certification has benefited me in numerous ways, from opening my own business, to having the confidence and knowledge to effectively communicate on a job site. This exam is not just for commercial interior designers; I use my NCIDQ knowledge everyday as a residential interior designer and highly recommend all interior designers work towards this certification.
I always felt there was a need for more NCIDQ mentorship among the design community. After passing the exam, I looked into the CIDQ Ambassadors program where I could provide mentorship to candidates and educate Interior Design students on the value of the NCIDQ exam. I strive to be a resource to other designers, sharing my NCIDQ journey and encouraging them to take the exam.
I have helped many aspiring designers work towards this certification as well. As the 2019 ASID Illinois NCIDQ Committee Chair, I lead a study group of 5 designers towards NCIDQ success. Everyone in our study group passed their exams! Since then, the ASID Illinois Chapter has hosted a study group session every testing season and has even partnered with IIDA to broaden the outreach to the design community.
Just starting to think about taking this exam can be daunting task in itself! I’m here to help break down the requirements and get you on track for taking the exam. Keep reading below for step by step instructions on how you can become NCIDQ Certified.
Please note - the statements on this website are my own and not a reflection of CIDQ as an organization. This blog post is intended to be a supplementary guide for your NCIDQ journey. Please visit CIDQ.org for more information regarding qualifications, expectations, current prices, etc. Familiarize yourself with the CIDQ website, eligibility requirements, application process, registration process, and important dates and deadlines!
Applications for the Spring 2022 Exam needed to be
submitted by January 31st and July 31st for the Fall 2022 Exam.
What is NCIDQ Certification and Who is CIDQ?
The NCIDQ exam stands for the National Council for Interior Design Qualification. This is a globally recognized exam and the highest standard an Interior Designer can earn. The NCIDQ Exam was created by the Council for Interior Design Qualification (CIDQ). Once you pass all three sections (IDFX, IDPX, Practicum) of the the NCIDQ Exam, you become an NCIDQ Certificate Holder. You can then use the NCIDQ appellation after your name: Sarah Schwuchow, NCIDQ. The exam is offered for the entire months of April and October at Prometric Testing Centers. Remote proctoring is available for the IDFX and IDPX Exams. All three sections of the exam are now computerized- no hand drafting!

CIDQ History
CIDQ was created by the American Institute of Interior Designers (AID) and the National Society of Interior Designers (NSID) in the late 1960s. The group officially incorporated as a not-for-profit in 1974 and was the basis for issuing credentials to Interior Design professionals. The AID and NSID would eventually merge to become what is now the American Society of Interior Designers. CIDQ went on to run as an independent organization, which administers the NCIDQ exam
Why Does NCIDQ Certification Matter?
NCIDQ Certification matters because it is an indicator of our proficiency and knowledge. The Interior Design profession is still relatively young at only about 100 years old. We are still working towards reasonable regulation, title acts, practice acts, stamping abilities, and legislative rights for our profession. NCIDQ Certification helps to create a standard to ensure designers have the knowledge, education, and experience to create spaces that meet codes, regulations, ADA requirements, health, safety, and welfare. I am proud to be an NCIDQ Certified Interior Designer that can contribute to the development of the Interior Design profession as a whole
The NCIDQ exam was always a vital goal of mine and I admired design professionals who held the credentials. In the State of Illinois, you must be an NCIDQ Certificate holder to become a Registered Interior Designer. From a legislative standpoint in Illinois, it is critical that we ensure the “Registered Interior Designers Act'' stays in effect, as many legal benefits come with this title such as lien rights. I wanted to be part of the advocacy efforts, increasing our Registered Interior Designer numbers, and supporting the ASID and IIDA chapters who continuously educate the public on Interior Designs' impact on health, safety and welfare.
10 Reasons Why You Should Take the NCIDQ Exam
NCIDQ Certification sets you apart from unqualified designers and decorators.
It is an indicator of your proficiency and knowledge.
NCIDQ Certification shows your commitment to the Interior Design profession.
You’ll earn respect among your colleges, employers and clients.
You’ll have the potential to earn more money and promotions, as many firms require NCIDQ Certification.
Increasing the number of registered/licensed designers elevates our profession.
NCIDQ Certification helps with legislation and Interior Design rights.
In Illinois, you must be an NCIDQ Certificate Holder to become a Registered Interior Designer.
Registered Interior Designers in Illinois now have the right to file liens. Unregistered designers and decorators do not hold this right.
“To date, more than 30,000 people around the world have earned NCIDQ Certification, the gold standard for interior design professionals” (CIDQ.org).
What’s on the NCIDQ Exam?
“The strenuous requirements of the NCIDQ Examination give clients and employers added confidence in the caliber of work from NCIDQ Certified designers” (CIDQ.org).
The NCIDQ examination is no walk in the park. The level of difficulty proves that a NCIDQ designer possesses the knowledge and expertise for building systems, codes, construction standards, contract administration, design application, professional practice, and project coordination.
The exam is broken down into 3 parts: Interior Design Fundamentals (IDFX), Interior Design Professionals Exam (IDPX), and Practicum 2.0. Each section measures a candidate’s knowledge and proficiency on different topics related to health, safety, and welfare. All exams are taken during the entire month of April and October. Applicants have five years to complete all three exams.
Fundamentals Exam (IDFX)
Eligibility: Candidates can take this part of the exam before completing their work experience hours. This exam can be taken as early as a student’s final year of school for a Bachelors or Masters program.
Exam Format: 125 multiple choice questions (100 scored and 25 unscored pilot questions)
Exam Length: 3 Hours
Application Fee for IDFX Only: $95.00
Registration Fee: $295.00
Passing Score: 500 (Scores are weighted and on a scale of (200-800)

Professional Exam (IDPX)
Eligibility: Candidates must complete their education and work hours before applying for this exam.
Exam Format: 175 multiple choice questions (150 scored and 25 unscored pilot questions)
Exam Length: 4 Hours
Application Fee for IDPX and Prac Only: $145.00
Application Fee for all 3 Sections: $225.00
IDPX Registration Fee: $355.00
Passing Score: 500 (Scores are weighted and on a scale of 200-800)

Practicum 2.0 (PRAC)
Eligibility: Candidates must complete their education and work hours before applying for this exam.
Exam Format: Interactive computerized exam consisting of 3 case studies: large commercial, small commercial, and multi-family residential
Exam Length: 4 Hours
Application Fee for IDPX and Prac Only: $145.00
Application Fee for all 3 Sections: $225.00
Practicum Registration Fee: $460.00
Passing Score: 500 (Scores are weighted and on a scale of 200-800)

What’s New for 2022?
Interior Design Fundamentals Exam and Interior Design Professional Exam
The IDFX and IDPX are now available for remote proctoring! Remote proctoring is an exam delivery method administered by Prometric, CIDQ’s test delivery vendor, which provides candidates with the option of taking the IDFX or IDPX exams in a convenient location (i.e., at home) versus at a Prometric test center. Participating in a remotely proctored exam can only occur if your testing environment and computer systems meet Prometric requirements.
Practicum Exam
The Practicum Exam uses new codes, no longer will you use the 18 page NCIDQ codes for this exam. Instead, you will reference real life codes from IBC. You are not expected the completely memorize all of these codes, but should be familiar with them, know how to reference and apply the codes. Click here to view the codes!


Ready to Take the Exam?
Step 1: Eligibility Requirements

First things first—are you qualified to take the NCIDQ Exam? Visit the CIDQ website for full eligibility path requirements based your education and work experience.
Step 2: Create an Account
Before you can apply, you must create an account with CIDQ. Click here to register and then log in with instructions received in your email. If you have trouble, email inquiries@cidq.org for help.
Step 3: Applying for the Exam
There are two route options for applying for the NCIDQ Exam:
Option 1: Apply only for the IDFX. If you apply just for the IDFX now, you will need to submit another application for the IDPX and Practicum once you finish your work experience hours.
Application Fee for IDFX only: $95.00 (Second application for IDPX and Prac will be $145.00)
Option 2: Apply for all three sections.
Application Fee for all 3 Sections: $225.00
Applications are a one time fee. Your application will also require you to submit an official transcript from your institution and your work experience (for IDPX & Practicum 2.0). Make sure you leave enough time for your sealed official transcripts to arrive, as any incomplete applications will not be considered after the deadline and you’ll have to wait until the next testing season.
Step 4: Registering and Scheduling Your Exam
Once your application has been approved, you will receive an email notifying you that you that can register for the exam and schedule a date at a Prometric Testing Center. Make sure to register early so you can lock in your preferred exam date!
From this point, you have 10 testing windows to pass all three sections of the NCIDQ exam. If you are only taking the IDFX, you must pass that exam within 4 exam windows. The second stage (IDPX and Practicum) must then be completed within 10 testing windows. Any scores older than 5 years are automatically voided. Registration fees occur each time you take an exam.
Registration Fees
IDFX: $295.00
IDPX: $355.00
PRAC: $460.00
Step 5: Studying
Make sure you leave yourself adequate time to study for this exam. I recommend at least 10 weeks and join a study group. Qpractice is a great online resource to help you stay on schedule. Stay tuned for my upcoming blog post on my tips and tricks for studying for the NCIDQ Exam!
Join the more than 30,000 people around the world that have earned their NCIDQ Certification!
“Having an NCIDQ has helped me further develop my professional career in many ways. Overall, I look at new projects with better insight, knowledge, and have more confidence in the work I am providing to our clients.”
“NCIDQ validates you as a professional designer to your clients, peers, and the public.”

Designer Advice for a Smoother Remodel
A remodel of your home doesn’t have to take years off your life! If you’re thinking of starting your next project, you’ve come to right place to get the best advice on creating a smoother remodeling experience for your home.
If you’ve ever had your house, condo, or apartment undergo a remodel or renovation, you know how stressful it can be. Unforeseen circumstances are a dime a dozen, there are people in and out of your living space, and you’re expected to trust that everyone knows what they’re doing. We’re here to tell you that a remodel of your home, whether it’s a small or large project, doesn’t have to take years off your life! If you’re thinking of starting your next project, you’ve come to right place to get the best advice on creating a smoother remodeling experience for your home.
1. Don’t Skimp on Quality Labor
Sure, your neighbor built his own fence ten years ago and is pretty handy with a hammer, but that doesn’t mean that he’ll be able to install your kitchen cabinets, that expensive backsplash you love, and your new carpet without a few (or many) hiccups. When it comes to renovations, it pays not to go for the discount labor.
A remodel, renovation, or refresh is a huge investment into your living space. The last thing you want is to spend a huge amount of time and money into work that you’ll just have to hire someone else to do over and correct. A quality contractor will also know building codes and regulations and save you a hassle down the road if you decide to sell your home or condo.


2. Know Your City Codes and Condo Association Requirements
This is one of the most important things to do in the early planning stages of your project. Does you city require building permits, special variances, the use of an architect? How much will these fees cost you? Is your home a historic landmark? Will the renovations or remodel require city approval? Be sure to do your research; call your city or village office or visit their website to find out what you need.
If you live in a condo, you’ll need to contact your condo association office before you start any phase of construction. Many condos require any work done to your unit to be approved by a board. You might also be required to use a Registered Interior Designer or their provided building engineer. Some Condos require the use of union labor. You’ll also want to know things like how to move supplies in and debris out, whether or not there is a charge for the freight elevator, and if your contractors need certificates of insurance on file.
3. Plan in Advance
The more you plan prior to beginning construction or renovations, the smoother your project will go. In order to plan effectively, you’ll need to really understand the construction and architectural constrictions of your space to know what is possible and what isn’t.
Work with your contractors and laborers to create a realistic timeline and make sure you include some wiggle room. Don’t start your project until you have a clear scope-of-work and budget established. Make sure to finalize selections and purchases of appliances or built-ins early in the project or before construction even begins to ensure that you have what you need before it holds up your project. The last thing you want is to need to do several last minute change orders to a project, which can cost you extra time and money.


4. Be Flexible
Even the best laid plans can come crashing down around you. Be prepared to make tough decisions if a portion of your plan falls through or a selection you’ve made is suddenly unavailable. Timelines can also be pushed back due to things like weather and the availability of labor. Don’t set your project timeline so tight that you can’t be flexible if the unforeseeable happens.
One of the most important things to be flexible about is your budget. Don’t initially settle on a number that is at the very top of your budget. Chances are, unforeseen circumstances will create additional spending. This doesn’t mean you will definitely pay much more than you have budgeted for, but you won’t be stuck halfway through a project when you run out of funds and you only have half a kitchen. Do your research on the average price of a remodel for your area and quality of product you would like to use.
Another thing to consider is the time you will need to commit to this project. You may have to leave work early or take a few days off here and there to ensure that someone is home to let in contractors, laborers, or to receive deliveries. If this is not something you can commit to, consider leaving a lockbox outside your home for workers to gain access to your space.
5. Be Prepared to Vacate Your Space for Awhile
If you’re remodeling a small portion of your house, chances are this won’t apply to you. Planning a full home renovation or a project that will affect your day-to-day life? Then definitely consider relocating for the construction phase. Living without a kitchen or with interrupted plumbing is not a sustainable existence and will save you and your family a big headache.
You may also need to consider storing some of your furniture and possessions for projects that include flooring or installation of carpeting, especially in a smaller space where the shifting of larger furniture is not as feasible. These costs should be worked into your budget and decided on well in advance (remember to plan and be flexible!) to save you additional stress.

6. Hire a Designer!
Yes, yes, we’re an Interior Design Firm, so of course we’ll tell you to hire a designer. Trust us; we know what we’re talking about. A designer can help you create a realistic timeline and budget based on their experience of similar scopes of work, making sure you don’t get stuck in the middle of a project.
A designer can also save you time, energy, and money. They handle every detail, make sure the work is done right the first time, and can recommend quality products and laborers. Designers will even come to supervise work being done so you don’t have to worry about stopping your life and leaving work for deliveries, letting contractors in, inspecting quality of work, etc.
When you hire a designer, they take care of all the paperwork and contracts. No more headaches trying to negotiate with contractors and figure out complicated construction documents. The bottom line is that a designer is your advocate and will ensure that your project produces your dream space!

Need help with your next home remodel or renovation? Schedule a design consultation today!

Get NCIDQ Certified in 2023!
If you’re interested in learning more about the NCIDQ Exam, why it’s important, and how it can benefit you as a designer, you’re in the right place! I’m Sarah Schwuchow, a Registered Interior Designer in Illinois and I passed the NCIDQ exam in the Spring of 2018. I am also a CIDQ Ambassador, which means I help mentor exam candidates, educate students, and promote the value of NCIDQ certification to the public. I’m on a mission to help other designers pass the NCIDQ exam and become Registered Interior Designers!
Hello! I’m so glad you are interested in learning more about the NCIDQ Exam! I’m Sarah Schwuchow, a Registered Interior Designer in Illinois and I passed the NCIDQ exam in the Spring of 2018.
I am also a CIDQ Ambassador, which means I help mentor exam candidates, educate students, and promote the value of NCIDQ certification to the public. I’m on a mission to help other designers pass the NCIDQ exam and become Registered Interior Designers!
If you’re interested in learning more about the NCIDQ Exam, why it’s important, and how it can benefit you as a designer, you’re in the right place!
It’s been 3 years since I earned my NCIDQ certification. This certification has benefited me in numerous ways, from opening my own business to having the confidence and knowledge to effectively communicate on a job site. This exam is not just for commercial interior designers; I use my NCIDQ knowledge every day as a residential interior designer and highly recommend all interior designers work towards this certification.
I always felt there was a need for more NCIDQ mentorship among the design community. After passing the exam, I looked into the CIDQ Ambassadors program where I could provide mentorship to candidates and educate Interior Design students on the value of the NCIDQ exam. I strive to be a resource to other designers, sharing my NCIDQ journey and encouraging them to take the exam.
I have helped many aspiring designers work towards this certification as well. In 2019 I created a study group through ASID to help designers pass the NCIDQ exam. Since then, the group has grown and we now partner with IIDA IL to broaden our reach.
Just starting to think about taking this exam can be a daunting task in itself! I’m here to help break down the requirements and get you on track for taking the exam. Keep reading below for step-by-step instructions on how you can become NCIDQ Certified.
Please note - the statements on this website are my own and not a reflection of CIDQ as an organization. This blog post is intended to be a supplementary guide for your NCIDQ journey. Please visit CIDQ.org for more information regarding qualifications, expectations, current prices, etc. Familiarize yourself with the CIDQ website, eligibility requirements, application process, registration process, and important dates and deadlines!
Application deadline
Applications for the Spring 2023 Exam needed to be
submitted by January 31st and July 31st for the Fall 2023 Exam.
Do NOT submit your application until you are ready to begin sitting for the NCIDQ Examination. Your testing windows are based on application approval.
What is NCIDQ Certification and Who is CIDQ?
CIDQ History
CIDQ was created by the American Institute of Interior Designers (AID) and the National Society of Interior Designers (NSID) in the late 1960s. The group officially incorporated as a not-for-profit in 1974 and was the basis for issuing credentials to Interior Design professionals. The AID and NSID would eventually merge to become what is now the American Society of Interior Designers. CIDQ went on to run as an independent organization, which administers the NCIDQ exam
What Does NCIDQ Mean?
The NCIDQ exam stands for the National Council for Interior Design Qualification. This is a globally recognized exam and the highest standard an Interior Designer can earn. The NCIDQ Exam was created by the Council for Interior Design Qualification (CIDQ). Once you pass all three sections (IDFX, IDPX, Practicum) of the the NCIDQ Exam, you become an NCIDQ Certificate Holder. You can then use the NCIDQ appellation after your name: Sarah Schwuchow, NCIDQ. The exam is offered for the entire months of April and October at Prometric Testing Centers. All three sections of the exam are now computerized.
Why Does NCIDQ Certification Matter?
NCIDQ Certification matters because it is an indicator of our proficiency and knowledge.
The Interior Design profession is still relatively young at only about 100 years old.
We are still working towards reasonable regulation, the title acts, practice acts, stamping abilities, and legislative rights for our profession.
NCIDQ Certification helps to create a standard to ensure designers have the knowledge, education, and experience to create spaces that meet codes, regulations, ADA requirements, health, safety, and welfare.
I am proud to be an NCIDQ Certified Interior Designer that can contribute to the development of the Interior Design profession as a whole.
From a legislative standpoint in Illinois, it is critical that we ensure the “Registered Interior Designers Act'' stays in effect, as many legal benefits come with this title such as lien rights.
In 2022, a major advancement in our profession was made. Governor Pritzker signed historic legislation that establishes practice rights for interior designers in Illinois. Read more Here.
10 Reasons Why You Should Take the NCIDQ Exam
NCIDQ Certification sets you apart from unqualified designers and decorators.
It is an indicator of your proficiency and knowledge.
NCIDQ Certification shows your commitment to the Interior Design profession.
You’ll earn respect among your colleagues, employers, and clients.
You’ll have the potential to earn more money and promotions, as many firms require NCIDQ Certification.
Increasing the number of registered/licensed designers elevates our profession.
NCIDQ Certification helps with legislation and Interior Design rights.
In Illinois, you must be an NCIDQ Certificate Holder to become a Registered Interior Designer, which gives you lien rights and practice rights now!
Registered Interior Designers in Illinois now have the right to file liens. Unregistered designers and decorators do not hold this right.
“To date, more than 30,000 people around the world have earned NCIDQ Certification, the gold standard for interior design professionals” (CIDQ.org).
What’s on the NCIDQ Exam?
“The strenuous requirements of the NCIDQ Examination give clients and employers added confidence in the caliber of work from NCIDQ Certified designers” (CIDQ.org).
The NCIDQ examination is no walk in the park. The level of difficulty proves that an NCIDQ designer possesses the knowledge and expertise for building systems, codes, construction standards, contract administration, design application, professional practice, and project coordination.
The exam is broken down into 3 parts: Interior Design Fundamentals (IDFX), Interior Design Professionals Exam (IDPX), and Practicum. Each section measures a candidate’s knowledge and proficiency on different topics related to health, safety, and welfare. All exams are taken during the entire month of April and October. Applicants have five years to complete all three exams.
Fundamentals Exam (IDFX)
Eligibility: Candidates can take this part of the exam before completing their work experience hours. This exam can be taken as early as a student’s final year of school for a Bachelors's or Masters's program.
Exam Format: 125 multiple-choice questions (100 Scored and 25 Pilot Questions)
Exam Length: 3 Hours
Application Fee for IDFX Only: $95.00
Registration Fee: $295.00
Testing Location: Remote Protectoring or Prometric Facility
Passing Score: 500 (Scores are weighted and on a scale of (200-800)
Professional Exam (IDPX)
Eligibility: Candidates must complete their education and work hours before applying for this exam. *WORK EXPERIENCE IS CHANGING IN 2024
Exam Format: 175 multiple-choice questions (150 Scored and 25 Pilot Questions)
Exam Length: 4 Hours
Application Fee for IDPX and Prac Only: $145.00
Application Fee for all 3 Sections: $225.00
IDPX Registration Fee: $355.00
Testing Location: Remote Protectoring or Prometric Facility
Passing Score: 500 (Scores are weighted and on a scale of 200-800)
Practicum (PRAC)
Eligibility: Candidates must complete their education and work hours before applying for this exam. *WORK EXPERIENCE IS CHANGING IN 2024
Exam Format: 114 Questions (105 scored, 9 Pilot Questions), Interactive computerized exam consisting of 3 case studies: large commercial, small commercial, and multi-family residential. No AutoCAD, or Hand Drawing.
Exam Length: 4 Hours
Application Fee for IDPX and Prac Only: $145.00
Application Fee for all 3 Sections: $225.00
Practicum Registration Fee: $460.00
Testing Location: Prometric Facility
Passing Score: 500 (Scores are weighted and on a scale of 200-800)
How Long do I have to Take the Exams?
ALL THREE SECTIONS: Must be passed within 10 exam administrations ( About 5 Years)
IDFX ONLY: Must be passed within 4 exam administrations + IDPX & PRACTICUM (2nd stage for IDFX ONLY applicants): Must be passed within 10 exam administrations.
Exam testing windows are April and October
Ready to Take the Exam?
Step 1: Eligibility Requirements
First things first—are you qualified to take the NCIDQ Exam? Visit the CIDQ website for full eligibility path requirements based your education and work experience. Work Experience will be changing for 2024!
Step 2: Create an Account
Before you can apply, you must create an account with CIDQ. Click here to register and then log in with instructions received in your email. If you have trouble, email inquiries@cidq.org for help.
Step 3: Applying for the Exam
There are two route options for applying for the NCIDQ Exam:
Option 1: Apply only for the IDFX. If you apply just for the IDFX now, you will need to submit another application for the IDPX and Practicum once you finish your work experience hours.
Application Fee for IDFX only: $95.00 (Second application for IDPX and Prac will be $145.00)
Option 2: Apply for all three sections.
Application Fee for all 3 Sections: $225.00
Applications are a one-time fee. Your application will also require you to submit an official transcript from your institution and your work experience (for IDPX & Practicum). Make sure you leave enough time for your sealed official transcripts to arrive, as any incomplete applications will not be considered after the deadline and you’ll have to wait until the next testing season.
Step 4: Registering and Scheduling Your Exam
Once your application has been approved, you will receive an email notifying you that you that can register for the exam and schedule a date at a Prometric Testing Center. Make sure to register early so you can lock in your preferred exam date!
From this point, you have 10 testing windows to pass all three sections of the NCIDQ exam. If you are only taking the IDFX, you must pass that exam within 4 exam windows. The second stage (IDPX and Practicum) must then be completed within 10 testing windows. Any scores older than 5 years are automatically voided. Registration fees occur each time you take an exam.
Exam Fees
IDFX: $295.00
IDPX: $355.00
PRAC: $460.00
Step 5: Studying
Make sure you leave yourself adequate time to study for this exam. I recommend at least 10 weeks and join a study group. Qpractice are ID Conquer are a great online resource to help you stay on schedule. Stay tuned for my upcoming blog post on my tips and tricks for studying for the NCIDQ Exam!
Join the more than 30,000 people around the world that have earned their NCIDQ Certification!
“Sarah has so much valuable knowledge and creativity to share as a designer. She will take the time to sit down and explain everything no matter what phase of the design process you are in. Sarah played a huge role in my success while studying for the NCIDQ. She was enthusiastic, motivating and genuinely cared. Working alongside Sarah and her team will make the entire process a positive and memorable experience!”

The Psychology of Color in Interior Design
I love using color as a communication tool in my interior design projects. In order to do that effectively, it’s important to understand how colors behave and how they can influence our mood. Color psychology suggests that some colors may increase anxiety, while others can boost your energy level. Your home should be your sanctuary, so it’s important to understand the emotional impact a color will have in your home.
I love using color as a communication tool in my interior design projects. In order to do that effectively, it’s important to understand how colors behave and how they can influence our mood. Colors evoke emotional responses in everyone. The psychology of color is used around us every day and is an important tool for transmitting information. A red stop sign prompts you to stop and look around; a brightly colored playground evokes feelings of joy and youthfulness.
The colors you choose for your walls and furniture have a big impact on your mood and emotions too. Color psychology suggests that some colors may increase anxiety, while others can boost your energy level. Your home should be your sanctuary, so it’s important to understand the emotional impact a color will have in your home.
Here are some things to take into consideration when choosing a color palette.

“Color is a power which directly influences the soul.”
-Wassily Kandinksy
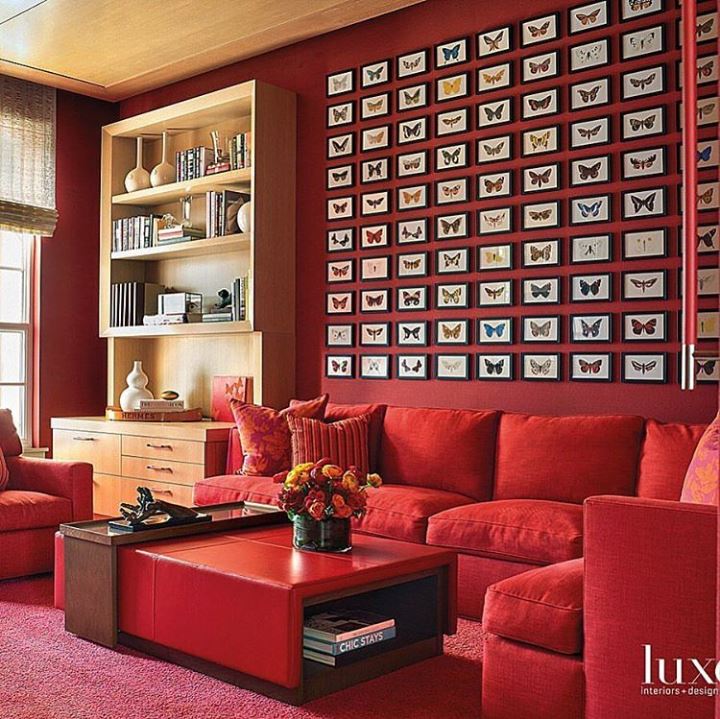
Red
Red is the color of passion and drama. It attracts the most attention and is often associated with strong emotions such as love and anger. Red is used universally to communicate danger or power. While it is vibrant and exciting, it also inspires feelings of lust with a strong link to sexuality.
Color psychologists have proven that red can increase blood pressure and stimulates the adrenal glands. In color therapy, red is often used to help dispel negative thoughts and release anger.
Red | Emotions
Excitement
Energy
Passion
Attention
Orange
Orange is the color of optimism and is socially inviting. This color is for the extrovert, exuding energy and motivation. The combination of yellow and red makes orange, conveying warmth and excitement and typically appeals to younger people. Orange is often used as a natural antidepressant in color therapy and can relieve feelings of self-pity. It is also thought to help strengthen the immune system and aid in digestion.
Orange | Emotions
Optimism
Independence
Adventurous
Creativity
Youthfulness

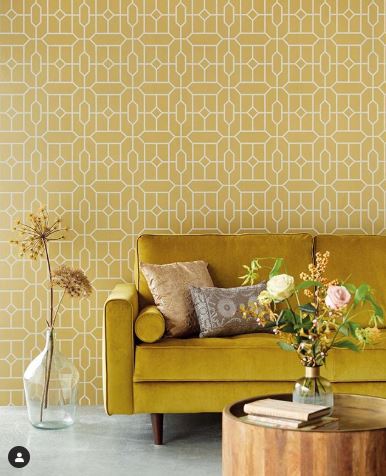
Yellow
Yellow is full of energy and happiness. It conveys youthful optimism and freshness. The color of sunshine, it is uplifting and illuminating and often associated with success and confidence. Yellow stimulates the left side of the brain, which aids in clear thinking and quick decision making.
In color therapy, yellow is used to create uplifting feelings. It stimulates the brain and can make you more alert and energetic. Yellow also builds self confidence, yet some may find that it can also trigger feelings of fear and anxiety.
Yellow | Emotions
Enthusiasm
Opportunity
Spontaneity
Happiness
Positive
Green

Found in all of nature, green is the color of growth and health, expressing renewal and life. Green has a strong association as a refreshing and peaceful color. It evokes feelings of abundance while providing a restful and secure feeling.
Green is thought to be good for your heart and also helps you breathe slower and deeper. It creates feelings of comfort and relaxation as we are reminded of nature. However, olive greens have been known to convey thoughts of decay and death and may be detrimental to psychological and emotional health.
Green | Emotions
Safety
Harmony
Stability
Reliability
Balance
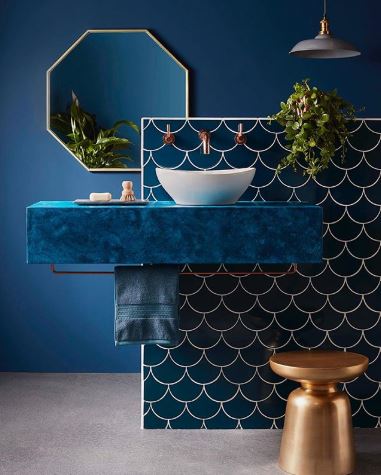
Blue
The hue of the sea and sky, blue communicates a tranquil emotion that induces peace and serenity. This calming color instills confidence and inspires feelings of loyalty, integrity and responsibility. A cooler blue is conservative, responsible, and can instill feelings of security.
Blues are often used to reduce stress, increase relaxation and has been proven to lower blood pressure. Blue inspires mental control and clarity. Though it is calming, too much blue can increase feelings of depression.
Blue | Emotions
Trustworthy
Responsibility
Honesty
Calming
Inner security

Violet
Violet is often associated with spirituality and royalty. The energy of red combined with the calm of blue, it is a color that inspires intrinsic qualities and reflection. It is the color of the introvert. It is often used to encourage creativity and communicate luxury.
Violet has an antiseptic effect. In color therapy, it is used to treat mental and nervous disorders, as it can help to balance the mind and transform obsessions and fears. It also has a cleansing effect in regards to emotional disturbances.
Violet | Emotions
Imagination
Mystery
Sensitivity
Compassion

Need help creating a color palette for your home? Schedule a design consultation today!

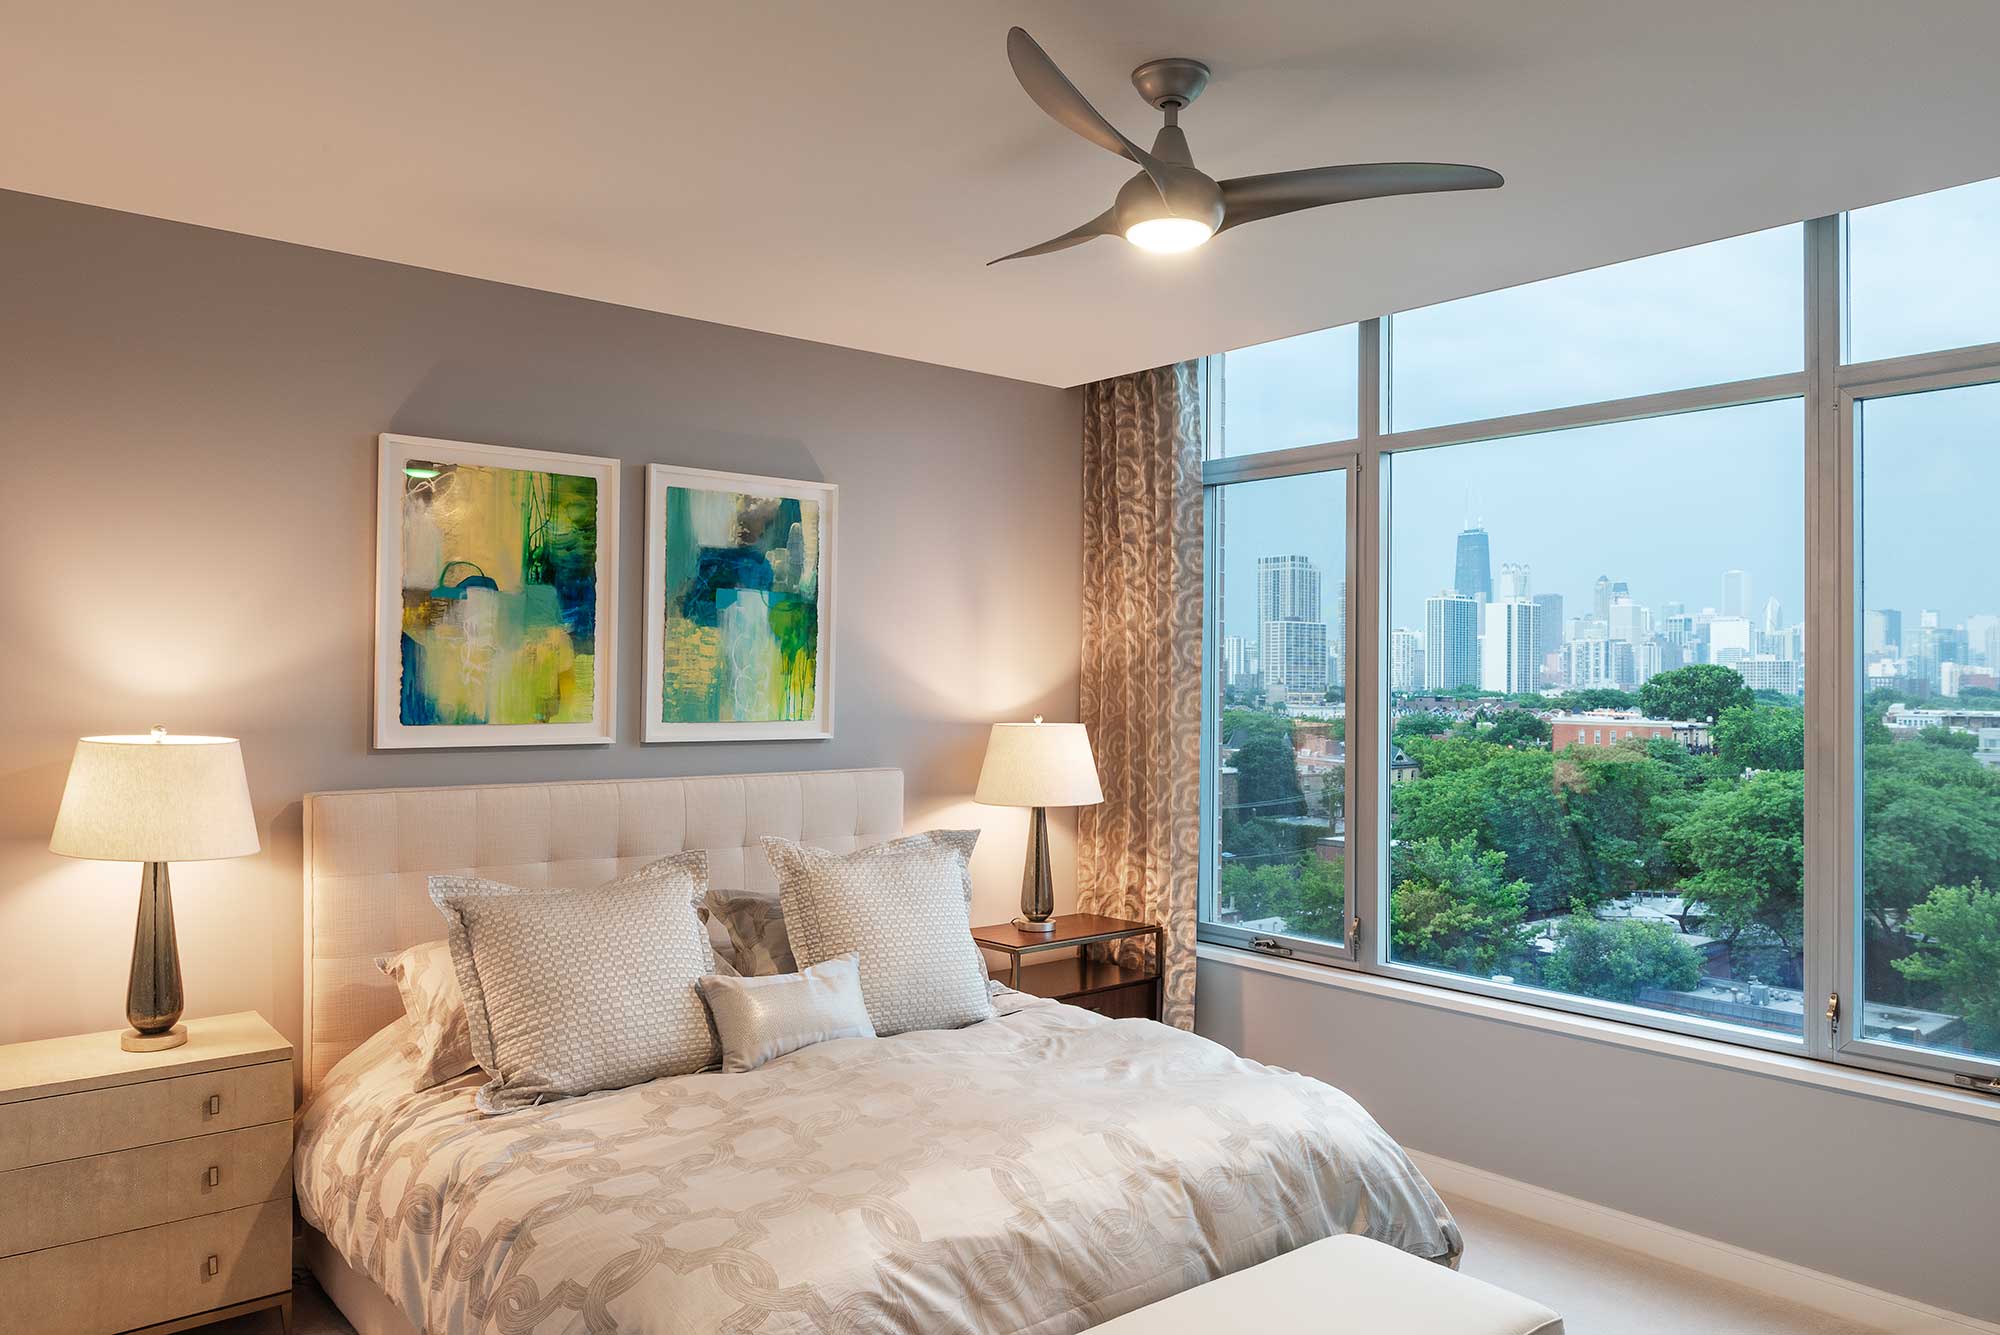
6 Steps to Selecting the Perfect Ceiling Fan
Ceiling fans come in a variety of sizes, heights, styles, and colors. Choosing the right size fan for your space ensures it will provide efficient air flow. Here are 6 steps to selecting the perfect ceiling fans for your home!
Ceiling fans come in a variety of sizes, heights, styles, and colors. Choosing the right size fan for your space ensures it will provide efficient air flow. Though ceiling fans are not usually considered the focal point of a room, the right one can tie a room together while providing maximum comfort. Here are 6 steps to selecting the perfect ceiling fans for your home!
1. Select the Right Size
Lightology
Getting the right fan is all about proportion. Make sure to measure your room first so you know what size blade span to be looking for. The blade span of a fan is the diameter of the blades while they’re spinning, measured from the tip of one blade to the tip of the blade across from it. A fan that is too small for a space will not provide efficient air flow to the whole room. A fan that is too large will not provide any air flow directly below it.
BATHROOMS & SMALL SPACES (Less than 100sqft): 29” - 36” Blade Span
BEDROOMS & KITCHENS & DINING ROOMS (100-150sqft): 40-50” Blade Span
FAMILY ROOMS & LARGE ROOMS (350sqft): 52-60” Blade Span
EXTRA LARGE ROOMS (350sqft+): 60” Blade Span or Larger

2. Height Matters
For optimum air circulation, you want your ceiling fan to be about 7-8 ft. from the floor and at least 8” down from the ceiling. For higher ceilings, you might need a downrod to suspend your fan farther from the ceiling. For spaces with lower ceilings a flush-mount model (or ceiling hugger) will keep your fan from being lower than 7 ft.

3. Switching Directions
Make sure your fan blades can switch directions. In the summer, your fan blades should run counter clockwise at the highest speed to push air down. In the winter, set your fan to run clockwise at a low speed so the blades gently pull cooler air up to keep your space warm and cozy.

4. Choosing a Style
Now that you know what size and mount your space requires, you’ll need to choose the right style. You could compliment the decor of your space, or have it just blend in and disappear.
A modern fan creates clean lines and compliments a minimalist decor, communicating style and a little edge. A traditional fan can be a little more ornate and works well in warm spaces to create a sophisticated atmosphere. Period specific fans have the benefit of modern technology while still showcasing a vintage look. Transitional styles provide modern lines with a little detail, and can compliment crown moldings nicely.
5. Controlling your Fan

Make sure your fan is controllable the way you want it. Some fans are wall controls, others come with remotes, and some are pull cord chains.
There are positive and negative aspects to all of these control options. Wall controls are the most reliable, don’t require a battery powered remote, and can’t get lost. However, they require more labor to install and cannot be easily relocated.
Remote controls can be controlled from anywhere within the room. They are cheaper and easier to install, but they do require batteries and run the risk of being lost or damaged. Replacement remotes will also need to be installed by a qualified electrician.
Pull cords are reliable, can’t get lost like a remote, but it is sometimes hard to tell what speed the fan is on. They can often hang too low in lower ceiling or may be hard to reach with a higher ceiling.

6. Installation
Make sure you consult with an electrician to ensure proper and secure installation of your new fan. If you only have a ceiling light fixture in the room, additional wiring may need to be run to accommodate the electrical needs of the fan. A good electrician will be able to guide you with these requirements.
Need help finding the perfect ceiling fan for your space?Schedule a design consultation today!

Understanding the NCIDQ and How it Benefits You as an Interior Designer
We are on a mission to help other designers pass the NCIDQ exam and become Registered Interior Designers! Just starting to think about taking the NCIDQ exam can be daunting. We break down the requirements with step by step instructions on how to become an NCIDQ Interior Designer this fall!
It’s that time of year again! Application review for the Fall 2019 NCIDQ exam has begun! Applications must be completed and submitted by July 15th in order to be considered to sit for the October 2019 exams. As a CIDQ Ambassador, this is an incredibly personal topic for me, and I’m on a mission to help other designers pass the NCIDQ exam and become Registered Interior Designers!
It’s officially been 1 year since I earned my NCIDQ certification and became a Registered Interior Designer in Illinois. This certification has benefited me in numerous ways, from opening my own business, to having the confidence and knowledge to effectively communicate on a job site. This exam is not just for commercial interior designers; I use my NCIDQ knowledge everyday as a residential interior designer and highly recommend all interior designers work towards this certification.
Over the last year, I have helped many aspiring designers work towards that certification as well. As the ASID IL NCIDQ Committee Chair, this spring I lead a study group of 5 designers towards NCIDQ success. Everyone in our study group passed their exams, with Meahgan Pearson and
Lauren Visco passing the first part of the exam, the IDFX and three people completing all of the exam sections this spring. Congratulations Kelly Somrek, Erin LeGate, and Candice Spotted Elk on becoming NCIDQ certificate holders!
Just starting to think about taking this exam can be daunting in itself! I’m here to help break down the requirements and get you on track for taking the exam this fall 2019! Keep reading below for step by step instructions on how you can become NCIDQ Certified.
Please note - the statements on this website are my own and not a reflection of CIDQ as an organization. This blog post is intended to be a supplementary guide for your NCIDQ journey. Please visit CIDQ.org for more information regarding qualifications, expectations, current prices, etc. Familiarize yourself with the CIDQ website, eligibility requirements, application process, registration process, and important dates and deadlines!

What is NCIDQ Certification and Who is CIDQ?
The NCIDQ exam stands for the National Council for Interior Design Qualification. This is a globally recognized exam and the highest standard an Interior Designer can earn. The NCIDQ Exam was created by the Council for Interior Design Qualification (CIDQ). Once you pass all three sections (IDFX, IDPX, Practicum) of the the NCIDQ Exam, you become an NCIDQ Certificate Holder. You can then use the NCIDQ appellation after your name: Sarah Schwuchow, NCIDQ. The exam is offered for the entire months of April and October at Prometric Testing Centers. All three sections of the exam are now computerized.
CIDQ History
CIDQ was created by the American Institute of Interior Designers (AID) and the National Society of Interior Designers (NSID) in the late 1960s. The group officially incorporated as a not-for-profit in 1974 and was the basis for issuing credentials to Interior Design professionals. The AID and NSID would eventually merge to become what is now the American Society of Interior Designers. CIDQ went on to run as an independent organization, which administers the NCIDQ exam
10 Reasons Why You Should Take the NCIDQ Exam
NCIDQ Certification sets you apart from unqualified designers and decorators.
It is an indicator of your proficiency and knowledge.
NCIDQ Certification shows your commitment to the Interior Design profession.
You’ll earn respect among your colleges, employers and clients.
You’ll have the potential to earn more money and promotions, as many firms require NCIDQ Certification.
Increasing the number of registered/licensed designers elevates our profession.
NCIDQ Certification helps with legislation and Interior Design rights.
In Illinois, you must be an NCIDQ Certificate Holder to become a Registered Interior Designer.
Registered Interior Designers in Illinois now have the right to file liens. Unregistered designers and decorators do not hold this right.
“To date, more than 30,000 people around the world have earned NCIDQ Certification, the goal standard for interior design professionals” (CIDQ.org).
What’s on the NCIDQ Exam?
“The strenuous requirements of the NCIDQ Examination give clients and employers added confidence in the caliber of work from NCIDQ Certified designers” (CIDQ.org).
The NCIDQ examination is no walk in the park. The level of difficulty proves that a NCIDQ designer possesses the knowledge and expertise for building systems, codes, construction standards, contract administration, design application, professional practice, and project coordination.
The exam is broken down into 3 parts: Interior Design Fundamentals (IDFX), Interior Design Professionals Exam (IDPX), and Practicum 2.0. Each section measures a candidate’s knowledge and proficiency on different topics related to health, safety, and welfare. All exams are taken during the entire month of April and October. Applicants have five years to complete all three exams. For the fall 2019 exam, you must have your application submitted by July 15th for review.
Fundamentals Exam (IDFX)
Eligibility: Candidates can take this part of the exam before completing their work experience hours. This exam can be taken as early as a student’s final year of school for a Bachelors or Masters program.
Exam Format: 125 multiple choice questions (100 scored and 25 unscored pilot questions)
Exam Length: 3 Hours
Application Fee for IDFX Only: $95.00
Registration Fee: $295.00
Passing Score: 500 (Scores are weighted and on a scale of 200-800)

Professional Exam (IDPX)
Eligibility: Candidates must complete their education and work hours before applying for this exam.
Exam Format: 175 multiple choice questions (150 scored and 25 unscored pilot questions)
Exam Length: 4 Hours
Application Fee for IDPX and Prac Only: $145.00
Application Fee for all 3 Sections: $225.00
IDPX Registration Fee: $350.00
Passing Score: 500 (Scores are weighted and on a scale of 200-800)

Practicum 2.0 (PRAC)
Eligibility: Candidates must complete their education and work hours before applying for this exam.
Exam Format: Interactive computerized exam consisting of 3 case studies: large commercial, small commercial, and multi-family residential
Exam Length: 4 Hours
Application Fee for IDPX and Prac Only: $145.00
Application Fee for all 3 Sections: $225.00
Practicum Registration Fee: $455.00
Passing Score: 500 (Scores are weighted and on a scale of 200-800)

Ready to Start Testing?
Step 1: Eligibility Requirements
First things first—are you qualified to take the NCIDQ Exam? Visit the CIDQ website below for eligibility requirements based your education and work experience.
Step 2: Create an Account
Before you can apply, you must create an account with CIDQ. Click below to register and then log in with instructions received in your email. If you have trouble, email inquiries@cidq.org for help.
Step 3: Applying for the Exam
There are two route options for applying for the NCIDQ Exam:
Option 1: Apply only for the IDFX. If you apply just for the IDFX now, you will need to submit another application for the IDPX and Practicum once you finish your work experience hours.
Application Fee for IDFX only: $95.00 (Second application for IDPX and Prac will be $145.00)
Option 2: Apply for all three sections.
Application Fee for all 3 Sections: $225.00
Applications are a one time fee. Your application will also require you to submit an official transcript from your institution and your work experience (for IDPX & Practicum 2.0). Make sure you leave enough time for your sealed official transcripts to arrive, as any incomplete applications will not be considered after the deadline and you’ll have to wait until the next testing season.
Step 4: Registering for the Exam
Once your application has been approved, you will receive an email notifying you that you that can register for the exam and schedule a date at a Prometric Testing Center. Make sure to register early so you can lock in your preferred exam date!
From this point, you have 10 testing windows to pass all three sections of the NCIDQ exam. If you are only taking the IDFX, you must pass that exam within 4 exam windows. The second stage (IDPX and Practicum) must then be completed within 10 testing windows. Any scores older than 5 years are automatically voided. Registration fees occur each time you take an exam.
Registration Fees
IDFX: $295.00
IDPX: $350.00
PRAC: $455.00
Step 5: Studying
Make sure you leave yourself adequate time to study for this exam. I recommend at least 10 weeks and join a study group. Qpractice is a great online resource to help you stay on schedule. For the fall 2019 Exam, The Qpractice Study Season begins July 1st. Stay tuned for my upcoming blog post on my tips and tricks for studying for the NCIDQ Exam!
Join the more than 30,000 people around the world that have earned their NCIDQ Certification!
“Being NCIDQ certified has abled me to recognize potential possibilities and issues within areas of the technical design aspect, from space planning to material selection. Our industry is so unique & creative that everyone already stands out, but being able to understand the fundamentals of health, safety, and welfare adequately propels designers to the next level. I am now a go-to resource amongst my colleagues, and I understand a lot more details when speaking with reps, architects and general contractors on projects. Knowledge is power! ”

5 Reasons You Need a Rug Pad
Many people don’t know that a rug pad is a necessity for the longevity of your rug, the protection of the floors beneath, and the safety of those who use the space. Here are 5 reasons why you need a rug pad.
One of the best moments as an interior designer is finding the perfect rug that ties the whole space together! But we’re not quiet finished; after a rug has been selected, we need to make sure we’ve got a rug pad to go with it. Far too often I see rugs without pads that are sliding all over the room, damaging the floor and thinning way too quickly. Many people don’t know that a rug pad is a necessity for the longevity of your rug, the protection of the floors beneath, and the safety of those who use the space. Whether its an inexpensive rug from Ikea or a hand-knotted rug from India, here are 5 reasons why you need a rug pad:
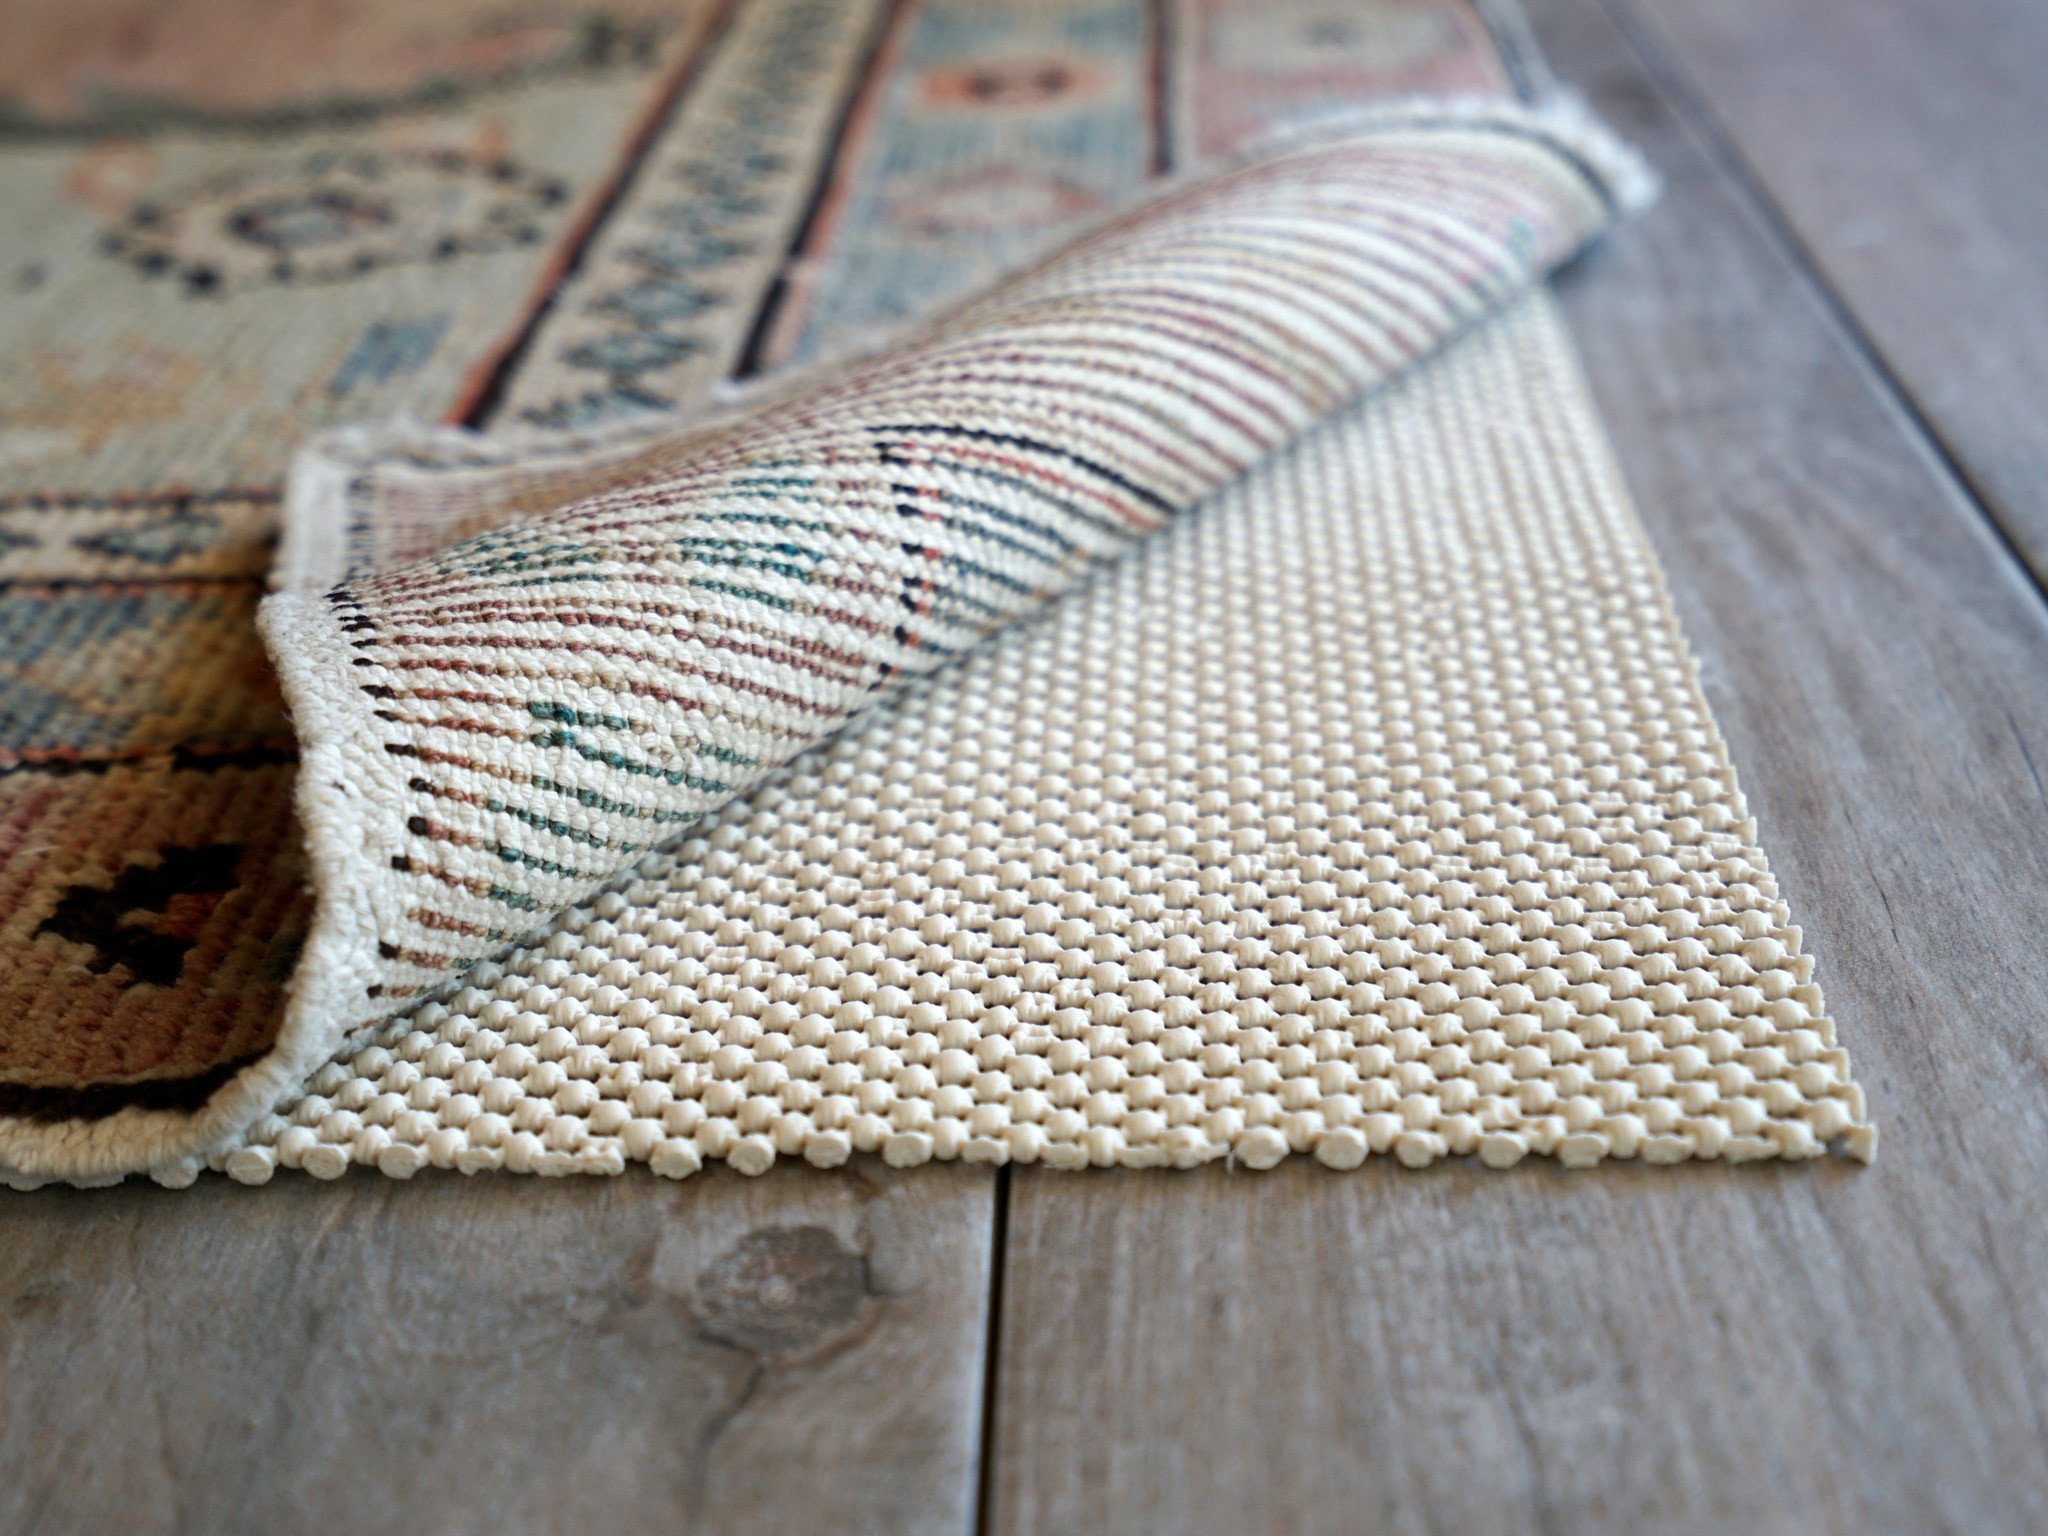

1. A RUG PAD KEEPS YOUR RUG IN PLACE
How annoying is it when you realize your rug is continually not staying in line with your furniture? A pad will also prevent thinner rugs from bunching or slipping, which could create a safety hazard.
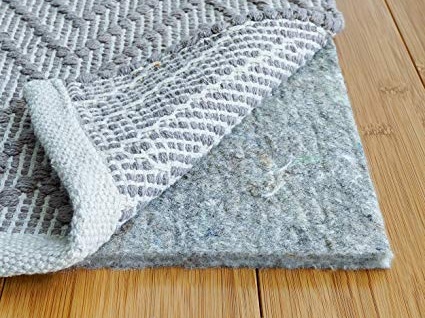
2. A RUG PAD WILL EXTEND THE LIFE OF YOUR RUG
A little extra cushion between your beautiful rug and hard floors could add years to its life, as the pad acts a buffer between the rug and flooring. It also prevents the delicate fibers from being crushed, which creates an old and wilted looking rug.
3. A RUG PAD PROTECTS YOUR FLOORS
The backside of many rugs can be rough. If it isn’t comfortable rubbing your skin on it, then it’s a guarantee that it will end up scratching your hardwood floors. A rug pad provides protection between the floor and rug. It also saves your flooring from any crocking or bleeding. Crocking color transfer can happen when a rug is dry, just as your new blue jeans can stain other materials. Bleeding color transfer occurs when a carpet gets wet, either from a spill or flooding. This is more common with darker colors, especially blues and reds.
4. A RUG PAD ADDS COMFORT
Who doesn’t need a little more comfort underfoot? Especially for those with small children, sitting on the carpet playing can be uncomfortable without any additional cushioning. Not only will your rug give your space a cozy look, it will have a cozy feel.
5. A RUG PAD REDUCES NOISE
The acoustics of a room with hardwood flooring can be quite loud, with little fabric for the noise to be absorbed by. A rug can help, but a rug pad adds additional absorption of sound, reducing echo, and making your space more peaceful

Need help finding the perfect rug and rug pad for your space? Schedule a design consultation today! I love working with my clients to create beautiful and functional interiors!

What's In Your Sofa?
Have you ever stopped to consider what’s inside your sofa? When it comes to furniture, it’s not all created equal. Lets breakdown the basics of what’s inside a sofa: frame, suspension, and cushions. When shopping for your next sofa, ask the manufacturer these questions.
So you’ve decide to buy a new sofa, but you don’t know where to start! You’ve see sofas advertised on sale for $399.00 at your local retailer, which sounds like a great deal! But have you stopped to think about what’s inside that sofa that makes it so inexpensive?
When it comes to furniture, it’s not all created equal. My experience as the Lead Designer and Project Manager at Covers Unlimited, a quality custom furniture manufacturer and reupholster, taught me the details and difference of what goes into making a quality piece of furniture. What may look good on the outside can be full of particle board on the inside. That inexpensive sofa is not going to last very long and you’ll be shopping for a replacement again in a couple of years.
Lets breakdown the basics of what’s inside a sofa: frame, suspension, and cushions. When shopping for your next sofa, ask the manufacturer these questions.

Manufactured by Covers Unlimited | designed by Jeannie Bishop Design
What is the Frame Made of?
This is the bones and foundation of the piece. Look for Kiln Dried Hardwood. Kiln drying is the process that gets all of the moisture out of the wood. This is important, because it helps to prevent warping and destabilizing of the wood frame. Hardwoods like Walnut, Cheery, Maple, Poplar, and Oak and will have the most strength, making them appropriate for furniture construction.
Pro Tip: Look for woods sourced from sustainably managed forests.
What to watch out for:
Plywood Frames - Thin layers of inexpensive wood that are glued together to create a stronger piece of wood. A.K.A engineered wood.
Particle Board - Made from wood chips and fibers that are glued together. This is not suitable for sofa frames and will eventually fall apart.
What Type of Suspension?

Furniture suspensions are just like the suspension on your car, they provide support when sitting on the furniture piece. They need to be resilient enough to take impact and return to original form. There are 4 main types of suspensions and each serve a different purpose: Webbing, Wood Board, Zig Zag, and Coil Springs. Often you will see a combinations of these suspensions together.
Webbing Suspension: Webbing suspension can be found on the arms, backs and seats of sofas. It’s flexible so it’s great for curved furniture. This type of suspension is less expensive than spring construction and easier to install.
Wood Board Suspension: Wood Board suspension is a removable piece of wood that gets foamed and upholstered and then reinstalled on the piece. You will see this on banquette seating, window seating, and dining chairs. It’s easy and affordable, but lacks the resilience and shock absorbing qualities of webbing or springs. Keep in mind when using board construction, the thickness and density of the foam. You want a high density, medium firm foam of at least one to two inches, so that you don’t feel the wood board when you sit down. Three inches is preferred for banquette and window seating.
Zigzag Springs: Zigzag Springs absorb shock, and are typically less expensive than hand tied springs. You will see these in chairs, sofas, and sectionals.
Eight Way Hand Tied Springs: This is the best of the best for suspension. You’ve probably seen this in high quality pieces of furniture. This will give you the most resilience and shock absorption. It is most expensive because of the labor required to manufacturer.
What’s the Cushion Filling?
There are many subcategories and fiber contents within each of these, but let’s stick to the basics for cushions.
Foam: I look for a high density, medium firm foam. The quality is in the density, not the firmness. It’s a misconception that a firmer foam will last longer than a softer foam. It’s all about the density, which you can’t necessary see or feel that makes it a quality product. A good furniture manufacturer, will be able to tell you more about the foam composition, rather than just say “it’s high quality!” Phrases like that will lead you down a road to saggy cushions in 6 months.
Dacron: Dacron is made of polyester and is known for its durability. Dacron, unlike natural fibers, is hypoallergenic, non-absorbent, and mildew-resistant. Most often seen loose or in sewn bags to create back cushions. Dacon as a material is not a bad thing, but it’s how it’s combined to create your furniture that you should watch out for. A back cushion that is 100% dacon is okay, but a seat cushion that is 100% Dacron will not give you any support, you need foam in there to hold it up.
Feather/Down blends: A blend of feather and down creates an ultra plush cushion. You will typically see this in sewn bags for back or seat cushions.
Foam and Feather/Down Wrap: Also known as a sandwich cushion. The inside has a piece of foam, then it’s wrapped in layers of feather and down bags. This provides structure, but also that ultra comfortable feel.
Outdoor Foams: Reticulated foams have tiny holes that allows water to pass through. This prevents the growth of mildew. This is important as you can not just use any type of cushion outside, it needs to be suitable for outdoor use. Also make sure to use an outdoor grade fabric. The goal is for the water to flow through the cushion, not sit on top.
Pro Tip: Make sure if you use a welt cord on outdoor furniture, that is made of acrylic and not cotton! The cotton when wet over time will grow mildew, making your outdoor cushions and outdoor fabric useless.


Need More Help?
Need help selecting a sofa? Many factors like what it’s made of, where and how it’s made, fabric, size, style, and if it will even fit through your back door need to considered. I’d love to help you with these decisions and find the perfect sofa for your lifestyle and budget!

What Paint Sheen Should I Use?
So you’ve selected a paint color! But now you've got another decision to make, what sheen to use. You pull out the little chart that shows the gloss levels increasing, but where to start? You decide that semi gloss is durable, and buy enough for your walls, ceiling, and moldings, one easy decision - right?
So you’ve selected a paint color! You’ve even done your research on what brand of paint to buy that will keep your home healthy! (Check out my last blog post “What's in Your Paint?”) But now you've got another decision to make, what sheen to use. You pull out the little chart that shows the gloss levels increasing, but where to start? A quick Google search will tell you to never paint your walls in high traffic areas with anything less than semi gloss. So you decide that semi gloss is durable, and buy enough for your walls, ceiling, and moldings, one easy decision - right?
YIKES - this is a disaster waiting to happen. You’re going to end up with a shiny, reflective envelope full of imperfections. I guarantee you will not be happy with this choice.
I see this dilemma far too often with home owners. Choosing the right finish the first time can save you time, money and headaches.
Many factors go into selecting the perfect sheen for your application. First, let’s review the basics of sheen. Keep in mind, every paint company will have a different version of these terms and the order of increasing sheen intensity may vary.
The Basics of Paint Sheen
Flat Paint/Matte Paint - No Shine
Flat paint provides a rich depth of color and is great for less than perfect surfaces. Flat paint has the most pigment and will provide the most coverage. Since there is no shine, the light is absorbed rather than reflected. Matte paint is one step up in sheen from flat, but still very low luster. Typically, Flat or Matte finish is the least cleanable option and not good for high traffic areas.
Eggshell - Slight Luster
Not surprisingly, this finish is similar to egg shells. Eggshell offers a real depth of color with a soft and polished look. Good quality Eggshell paint is easy to clean, covers wall imperfections nicely, and is good for moderate to high traffic areas.
Satin - Velvety Luster
Satin is easy to clean, great for high traffic areas, but shows imperfections on flat surfaces. Can be used on walls of high traffic areas or on wood elements.
Semi Gloss - Subtle Shine
Semi Gloss is durable and stands up to repeated cleanings. This finish is often recommended for molding and trims, but can easily show imperfections on flat surfaces.
High Gloss - The Most Shine
High Gloss paint offers a durable finish. It is typically the most easy to clean out of all the paint finishes. High Gloss paint is super shiny and light reflecting. It’s often used for wood elements like cabinets, trims, and doors. Be careful with high gloss though, as it will show all imperfections! While it can be a beautiful look if your walls or ceilings are prepped correctly, it can turn into a disaster very quickly. Surfaces that take high gloss must be perfectly flat with zero imperfections. High Gloss paint requires preparation and a lot of labor to create the perfect end product.
Designer Secrets
A good rule of thumb is that the higher the sheen, the higher the shine and the easier the surface will be to clean. But many advancements in paint technology today allow for lower sheens to be just as durable and cleanable as their shiny counterparts. I’m going to share some tricks of the trade and what I typically use on my client home projects.
Ceilings
For ceilings, I always use flat paint. Since there is no sheen, it hides imperfections and has a beautiful depth of color. Ceilings tend to be uneven and a flat paint will hide those problem areas and will make the surface look uniform. My absolute favorite product for ceilings is Benjamin Moore Ultra Flat Water Borne Ceiling Paint. It provides a flawless finish and is the flattest finish offered by Benjamin Moore. It is Zero VOC and Engineered with Gennex® Color Technology. Check out my previous post “What’s in Your Paint” for more information on selecting a paint for a healthy home.
Walls
For the walls, I like to use an eggshell finish. It allows for easier clean-ability, but is not too shiny. For walls, I love to use Benjamin Moore Aura in Eggshell finish. It’s a rich and thick paint that provides full coverage, and a beautiful finish with great durability. Good for high traffic areas and it can stand up to repeated washing with no color rub off. It’s a paint and primer in one, mildew resistant, and Zero VOC.
Doors, Baseboards, Trims, Casings, Moldings
I like a satin finish for these wood elements. It’s very durable so it will hold up to normal every day wear and tear. My favorite product for this is Benjamin Moore Aura in a Satin Finish. It’s also great for high traffic areas and it can stand up to repeated washing with no color rub off. It’s also a paint and primer in one, mildew resistant, and Zero VOC.
Bathrooms
Painting a bathroom can be tricky, especially if you don’t want to use a glossy finish everywhere to avoid mildew! Benjamin Moore has a wonderful line of paint called Aura Bath and Spa in a Matte finish. It’s specially formulated for high humidity environments and is mildew resistant. It can stand up to repeated washing with no color rub off. I use this paint on both ceilings and walls in bathrooms for crisp low sheen look.
Cabinets
Painting kitchen cabinets is a very technical skill and requires proper preparation. Kitchen cabinets are one of the most commonly touched surfaces and get the most wear. Cabinets must be prepped properly by an experienced painter, primed twice, and then painted. Advance by Benjamin Moore is my “go to” for cabinet painting. As for finish, a paint with some shine is the way to go for durability, so I would avoid Flat paint for this application.
Need More Help with Paint?
Not all paint is the same. Make a conscious effort for your families health by choosing a high quality paint and doing your research on it’s environmental impact. Need help selecting paint colors, finishes, or environmentally friendly products? Schedule a consultation with Sarah Jacquelyn Interiors today! No project too big or small, I love helping my clients specify the perfect paint for their home!

What’s in Your Paint?
Paint is paint, right? Why pay more for the same color? Not all paint is created equal and good quality paint comes at a price. Let’s dive into what really goes into a high quality can of paint that makes it worth the extra money.
It’s no secret that I love color! On the floor, furniture, and walls, I love working with my clients to get just the right balance that reflects who they are and makes them feel at home! Paint is one of the easiest and most cost effective ways to change the mood of your home or office. Aside from picking a stunning new color, there are many other factors to consider before breaking out the rollers. The finish, brand of paint, product line, environmental impact, and the health and safety of your family should all be considerations. Not all paint is created equal. So what’s the difference? Paint is paint right? Why pay more for the same color?
Good quality paint comes at a price. Let’s dive into what really goes into a can of paint to make it worth it. There are four main components in a gallon of paint: pigments, liquids, additives, and binders.

Pigment
Pigments are the finely ground particles that impact hide and color. There are two types of pigments that go into a can of paint. The first and most important are the prime pigments, they provide color and hide. The second are extender pigments, they add bulk to the paint, but do not really affect the color. Higher quality paints have more prime pigments providing an easier application, increased durability, and better color retention.
Liquids
The liquid is the carrier that helps get the paint from the can onto the wall. The liquid itself does not affect the quality of the paint, but rather the ratio of liquid to pigments and binders is what makes a top quality paint. The greater the ratio of solids to liquids, the higher quality the paint.
Additives
Additives are the extra ingredients that give a paint it’s specific performance characteristics differentiating from one paint to the next. Common additives in higher-quality paints include: Increased leveling agents to make the application process easier, microbicidal and anti microbial technology, preservatives to prevent spoilage, oder eliminating technology, and many more.
Binders
Binders provide adhesion and resistance to cracking, blistering and peeling. Latex paints use 100% acrylic, styrene-acrylic, or vinyl acrylic as a binder, while oil based based typically contain modified oils called alkyds like linseed oil and soya oil. The type, quality and quantity of binder affect everything including stain resistance, gloss, adhesion and crack resistance. Higher quality binders adhere to surfaces better and provide longer lasting performance.

BenjaminMoore.com

